Main spar progress

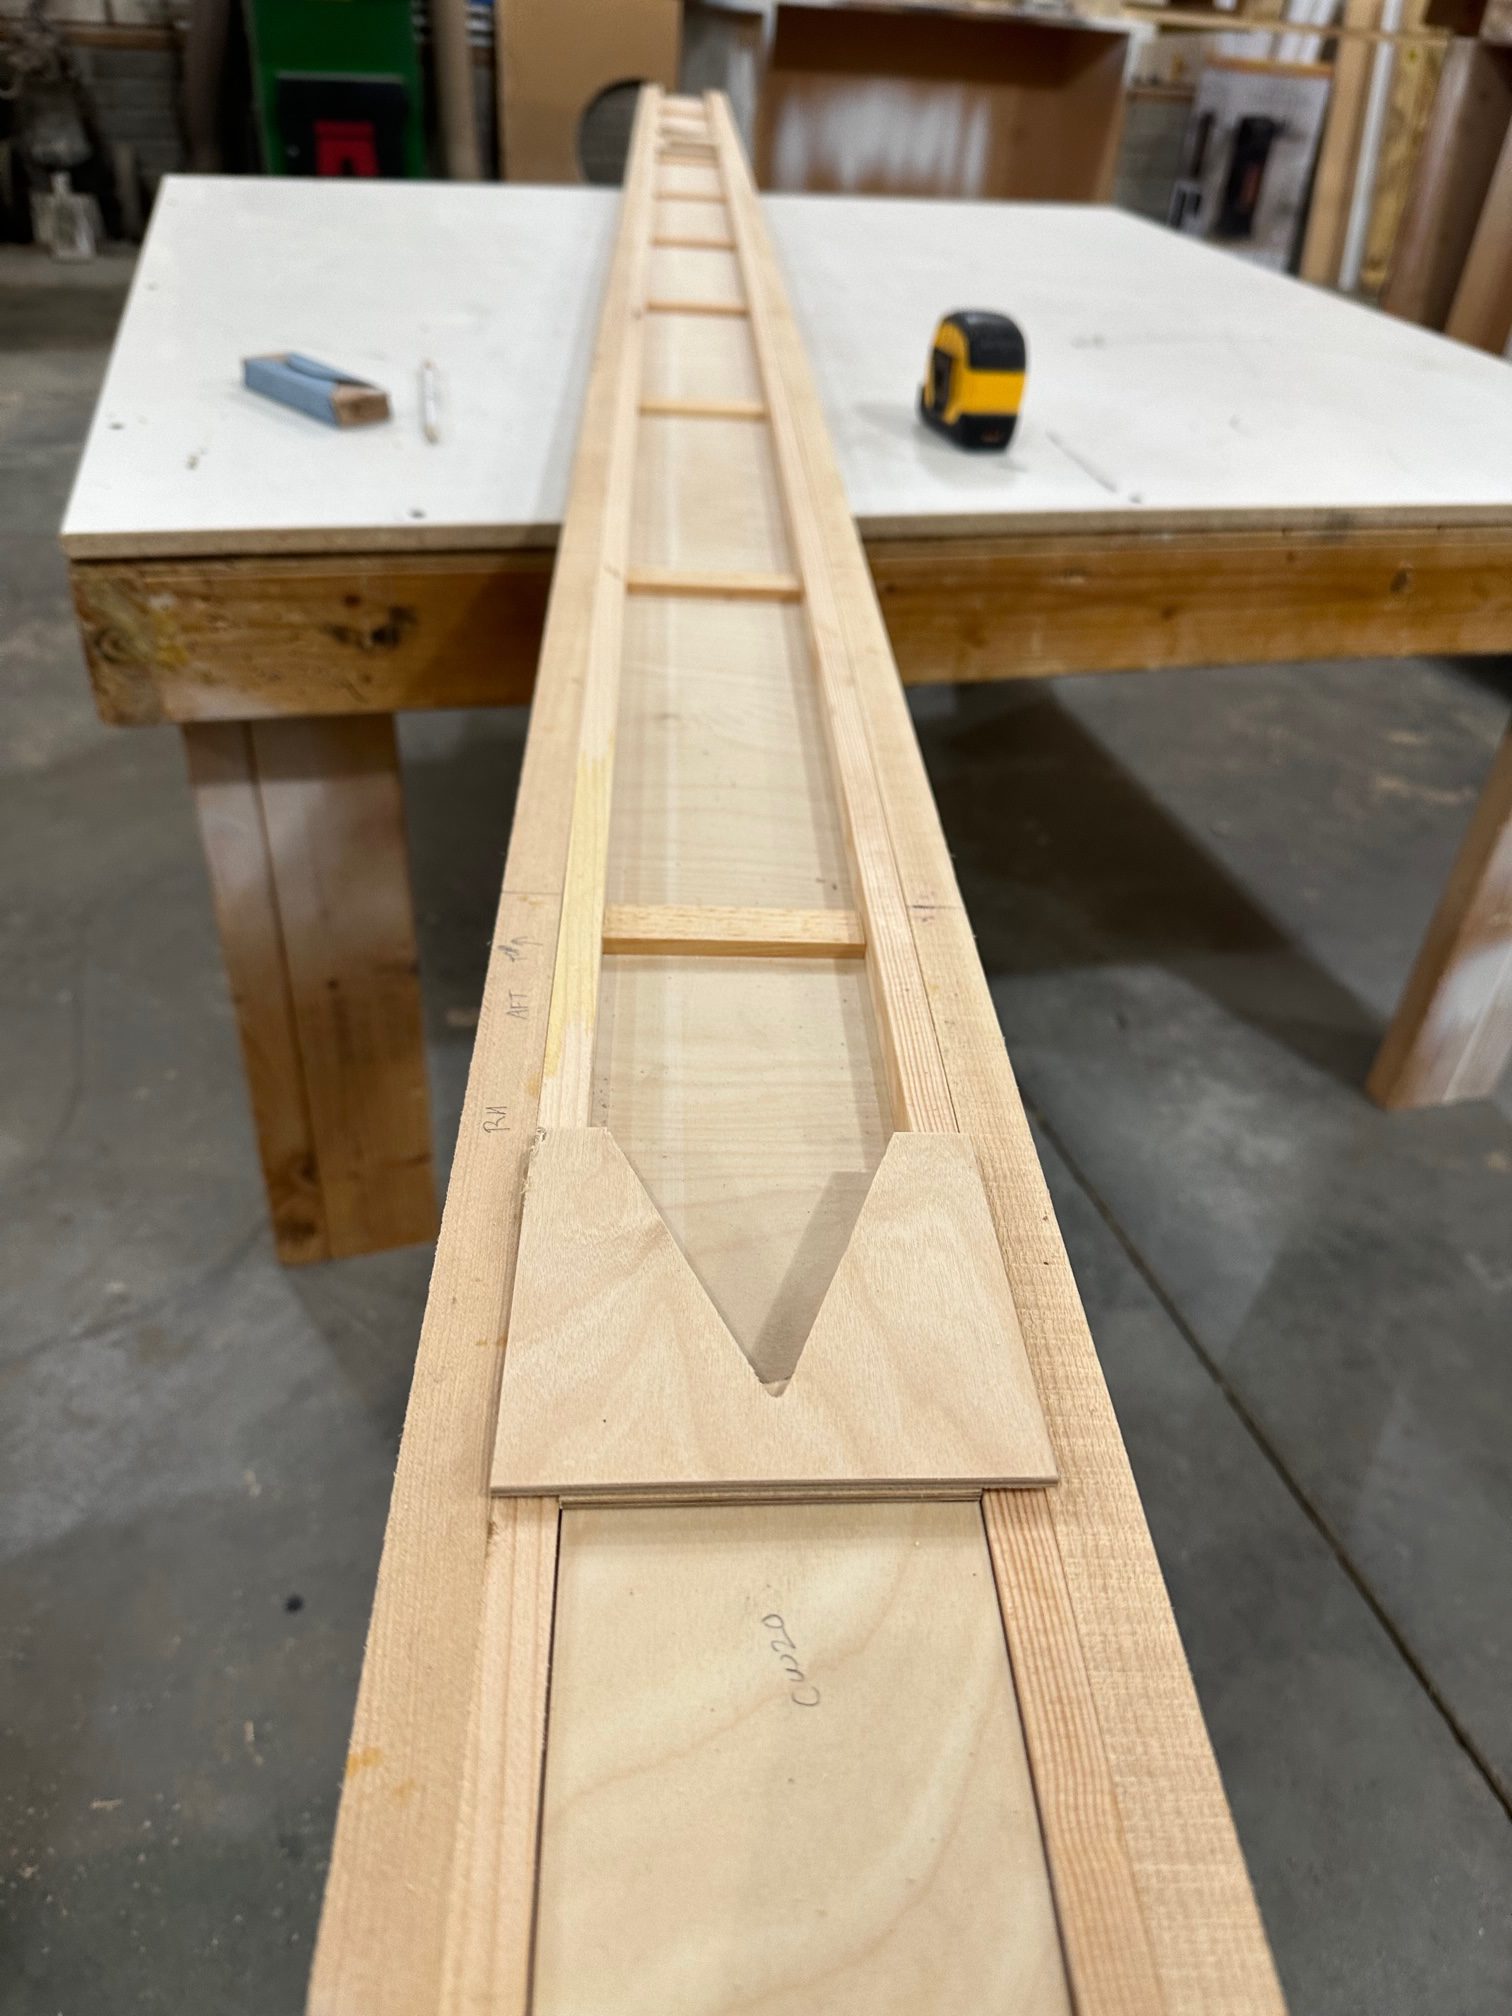
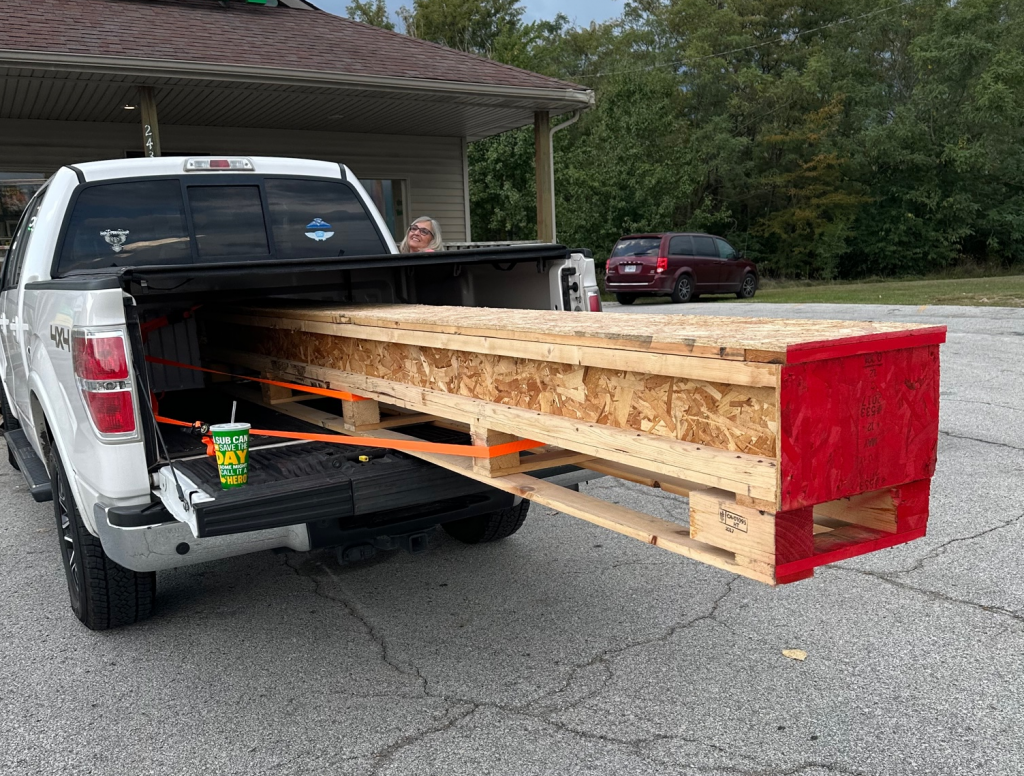
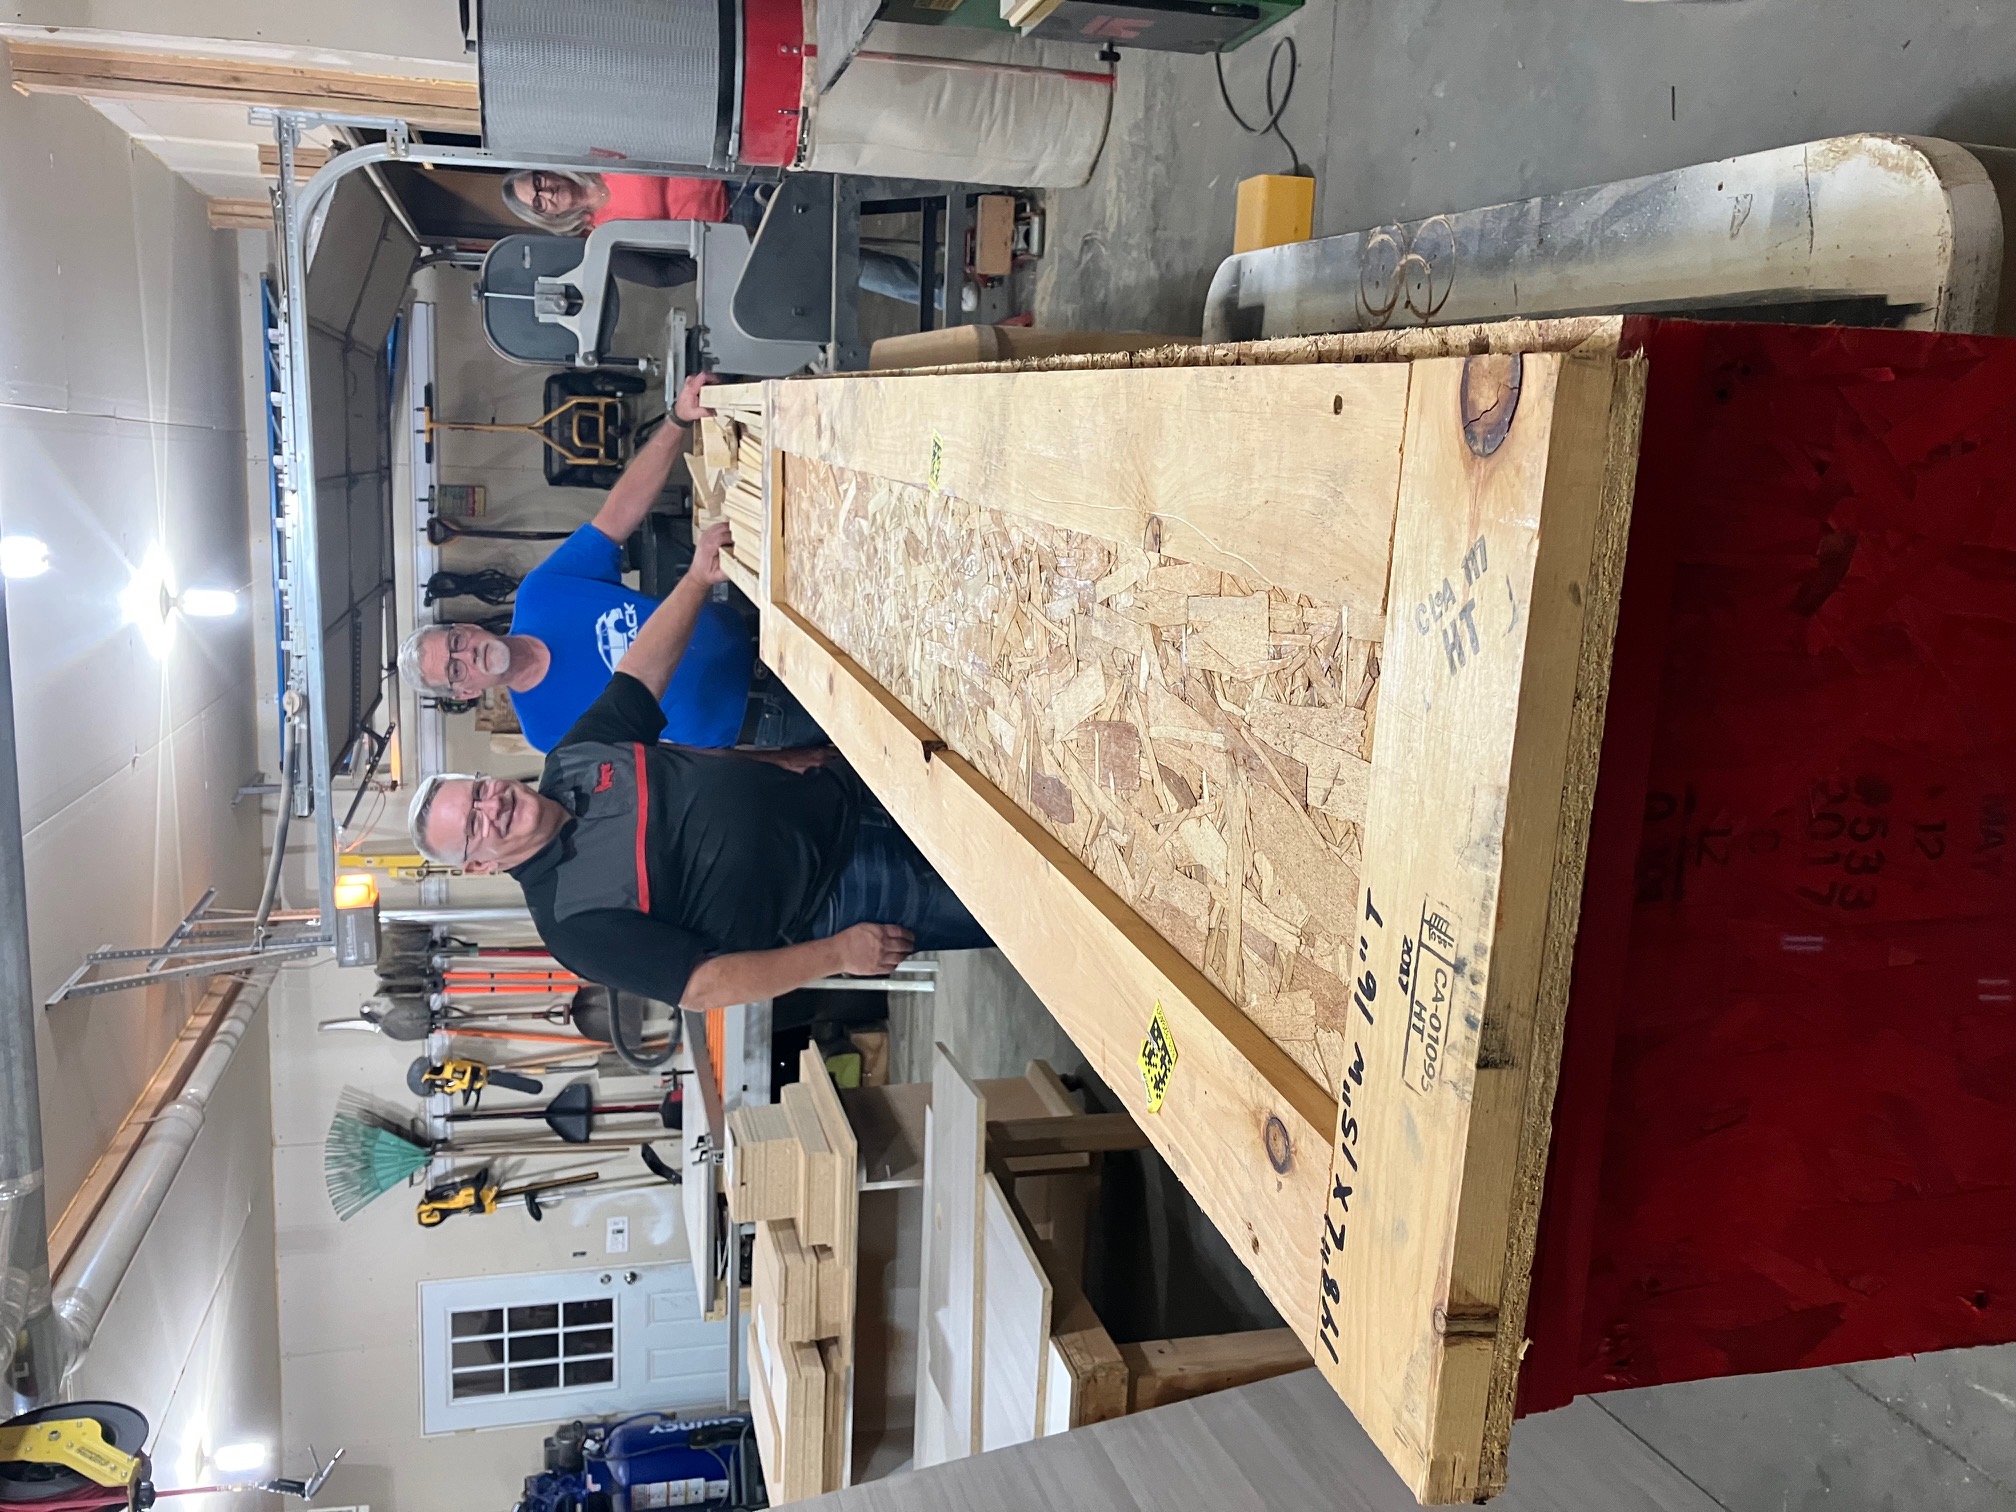
It’s been a busy week. The two upper main spars are essentially complete. Spar caps, stiffeners, and all of the filler and reinforcing blocks are assembled. The only thing not done are the outboard ends, where the tapered pieces for the wingtip bow attachment need to be assembled. The two lower main spars are under construction now. Both have the caps and web glued, and one has the stiffeners on one side. I’m planning to finish as much as I can today on the main spars, and hopefully get at least one of the rear spars glued up.

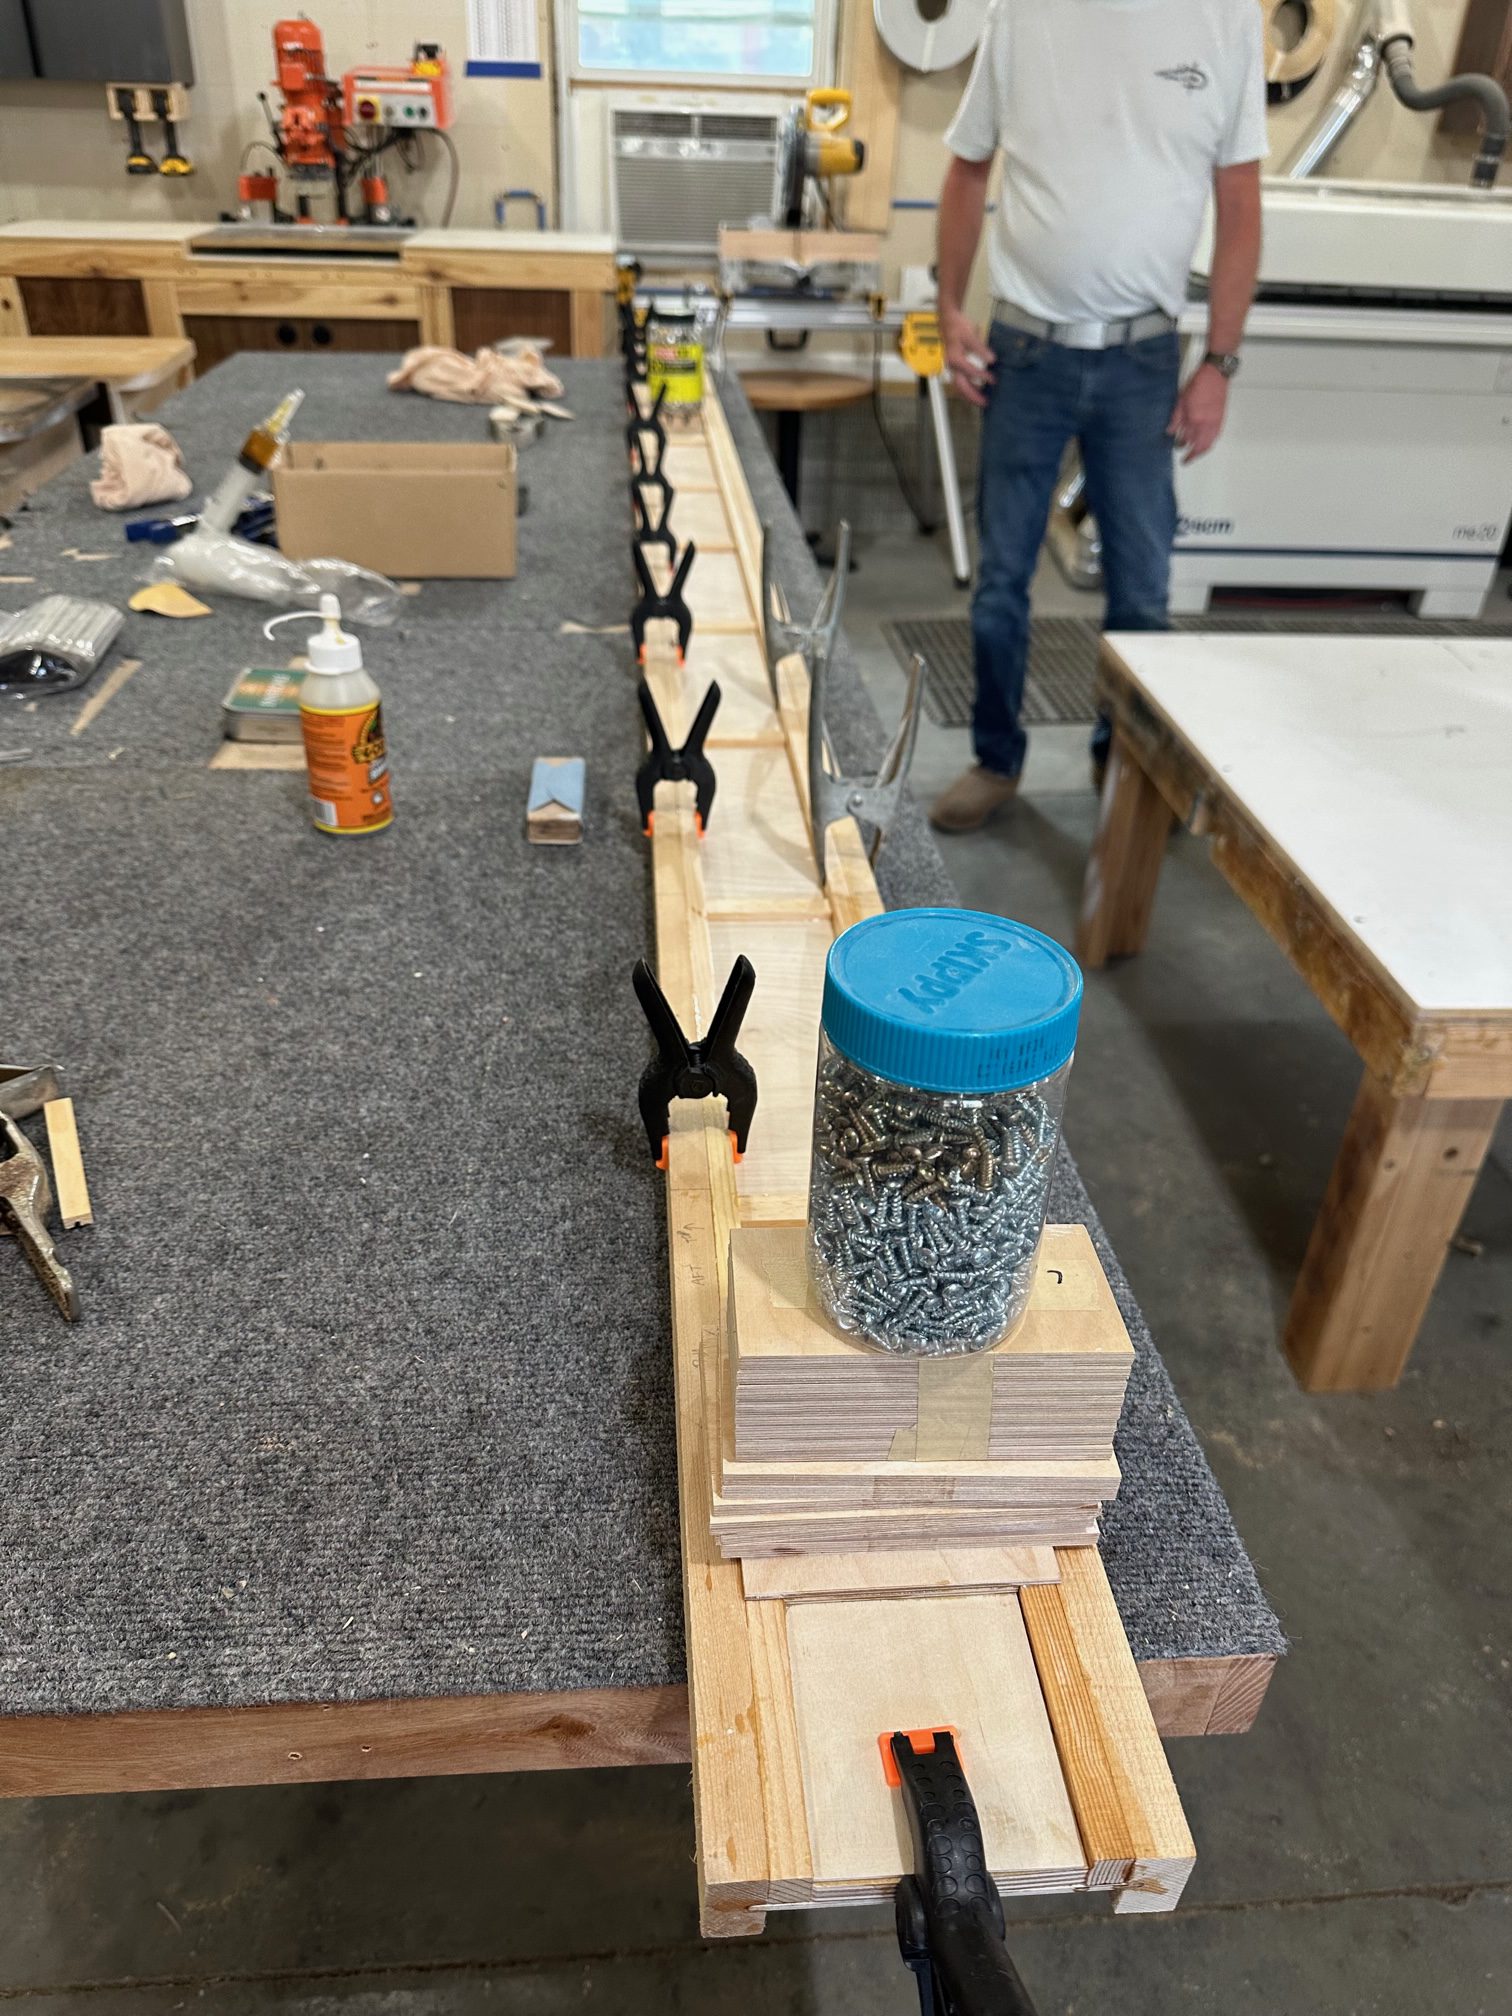
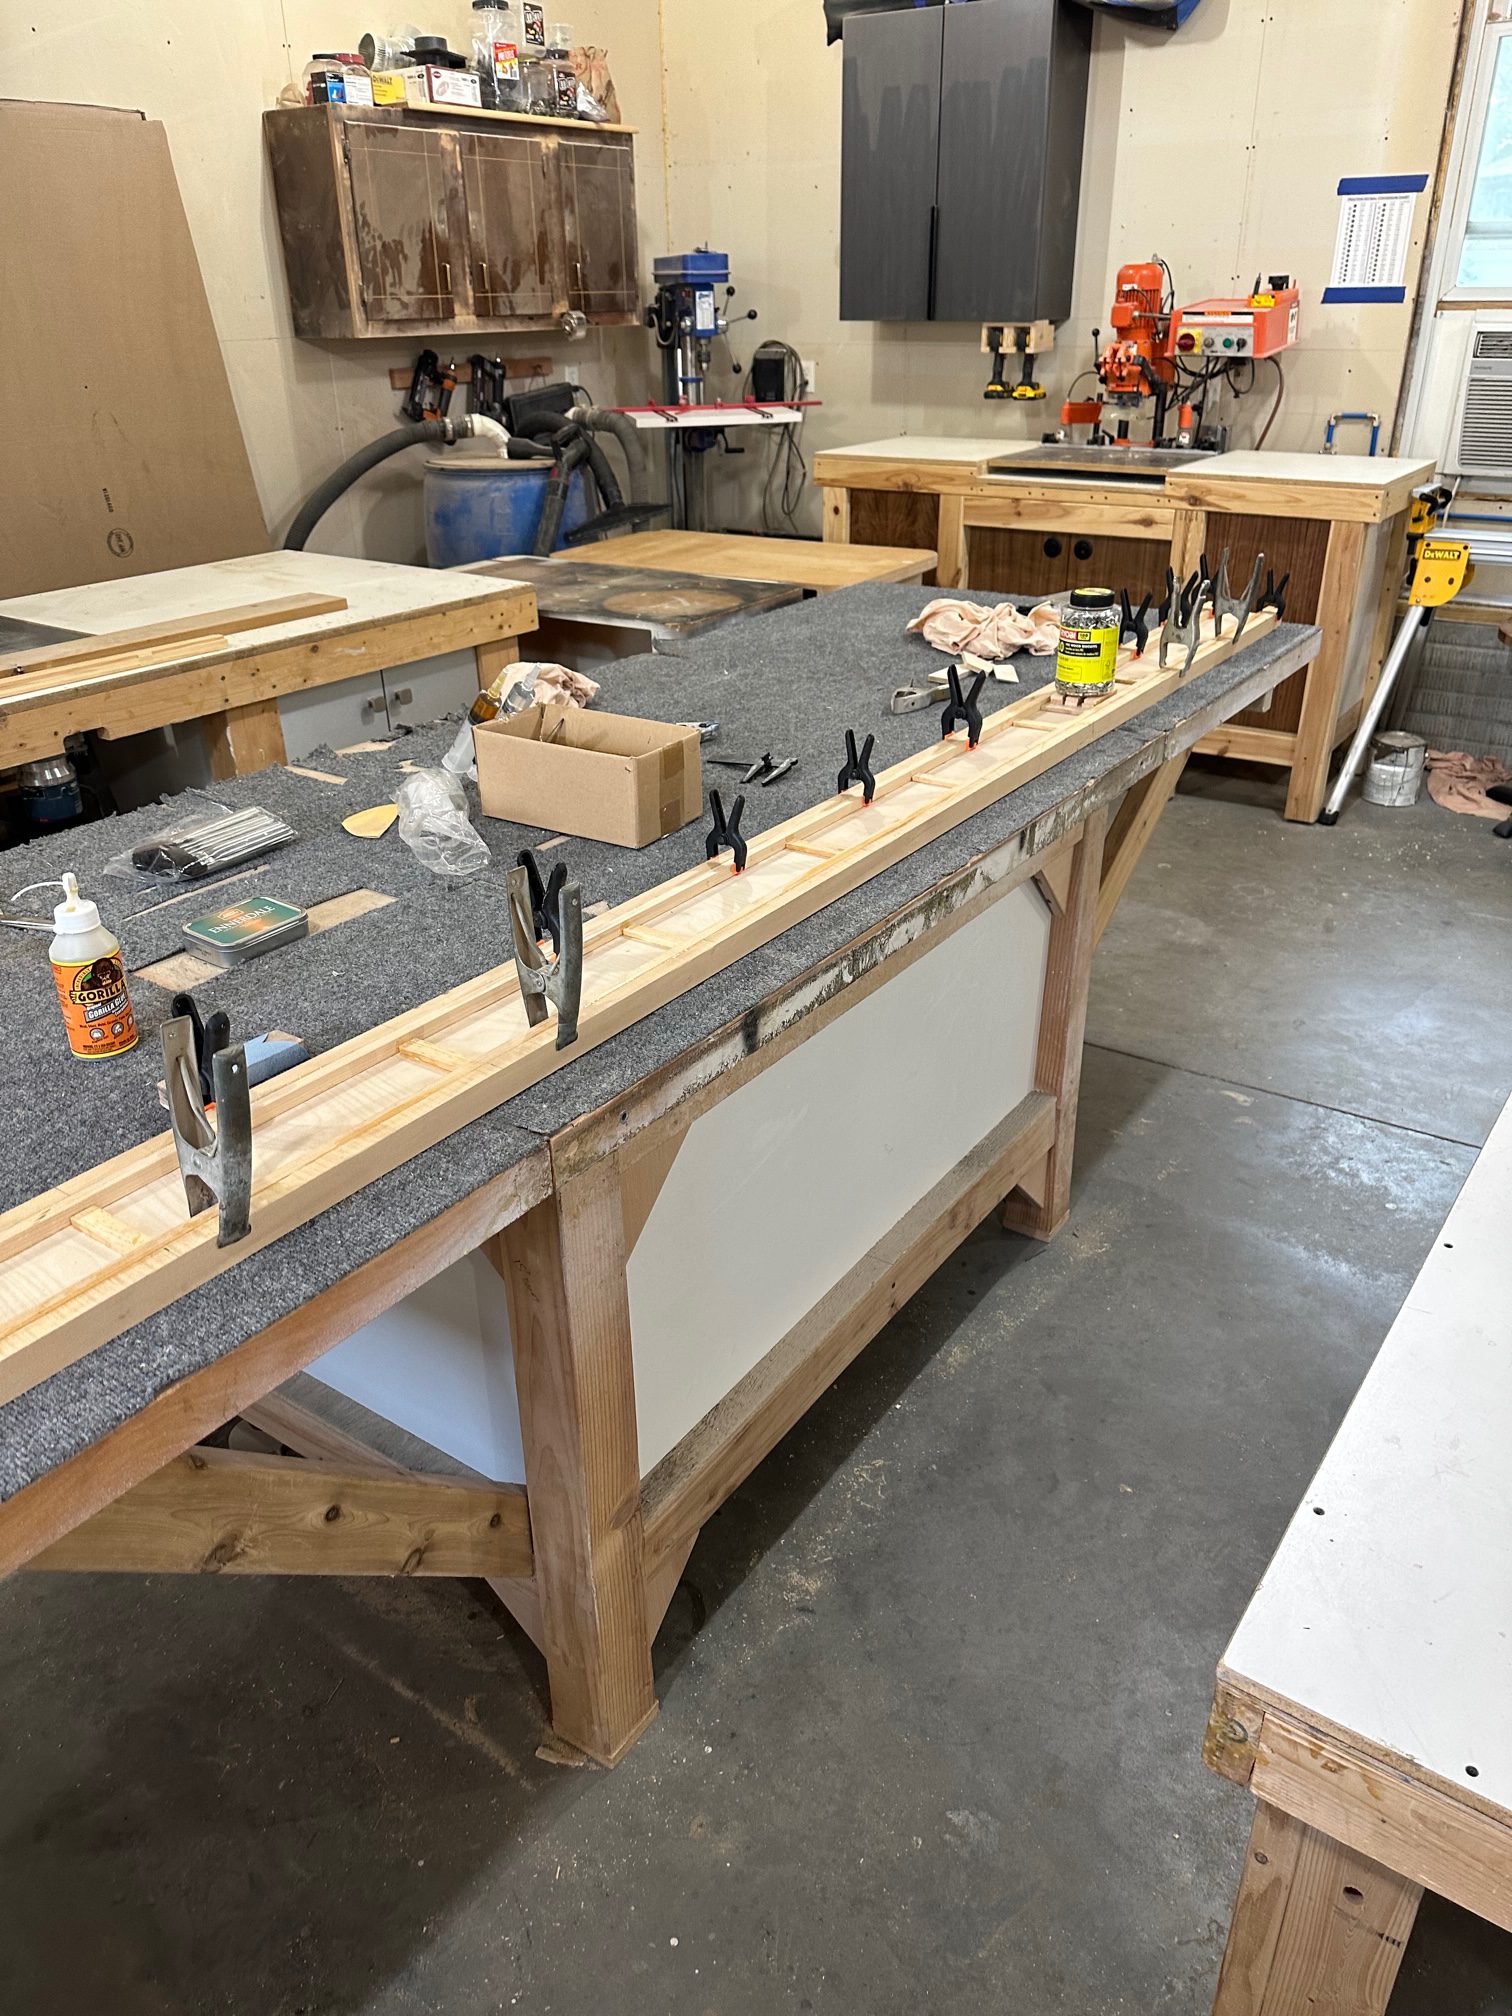
It’s been a real joy working in a place where there’s plenty of room to work. The availability of a large number of bar clamps – in addition to the 40 or so spring clamps I have – really helps as well. I took the day off work yesterday and was able to get over there once in the morning to set up a spar, then again in the afternoon to take that one off of the jig and glue up the next one.

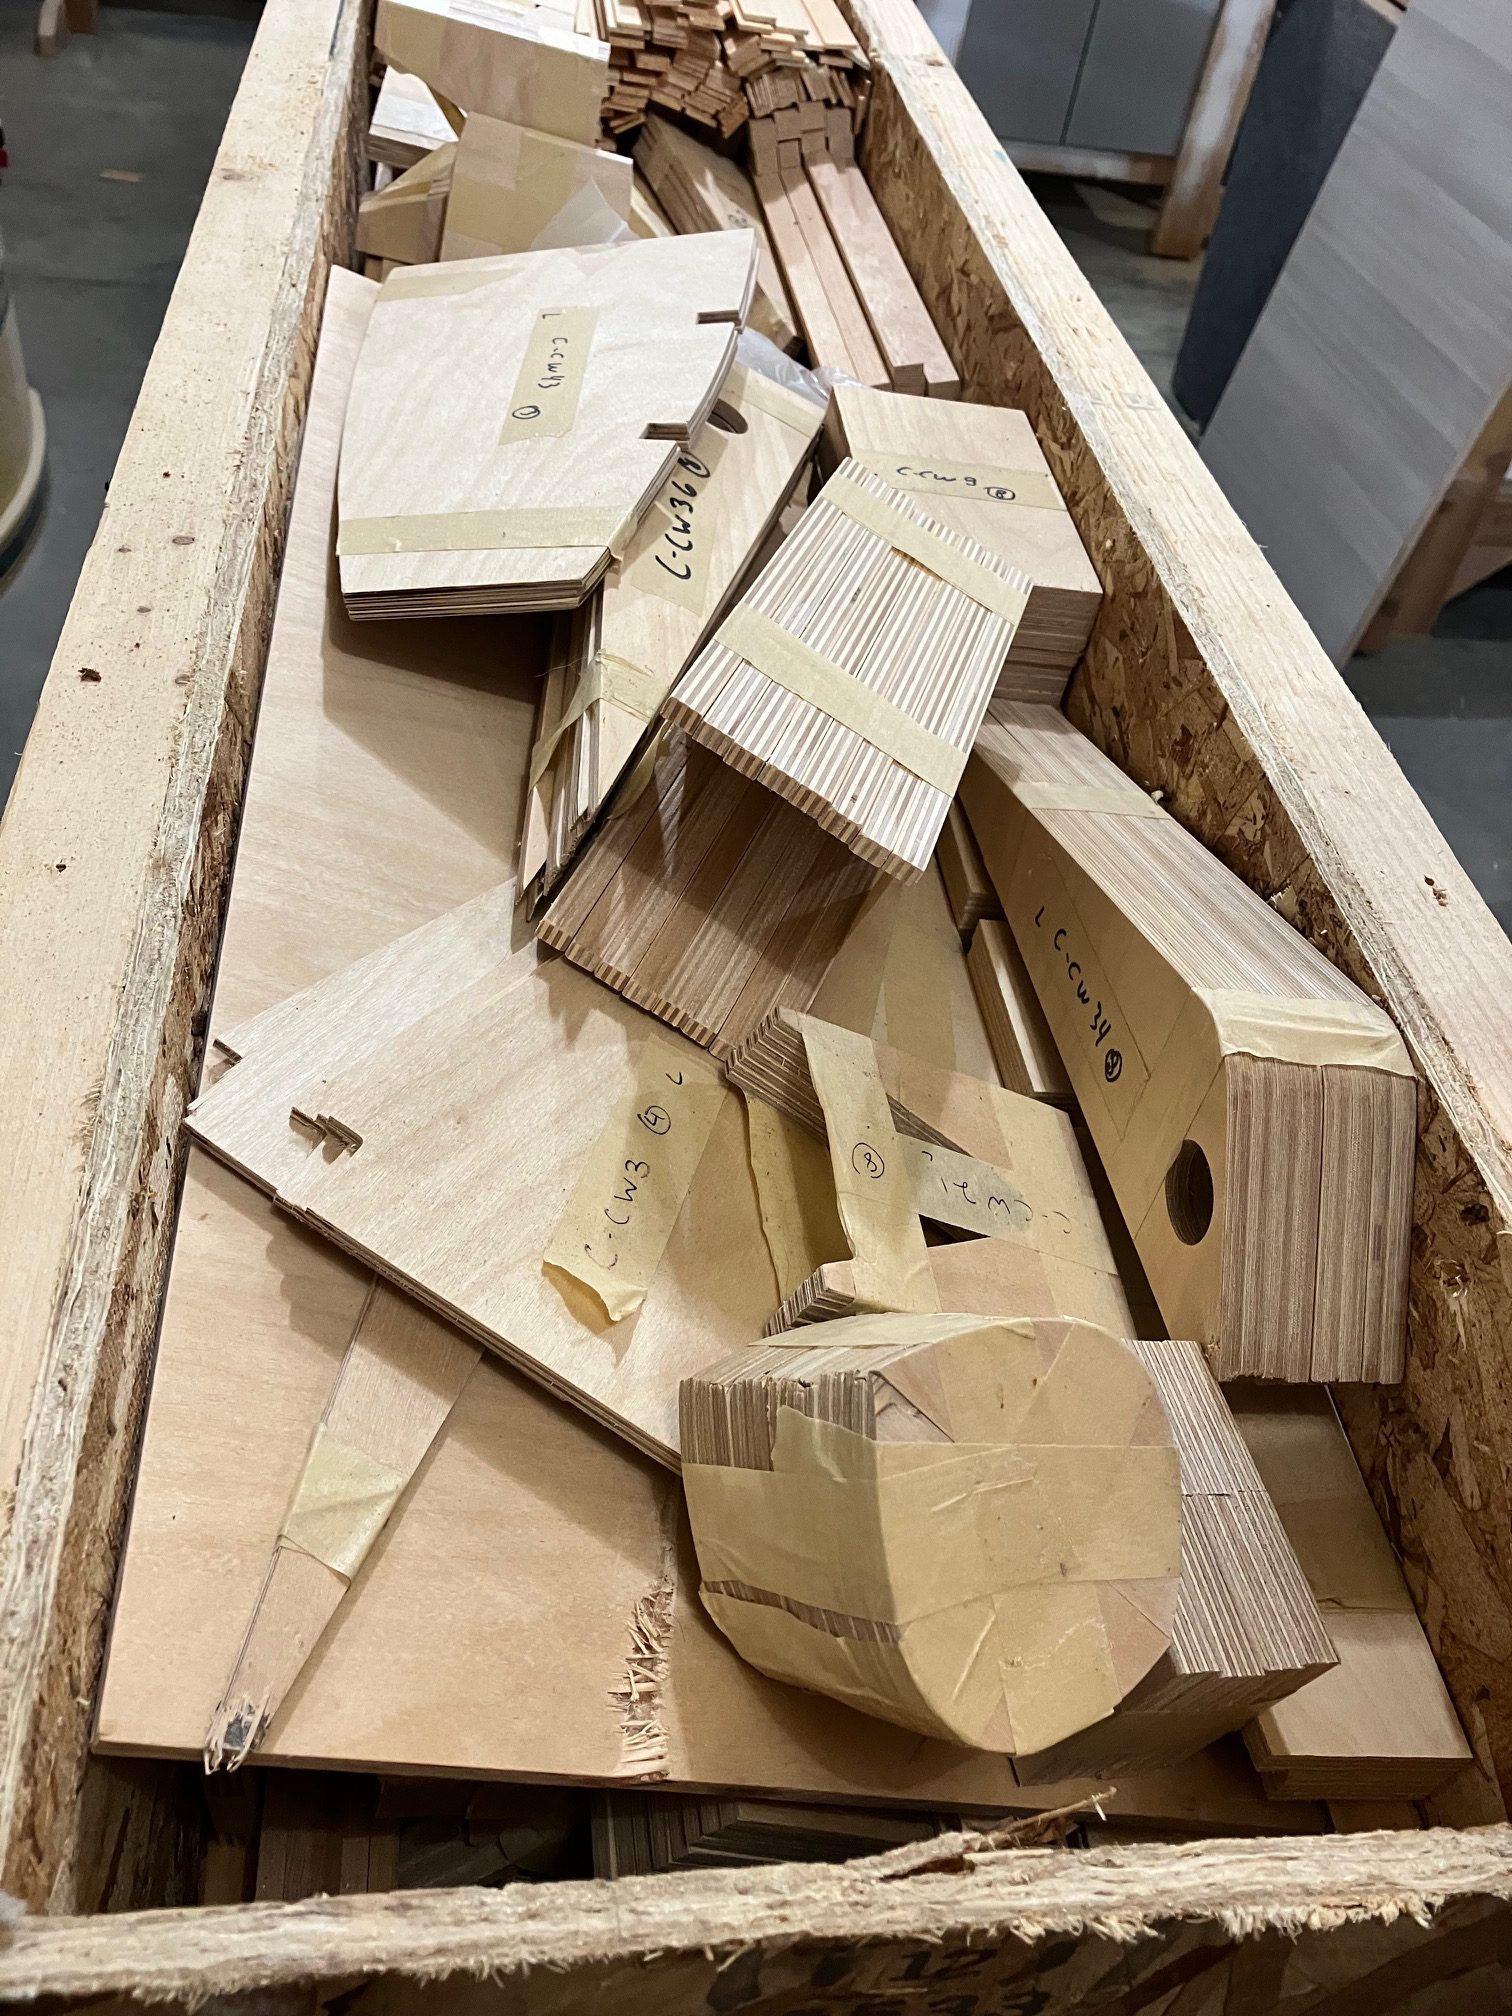
Stu is anxious to get enough pieces built to start getting wings assembled so they look like wings — I can’t say I’m not in agreement. I was a little tempted to build a rear spar after the first main so we could assemble one complete wing, but I’m convinced that this way is a lot more efficient. For one thing, after the first spar we’ve both figured out enough ways to make the process better that each spar is taking less time than the one before. Just as an example, my process for getting epoxy into the grooves in the main spar caps has evolved and gotten much more efficient with each spar. It’s almost a shame there aren’t any more to do. On the last couple I would get some glue on the long edge of a popsicle stick and use that to spread it into the groove. After doing a foot or so, I’d slowly follow through with an acid brush with the bristles trimmed down to about 1/4″ or so, to make sure it was evenly distributed and get any excess out of the groove. The result was the cleanest glue joints of all the spars.

I’ve been going through T-88 like crazy. Gluing 9 and 10 foot long pieces of wood uses a lot of epoxy, and I know the laminations for the wingtip bows and tail surfaces will use a lot as well. Given the price increases since the last time I bought glue, I think I’ll just order a gallon.

Started on the second spar

This morning I went over to Stu’s and finished gluing the root attach blocks and the blocks for the N strut and flying wire brackets to the spar. Other than the tapered extension for the wing tip bow, that’s all of the wood for the first spar. Once the glue is cured, I can start locating and drilling the holes for the attachment bolts and bushings.

With that done, Stu and I started on the second upper wing spar. The bench has threaded inserts set into the edge, and he’s got a long steel rail that bolts on. It’s 2 x 2 inch square steel tubing with mounting brackets welded on. The rails were designed and built to bolt to the table, then he’s got a steel sled that sits on them that he can use to flatten a large wood slab using a router. We bolted one rail to the edge of the table, overhanging the work surface. Now there’s a long work bench with a straight, level steel rail on one edge.

We glued the groove in the spar cap, inserted the plywood web, then glued the other spar cap. One spar cap is clamped against the rail, then the assembly is clamped in place to hold it straight, flat, and properly spaced at 5-3/4″ total spar height along its entire length.

I think about 10 ml of epoxy is plenty to glue one spar cap groove. I mixed two batches today. I’ve been using 60 ml syringes ordered from Amazon to hold and measure the glue – it works wonderfully. I can very precisely measure out even very small quantities.

First spar, continued

It’s been a bit of a learning experience building this spar. The amount of glue required, of course, is one thing – about 45 ml or so, I think, for the whole thing. There are still a few pieces of plywood that need to be glued, most of them for the flying wire and N-strut attachment brackets. Yesterday Stu showed me his pneumatic pin nailer, which I plan to use. It’s not unusual to use staples or small brads to hold wood together while glue cures. This thing shoots ridiculously small wire pins — 22 or 24 gauge, I think — with no heads. They’re just enough to hold the wood in place, and won’t need to be removed.

I also found that the spar has about 1/8″ of gradual taper toward the tip end. That was a builder error; it’s supposed to be a constant 5-3/4″ across the entire length. When I assemble the other three they will be correct. It’s not a critical error; I can fix it with shims when the wing is assembled. It’s even noted in the plans that ribs may be shimmed where they attach to the spar. It’s just been an inconvenience. Before I found that taper we’d cut some reinforcing blocks that fit between the spar stiffeners to a constant length. Some needed to be sanded, some needed to be re-cut because they were too long. That’s when I measured the spar height more carefully. I had just measured one end and a spot partway down the spar before — I guess it didn’t occur to me that it would have a taper to it. Everything else is good, there’s no bend, twist, or warping, so it’s good to go.

Other minor things — the plans call out 120-1/4″ for the spar length, but the main caps are 120″. Obviously the quarter inch at the tip isn’t going to make a difference, I’ll just make sure both spars are exactly the same length.

I’ll go over tonight and finish the assembly of this spar, and hopefully get started on the next. I also need to find my box of 4130 steel tubing and see if I’ve got the stock I need to make the bushings for the wings. There are bolts through the wing that hold the attach brackets for the fuselage, struts, and flying & landing wires. All of the holes need steel bushings through them. Simple enough to cut and file to size; I just need the right size tubing. I bought a “grab bag” assortment of random tubing cut-offs from ACS a while back to see if I could learn to weld. If I’ve got a couple feet of the sizes I need, I can use them for this.

Gluing up a wing spar

Yesterday I headed over to Stu’s to glue up all of the pieces to the aft face of the upper right wing spar. There are two full length spruce spar stiffeners, four pieces of plywood at the wing root, spruce blocks placed at each rib location, and four plywood pieces for the flying wire attachment brackets. Then I’ll get to flip it over and do the same on the other side.

When I was building wing ribs, I found that a total of 8 ml or so was about right to make two ribs. Since I did that a lot, I got used to mixing up small batches of T-88 epoxy. Yesterday was the first time I have had to mix relatively large quantities — I went through two 20 ml batches, which is about the most I can do in the little medicine cups I bought for this. Even that left me slightly short. There are a couple of plywood attachment pieces that I didn’t get installed yesterday. System Three makes auto-mixing dispensing cartridges, but they’re substantially more expensive to use. As in, over six times the cost. I think I’ll be sticking to mixing cups. I may need to get some larger ones, though — mixing up 20 ml at a time isn’t going to work for a lot of this stuff.

Last rib done, first spar started

I just pulled the last two false ribs in the jigs. It’s been a long haul — six and a half years since I built the first rib, but now they’re done AND I’ve got the materials and the place needed to continue the build.

Last night I was over at Stu’s place. One of the main spars has been partially assembled; the spar caps have been glued to the web. I got all of the rest of the parts for the aft face of the spar fitted and ready to glue up. I decided to designate this one the upper right wing. I’ll head over tonight and glue it.

I briefly thought about tearing down the rib jigs now that all of the ribs are finished. I decided not to do that quite yet. For one thing, there’s a chance I may need or want to make more of them for one reason or another. I don’t need two jigs, though. I’ll probably leave the first one I made as is, and pull the blocks and plastic from the second copy. It’s not a high priority, since it will only yield a 4′ x 1′ chunk of MDF.

Workshop assessment and kit inventory

I met with Stu over the weekend to figure out where and how we’d set up the spar assemblies. I was concerned about the lack of any long workbenches in his shop. He’s primarily set up for building cabinets, and most of his work tables are smaller, low to the ground, and on casters. As it turns out, one of the tables has folding extensions that make it 9 or 10 feet long. The top is very thick, heavy, rigid, and very flat — he uses it to mount rails and a sled for a router to flatten large slabs of wood. He put threaded inserts on the edges of the table where a set of heavy welded steel rails can be attached. With those installed, there will be a built-in straight edge for blocking and clamping the spar caps. It’s not something I would have thought of; the “normal” practice is to lay out a chalk line and nail wood blocks to locate the spar caps during assembly. I think, however, that this setup will be more than adequate for spar construction. I may need to build a matched-height extension for the wing assembly, but that’s a decision for another day.

The wing kit contains no hardware at all. Fortunately it looks like all of the hardware required is made from readily available material and requires simple manufacturing. It’s all flat aluminum stock, some 4130 tubing for bushings, aluminum tubing for aileron torque tubes, and so on. No brake, lathe, welder, etc. required yet. Some of the material I may already have on hand, in fact. The rest can be ordered or even found locally.

While I was there, I grabbed a few pieces of rib capstrip so I could finish off the last of the false ribs. I made two on Sunday, and set up two more this morning.

A kickstart, I hope

Yesterday (9/16/23) we drove to St. Charles, MO. Normally I wouldn’t do such a thing, but a guy had advertised a Celebrity wing kit and plans on Barnstormers. Apparently the original owner of the kit never had a chance to start building before age took its toll, so I was able to pick up all of the wing parts for less than it would have cost me to buy just the spruce for the spar caps. I’ve really been kind of stalled up until now because I just couldn’t get past the cost of buying the wood from ACS, then paying truck freight go get some oversized but very lightweight pieces of wood shipped here. The total cost of our trip was less than the shipping cost for just the longer spar pieces, and I’ve got all of the pre-cut plywood parts as well. Rib nose pieces, trailing edge stock, aileron ends, spar reinforcements, all of it. I’ve also got a second complete set of plans and documents that I can put up for sale, since they have never been used and I don’t need two.

The other thing that has kept me at a standstill has been the lack of a suitable place to work. My garage has, unfortunately, been occupied for the past few years with a “project” car that I probably never should have bought. My own fault, but is it better to have one project stalled, or two? I had plans at one time to put a sheet of MDF on top of the island in our basement to build the tail surfaces, but that is now part of a very busy sewing room. Zero complaints about that, of course! It just means I can’t work in there.

Anyway, a couple of weeks ago I was talking about the airplane with my friend Stu. He’s been building cabinets for the past couple of decades and has a large woodworking shop next to his house. Not only is it well equipped, but it’s also climate controlled and well lit. Quite frankly, it would be the envy of most people who would want to build stuff – certainly myself included.

Stu offered to let me use his shop and help with the build. I doubt he’ll ever want to fly in the finished airplane, but he thinks the idea of building an entire airplane out of wood is pretty cool. I can understand that; I think so too. When we got back from the road trip yesterday we unloaded the crate at Stu’s shop. It was late, so all we did was pop the top off and have a quick look, and grab the Fisher assembly video DVDs that were in there.

I’m pretty pumped, to be honest. This means I’ve now got everything I need to complete all four wings and the horizontal stabilizer & elevator, and a place to do it. I’m hoping to get the last few of the false ribs knocked out this week and lay out the pieces to assemble the main and rear spars.

Generic update

Yeah, it’s been a long time, no updates, and so on. I bought a few more pieces of capstrip from ACS to finish out the last of the false ribs, but honestly the lack of any place to assemble wings or build the tail surfaces — or really any other parts of the plane — has had me less than enthused about getting much done. I’ve got a tall stack of full wing ribs and an almost-as-tall stack of false ribs sitting on a bench on my basement, doing nothing.

From time to time I check Barnstormers to see if another Celebrity pops up for sale. Occasionally one does. The two that really gnaw at me? A gorgeous, Rotec radial powered Kitplanes Magazine article centerfold that was advertised for probably less than the engine would cost me, and one a couple hours’ drive from here with no engine that was listed at about $5K or so. In both cases the timing just was not right (hell having not frozen over quite yet).

Now I’m contemplating a run down to St. Louis. The purchaser of Celebrity serial number CE165 – one later than mine – had apparently never started building, and a crate with the complete wing kit is for sale. The seller is asking a fraction of the cost of a new kit, and it appears to be complete. I did some plotting, and even just ordering the wood for the wing spars – not the entire wings, mind you, just the spars — would cost more than he’s asking plus my gas for the trip, and that’s before I pay LTL freight costs to have it shipped from Aircraft Spruce. Plus it’s a complete wing kit, with all the pre-cut plywood pieces, laminating strips for the wingtip bows, trailing edge pieces, all of the bits that would add cost and time and aggravation to a scratch build. I can’t pass it up. I’d also have a full set of plans that I could sell to help defray a little of the cost.

A friend with a large woodworking shop has offered to let me continue building there in his shop — heated, air conditioned, lots of space, plenty of power tools, and this all feels almost too good to be true. I’ve just got to make a 13-14 hour round trip with a pocket full of cash.

Stay tuned, I guess.

On the home stretch

Well, for wing ribs at least. 30 false ribs down, 8 to go. It looks like I may be able to get some more building done, at least temporarily, at the EAA Chapter 80 “Able Ace” build space. The chapter has leased a storefront in a shopping mall that’s dying a slow and pitiful death. There are a couple of good sized workbenches there that I may be able to use for wing spar and tail assembly.

More ribs

Got a couple more false ribs glued up, now I’m waiting for the epoxy to cure. I also unrolled the plans to get a good look at the wing layouts, and re-read the instructions for building wing ribs. The instructions say to make 42 main ribs (I have 43) and 37 false ribs. These two make 20, or it could be 21 if I cut down the extra main rib. I’ll just keep making them and see what happens. I really need to get that second jig back on the bench so I can do 3 at a time.