Bench tops and bottoms

On Thursday I picked up the particle board and plywood and Stu helped me — er, that is to say, Stu cut the sheets up for the top and shelf of the new bench. He’s got a massive SawStop table saw, and he’s a virtuoso using it. It seems to be a challenge for me to rip a 2×4 in half on a table saw; he can zip a 4×8 sheet of 3/4 particle board through that thing like it was a sheet of paper. I try not to use his saw, because even though I’ve never in my life hit the blade of a running saw with a finger, sure as hell I’d trigger his SawStop and add the ignominy of replacing a blade and cartridge to my list of accomplishments. I have, however, found that when I do use his saw things go a lot easier. My old table saw was a challenge to use — for most of the time I owned it the fence wasn’t parallel to the blade, and once I got that fixed the blade was dull. It was actually halfway decent in the end, for smaller pieces. Once I got it finally set up and a brand new carbide blade on it, some asswipe stole it… so now I get to buy new, some day when I have a place to put one. But I digress.

The tops are two layers of 3/4″ particle board, glued and stapled together. The lower shelf is 1/2 plywood, mainly because I had to buy some anyway for another project. The shelf is in three sections, so I’ll need to join them with some scraps of particle board or something. I plan to build some sort of storage to slide in on top of that shelf.

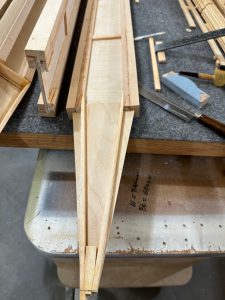
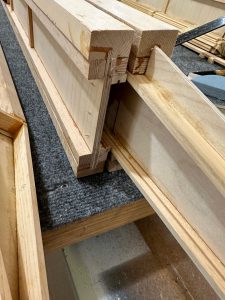
My casters and levelers also arrived Thursday afternoon, so on Friday I went over and installed those. I also cut the plywood for the lower shelf to fit, cut some corner blocks to keep the top square, and made the diagonal supports for the two extensions. Those are lengths of 2×4, notched on the lower end and with a double 45 cut on the upper end, that will brace between the lower shelf support and the top of the extension on either side.

The last thing to be done before final assembly is to flatten the top. As the bench was built with dimensional lumber on top of a workbench with a carpeted top, it’s “more or less” flat but the 2x4s aren’t perfect by any means. In a perfect world I’d have used a 6 foot jointer and a thickness plane to turn them into perfect boards before building, but I didn’t have access to a jointer. I know for sure one of the long edges of the table frame has a hump in it, and I want the top to be FLAT. I’ll evaluate how much needs to be done to make that a reality and see how I’ll make that happen.

Episode V: A New Workbench

I guess I missed a chance to make this Episode IV for a catchier title. Ah, well.

Today I bought some 2x4s, did some measuring and cutting, gluing, screwing, clamping, and ended up with a new work table mostly built. I’ll try and finish it up tomorrow. The main section is 60″ long by 36″ wide (that’s roughly 152 x 91 cm for you metric folks). Each end has a 30″ folding extension, so you can have a 5′, 7.5′, or 10′ total length depending on your needs. For most of the airplane build I’ll likely have it fully extended, but it will be nice to be able to shorten it when needed.

I used the basic EAA 1000 work table plan, with a few changes. The width is increased, of course, from 24 to 36 inches. The folding extensions are another departure. I also lowered the shelf to about 4.5″ from the bottom of the legs rather than the original 8.5″. In hindsight, I kind of wish I’d made it even lower, but it’s fine. Tomorrow I’ll be adding some corner blocking to keep it perfectly square and solid. I still need to install the top (two layers of particle board) and the supports for the extensions. Those will be simple lengths of 2×4, with one end notched and the other cut to fit into the extension, Stu has a similar setup on the work table I have been using at his shop, and it’s absolutely rock steady and completely flat.

I thought long and hard about how to put retractable casters on this bench. I’ve seen a lot of different ways to do it. I had another work table, 3′ x 8′ with a setup on it that worked, but was a little more involved than I wanted. I’ve seen a few more designs on Youtube, several of which look kind of fidgety – making custom steel latches, etc. Anyway, in the process of working that out I managed to forget to re-add 1.5″ to the legs that I’d subtracted for one of the designs. Then I came up with what I think is an absolutely brilliant method, and I think it would work really well… on any workbench that does NOT have folding extensions that will block access to the end of the bench. In the immortal words of Homer Simpson…

So, I have ordered some retracting casters from Amazon that will be here tomorrow, and will cut some blocks of 2×4 for the bottom of the legs. No biggie. Perfection is the enemy of completion.

I think it’s very likely that I’ll build some sort of cabinet, shelving, and/or drawers under the top. I can only imagine how handy it would be to have all of the woodworking tools, clamps, glue, and so on right there at hand, and storage to keep it well organized and clean. That will wait until I have the bench at home and set up in the garage; that way I can cut the wood and do the assembly there. I can think of a long list of items that I will want to always have within easy reach, and more importantly have a place to put it within easy reach so I don’t end up with tools and supplies scattered everywhere.

Of course the very first thing the new bench will be used for is finishing the rebuild of the “gossip bench”. The veneer for that should arrive later this week.

Garage prep, chapter four

I’m nearing the end of the gossip bench rebuild, but that’s on hold while I wait for some fancy quilted maple veneer to arrive. It’s been stripped, sanded, reassembled, and stained. Only the curved plywood and veneer remain, then it will get lacquered.

While waiting for that, I decided to attack my rolling tool table. I’d built it years ago when I was working on an RV-7. It’s a 24” square rolling table, with one tool on each corner – tabletop band saw, belt/disk sander, drill press, and a buffer with a cloth wheel on one side and a 3M Scotchbrite wheel for smoothing aluminum on the other. It had become a bit of a junk collecting place, so I’m cleaning that up. It need to come down a bit; the newer drill press is a foot taller than the old one. I’ll either put smaller casters on it, remove them altogether, or just take a couple inches off the legs. It is awfully nice to be able to easily roll it anywhere I need it, and quickly rotate it to bring the tool I need to the front.

My drill press is a Wen benchtop 10 or 12” model with laser lines to mark dead center of the drill bit with a nice red X. Well, they do that with two straight line lasers, and one is dead. I’ve got a new one coming, so hopefully that shows up this coming week along with the veneer.

On the plus side, I’ve got a final plan for the work table, a materials list, and a cut list for the 2x4s. I may build that while waiting for the parts. I can always make the gossip bench the first project for that. Oh, and the extended top my wife wants for her ironing board…

Garage prep, chapter three

Yesterday I built a storage rack on the back wall of the garage. I call it the back wall; it’s the “back” only from the perspective of the door from the house to the garage. It’s the side of the last garage space. Anyway… Three 8′ 2x4s and an hour or so with a chop saw, pocket hole jig, glue, and screws, and I had the three wall brackets. I spaced them 32″ apart and screwed them to the wall studs. Each bracket has three 18″ horizontal supports on which I can stack lumber or whatever.

Going through my stock of random left-over lumber from previous projects, one of the things I found was a 1×12 board about 10′ long. I suspect it was left over after disassembling and old Van’s Aircraft shipping crate, though it may have been something else. It’s a pretty crappy board, and I can’t imagine using it for anything else, so I cut it to length and used 67″ of it to screw to the bottom supports as a shelf for shorter stock.

One task remains – finishing up the “gossip bench” – before I can get a work table built and get back to building. I discussed the general plan for the work table with Stu yesterday, I just need to figure out exactly how I want to build it.

Garage prep, chapter two

Tool boxes have been swapped, a cabinet moved, more cleaning and organizing done. I’ve made a calculated decision to take a side trip to disassemble, sand, reassemble, and refinish an old “gossip bench” or telephone table that belonged to my wife’s grandmother. It’s been sitting in the garage for many years, rickety and falling apart. The top portion is an enclosed shelf made with a curved piece of plywood with solid beech for the top and bottom – you know, to hold a phone book. The plywood got cracked by something long ago, so I’ll use some new birch plywood and bend it to make a replacement. I figure a week to finish this up, then it can come inside the house for my wife to make a new seat cushion and find a place for it, which she has assured me she can do. As long as it’s not in the garage, I’ll be happy.

Now on to figuring out how to wedge in some wood storage.

Garage prep and planning

I’m getting really tired of not being able to get any building done. This has really been driven home for the past few weeks of non-building. During the summer there’s plenty of yard work and other projects to fill int he gaps and keep one from getting bored. When it’s this cold, though, it becomes obvious that something has to be done. Rather than dive into a “just do something, anything” mentality that invariably leads to a big stalled mess, I’ve been taking the time to figure out exactly what the obstacles are and how they can be overcome.

Obviously, one of the biggest factors is space. There wasn’t any. The garage is packed pretty full, but a lot of it is just clutter. Over the past couple of weeks I’ve been cleaning things up, putting things away, figuring out what can be tossed, and just generally rearranging things. I have a day or two left to go on the big parts of that effort. Right now I have about half a garage space completely cleared, and will extend that another couple feet as I get rid of some junk that needs to go. I also plan to move the riding mower from the garage to the back patio, and cover it with an all-weather cover I bought for it. I have some rodent repellant balls I’ll use to try and keep mice and squirrels out of there… we’ll see how that works. The balls are strongly scented with peppermint and some other stuff; it’s non-toxic and doesn’t stink. I’ve also got two tool chests that I’m swapping around and getting all of the tools organized. I’m terrible about not putting tools away, and as a result they tend to end up scattered everywhere, and I’m trying to fix that.

The next issue is climate control. It’s a garage. The temperature out there is more moderate than it used to be, since we insulated the walls and ceiling several years ago when the new siding was installed. Still, it gets too hot to work out there during part of the summer, and too cold in the winter. Epoxy won’t cure properly when it’s 40 degrees in the garage, and working in 90-plus heat or refrigerator temps leads to careless and sloppy work. I’ve got a 1500W infrared space heater going out there now to keep it at sweatshirt temperatures just so I can get the cleanup done, but a betters solution is going to be required. I’m looking at installing a ductless mini-split heat pump. That will require a new 220 V circuit installed, and some cabinets will need to move, so as one might imagine it just leads to a stream of new projects and complications. I do have a. plan, though, even if its implementation is not as quick as I’d like. I’m also going to need to seal up the garage doors better than they are — the rubber seals are old and leaky. I suspect we’ll probably end up with new garage doors, which we’ve been wanting for a while anyway.

Then there’s the work table situation. There is none. I’ve been looking at what I’ll need for tables to assemble the upper wings, tail, and fuselage. I have full size prints for everything, so I know that a 3′ wide table will be enough or everything. Wider would be good for wings, but 36″ will cover the distance from the trailing edge to the main spar, so it’s enough. I already know I’ll need at least 10′ for the wings. That will also be enough for the tail; the biggest piece is the horizontal stab and elevator at 8′ span. So, a 10 foot long table will be enough for everything up until I start the fuselage. For that, I’ll need 14 feet (I just checked the drawing; it’s 13′ and change). That’s probably a year out, though. After discussing with Stu, I’m currently planning to build a work table with folding wings on each end, similar to the one in his shop. He’s suggesting a 36 x 60 inch table with 36 x 30 inch wings; that will end up 10′ long when fully extended. When it comes time to build the fuselage, I’d need to add a second, smaller table to extend it to the length required. A standard 24 x 60 inch EAA 1000 table should be enough for that; I can build one if nobody has one I can borrow for a couple of months.

Lastly, there’s storage. Right now, in order to move everything home I’ll need a place to store wood and parts. The longest pieces are the eleven-foot-long upper wing spars. There’s a lot of 6- to 8-foot stock, a stack of wing ribs, and so on. I need to set up something accessible on one wall of the garage to store that stuff. Also, I’ll need other load of lumber for the tail and fuselage; that will need to be stored as well. I’m thinking I may place an order with Aircraft Spruce and drive out to Oshkosh this year to bring it home in the truck. I haven’t been to Airventure since 2018, I think, so it’s about time for another trip out there anyway. I’m also scouting for lumber yards tat would carry good quality southern white pine, as that can be used for a good portion of the fuselage and tail according to Fisher.

Onward. I’ve been spending a lot of time in the garage getting things cleaned up, organized, and re-organized. I want to get this under control and get back to building ASAP.

Splitting up the build

I heard from Stu today that he needs his shop back. I didn’t ask for how long — I suspect he may be not quite as enthused about having a large part his shop taken over with what seems like an indefinite project, especially when I’m not there for a week or two. I’ve been dealing with a bunch of other things that have been deferred on the house and cars, and admittedly a couple of those days have been just inertia – and trying to figure out the best way to deal with the aileron/bracket interference. I did tell him it would take 2-3 years to get to the point where I was ready to take it to the airport for assembly, but being told that and actually seeing the impact are two different things, of course.

At this point I’ll build a movable wing storage rack for the two lower wings, and move them to the hangar at Millard as soon as I have the left wing varnished. Those wings can live there while I figure out my next move. My garage is not currently in a state suitable for building. It’s too cold in winter to work with epoxy, and unbearably hot for much of the summer. It was workable for aluminum construction on the RV-7, but the epoxy used for this plane is less tolerant of temperature extremes while working on assembly. I’ve been planning to install a mini split heat pump in there for heat and A/C; I think I’ll move ahead with that.

Tail surfaces can be built on a single 4 x 8′ sheet of MDF. I think I can free up enough space in the garage for that, and once done they can hang on a wall either at home or at the hangar. I need to review the fuselage plans to see how much workbench I’ll need for that — with any luck, a 2 x 16′ bench would do, so maybe I can just split the 4 x 8 down the center and make a single long bench for the fuselage. The upper wings will be the challenge. I really need at least 11 x 4′, so I just need to do some planning.

Wing down, new bandsaw blades

Wednesday afternoon I went over and worked with Stu to get the wing down off the rack and onto the bench. I grabbed the nose ribs and, since they weren’t cut out for the false spars, took them home with me. Before I did, I carefully marked where they need to be notched.

Stu has gotten out of the cabinet business and has sold off much of his wood shop equipment. The thickness planer, jointer, band saw, edge banding machine, and some other stuff is gone. Wait — the band saw is gone? Crap, if I’d known I’d have bought it from him on condition that I could leave it where it was. Oh well. I have one at home, a cheap little 10″ tabletop model.

While cutting the notches in the nose ribs, it was immediately apparent that the saw blade was toast. I’d wanted to replace it anyway, as it’s a 1/4″ wide blade and not really great for keeping a straight line. I removed and measured it, then tossed that and the equally worn out metal blade I had for it that couldn’t make it through 1/8″ 6061. I ordered a 62″ x 3/8″ x 6 TPI wood blade, a 10 TPI wood blade, and a 1/2″ wide 24 tooth metal cutting blade.

A few days’ delay was inserted here, while dealing with another issue unrelated to the airplane..

The blades arrived over the past few days. I put the 6-tooth wood cutting blade on and got the saw adjusted’ it works great. I can cut a 1/16 slice off the end of a 2×2. I think I still need to get the saw table squared up a little better with the blade before trying to do any re-sawing, but it’s close enough for the time being. The metal cutting blade slides through that 6061 like butter, so I’ll be able to finish off the AL fittings for the wing and get the tubing cut for the bushings. Then I can order the bolts I need and get the fittings installed.

11/5/23 updates

Went over this morning to see what remaining tasks I could knock out before starting the first wing assembly, and to do some planning and figuring stuff out — like, how I was going to jig up the trailing edge and other stuff for the wings. Stu came in and had a fantastic idea for using the existing steel rails on his workbench to hold the TE flat and perfectly straight, then supporting the front of the ribs with the other rail. It’s a 10′ bench with 12′ rails, so plenty big enough. It’s a significantly different method than that suggested in the plans, but it’s a pretty unique setup. I’m sure a 2×4 shimmed for the correct angle is a lot easier solution for most people than adjustable 12′ long steel square tube rails. I’m just glad he had them built out of square tube and not round.

Next I gave the main and rear spars a once-over to make sure everything was right. It wasn’t. One of the upper wing main spar tip bow supports was off by 1/2″, the result of not having the two spars oriented the same way when I installed those parts. Or, maybe it was something else. Those supports have been a real pain in the rump, and I have a sneaking feeling I’ll run into issues there again. Anyway, the easiest fix was to cut the offending tip support off with a razor saw, put a slight angle cut on the root end, and re-attach it with appropriate splices. Right now part of the re-assembly is drying; I’m hoping to complete the assembly tonight after the epoxy cures.

I got the ten ribs that I have over there trimmed fore and aft, so they’re ready for assembly. I’m planning to start with the lower left wing, just for the sake of simplicity. The lower right wing gets the wing walk. The two upper wings may or may not get fuel tanks, so I’ll do the lower wings first while I work that out. Therefore the lower left is the simplest and a good place to start, I think.

Stu and I discussed building the wingtip bows. He’s got a 48″ square table with a melamine top. It’s big enough to lay our two bows. I’ll wax it thoroughly and use a glue roller for gluing up the lamination strips. This will be good practice for the tail surfaces, which will need to wait until after the wings are done as they’ll need a 4 x 8 work surface. Now I just need to order a glue roller and about 40 or 50 more spring clamps. Given the size of the stabilizer & elevator assembly, more is better… I’m pretty sure there is no such thing as too many clamps.

The easy way to manage T-88 epoxy

I’ve seen all kinds of methods people use to mix up their T-88 epoxy. The manufacturer says to mix the resin and hardener (Part A and Part B) 1:1 by volume, or 100:83 by weight – which are the same thing. Plenty of videos on YouTube and EAA Hints for Homebuilders show various methods, and I’ve read some pretty involved threads on various homebuilding message boards. Some squeeze out equal lines of the two parts. Some cut the bottle tips to different sizes and squeeze out for a measured amount of time. Some have built scales to measure out by weight. Some do it in graduated mixing cups, like the little medicine cups that are easy to find. Some just use “TLAR” – or, “That looks about right”. You can buy T-88 in twin dispensing cartridges that automatically dispense and mix the glue — but it’s something like six times the cost of buying it in bottles, and of course you’re going to waste some each time when you throw out the mixing tube.

I have a bit of an aversion to not measuring epoxy accurately, and estimating and hoping for the best didn’t seem to me like a good plan when building an airplane. I know the precise ratio isn’t super critical; even System Three says that. Still, though, why guesstimate or get “close enough” when it’s so easy to get an exact amount?

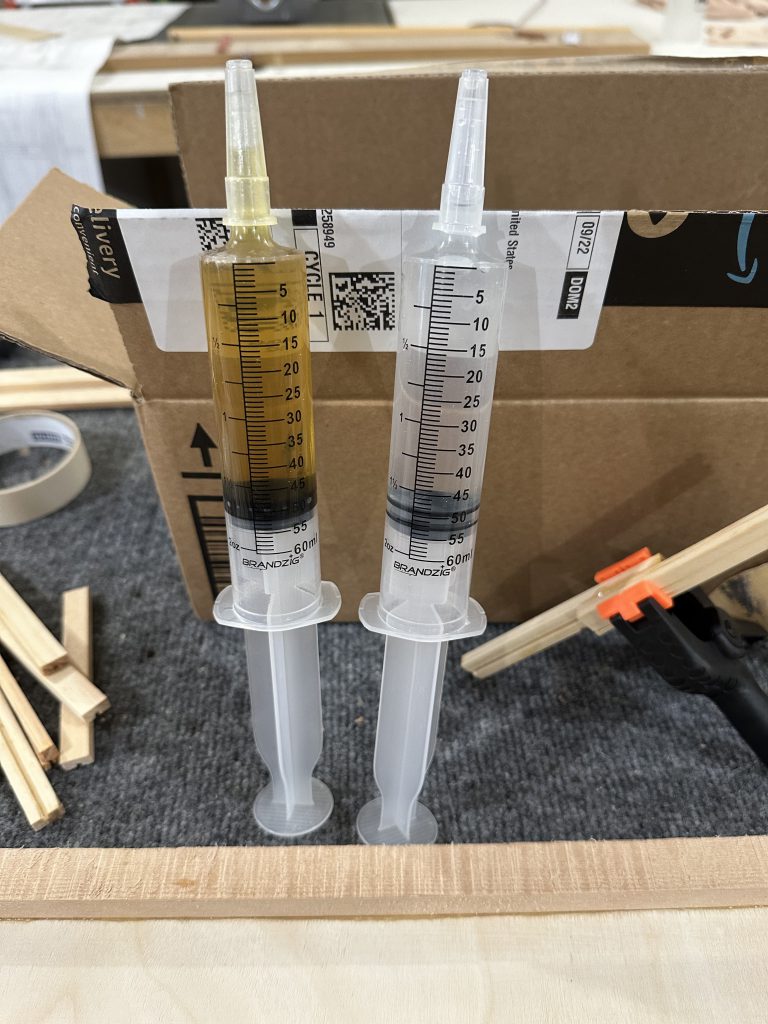
I bought some 60cc catheter tip syringes through Amazon. They’re cheap and disposable, though I’ve reused mine a number of times. I fill one with Part A and one with Part B, and usually use a permanent marker to mark the cap for the Part B (darker) syringe, just so I don’t accidentally mix the caps up and ruin some epoxy. I’ll fill them just past the 60CC mark, then stand them tips-up overnight to let all the trapped air bubble up to the top, then squeeze a little back into the bottle or jug until the plunger is exactly on the 60cc mark. Pull the plunger back just a bit to get a little air in the tip, and cap it.

By doing this you can very accurately measure both parts to mix up any desired quantity of glue, from 2 cc up to 120 cc. Gluing plywood spar webs to spar caps? I’ll mix up 20 cc at a time, 10cc from each syringe. Building ribs? About 8 or 10 cc of glue will do two wing ribs, so 4 or 5 cc from each syringe. When the syringes are empty, you can either be a cheapskate like me and refill them, or just toss them in the trash if they’re too grungy to re-use or if you’re Daddy Warbucks and don’t care about the cost. I’ve got two pair of syringes that I use, and each has been refilled probably six or eight times. I just ordered some more syringes, since these are getting a little sticky and I want to keep fresh ones on hand. I use them for other things as well, so it’s never a bad idea to have some around. You also don’t want to run out of glue before you’re done building for the day, so I try to always have at least two sets filled.

Note: Pay attention to the quality of the syringes you buy. The first few I bought were made by B-D (Beckton-Dickinson) or Brandzig, are nice heavy duty plastic, are marked with 1 cc graduations, have good caps, and are generally high quality. The next batch I bought are thin, lightweight, shorter, marked with 2 cc lines, and are generally cheap Chinese crap. I’ll toss these after the first use and chalk it up to a lesson learned. As is almost always the case, it’s better to spend a little extra for good quality.