Bottom geodetic and false spars

Yesterday I got the rest of the compression member gussets glued in, then cut and glued in all but two of the bottom geodetic braces. Those two I couldn’t get in because of a clamp holding a gusset in place. I also got about a quarter or so of the geodetic intersections glued and clamped before running out of epoxy.

Today I finished up the geodetic members, and had enough glue left to install the false spars on the front of the ribs. I think I may have actually used all of the spring clamps I had over there… in fact I know I did, because today I took over another dozen I’d gotten for Christmas a couple years back, that had been sitting in a gift bag in the basement. I think there were a couple left today, but certainly less than a dozen.

Compression members in (lower left wing)

Over the past few days, I have gotten the rest of the ribs glued to the rear spar. I’ve left them unattached to the top of the main spar, as I’m planning to just run the geodetic braces between the rib cap and spar rather than use a separate shim between the cap and spar.

Today I got all four of the compression member assembles cut, fitted, and glued in place, and glued plywood gussets on some of the joints. I ran out of time before I could get the remainder of the gussets cut and glued in.

New month, new wing

Yesterday I made the call to stop work on the lower left wing and start on the lower right. The remaining things to do on the first wing are all attachment hardware and pre-fabric finishing. Some of those things, like attaching the N strut and landing wire brackets, would make it more difficult to store. I think it will be better to build the other lower wing, then varnish and add the attach brackets to both at the same time.

So, we put the wing on a storage rack in a corner of the shop, and I started laying out the parts for the right wing. We figured out the trailing edge pieces and got them clamped to the bench rail, then slotted in the five ribs I had over there and slid the main spar into place. I’ll need to take over another batch of ribs and get them modified as I did the other wing to clear the torque tube. I spent the better part of six months on the first wing, if you count the time spent on spars and wingtip bows. If you count just the wing assembly time, it was more like four months. A lot of that time was spent on the leading edge wrapping and aileron construction. I’m hoping I can speed that up quite a bit and have this one done quicker, even though this one will include the wing walk.

Mocked up, nothing glued yet. Need to take more ribs over!

Lower left wing, Day 2

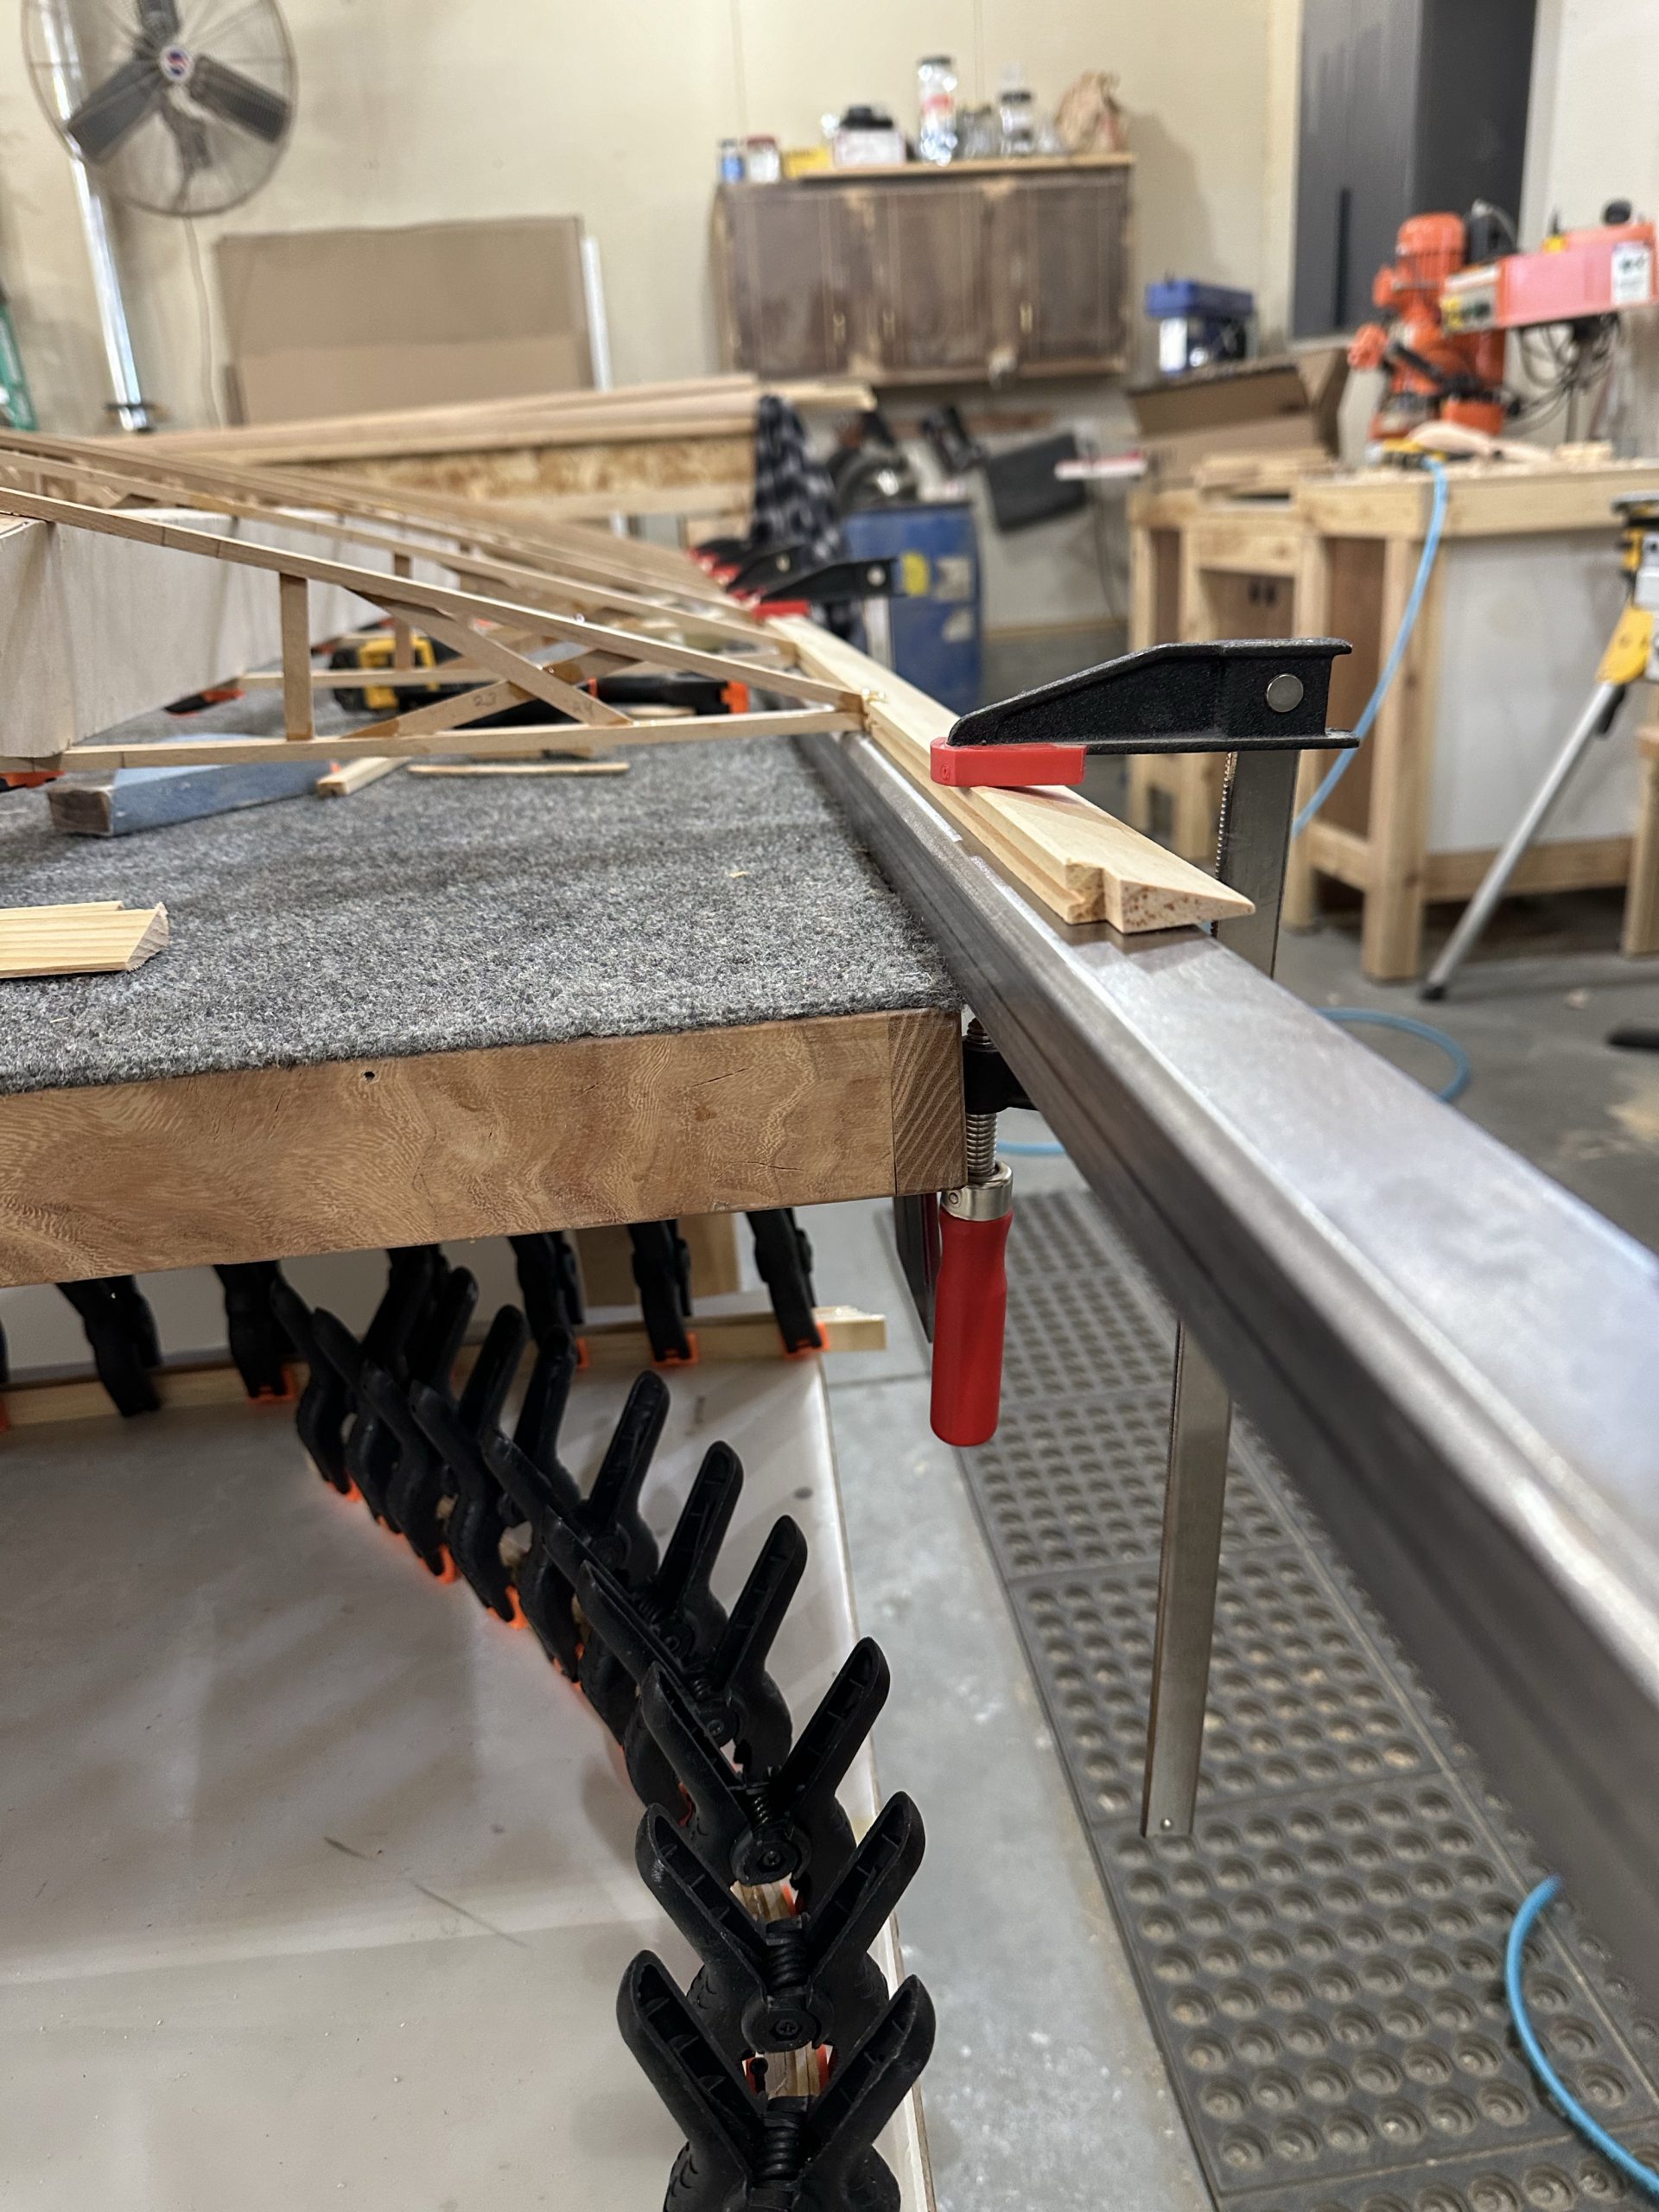
I feel like we accomplished a lot today. This morning Stu and I unclamped the partially assembled wing and found that it was already quite stiff and of course perfectly square. The epoxy where the ribs were glued to the trailing edge material was pretty well stuck to the steel rail, but the careful use of a utility knife blade between wood and steel popped those spots loose. Next time we’ll use poly or waxed paper. Stu sanded the rail to remove the epoxy and applied a couple coats of paste wax.

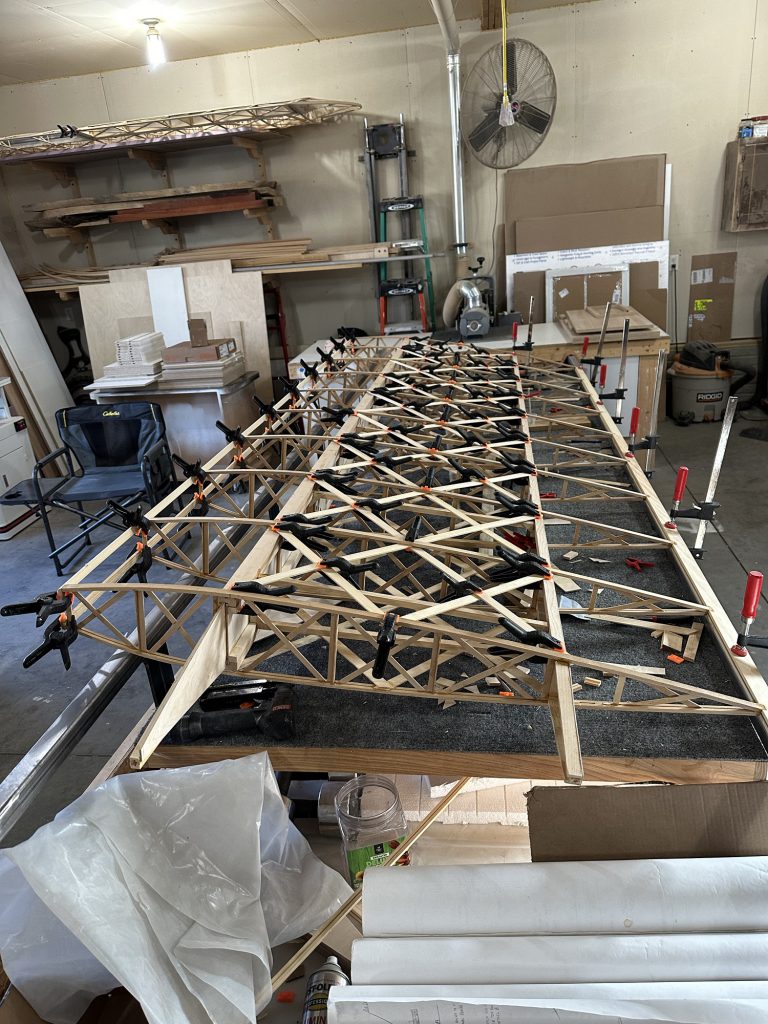
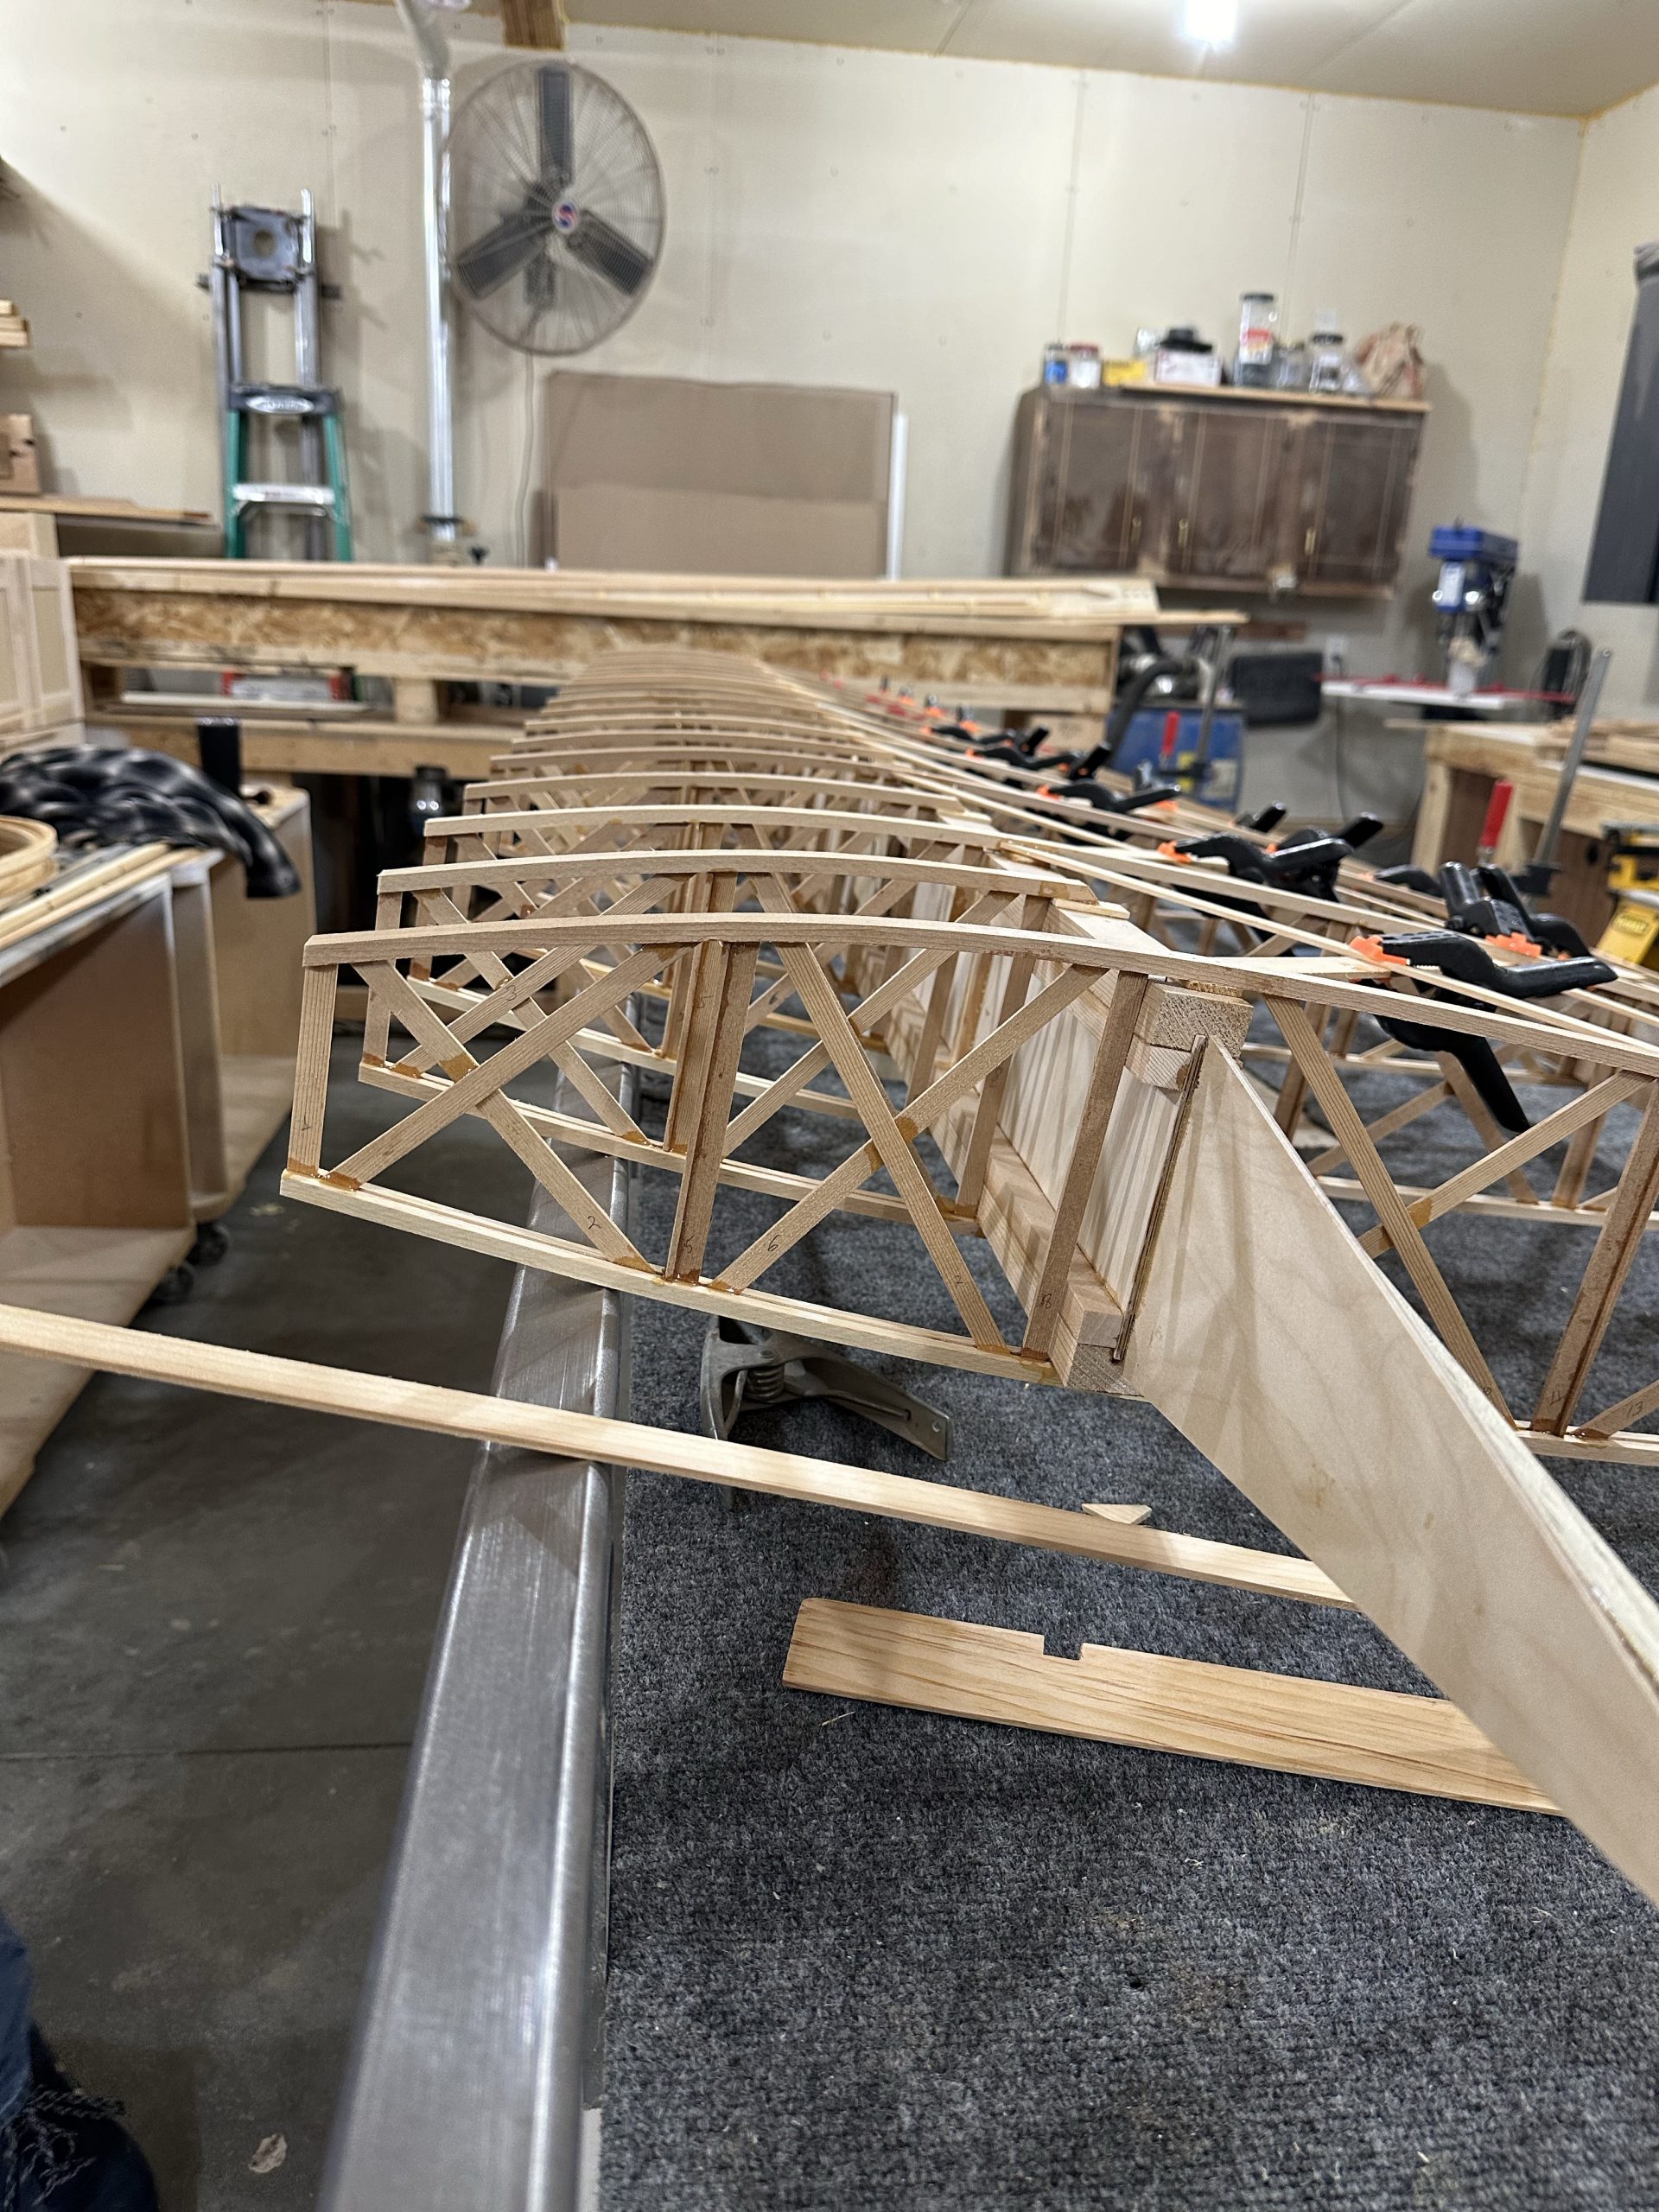
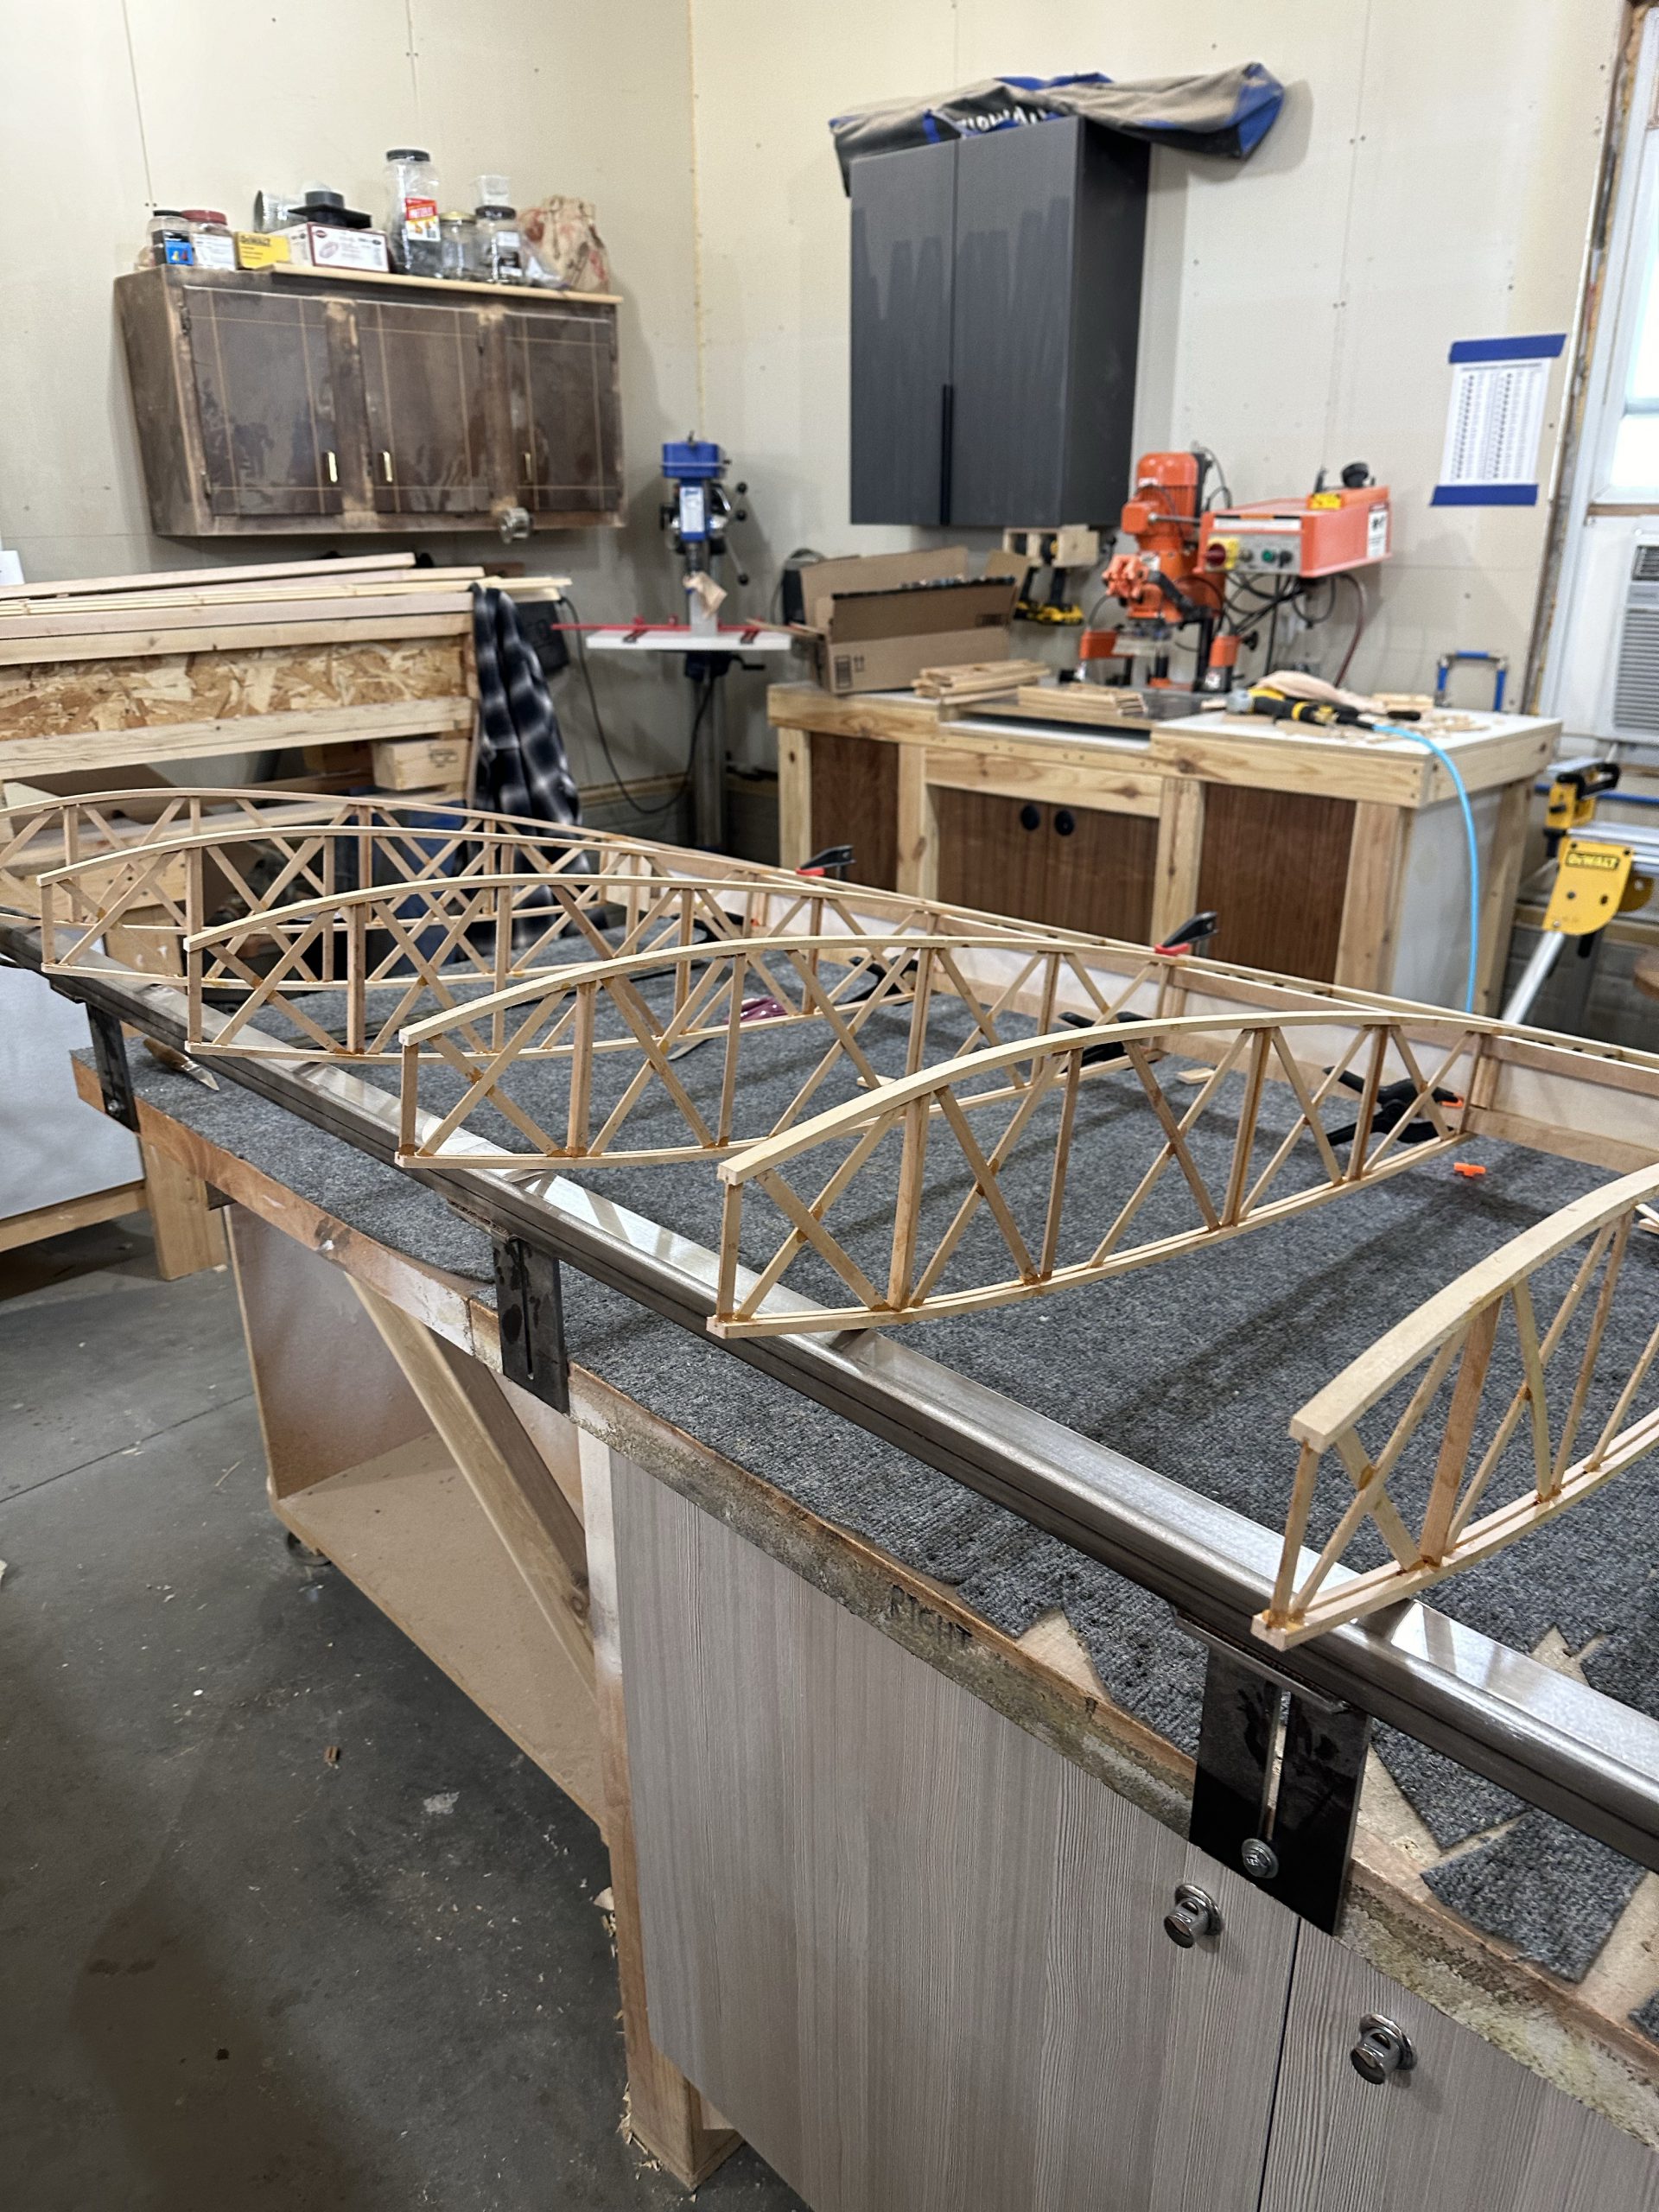
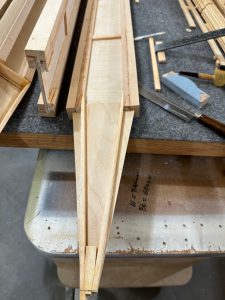
We stood the wing panel on its nose and slid the main spar into place, then glued and pinned the ribs to the bottom of the spar. The first rib was placed flush with the end of the spar, and the rese were once again set in place using the 11.5″ gauge block that we’d used for the rear spar rib spacing. It perfectly matches the notch spacing on the trailing edge, so everything remains perfectly spaced and square. Once that was done, we rotated it back horizontal and re-clamped the trailing edge to the rail. Now I cut some short lengths of laminating strip material to act as shims between the spar cap and rib caps, so we glued and pinned the ribs to the top rib cap.

With that done, we glued the false ribs in place using a 5.5″ gauge block. Lile the main ribs, these were glued and pinned to the bottom of the spar, then shimmed, glued, and pinned to the top.

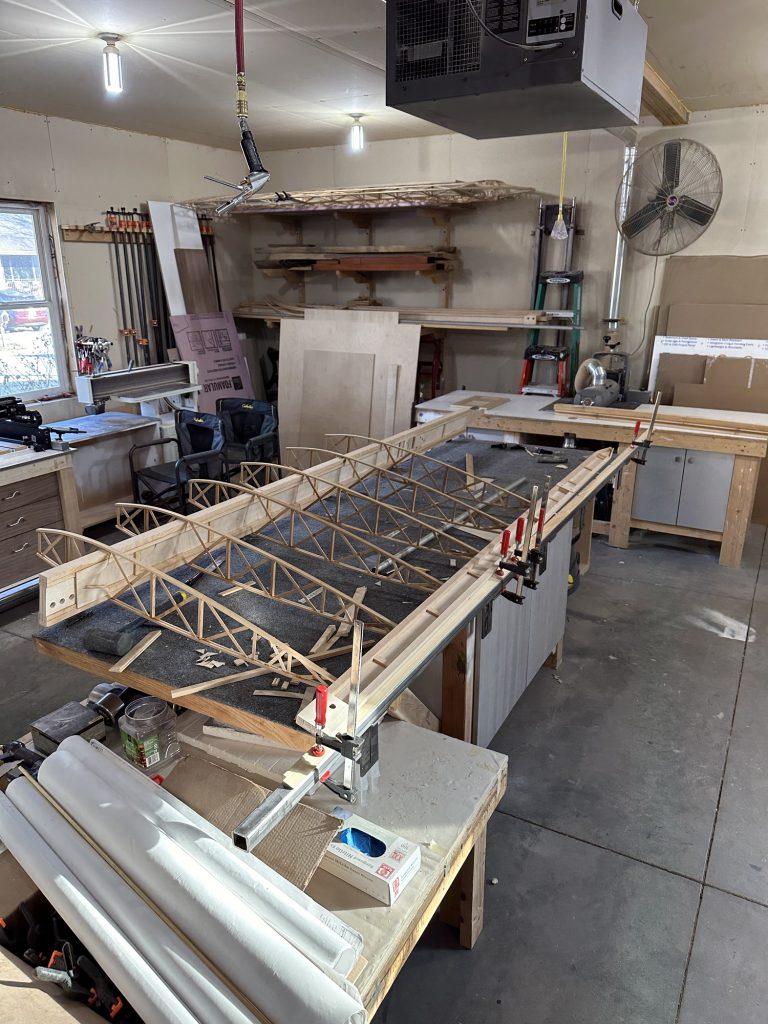
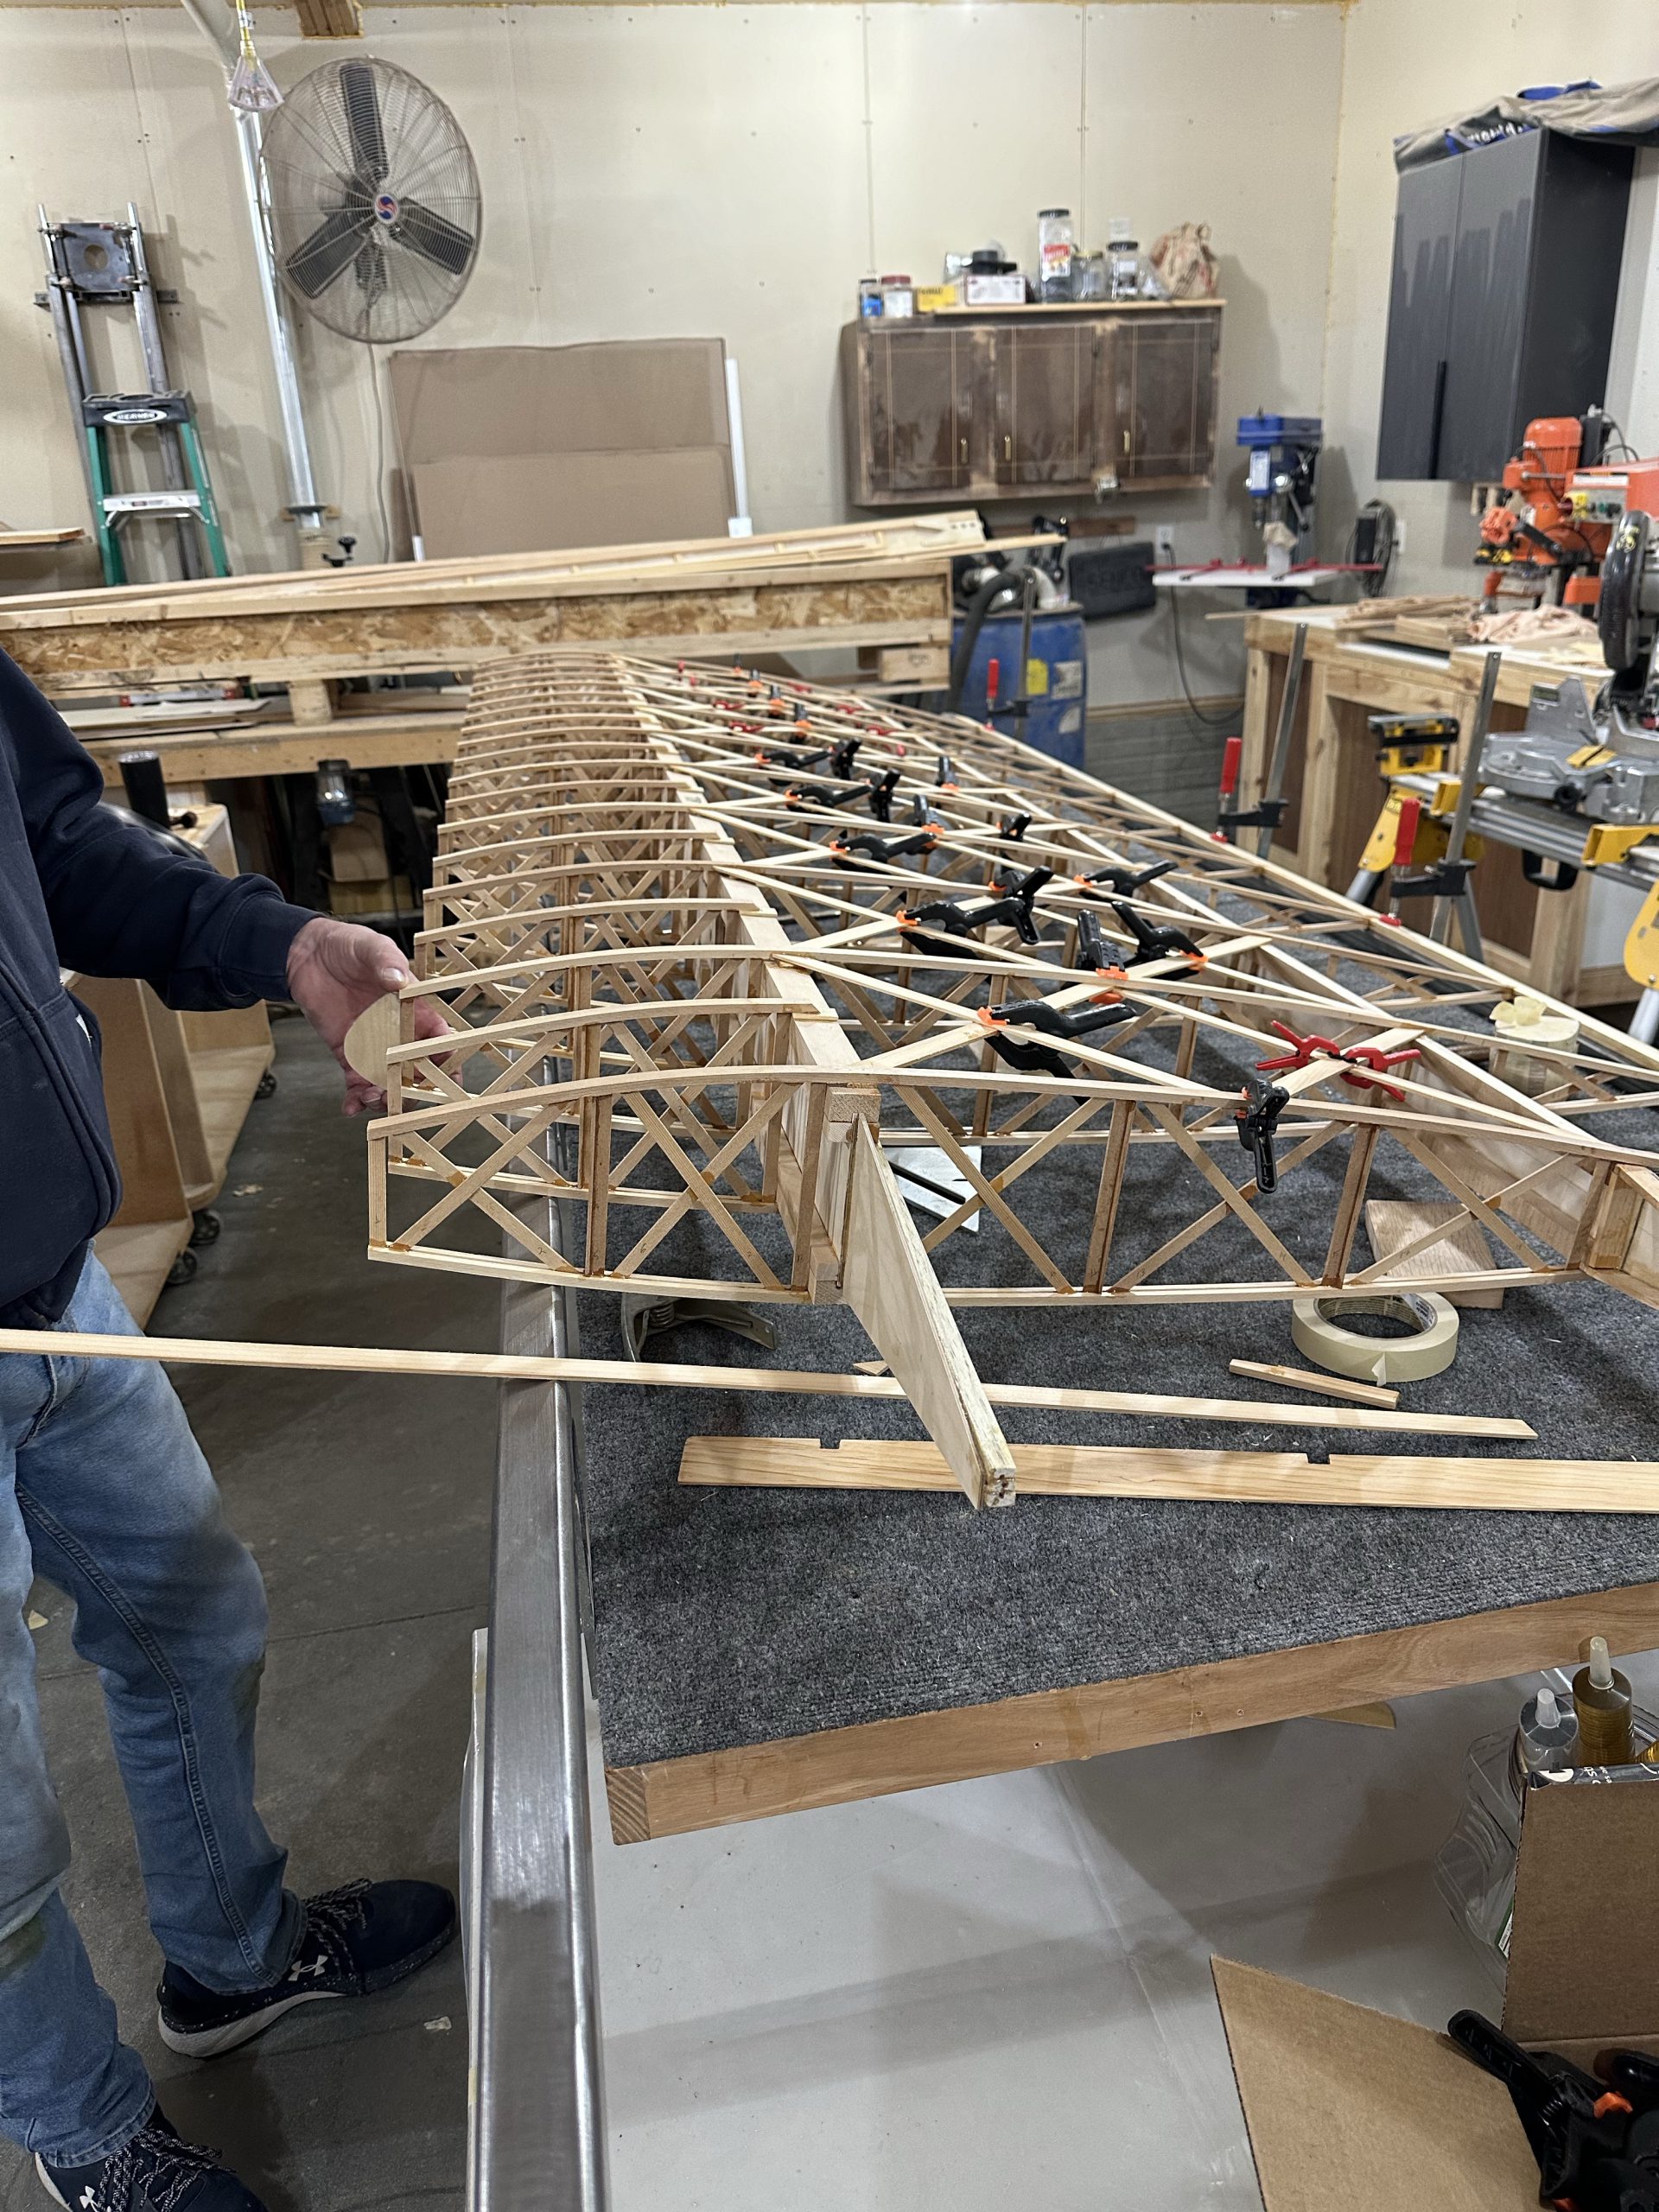
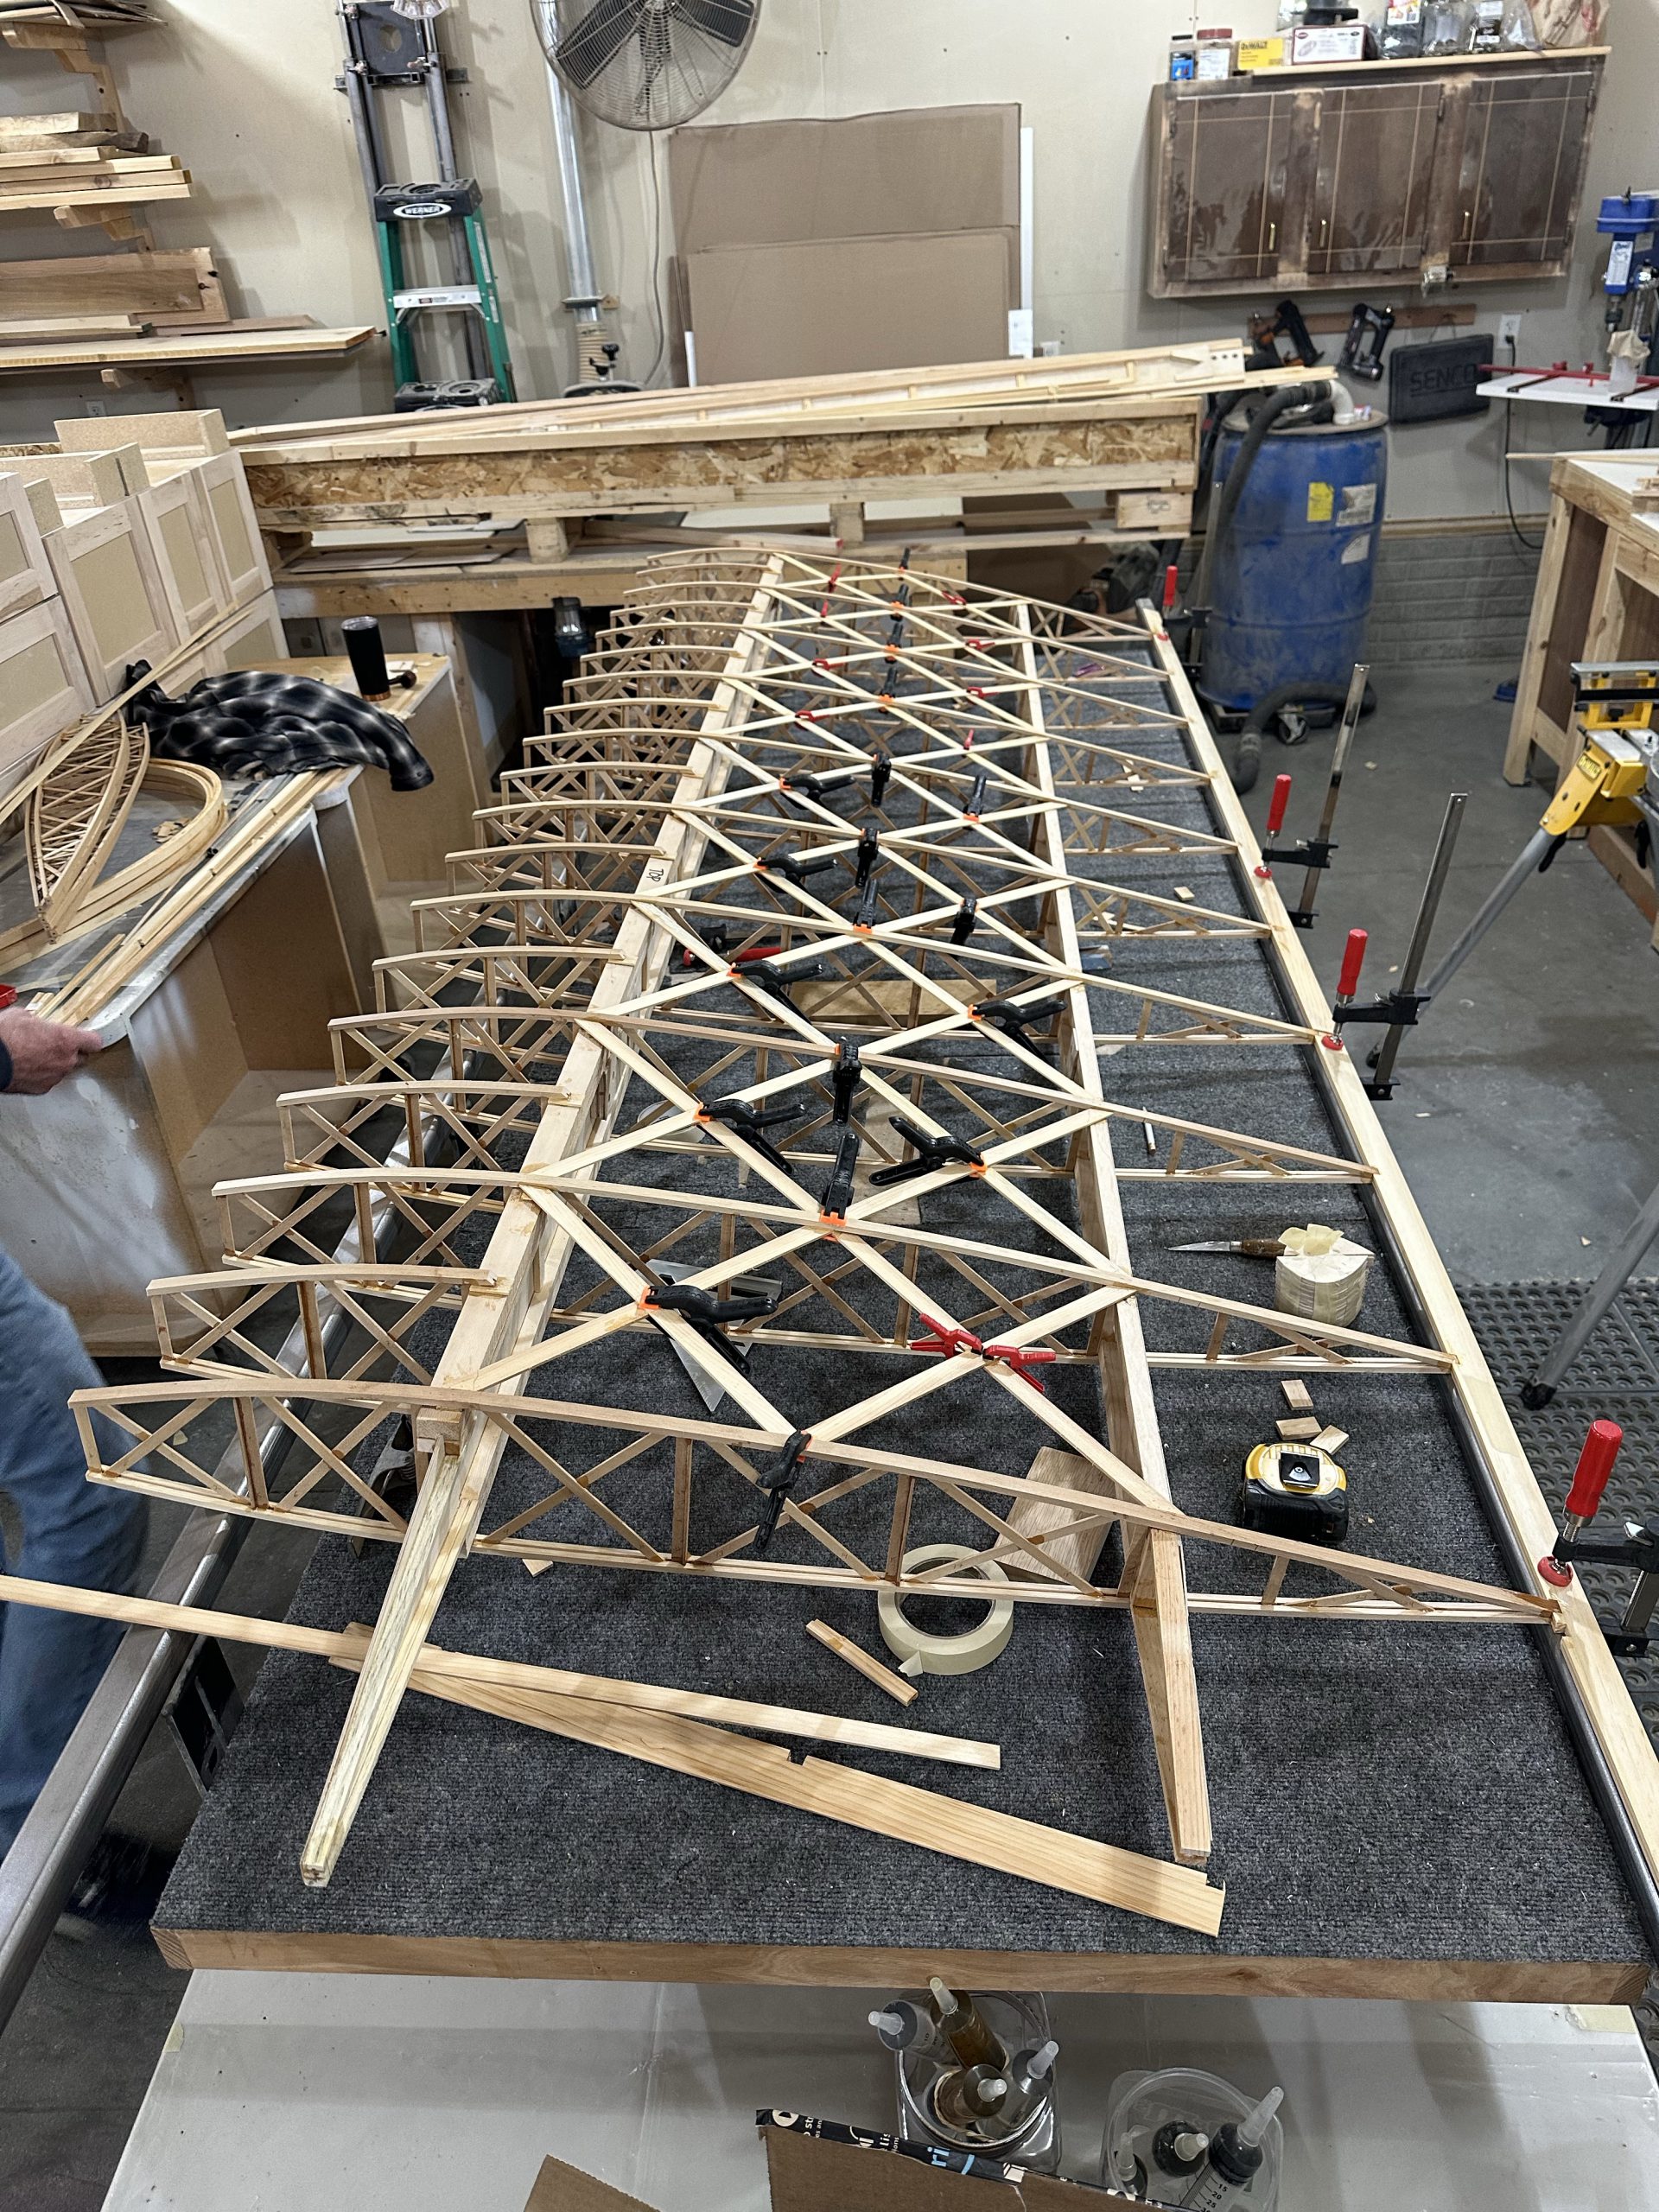
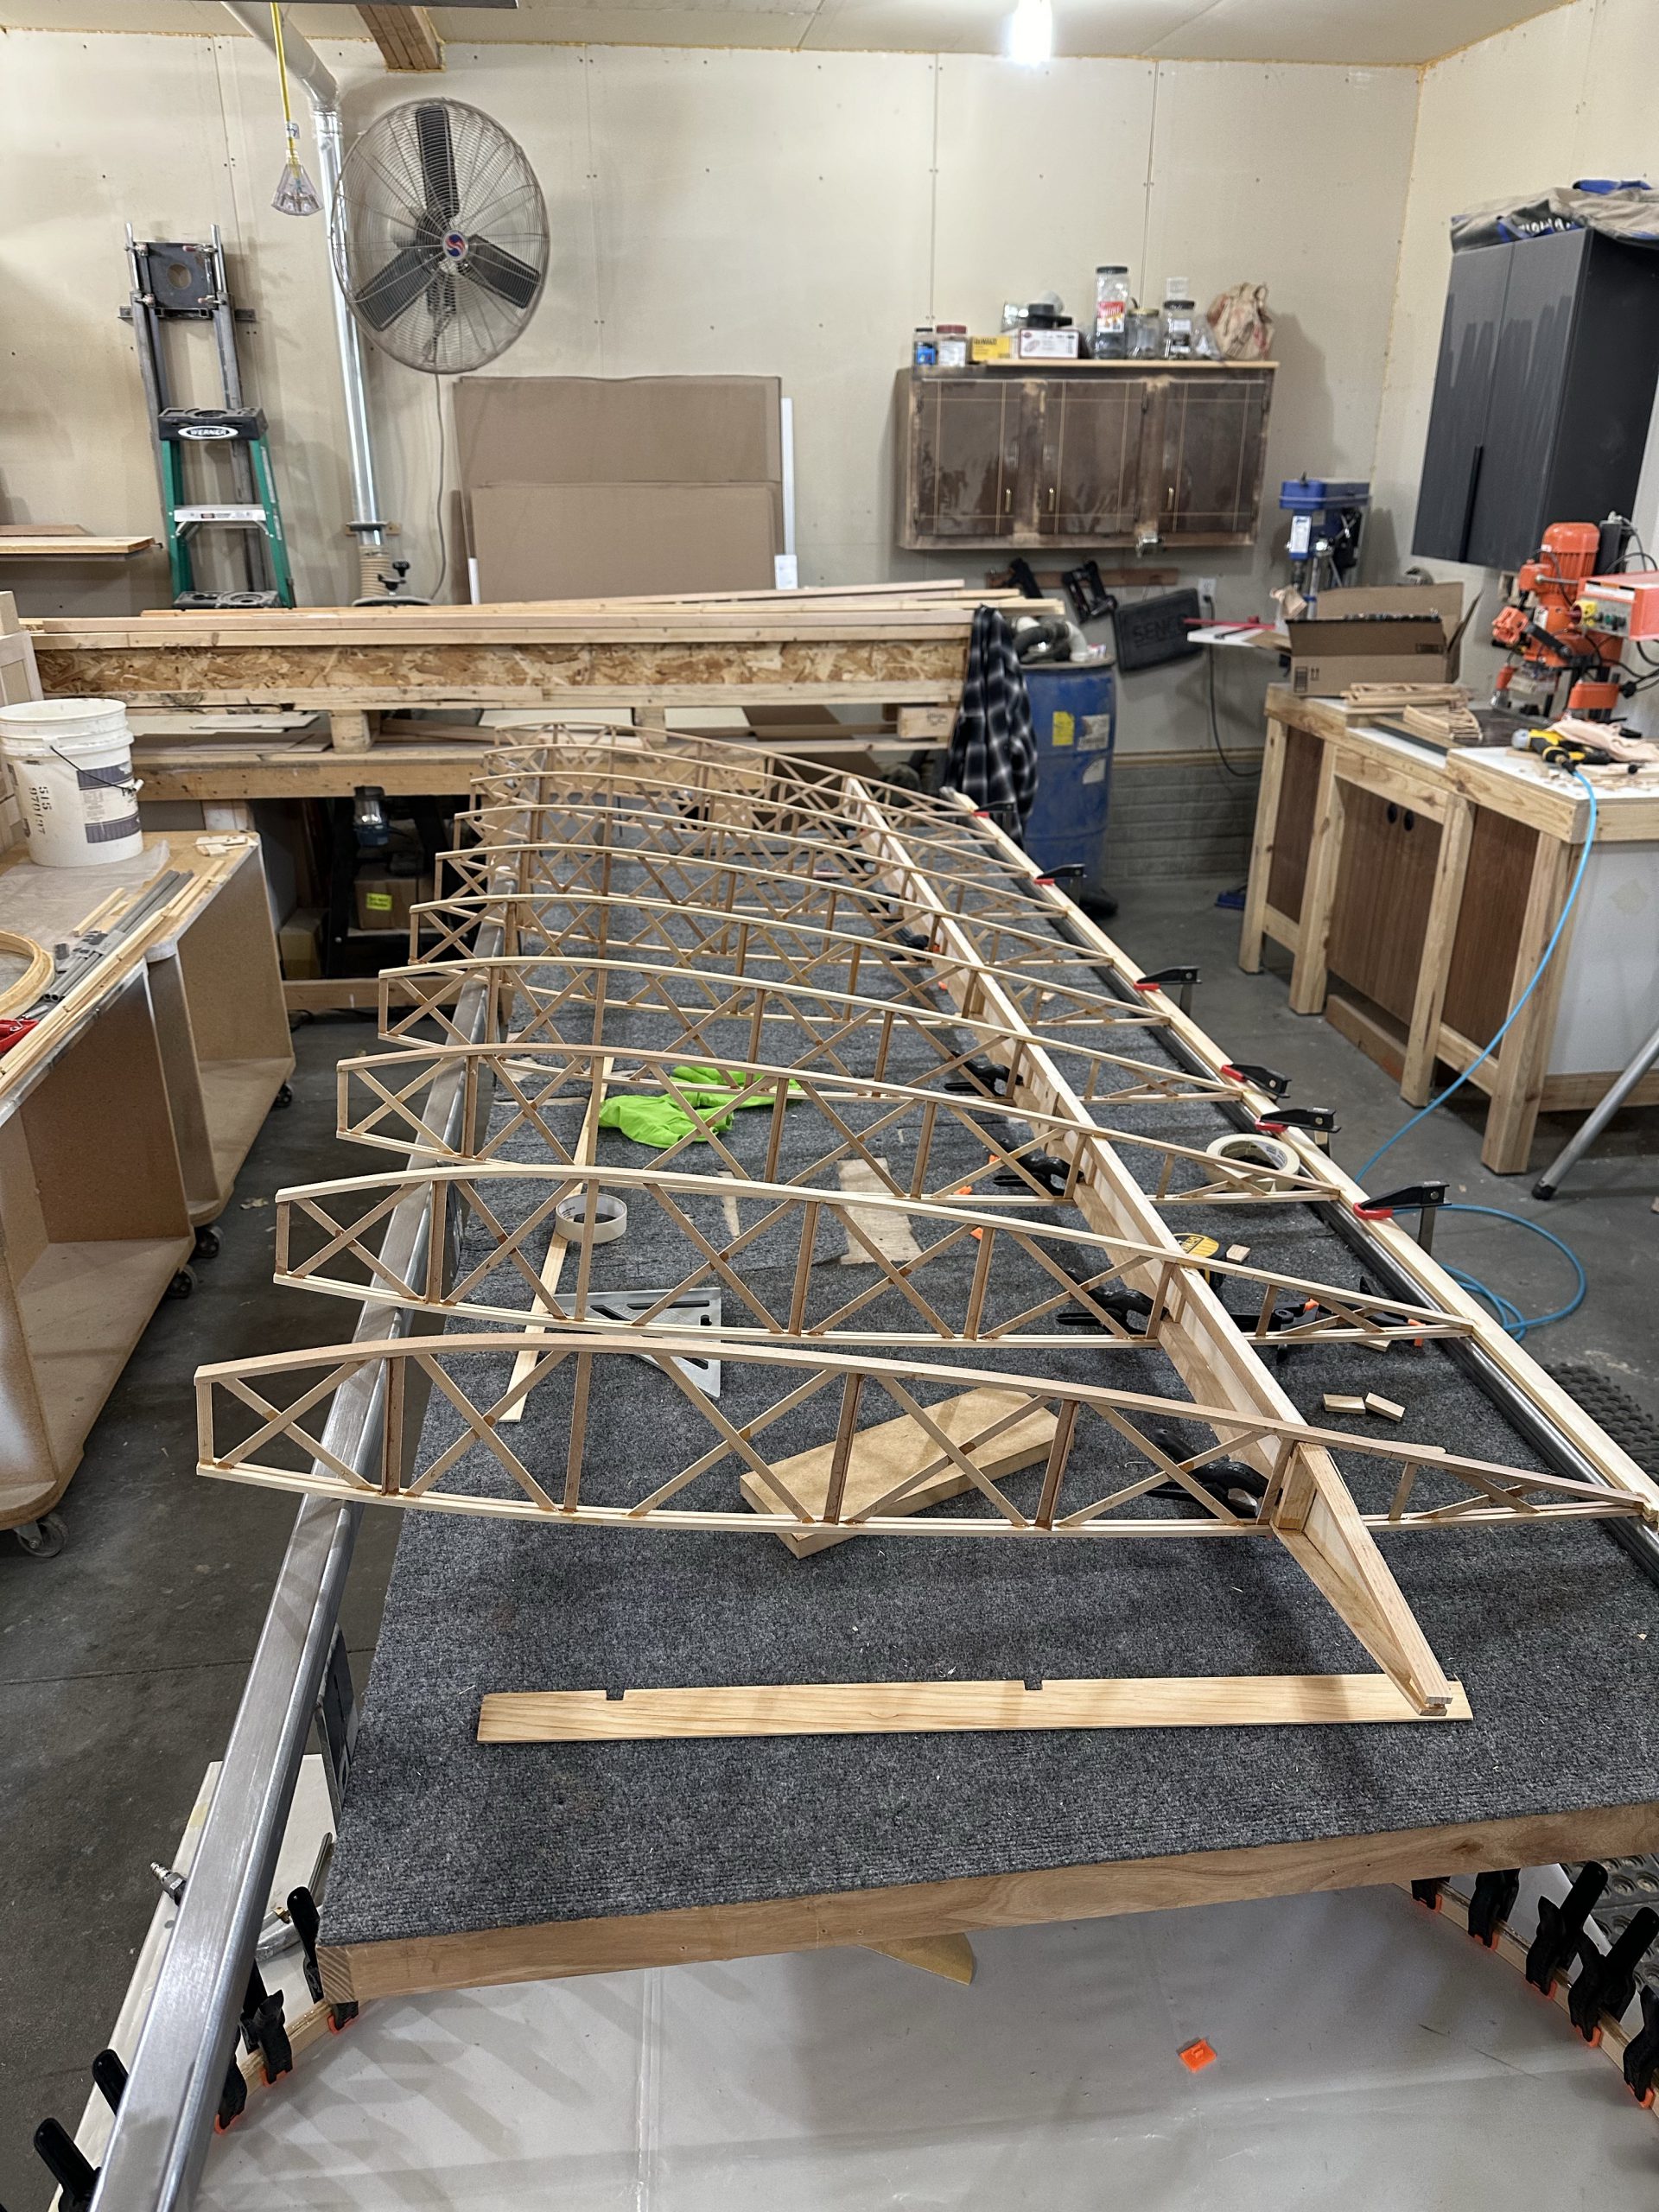
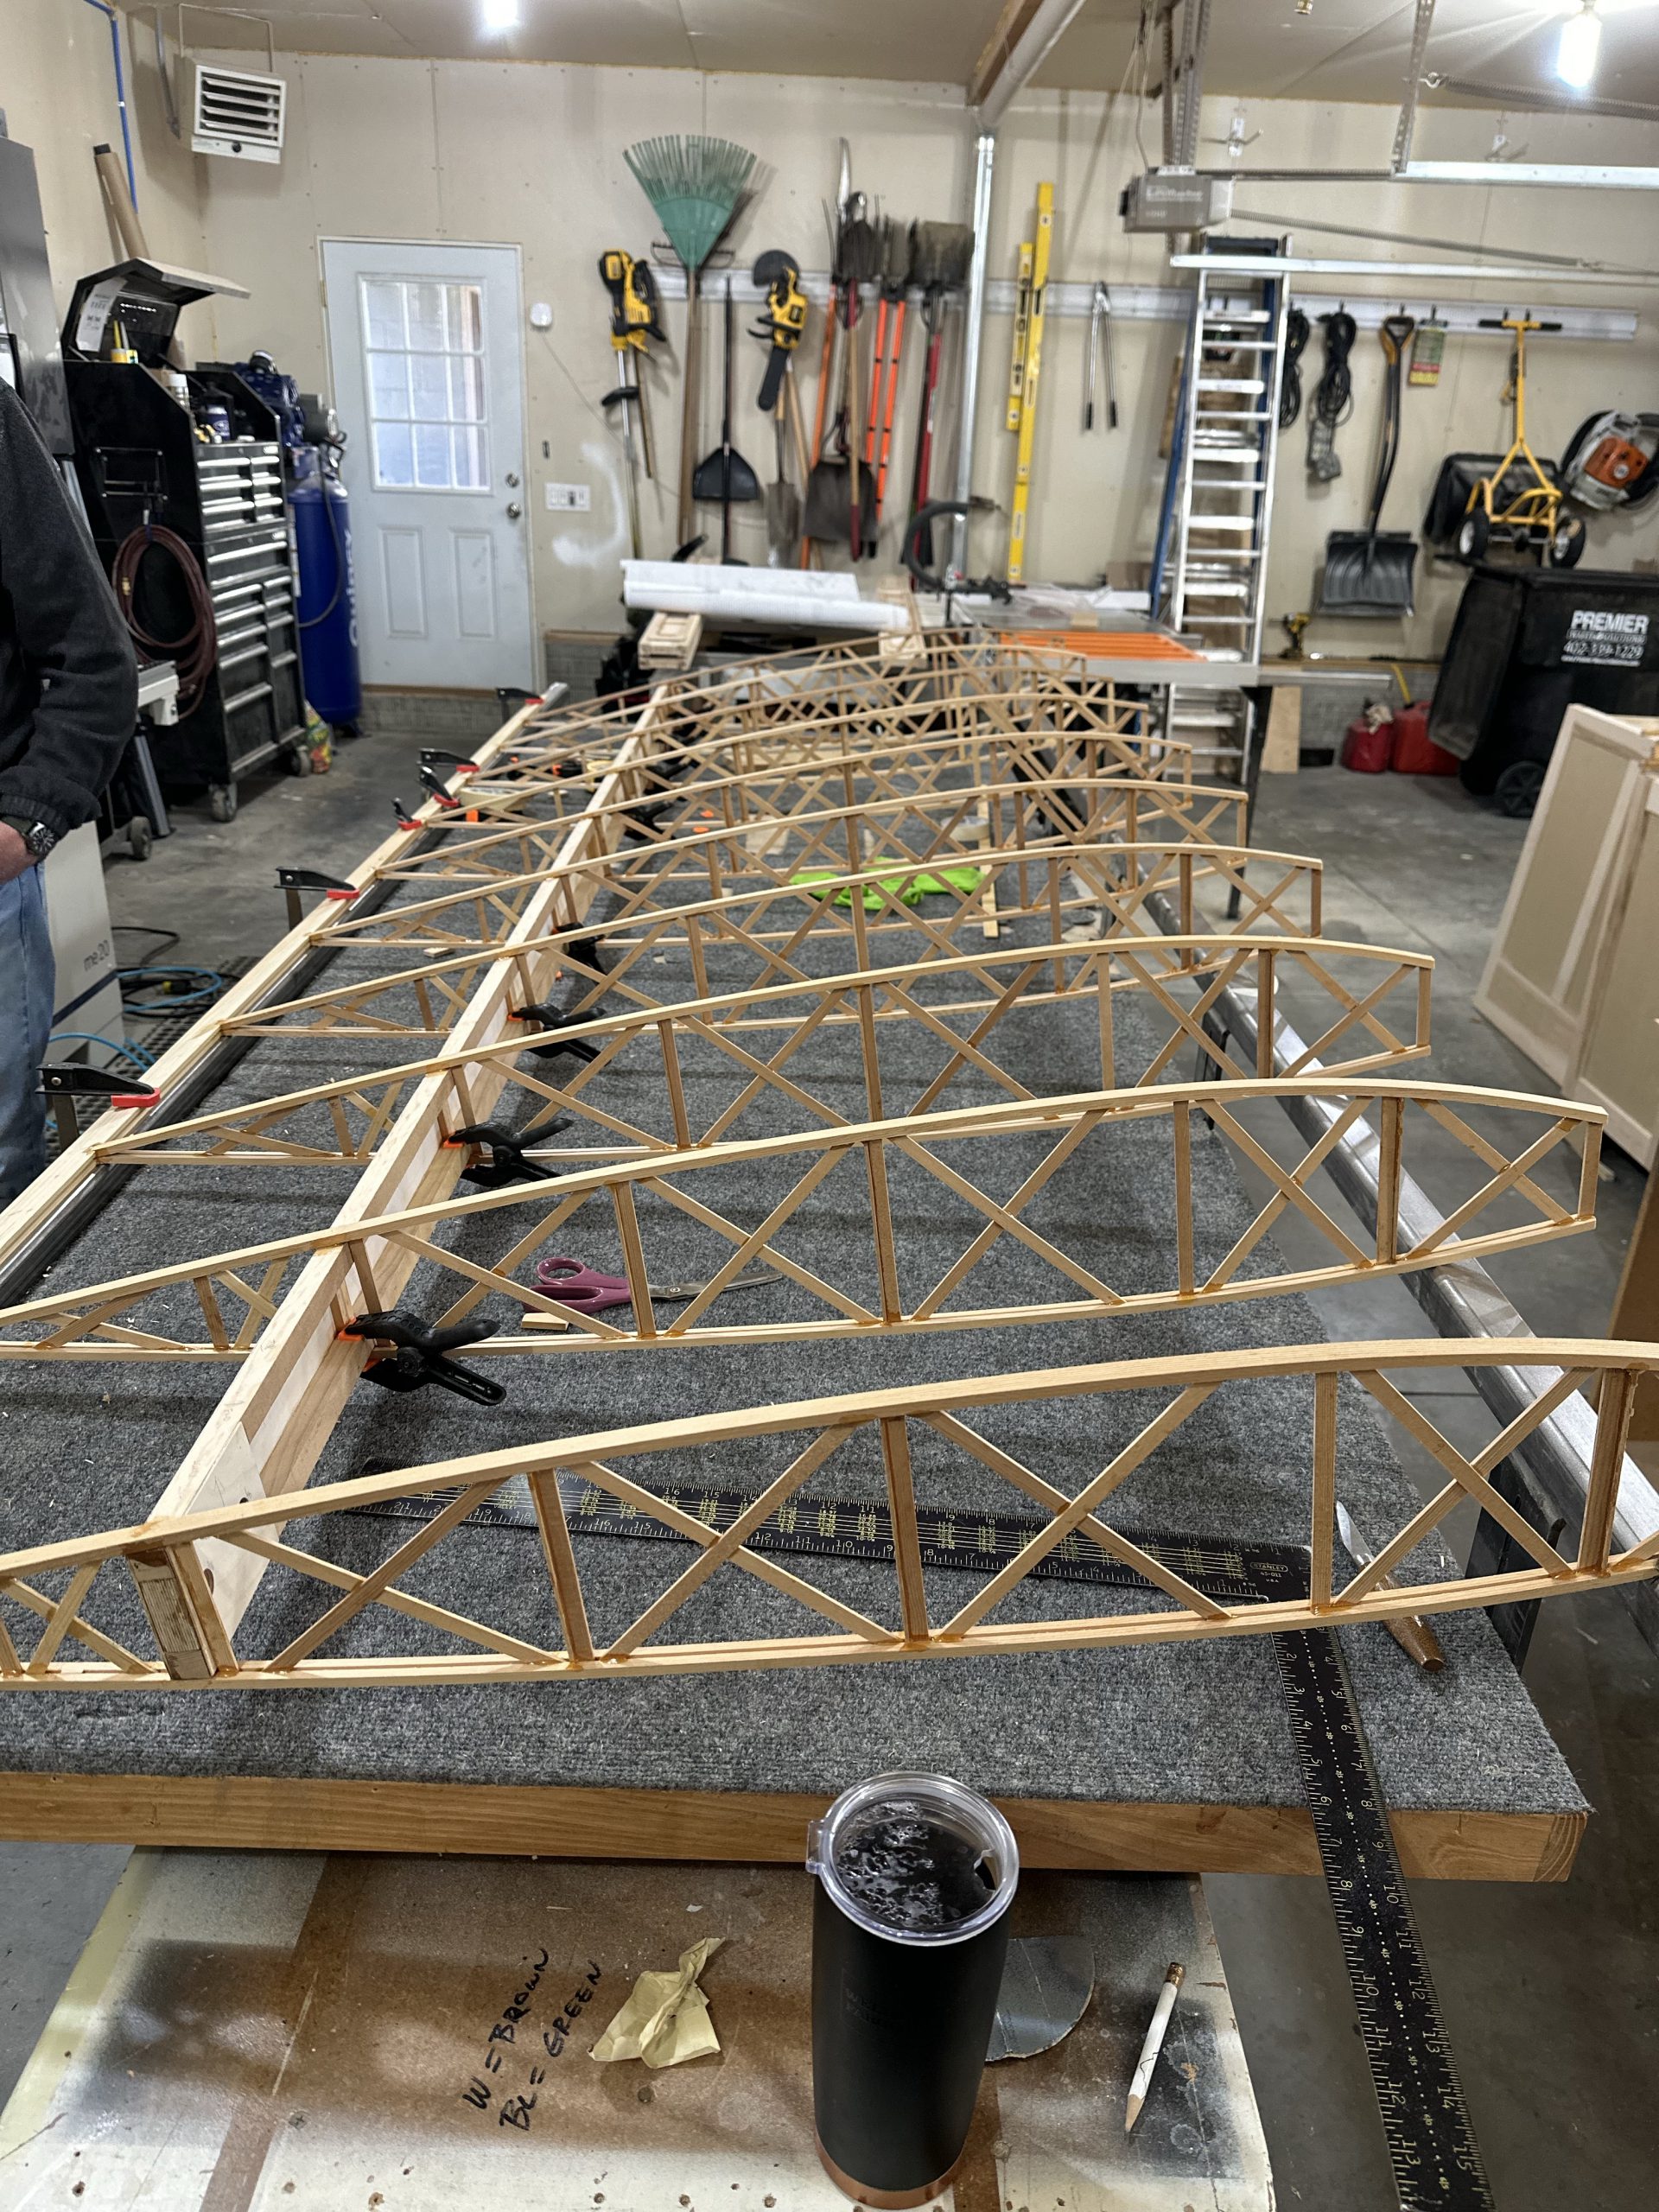
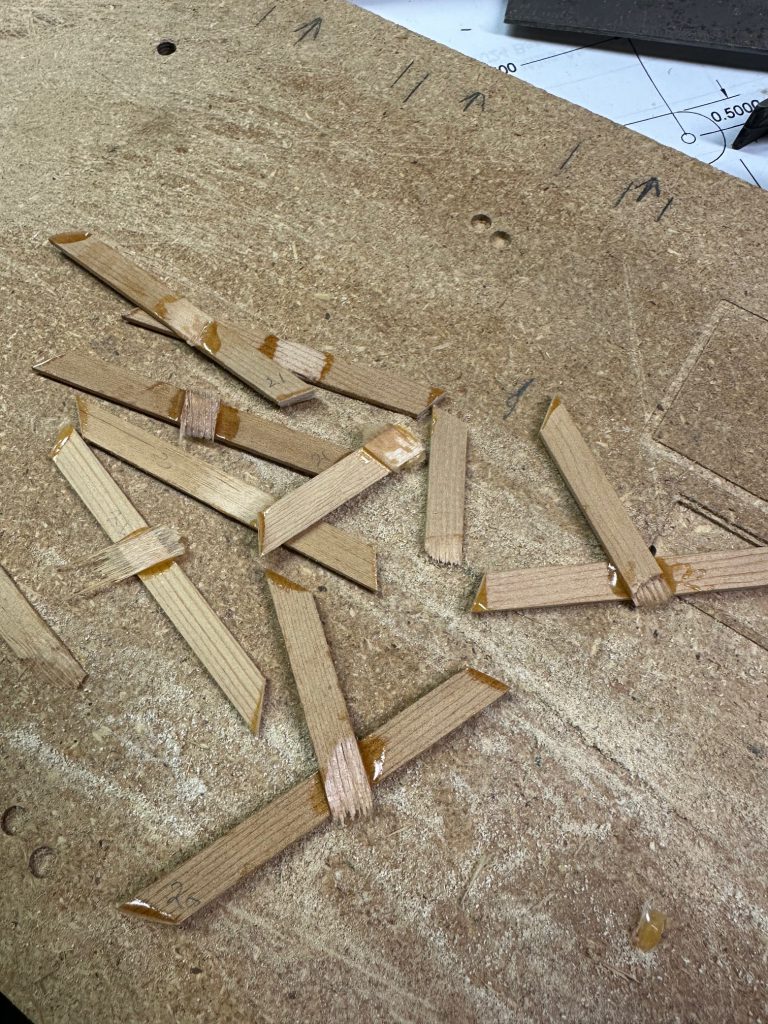
As I had some glue left over, I decided to attack the geodetic bracing. I hadn’t really intended to do it all, but in the end all of the top surface geodetic braces are glued and clamped in place. We’ll do the bottom surface after the compression struts are done. What remains is the compression struts, bottom geodetics, nose ribs and plywood, and ailerons. And that’s where it’s all going to get messy. When I modified the ribs to clear the rear spars in the upper wings, I inadvertently put the cross braces right where the aileron torque tubes need to go. Oops. Not a problem on the upper wing, but it is on the lower wing. I think my fix for this will be to simply remove the pair if X braces (that I just installed) on the non-aileron ribs, and glue on a side plate cut from 1/16 plywood to stiffen that part of the rib. Then I can just have a hole for the torque tube. This should make the rear portion of those ribs substantially stronger than using the geodetic bracing, and will be only very slightly heavier. The upper wings should not need this modification, only the lower wings.

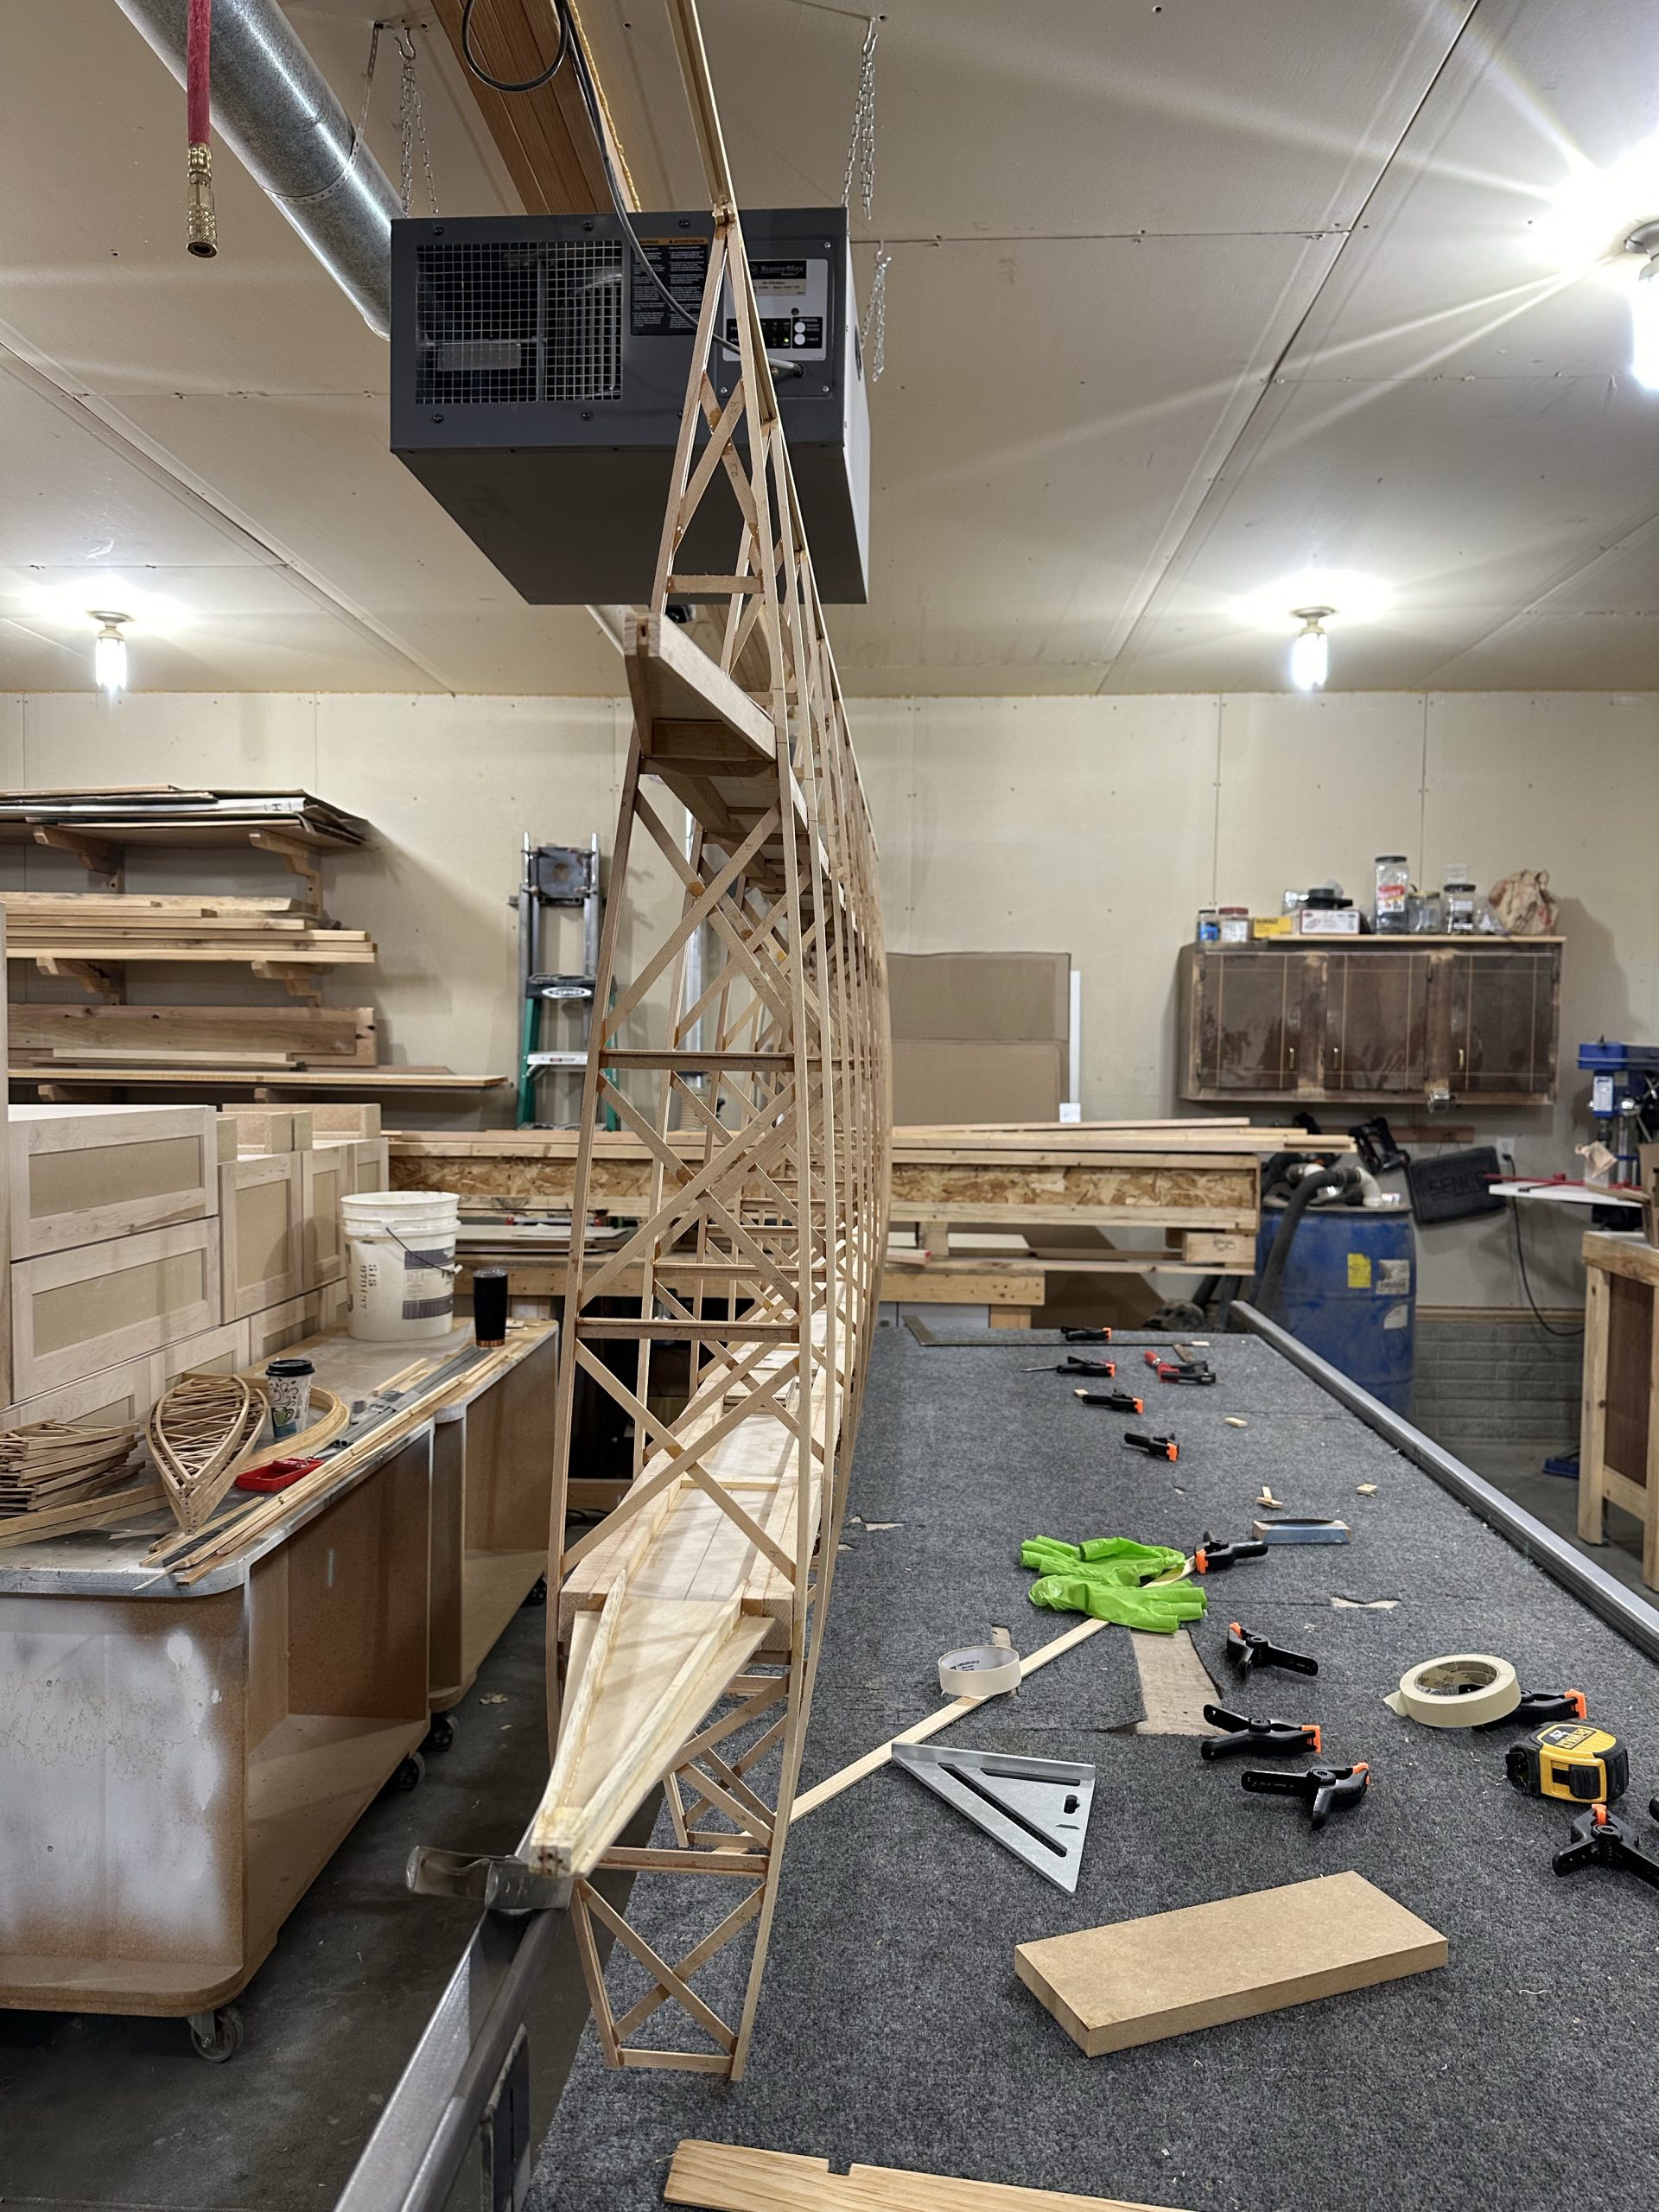
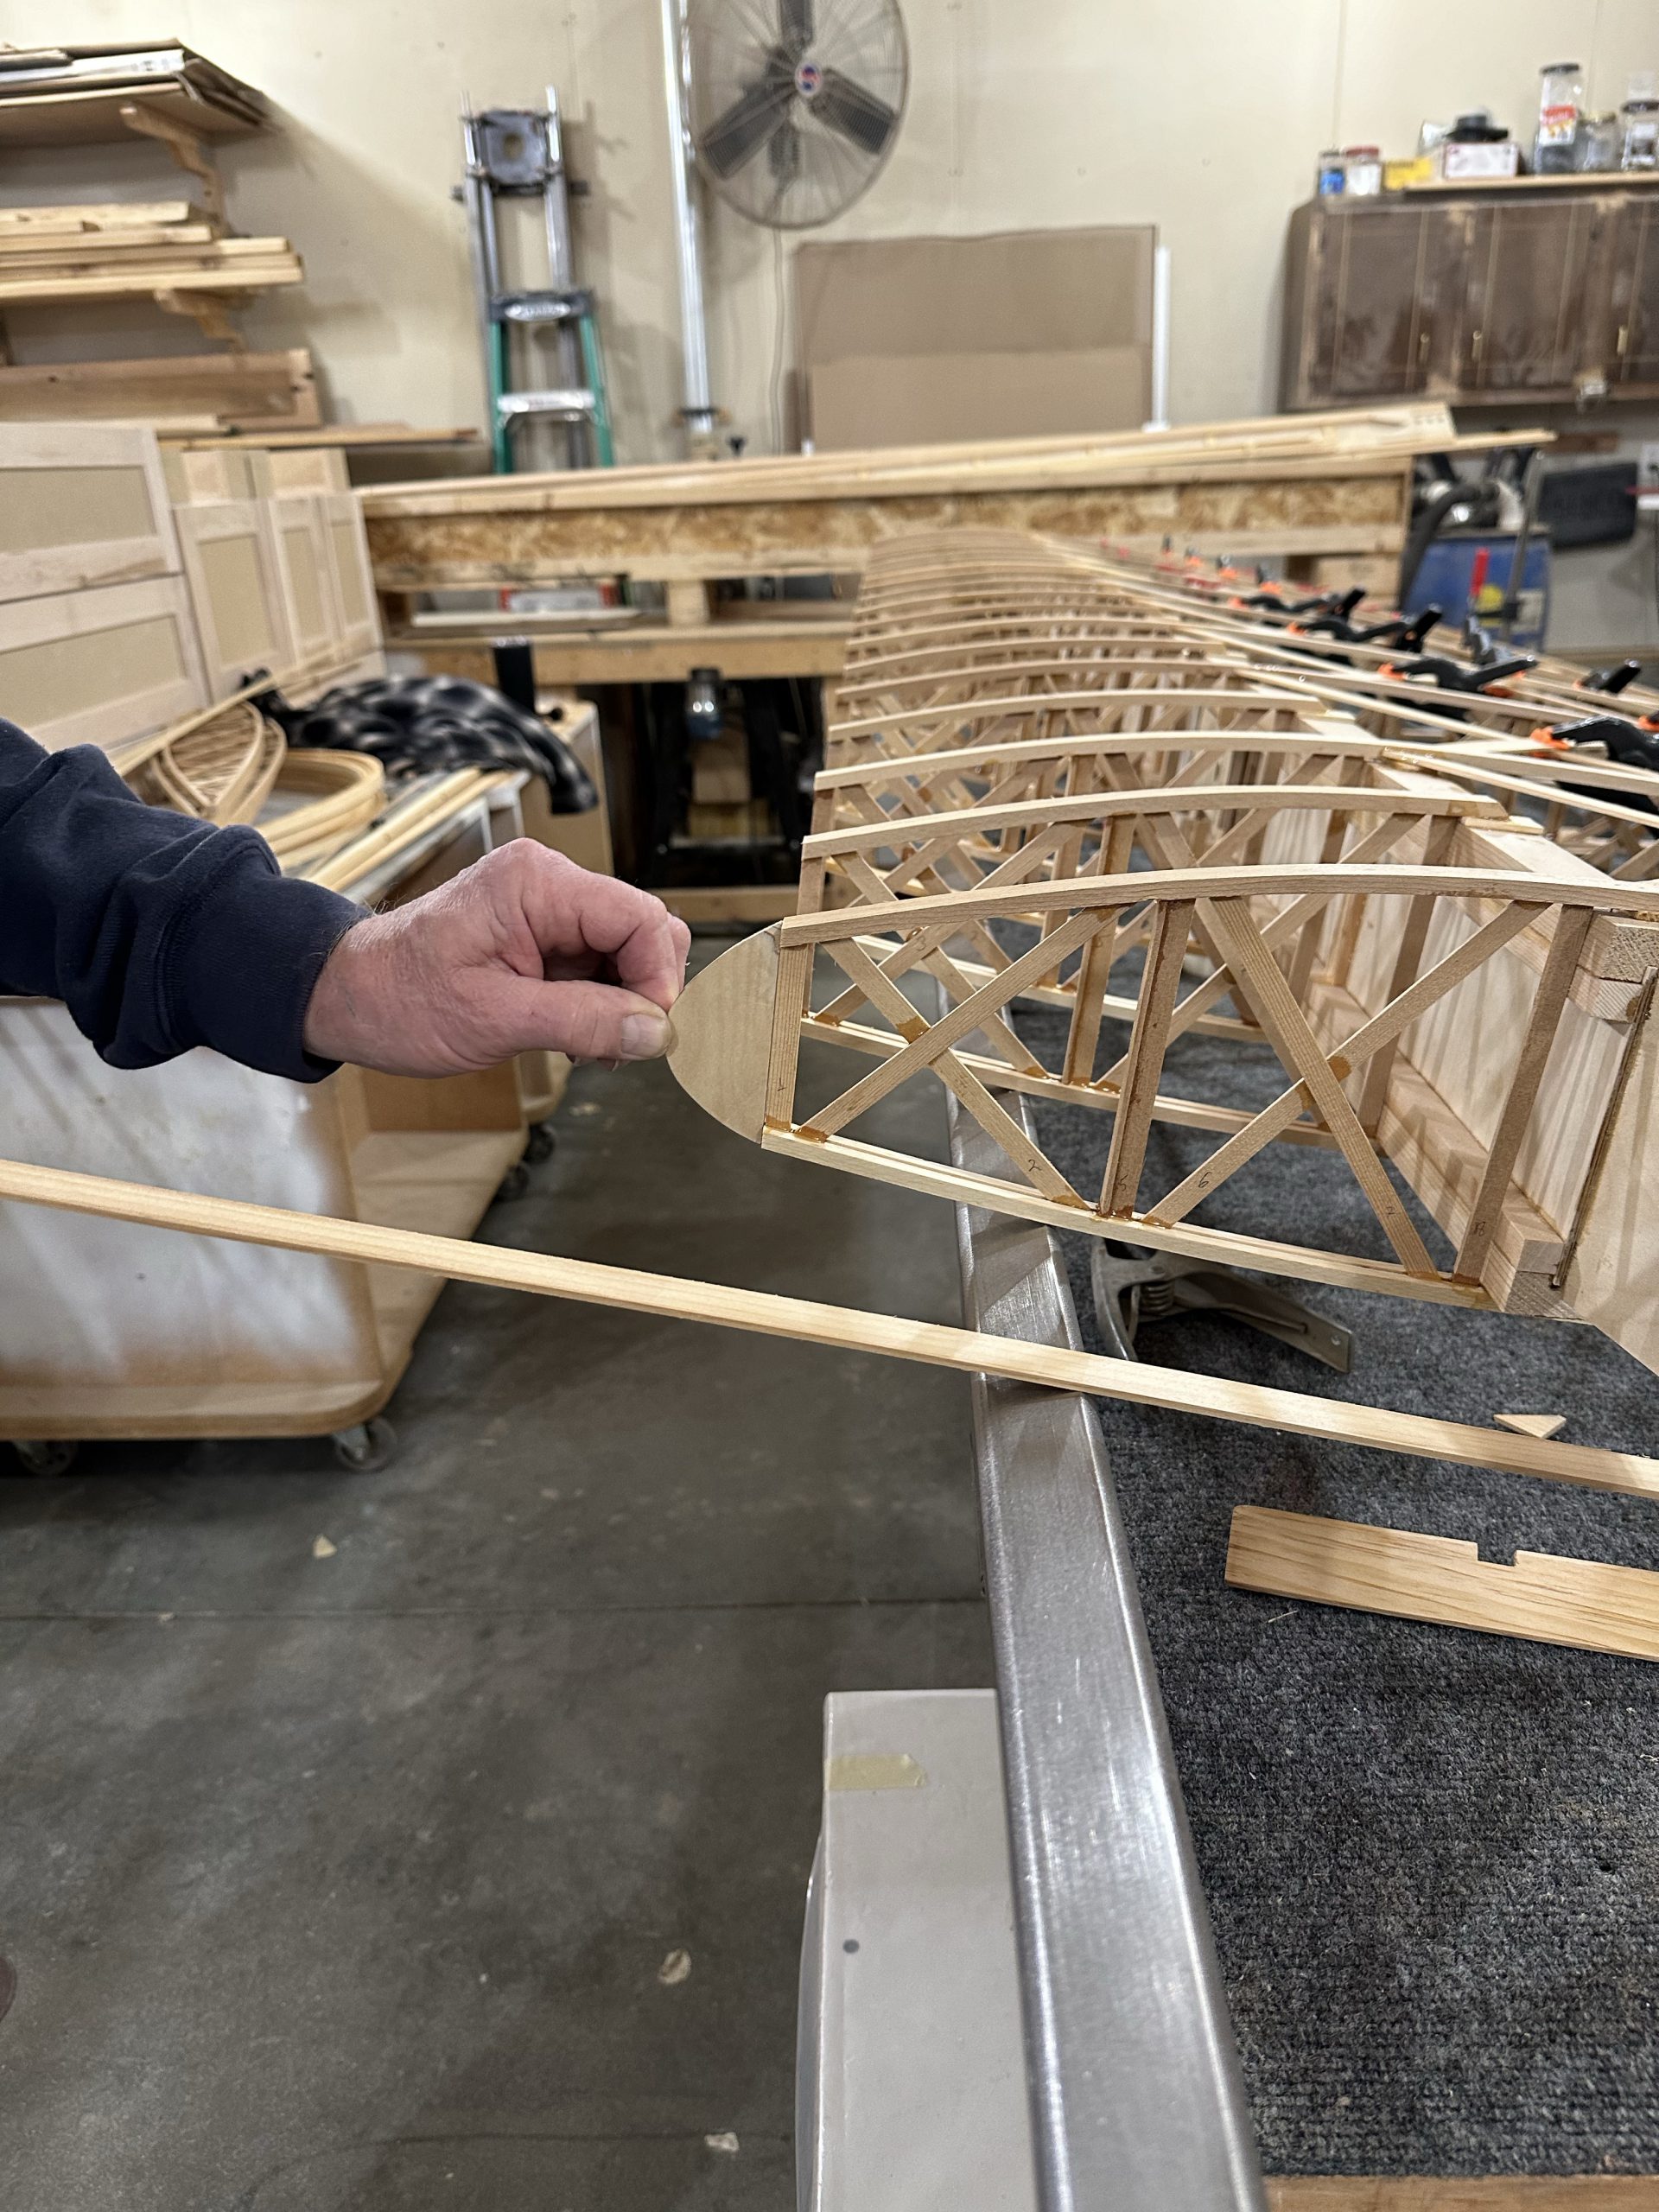
The last two wingtip bows came off the forms and are ready to install, so we removed all the screws from the table and stacked them until it’s time to finish them off. We’ll likely sand the top and bottom surfaces to remove the excess epoxy, then run the outer edges through the router table for a 3/8 radius top and bottom.

Lower left wing assembly

I chose the lower left wing to start with since it is the simplest of the four. The lower right will get the wing walk, and the upper wings get a diagonal cut on the inboard bay.

This morning I pulled the first two wingtip bows from the forms; they look pretty good. I mixed up about 40cc of glue and started gluing up all of the strips for the second pair of bows. Had to mix another 10cc, so if I ever do this again I know it takes 50cc per pair of layups. I got them clamped into the forms and slid the table as far out of the way as possible.

The plans say to nail or screw a block of wood to the top of the bench, square with the trailing edge to set up the wing. Since we’re not building it resting on the bench, Stu and I squared up the first rib with the TE (which is clamped to a steel rail) and marked & clamped it to the other rail. After some debate, we decided to pull the main spar out temporarily. I needed to pull the TE of the rib from the notched TE stock to glue it, and with both spars in place it was nearly impossible to do so. The rear spar is a pretty snug fit in the ribs, btu the main has about 1/8″ of clearance so it’s relatively easy to slide out and back in.

Rather than a continuous piece of trailing edge material long enough to do a complete wing, this kit had four 8′ long pieces and four pieces roughly 4-1/2′ long, I cut the longer piece just inboard of the first aileron rib, and started one of the shorter pieces at that point. We got them aligned and clamped well enough that you can’t tell where the joint is if you sight down the trailing edge.

Stu cut a rectangular block about 6″ tall by 11-1/2″ wide, since that’s the distance in between each pair of ribs. With the first rib glued in and squared to the TE, it was then just a matter of using that gauge block to seat each rib exactly where it needed to be on the rear spar. Each rib was glued to the TE and rear spar, and a couple of 1″ micro pins shot through the rib cap to hold it in place while the glue cures. Working that way we got the entire set of ribs in place. We’ll let the glue cure and slide the main spar back in place tomorrow, glue the ribs to it, and attach the false ribs

I did some other work today, including trimming the false ribs so they’re ready to install.

Rib modifications

I built all of the wing ribs exactly to plans, per Sheet 1 of the plan set. Unfortunately, that sheet has not been updated since the rear spar was changed from using 1/2″ square spar caps to 3/4″. As a result, the X braces just aft of the rear spar were way too far forward in all of the ribs I built — all except for the 16 aileron ribs, which don’t get those X braces. Installing the rear spar would require extensive trimming or notching of the geodetic stock — I just wasn’t happy with that. Plus, there’s another piece of square stock on the aft face of the rear spars on the upper wings. It already needs to be beveled to clear the ribs, and with the braces in place would need to be cut down to almost nothing.

So, out came the razor saw. I cut those two X braces from every one of the ribs, cut new ones, and glued them in place with enough clearance for the rear spar. It was a couple hours’ work, but since I have a lot of extra rib geodetic material wasn’t that big of a deal. On the bright side, I got to test the glue joints on all of the pieces I pulled out. We want the wood to fail before the glue does. Every single one of them broke the brace or separated it along a grain line before the glue gave up — 100% successful tests. That was not unexpected, but was reassuring nonetheless.

Now we can move forward with assembling the wings.

11/5/23 updates

Went over this morning to see what remaining tasks I could knock out before starting the first wing assembly, and to do some planning and figuring stuff out — like, how I was going to jig up the trailing edge and other stuff for the wings. Stu came in and had a fantastic idea for using the existing steel rails on his workbench to hold the TE flat and perfectly straight, then supporting the front of the ribs with the other rail. It’s a 10′ bench with 12′ rails, so plenty big enough. It’s a significantly different method than that suggested in the plans, but it’s a pretty unique setup. I’m sure a 2×4 shimmed for the correct angle is a lot easier solution for most people than adjustable 12′ long steel square tube rails. I’m just glad he had them built out of square tube and not round.

Next I gave the main and rear spars a once-over to make sure everything was right. It wasn’t. One of the upper wing main spar tip bow supports was off by 1/2″, the result of not having the two spars oriented the same way when I installed those parts. Or, maybe it was something else. Those supports have been a real pain in the rump, and I have a sneaking feeling I’ll run into issues there again. Anyway, the easiest fix was to cut the offending tip support off with a razor saw, put a slight angle cut on the root end, and re-attach it with appropriate splices. Right now part of the re-assembly is drying; I’m hoping to complete the assembly tonight after the epoxy cures.

I got the ten ribs that I have over there trimmed fore and aft, so they’re ready for assembly. I’m planning to start with the lower left wing, just for the sake of simplicity. The lower right wing gets the wing walk. The two upper wings may or may not get fuel tanks, so I’ll do the lower wings first while I work that out. Therefore the lower left is the simplest and a good place to start, I think.

Stu and I discussed building the wingtip bows. He’s got a 48″ square table with a melamine top. It’s big enough to lay our two bows. I’ll wax it thoroughly and use a glue roller for gluing up the lamination strips. This will be good practice for the tail surfaces, which will need to wait until after the wings are done as they’ll need a 4 x 8 work surface. Now I just need to order a glue roller and about 40 or 50 more spring clamps. Given the size of the stabilizer & elevator assembly, more is better… I’m pretty sure there is no such thing as too many clamps.

Last rib done, first spar started

I just pulled the last two false ribs in the jigs. It’s been a long haul — six and a half years since I built the first rib, but now they’re done AND I’ve got the materials and the place needed to continue the build.

Last night I was over at Stu’s place. One of the main spars has been partially assembled; the spar caps have been glued to the web. I got all of the rest of the parts for the aft face of the spar fitted and ready to glue up. I decided to designate this one the upper right wing. I’ll head over tonight and glue it.

I briefly thought about tearing down the rib jigs now that all of the ribs are finished. I decided not to do that quite yet. For one thing, there’s a chance I may need or want to make more of them for one reason or another. I don’t need two jigs, though. I’ll probably leave the first one I made as is, and pull the blocks and plastic from the second copy. It’s not a high priority, since it will only yield a 4′ x 1′ chunk of MDF.

Workshop assessment and kit inventory

I met with Stu over the weekend to figure out where and how we’d set up the spar assemblies. I was concerned about the lack of any long workbenches in his shop. He’s primarily set up for building cabinets, and most of his work tables are smaller, low to the ground, and on casters. As it turns out, one of the tables has folding extensions that make it 9 or 10 feet long. The top is very thick, heavy, rigid, and very flat — he uses it to mount rails and a sled for a router to flatten large slabs of wood. He put threaded inserts on the edges of the table where a set of heavy welded steel rails can be attached. With those installed, there will be a built-in straight edge for blocking and clamping the spar caps. It’s not something I would have thought of; the “normal” practice is to lay out a chalk line and nail wood blocks to locate the spar caps during assembly. I think, however, that this setup will be more than adequate for spar construction. I may need to build a matched-height extension for the wing assembly, but that’s a decision for another day.

The wing kit contains no hardware at all. Fortunately it looks like all of the hardware required is made from readily available material and requires simple manufacturing. It’s all flat aluminum stock, some 4130 tubing for bushings, aluminum tubing for aileron torque tubes, and so on. No brake, lathe, welder, etc. required yet. Some of the material I may already have on hand, in fact. The rest can be ordered or even found locally.

While I was there, I grabbed a few pieces of rib capstrip so I could finish off the last of the false ribs. I made two on Sunday, and set up two more this morning.

On the home stretch

Well, for wing ribs at least. 30 false ribs down, 8 to go. It looks like I may be able to get some more building done, at least temporarily, at the EAA Chapter 80 “Able Ace” build space. The chapter has leased a storefront in a shopping mall that’s dying a slow and pitiful death. There are a couple of good sized workbenches there that I may be able to use for wing spar and tail assembly.