Aileron end plates, blocking, tip supports

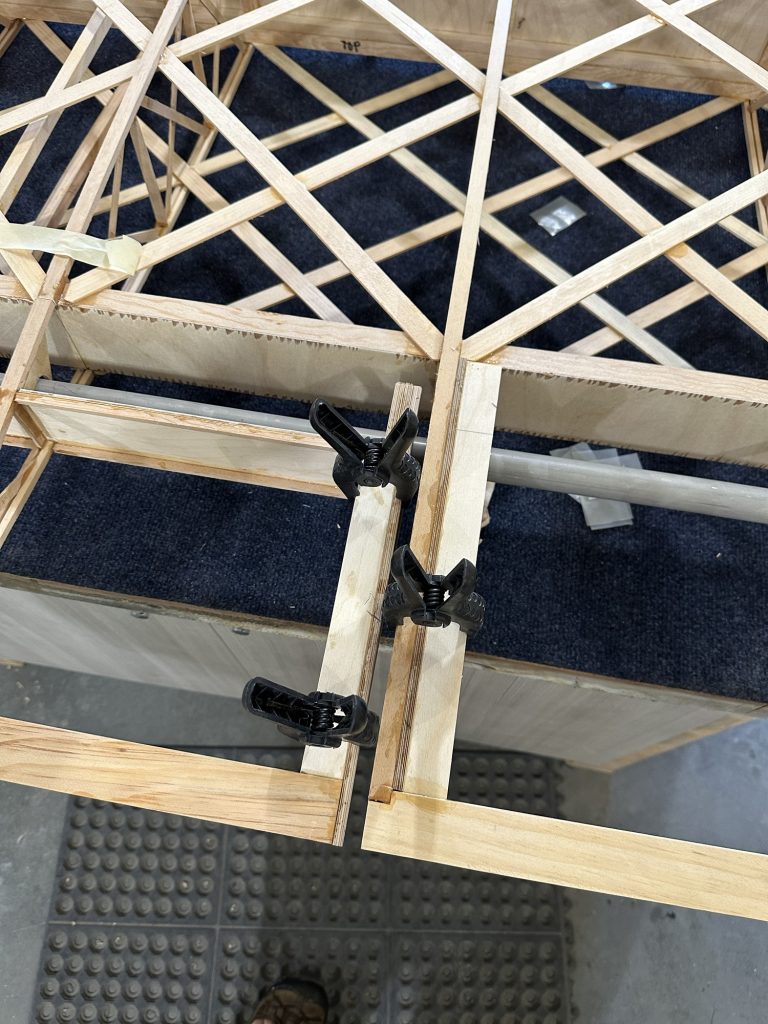
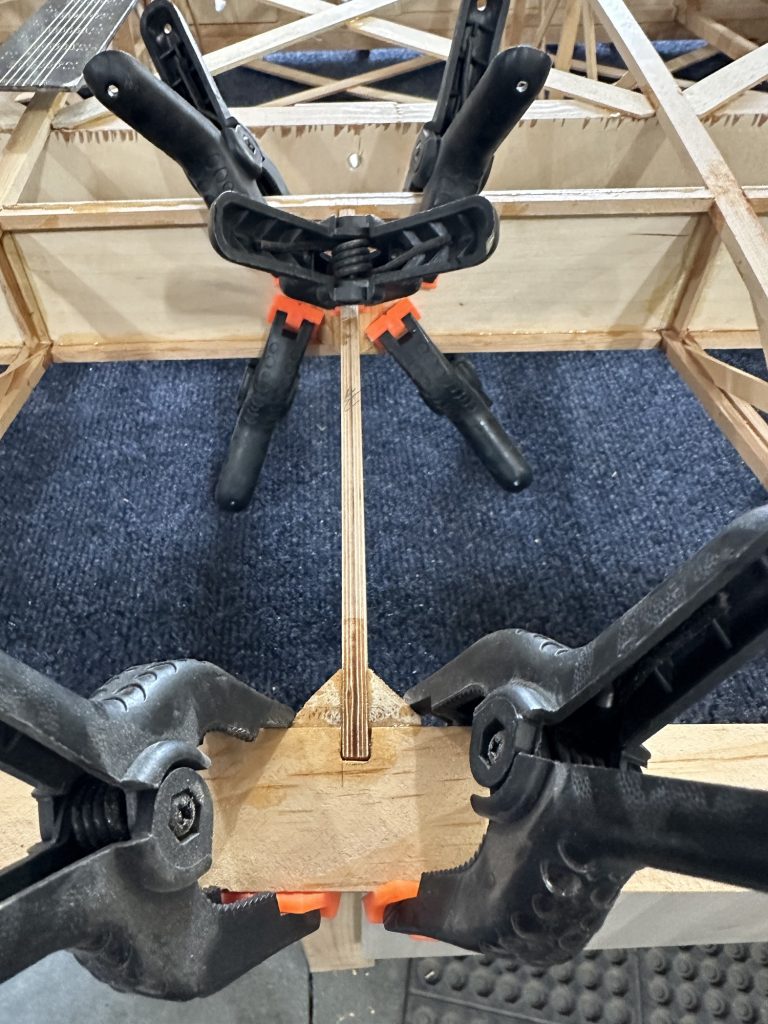
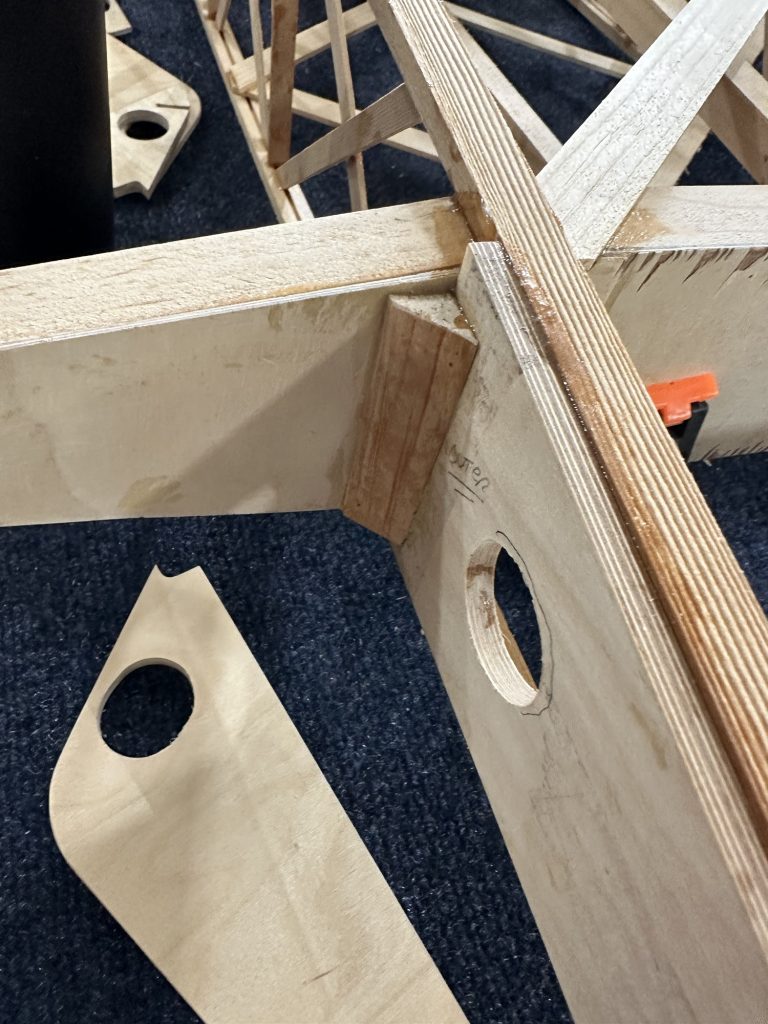
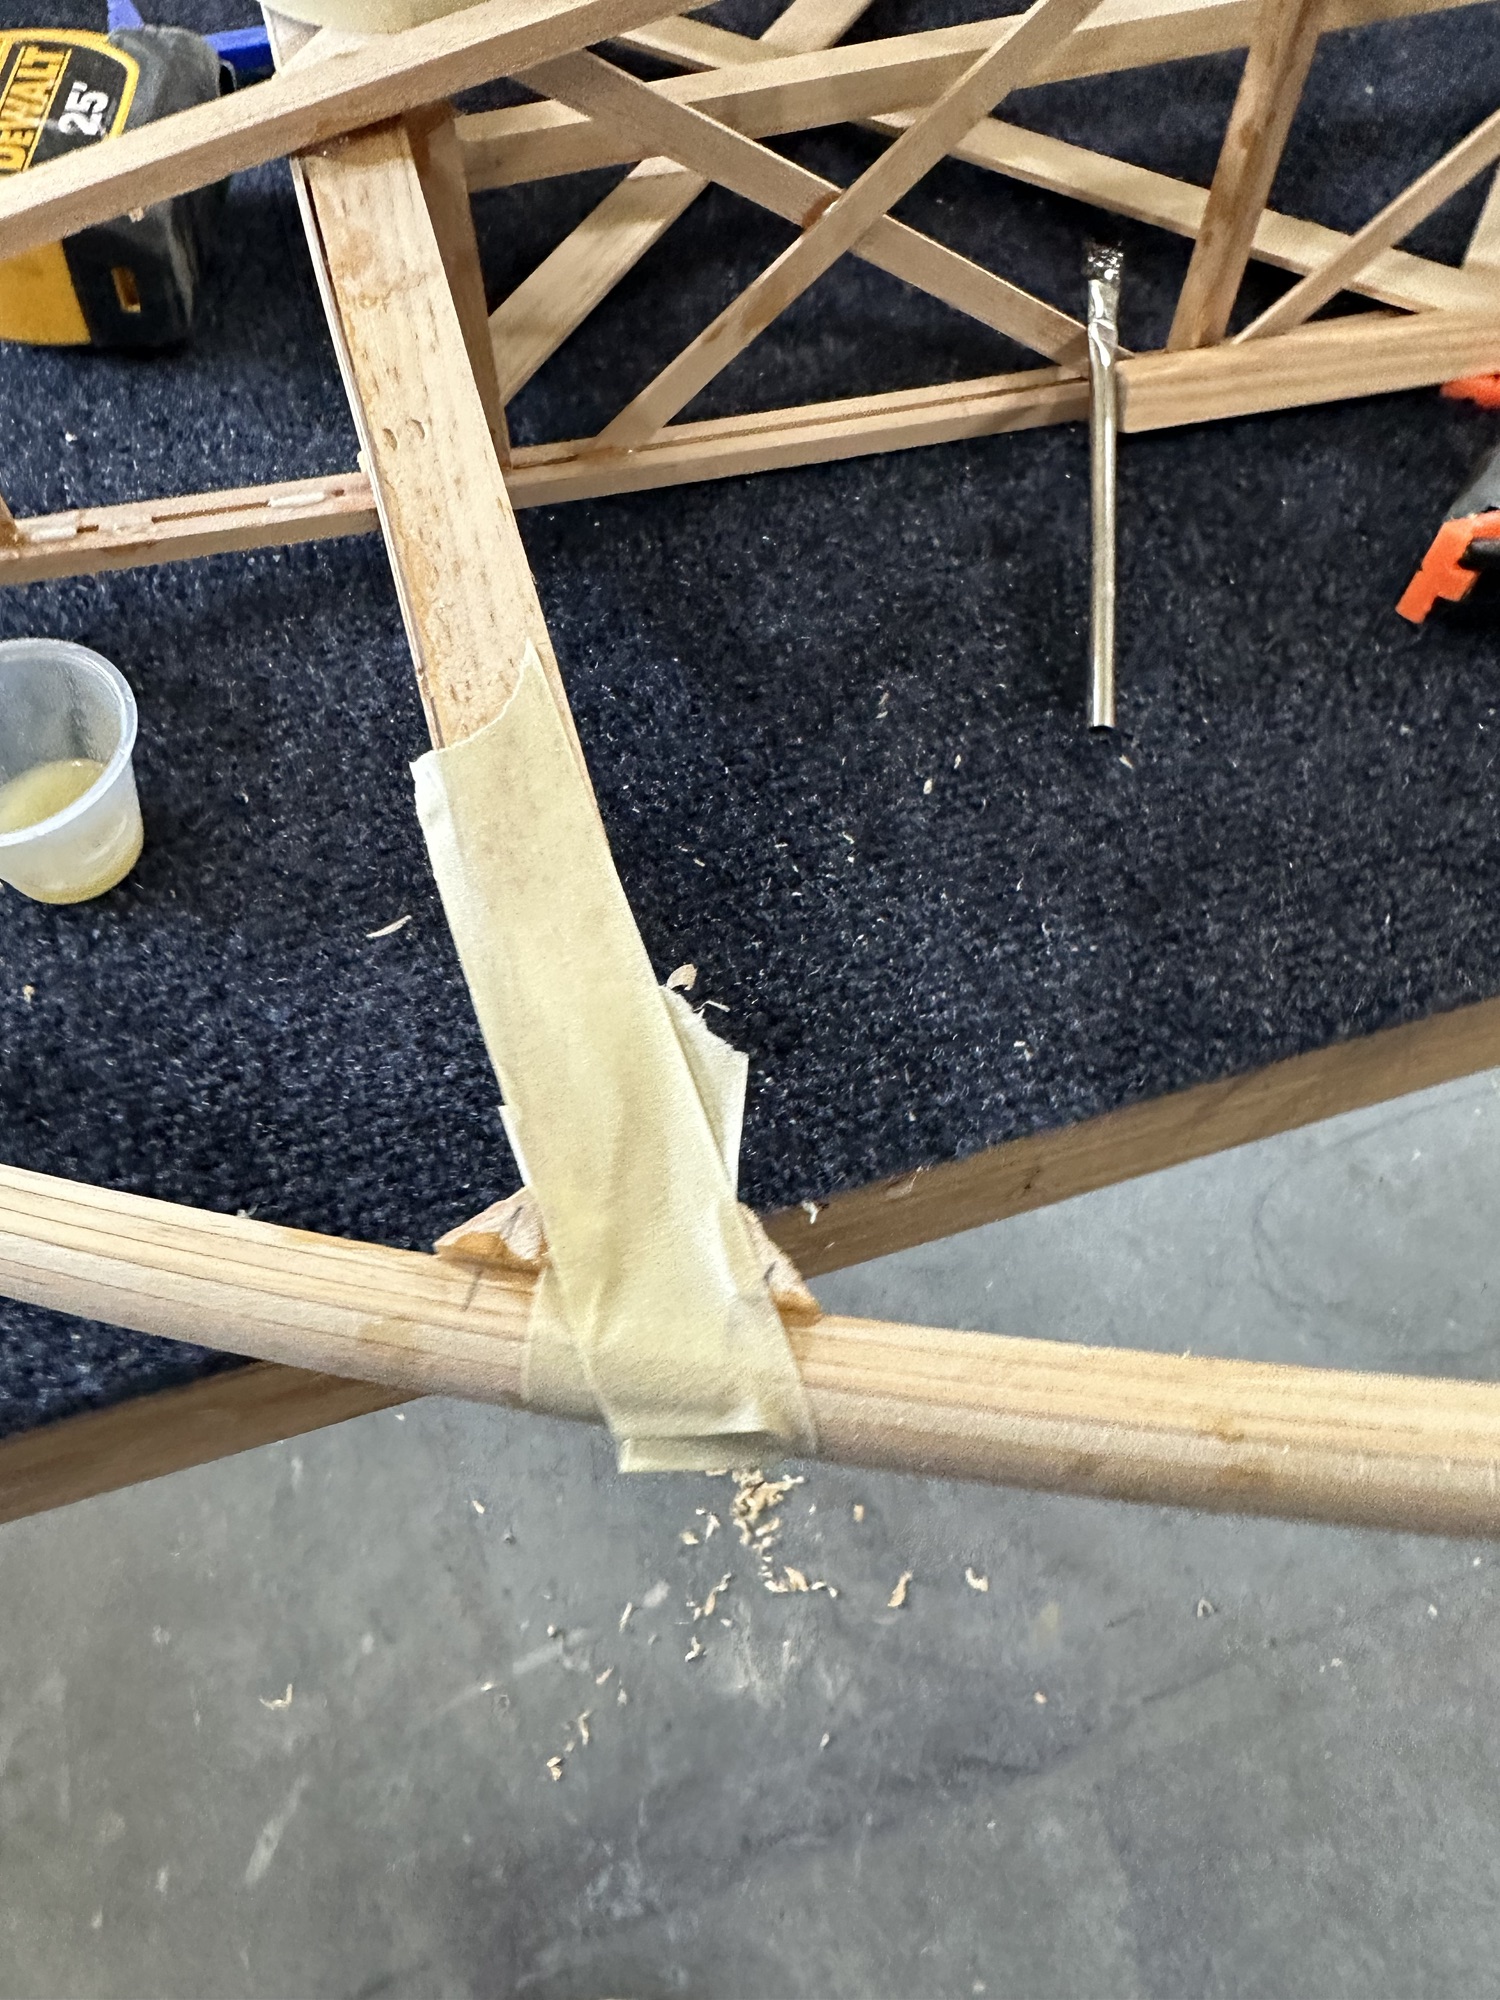
This morning I woke up early and couldn’t get back to sleep, so I headed over to get a little work done. I glued and clamped the aileron end plates (CW34) in place, along with the corner blocking for them. I also did a little work shaving off some of the excess plywood and corner blocking on the wingtip bow. I’ll probably just have to switch to some low-grit sandpaper to get that job done. I’d really like to get the plywood gussets cut and glued in — oh, wait, there’s more bracing for the wingtip bows to be done…

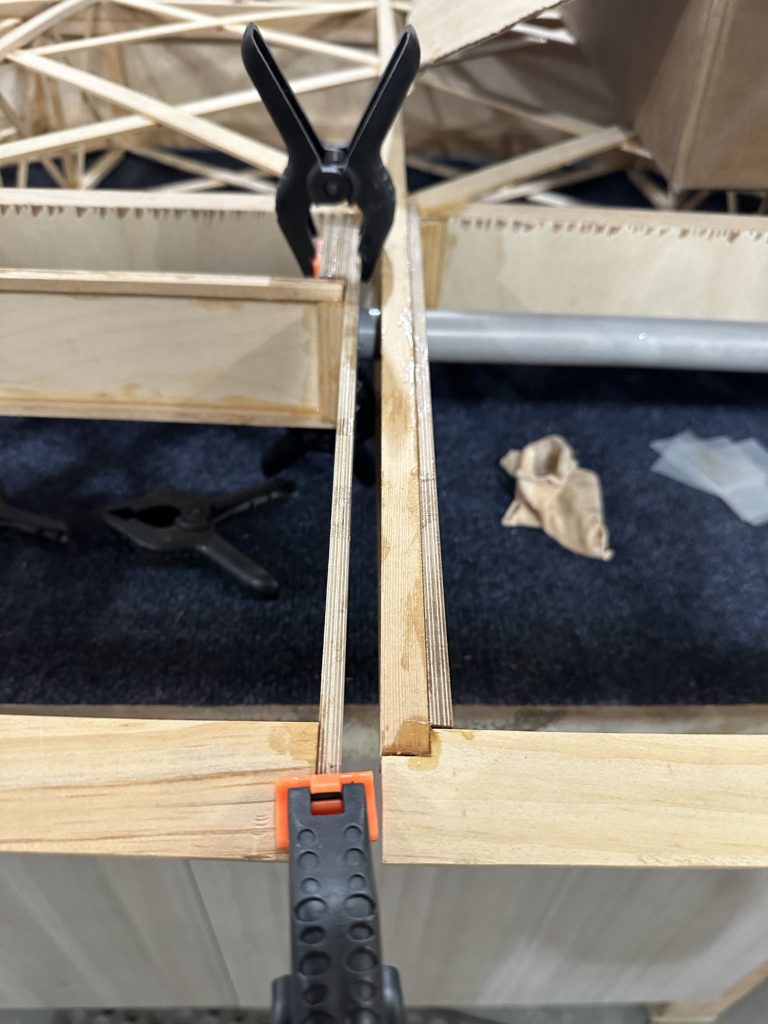
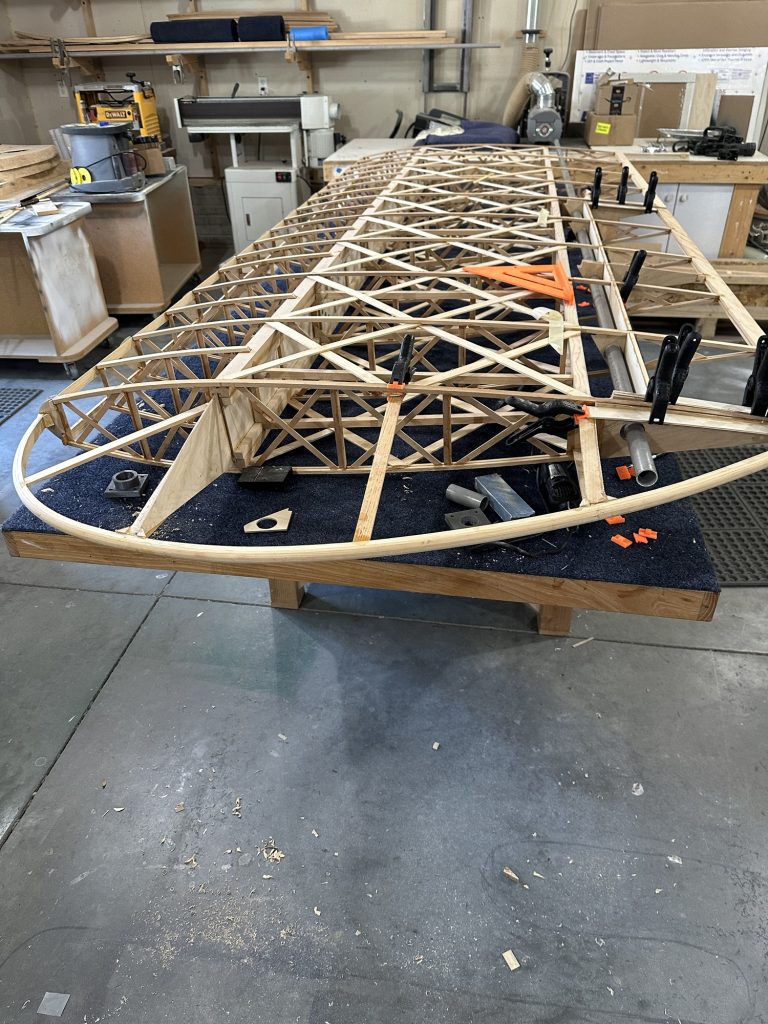
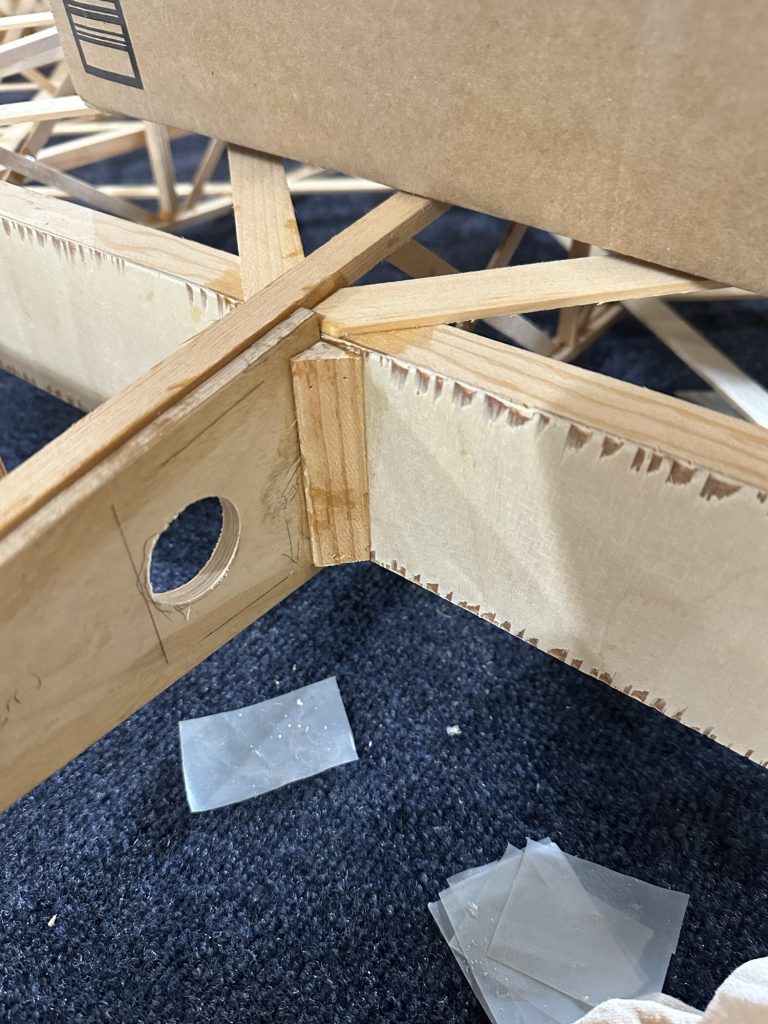
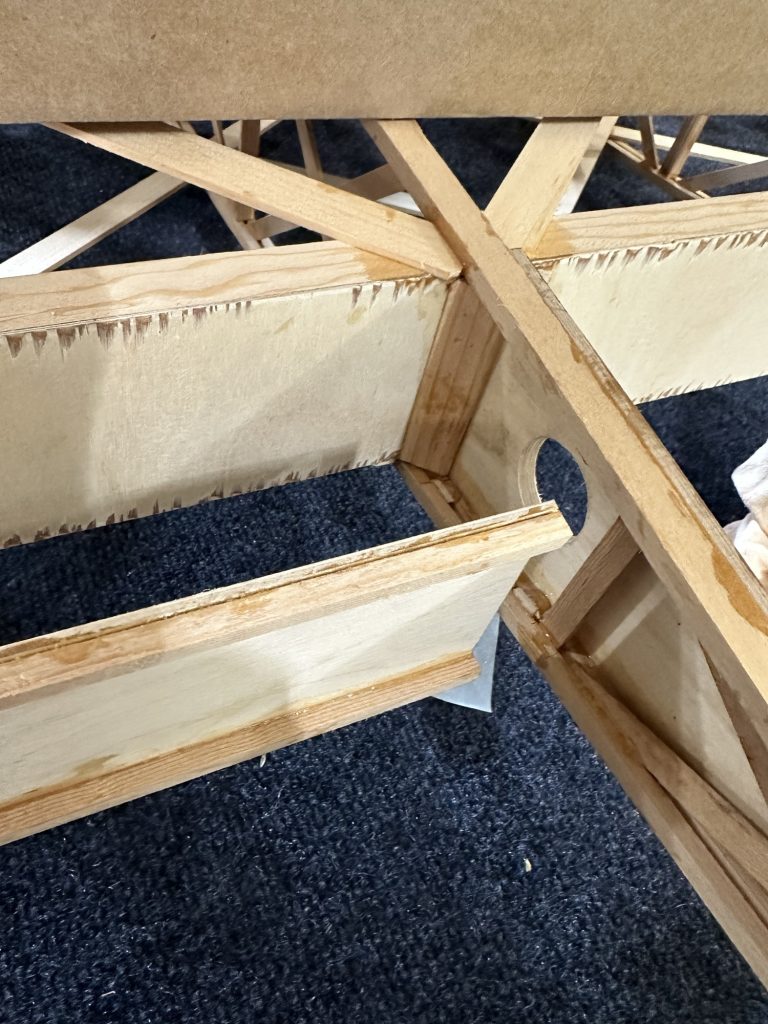
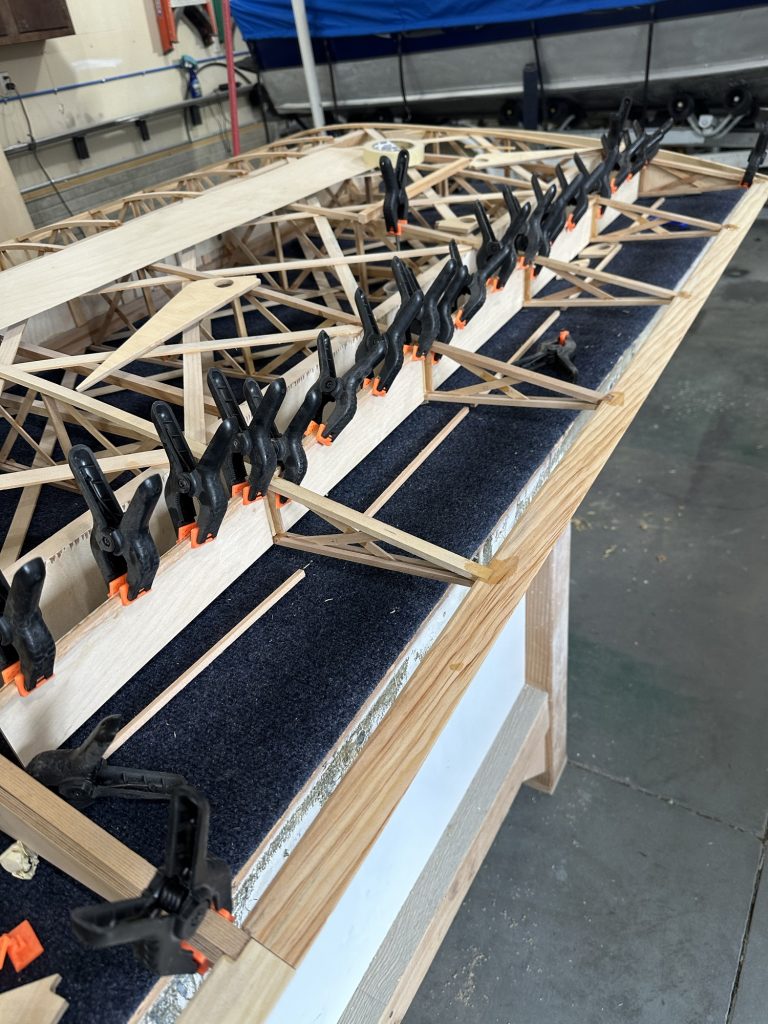
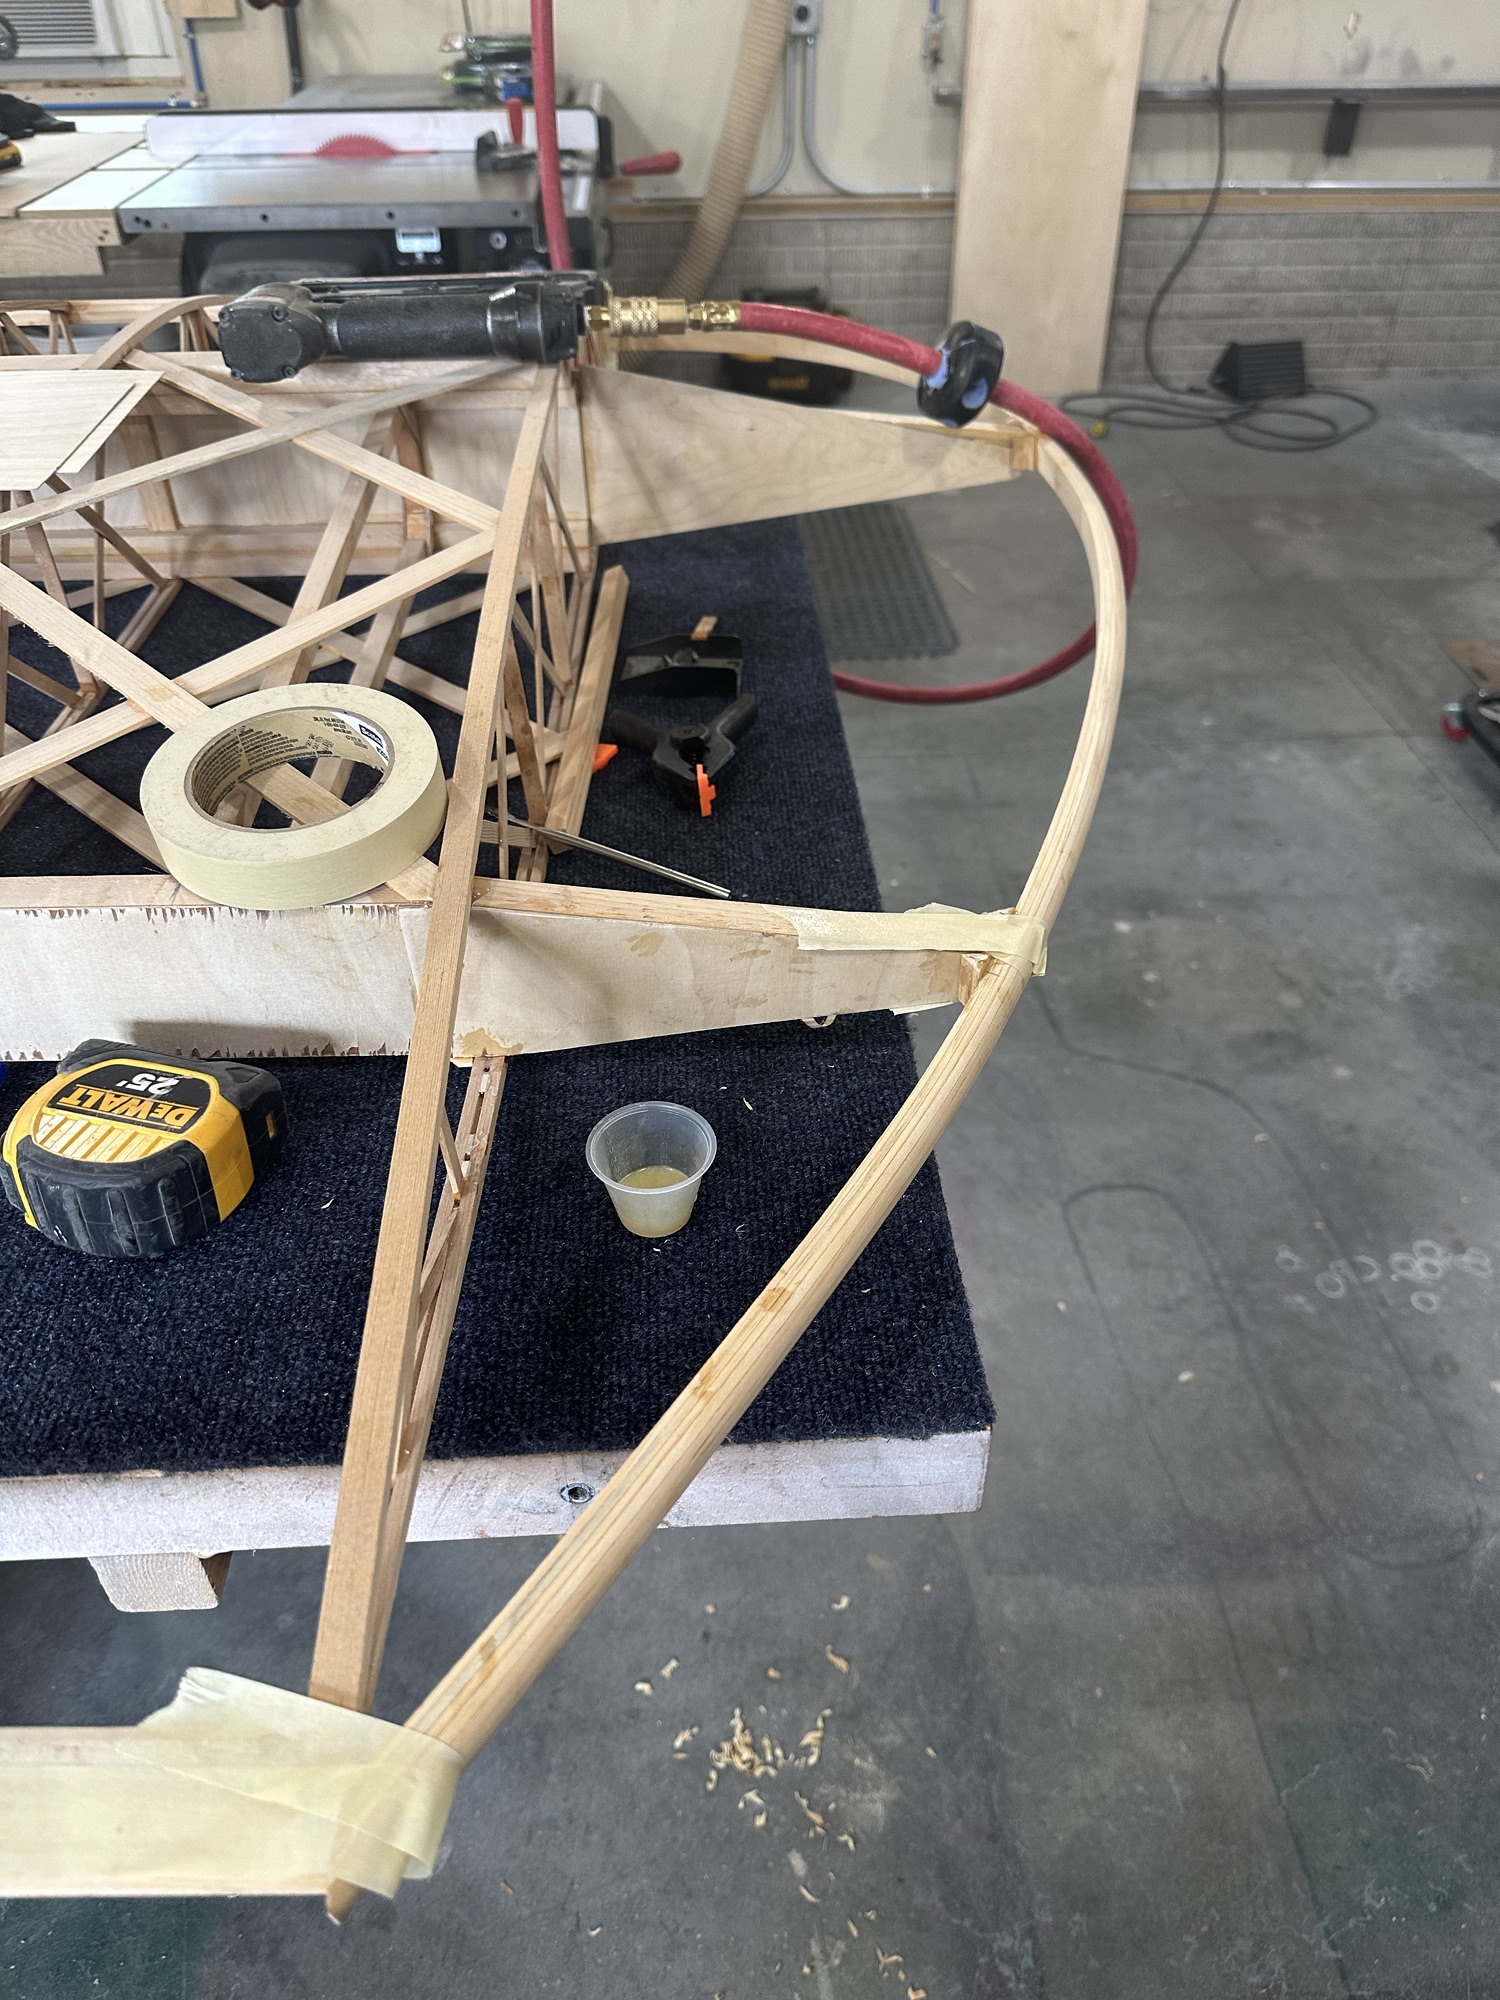
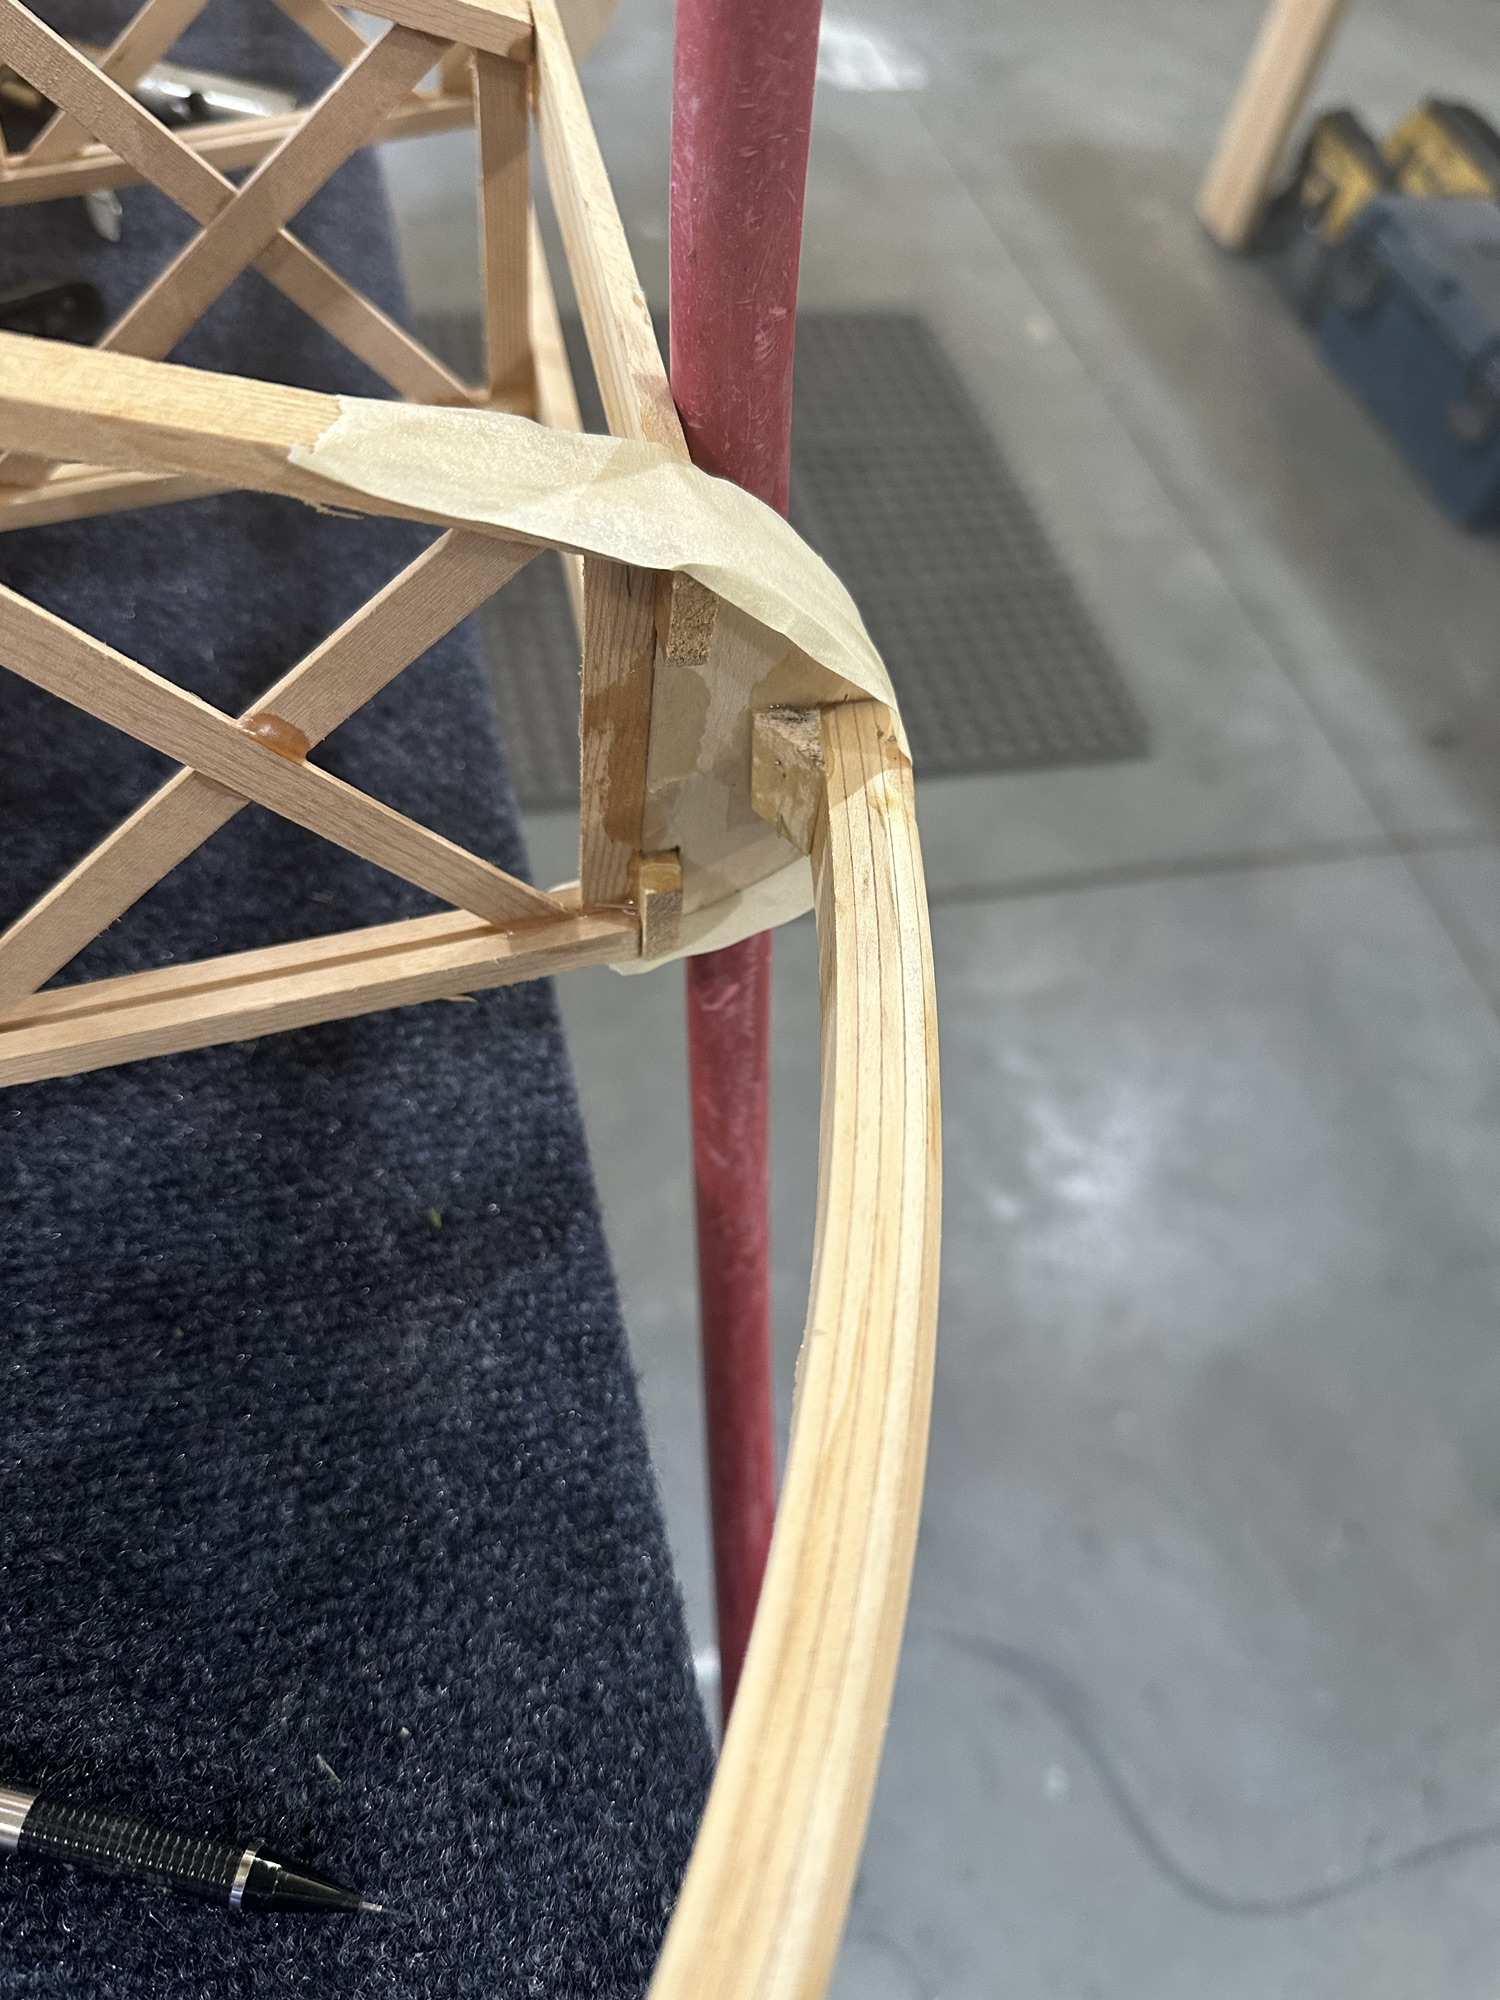
This afternoon I figured that after 8 hours or so it was safe to move on. I made another trip over and cut and installed the CW40 plywood stiffeners for the aileron and each end of the aileron bay. Then I cut and glued in supports for the wingtip bow. All of this is just the bottom side — since the wing is upside down. I’ll do the top side once I flip the wing back over, which will likely be tomorrow.

Getting two work sessions per day in could really speed things up. I think I’ll try and do more of that. I’m not thrilled with the fact that I seem to be averaging only three days a week working on this — I need to get a fire lit under things, figuratively speaking.

More CW35s glued in

I may be taking too cautious of an approach here, but I really don’t want to have to do a lot of work on the aileron ends like I did on the first one. carefully measured and cut the trailing edge so I could put the CW34 aileron end plates in place. Then, with the CW34s clamped in to make sure the edges lined up with the ends of the aileron spar, I lined up and glued in the pairs of CW35 pieces on each end of the aileron. I have the AL tubing in place to keep everything perfectly aligned.

I’ll probably go back and glue in the CW34s later on tonight. I probably should have just done it this morning. I get a little paranoid about this part of the process, since I’ve had to adjust or re-cut most of the holes for the torque tube.

More aileron structure

Getting the CW35 aileron nose ribs located perfectly in the aileron is critical to making sure the aileron is straight and consistent with the other wing. Today I slid the torque tube into place and checked the fit of all the pieces that I can at this point. After making some adjustments to the holes in the CW36 end plates, I glued the three CW35s in place in the middle of the aileron. The next step will require cutting the trailing edge to install the aileron end caps, so I want to make sure the torque tube location is easily and consistently reproducible.

I think at this point I may just bolt the torque tube bearings in place (I have a set of 3D printed temporary pieces) and cut the last piece of AL tubing in half. This will let me work with a much shorter and easier to handle piece of tubing while setting up the ailerons.

Corner blocking

On the first wing I built, I had the aileron pretty much finished before realizing that I’d left out a bunch of corner blocking. It was a real PITA to add it in after the fact! So this time I paid more attention. Today I cut and glued in all (I think) of the corner blocking for the parts I have done. MUCH easier this way!!

More aileron assembly work

Today I flipped the wing over and got the lower aileron spar caps glued in. I also glued and clamped the CW36 end plates, and a couple of the CW32 aileron nose ribs.

I also drilled the holes in all of the remaining CW32 parts. I may need to cut a couple more of those; it looks like I’ll come up short for the upper wings. I’ll check the crate to see if they got loose and are hiding somewhere, but it’s not a big deal – I have the plywood to make them.

Aileron spar and parts fitting

Today I got the aileron spar web cut and glued in, along with the top pieces of 1/4″ spar cap. I couldn’t get to the bottom side to clamp those pieces without some significant effort, so I left those for the next session. I also got the CW32 pieces cut and sanded to fit between the rib caps. I trimmed and clamped the CW36 and CW34 pieces in place to locate the aileron torque tube, then marked the CW32 pieces for the holes that will need to be drilled for the torque tube.

The wingtip is nice and solidly in place, so now I just need to sand the blocking and trailing edge flush so I can start installing the gussets and additional bracing.

This time around I plan to NOT screw up the same way I did the first aileron, by assuming that the holes in ANY of the parts are drilled in the proper place. As I did before, I’ll index everything off of the CW34 parts, using those to locate the torque tube, and drill or sand everything else to match them. And of course I’ve already 3D printed a pair of torque tube bearing blocks for this wing. The final parts will be milled out of UHMW or something similar, not 3D printed, but these are great for getting all the holes located without the risk of messing up a flight part.

The more I use it, the more I like my little razor plane. This thing was bought back in the 70s, I think, by my father for use on R/C airplanes that we (mostly he) built in our basement, usually from scratch. It’s a plastic body with a blade that resembled a heavy duty, oversized razor blade. The key thing I found was to use light passes, and hold the plane at an angle to the wood. It’s quite effective for shaving down spruce, plywood, and even the odd bit of end grain. It’s usually quicker than sanding.

Glued wingtip in place

Today I got the end nose rib notched and the wingtip glued in place. I have the blocking at the spar tips and nose rib, but will still need to block and shape the trailing edge as well as gluing in the plywood gussets. Still, it feels good to have the wingtip on. It looks more like a wing!

I also trimmed the CW36 pieces. These go on the ribs just outside the aileron bay and hold the torque tube support bushings. As supplied they were about 3/8 too long for the inboard side, and 7/16 for the outboard side where there’s an additional thickness of plywood where the wingtip spar web overlaps. For this I just set the miter gauge on the table saw to match the angle of the piece, then set the table saw to cut off the length needed. I won’t glue those two pieces in place until after I have the rest of the aileron structure built up.

CAW2 brackets

Over the past couple of days I’ve gotten all 14 of the CAW2 brackets shaped. I had drilled all of them already, but the ends needed to be rounded off. One end of each will be hidden inside the wing, but some will have one end exposed so I wanted them looking decent.

I designed a radius guide to help with the bandsaw and sander. It’s just a 1″ diameter disk, with a short 1/4″ button on the center of one face. Stick the button into the hole on one end of the bracket, and the guide is there to show a 1/2″ radius all the way around. My original idea was to use them to scribe a line to follow when finishing the ends. I had 3D printed a couple of them, and found it was just as easy to just leave it in place and work around the edge. Inevitably, of course, you end up nicking one so I printed up a batch of 9 more. I used 3 of them to finish off the CAW2 brackets.

Given that there are a bunch of other brackets to finish, I’ll definitely try the scribed line approach as well. Overall, though, I’m pleased with the results. I used the bandsaw to lop off the corners, then shaped the ends with a disc sander and finished them on a Scotch-Brite wheel. I had planned to paint them, but I may not. I’ve still got a batch of metal etch and Alodine (Bonderite 1201, to be precise), so if it still works I’d like to just give them a conversion coating that weighs nothing; that way they are protected from corrosion but only the exposed parts get paint. I’ll probably try a test piece to see if the Alodine still works; if not, I’ll get some self-etching primer and use that instead.

Miscellaneous work

Today came and went without mixing up any glue. I sorted out the nose plywood, then went through all of the aileron pieces and got them cleaned up, marked, and re-taped for the three remaining ailerons. I got the aileron spar web and marked it for the notches to clear the ribs, then brought it home and started cutting those notches on the bandsaw. I pulled a wingtip bow down and checked its fit; it looks like minimal trimming will be needed.

I also collected all of the aluminum pieces I had at Stu’s shop and brought them home, and cut the ends on the bandsaw. They’re all CAW2 pieces, I think — I need to dig out the rest of the pieces and get them all drilled and finished off. I’ll finish them on the belt sander and Scotchbrite wheel before priming them. My little 3D printed guide button worked great for this. I don’t recall if I described it or not, but it’s just a 1″ diameter by 1/8 thick disk, with a 1/4″ diameter by 1/8 thick nub in the center. Put the little piece in a 1/4 bolt hole, and the larger piece gives you a perfect guide for shaping the end of the bracket with a 1/2″ radius. They’re disposable if you nick or break one, and only take a little while to print up. I’ll probably print a few more in case I destroy any while using the belt sander.

I spent some time trying to determine whether the wing walk pieces will be of any use to me or not. The plan sheet and plywood supports all seem to be made for some earlier version of the wing. The notches on the supports don’t work (or even come close to working) with the root blocks on the main spar or rear spar. The forward plywood bits are too long, and even if cut off don’t match the curve of the wing ribs. There are supposed to be three installed forward of the spar — but that would only work if I removed one of the false ribs. I still don’t know what I’ll do for the wing walk. I do know that 1/4 plywood for the rear portion would need some curve in it, and I’m not sure about that. The plan notes say to nail it in place until the glue dries… ::shrug:: This is why I’m considering a laminated layup with some wood and maybe a layer or two of carbon fiber.

Nose ribs glued

Got the nose ribs glued in place, clamped, and taped to keep them stable. As I write this, I remember my earlier idea to cut another nose rib from slightly thicker plywood to use in the center of the span where the 1/32 plywood will have a butt joint. Oh well. I don’t think I did that on the other wing, so I’ll just have to get a look at that to see what I did there.

I did take a quick look at what I’d need to do to get started on the aileron, but didn’t really have time to spread the plans out and re-familiarize myself with that area. I’m kind of debating the order in which I’ll do the steps to complete this wing. I’m itching to tackle the aileron, but the more I think about it the more I think that would best be done later on. I think probably the best idea will be to wrap the nose with plywood and finish out that in order to protect the nose ribs. Once that’s done I think I’ll move on to mounting the wingtip, as it will be better to get that in and completely blocked in and reinforced before cutting out the aileron. Then there’s the wing walk to deal with. The plywood wing walk support pieces FFP packed in this kit are nowhere near correct, so I’ll probably just end up making new ones — unless I take a page from a guy who’s building a Tiger Moth and just make a new cantilevered wing walk from a sandwich of wood and carbon fiber.