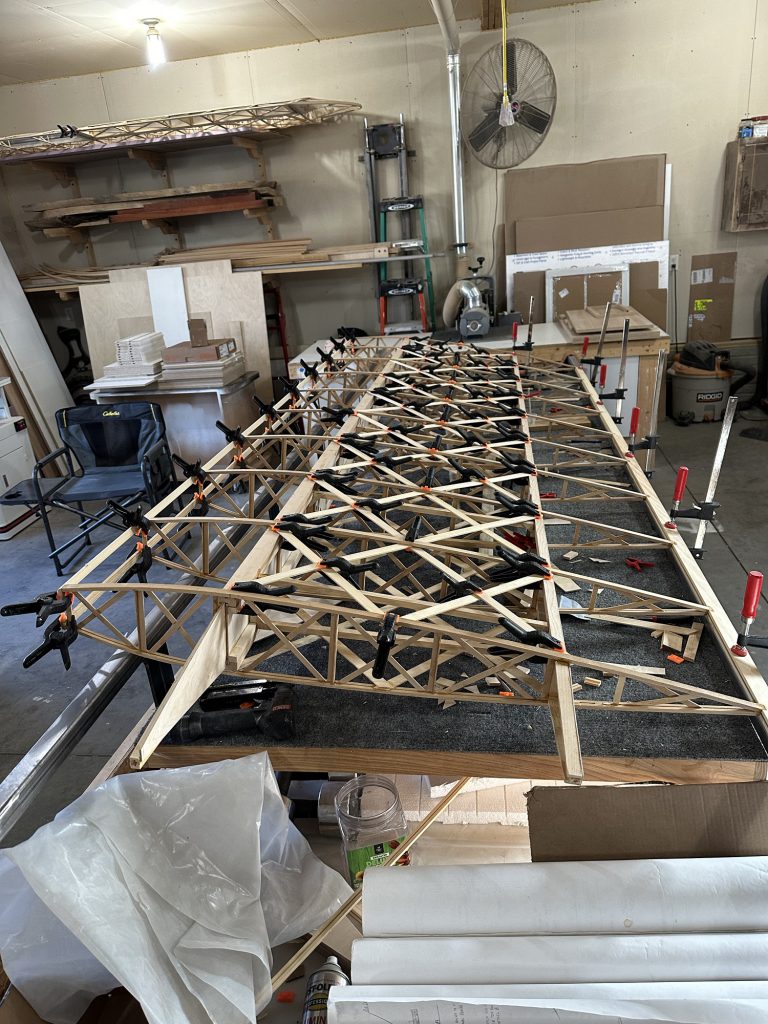
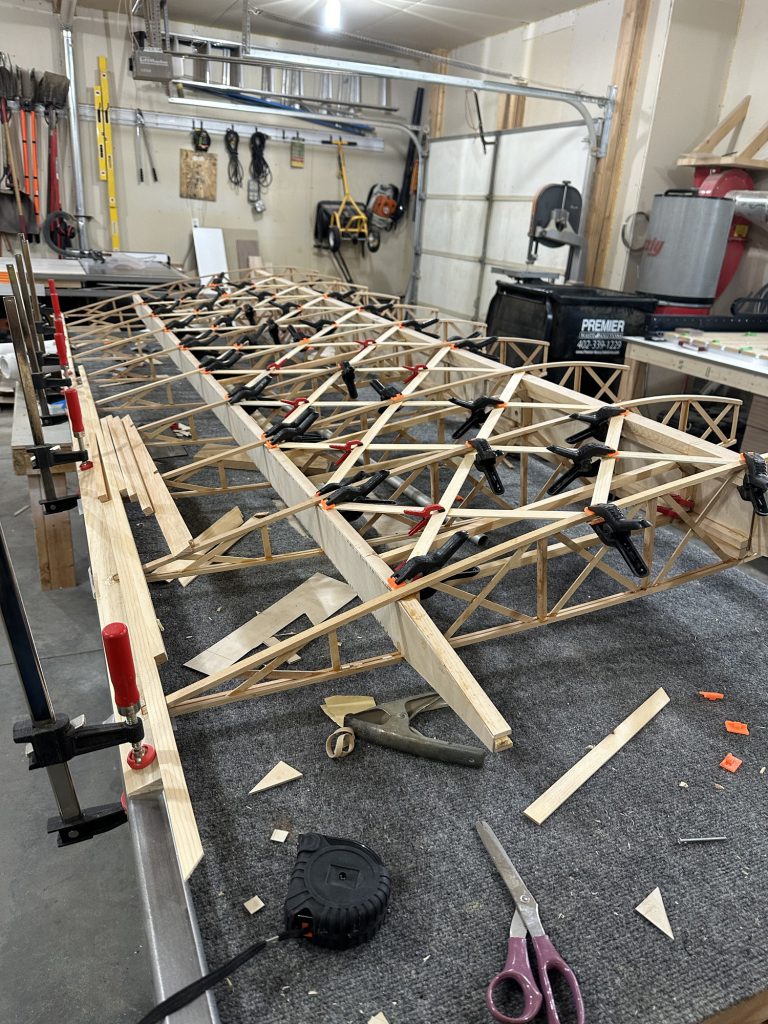
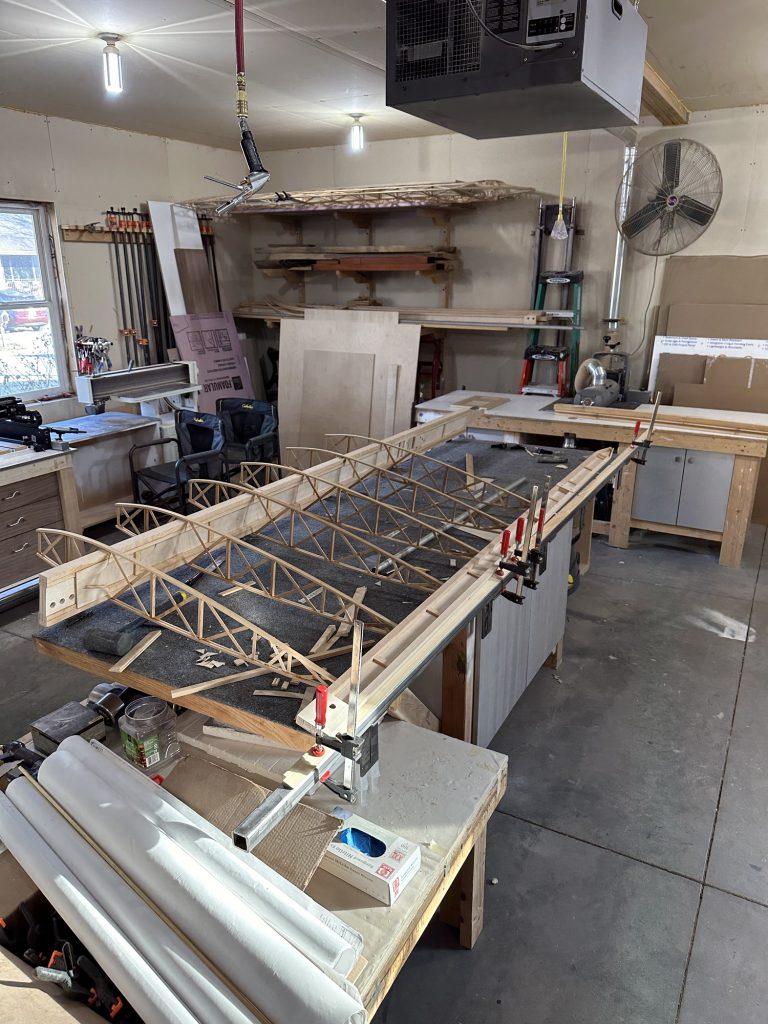
Bending wood and building stuff

This morning I went out to check the epoxy on the bending form.  It’s not warm in the garage (low 50s), not ideal for curing epoxy.  In addition, I was not too precise in mixing the epoxy.  I have a small scale that weighs in grams, ounces or even carats that I plan to use for epoxy to be used when measuring epoxy for actual airplane parts, but I didn’t use that last night.  Anyway, the glue was hard but still a little tacky on the surface – so not totally cured but “OK enough” to use.  I pulled the three capstrips out of the water soak and clamped them in the form.  A few hours later they had taken a fairly good set — but one of them cracked at the peak of the bend.  Looking at that one, it would have been OK if I’d either bent the other end, or cut the slot on the opposite side.  I just happened to try to bend it in a direction that didn’t work well with the grain slope of that piece of wood.   I’ll have to watch that on future pieces.

Knowing that I’ll want to rip some 1/8″ thick strips to make the wingtip bows and the frames for the tail feathers, I went looking for a way to do that easily.  I’ve been successful in ripping thin strips on the table saw, but as countless others have discovered doing it between the blade and rip fence is not the safest way.  The blade tends to launch the cut strip backwards off the saw table.  I found this thin strip rip jig at Rockler.com, which looks to be exactly the tool I need to rip pieces for laminating.  It’s not expensive, and I can think of a dozen other projects for which it would be very useful to be able to make strips for curved laminations.  I ordered it.

At lunch time I pulled the strips out of the bending jig and installed the rest of the forming blocks on the rib jig.  As I thought, the bottom capstrips won’t need to be pre-bent.  So, the first rib jig is ready to go.

The next job will be to shave the 1/8″ x 3/8″ strips received from ACS down to 3/32″ thick.  They’re actually a little thicker than spec, around .135 or so.  I thought about setting up something to jig up my low end belt/disc sander to do the job, but I don’t see a lot of success there.  I have a razor plane, but it doesn’t seem to work well on the wide side of the spruce strips.  I will have to figure out a good way to shave or sand or plane these down to the right thickness.  I did cut out all of the geodetic braces for the first rib, and marked them according to their placement.  I’ll use them as patterns to cut the remainder — just as soon as I figure out how to get those strips pared down to the right thickness.  Sanding just the ends down is going to be too time consuming and the results would probably not be consistent enough to suit me.  I need to figure out the best way to shave about .040 to .045 off of those strips.

Finally — the first shipment of spruce!

The UPS man just delivered a 30# package of spruce capstrip from Aircraft Spruce.  I can now — finally — start building.

The first step was to set up the table saw to groove the top and bottom rib capstrips for the geodetic braces.  They need a 3/32 x 3/32 groove cut on one side.  Getting the saw set up to cut a perfectly centered groove was trivially easy, and it gave me a reason to install the zero clearance throat plate on the saw for the first time.  Not wanting to experiment on the expensive spruce, I cut a couple of strips of pine the exact size of the capstrip and used one to set up the saw for the right depth and spacing.  The strips are small enough that rather than trying to use a push stick to feed it all the way through, it works out best to feed most of it through in one direction and then flip the piece around and feed the other end in.  The saw is set up precisely enough that you can’t see where the transition is between the grooves cut from the two ends.  It’s perfect.  With that done I grooved a dozen pieces of capstrip and decided that would be good for a limited test run.

I’ll also need a bending jig for the capstrip, since the top piece needs a pretty good curve toward the leading edge.  I could really probably do it dry, but I’ll feel better knowing that the wood is less stressed during assembly.  Better to put the curve in beforehand, I think.  The spruce is flexible enough that I don’t think there will be a problem with the bottom pieces, but we’ll see how it works out.  I cut a bending fixture from a chunk of scrap 2×4 — it split on the end as I was finishing up the cut, so I figured what better time to mix up a spoonful of T-88 and epoxy it back together?  After all, the glue joint should be stronger than the wood itself.  We’ll test that out.  Once that glue cures and I get some capstrip soaked in water and bent, I will finally be able to finish blocking in the rib jig and start cutting the geodetics.  I’ll need to also set up some sort of rig to sand or plane the ends of those down to 3/32″.

The grandkids are coming over Saturday to get some help with their Pinewood Derby cars.  Looks like a full-on woodworking weekend.

On the way… maybe?

Well, 24 days after placing my order Aircraft Spruce finally shows a tracking number for my capstrip stock.  We’ll see if it actually shows up this week.  For a while there I was afraid this would just be a blog about how difficult it is to obtain spruce…  maybe eventually I will get to actually build some airplane bits.

So, note to self: Lesson learned.  Always order wood at least a month ahead of needs, preferably two or three months.  Looks like it’s time to start on the spar stock and the stuff I’ll need for the tail surfaces.  That order might be here by the time I finish the ribs.  There’s a time scale that obviously applies to wood construction that is quite different than what I’m used to.  And it’s not like I can just run down to the lumber yard and pick out some suitable spruce or Douglas fir.

You gotta be kidding me.

So today, more than two weeks after placing an order for wood from Aircraft Spruce and five days after contacting their customer support to ask where the hell my order was, I finally get a response that they will be shipping three more days from now.  That will be a full three weeks from the time I placed the order, and also means I go yet another weekend without any supplies.

Strength vs. weight vs. work (rib geodetics)

While waiting (still) for my spruce to be shipped, I did some figuring…

Building from plans means not getting the wood factory cut and grooved.  There are just some pieces that you can’t buy off the shelf.  The Celebrity plans call for rib geodetic braces made of 3/32″ x 3/8″ Sitka spruce.  ACS and Wicks sell spruce capstrip down to 1/8″ thickness, but not 3/32″.  So the choices are to plane or sand down the entire length of the 1/8″ x 3/8″ strips, or use them as is and just sand the ends to fit the grooves in the top and bottom capstrips.  So how much extra weight will we end up with if we just use 1/8″ thick pieces?  It’s 1/32″ thicker, so we’ll do the math…

1/32″ x 3/8″ wide x 1464″ of capstrip = 17.25 in3 of extra spruce.  Sitka spruce weighs about 28 pounds per cubic foot (or 1728 cubic inches), so 17.25 / 1728 = .009928 ft3 x 28 lb gives us a little over a quarter of a pound, less whatever gets sanded off on the ends and scrap, etc.  So…  around four ounces or less; I can live with that.  Still, I’m thinking I may set up a spindle sander with a 3/32 gap to do the ends.  If it works well enough I could run the entire lengths of the strips through it, then so much the better.  Of course that would probably mean having to buy a new power tool.  Oh, no!  🙂


Waiting…

Well, I placed my first order for wood from Aircraft Spruce.  I ordered what should be enough spruce capstrip stock to build all f the wing ribs.  Should be here in a couple of weeks.  I guess I wasn’t thinking…  maybe I figured they kept this stuff in stock.  If I’d known there would be a 10-day lead time, I’d have ordered it two or three weeks ago.  Live and learn.

In the mean time, there’s not a lot to do.  If it warms up at all I may try to rip some 1/2 by 1/4 stock out of pine and get the saw set up to groove the rib capstrips.  I’d love to finish up the rib jig before the wood gets here.

Flying wires vs. lift struts

I emailed Dave at Fisher Flying Products asking about the lift struts I have seen used on several Celebrities that I’ve seen in pictures.  I still have not seen an actual Celebrity “in person”, nor any other completed Fisher design for that matter – just a partially built single seat ultralight at Oshkosh.  It seems you have a choice between lift struts or flying wires.  Personally, I like the look of flying wires a lot better.  It just has that classic wire-braced biplane look.  I know that a cylinder shape, such as a wire, has much higher drag than streamlined tubing.  A cylindrical object will have 10 times the drag of a streamlined shape of the same frontal area.  The wires, however, will be much thinner than struts, 5/32″ — meaning that they would produce drag roughly equivalent to 1-9/16″ wide streamlined struts.  BUT…  the plans call for 1-1/8″ and 1-1/4″ round tubing for the lift struts.  The flying wires would have far less drag than those.  I could probably replace the round aluminum tubing with smaller streamlined steel and pick up some drag reduction there, but the fact remains — I just don’t like the look of the lift struts.

It’s not like this airplane will be a speed demon no matter what I do, so I’m not really worried about what may be a small drag penalty for the wires.  If I wanted to fly faster and more efficiently without regard for anything else, well, I have an RV-12 for that (acknowledging that “faster” is entirely relative here).  It looks like I can have the wires made to my specs by Aircraft Spruce, swaged and tested with professional equipment so I don’t have to worry about getting it perfect on my first try.

More jig work and research

I did some additional work on the rib jig yesterday, including installing the main spar locating block and cleaning up a few nail points that were poking out the bottom.  I cut a bunch of blocks to locate the outer shape of the ribs, but did not install them yet.  I want to wait until I have some spruce stock to put in place, so I make sure it’s all in the right place.  I really want these to turn out as close to perfectly consistent as possible.  I had planned to use some pine cut down on the table saw to set up and test the jig, but it occurred to me that I had no way to know for sure my pine strips would be the exact same size as the capstrip stock supplied by Aircraft Spruce.  So, it’s time to order some wood.

Started rib jig #1

I spent some time yesterday working on the first wing rib jig.  The workbench needed a new top surface, so I picked up a sheet of 3/4″ MDF at Lowe’s.  They were nice enough to cut it for me.  I ended up with one piece 3′ x 8′ for the bench, and two 1′ x 4′ chunks for rib jigs.  Nice how that worked out.

I marked a center line on the MDF and laid out the rib setup from Sheet #1 of the plans over it, then trimmed the paper to fit the jig.  I hate cutting up plans, but there’s an extra copy of that page for this reason.  I made all of the little chunks of plywood for the locating blocks, and cut a few small pieces of pine stock as needed.  Then I cut out the places where I would need holes to accommodate clothespins, marked those on the MDF and cut them out with a scroll saw.  I used some spray adhesive to stick the plans down to the MDF.  So far so good.

Next I had to find some clear poly to cover the plans sheet.  I finally remembered the nearly 4′ long bag in which the plans were shipped; it fit just fine.  With that in place I started nailing the locating blocks in place over the plan sheet.  I got most of them done before knocking off for the night.  I still need to make one more plywood block for the main spar locator, and make the blocks for the top and bottom capstrips.  I haven’t decided for sure how to do those.  I had thought about using a couple pieces of pine bent to fit, but that seems like a great way to mess up the jig trying to get them perfectly in place, and the jig needs to be as close to perfect as I can make it.  I’ll probably go with closely spaced pine blocks, nailed in place.