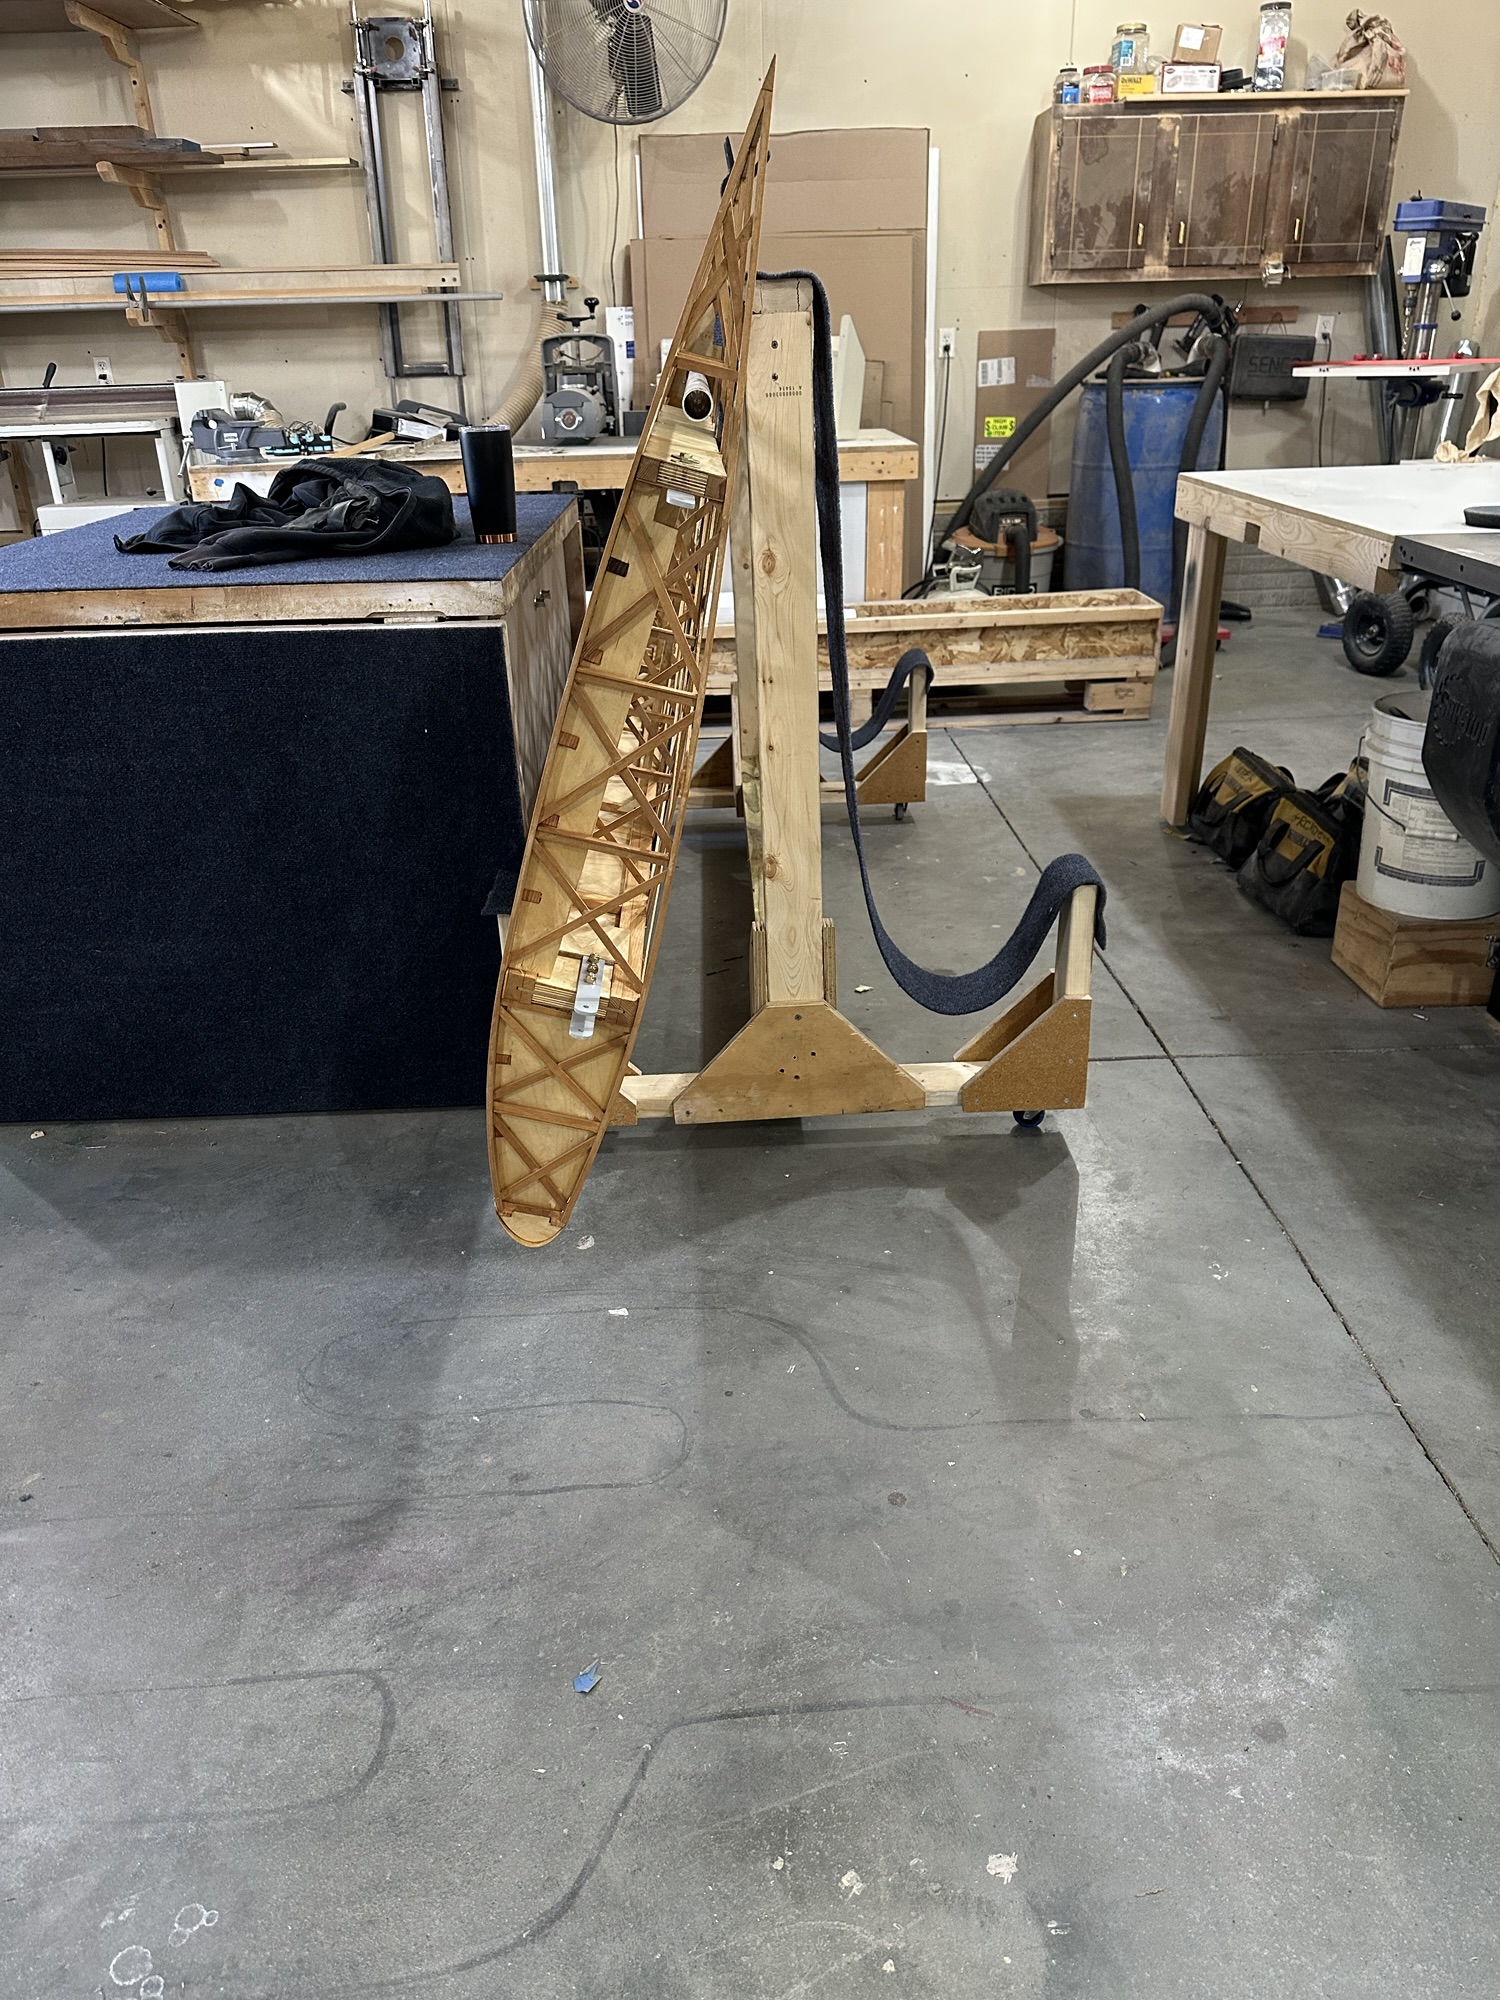
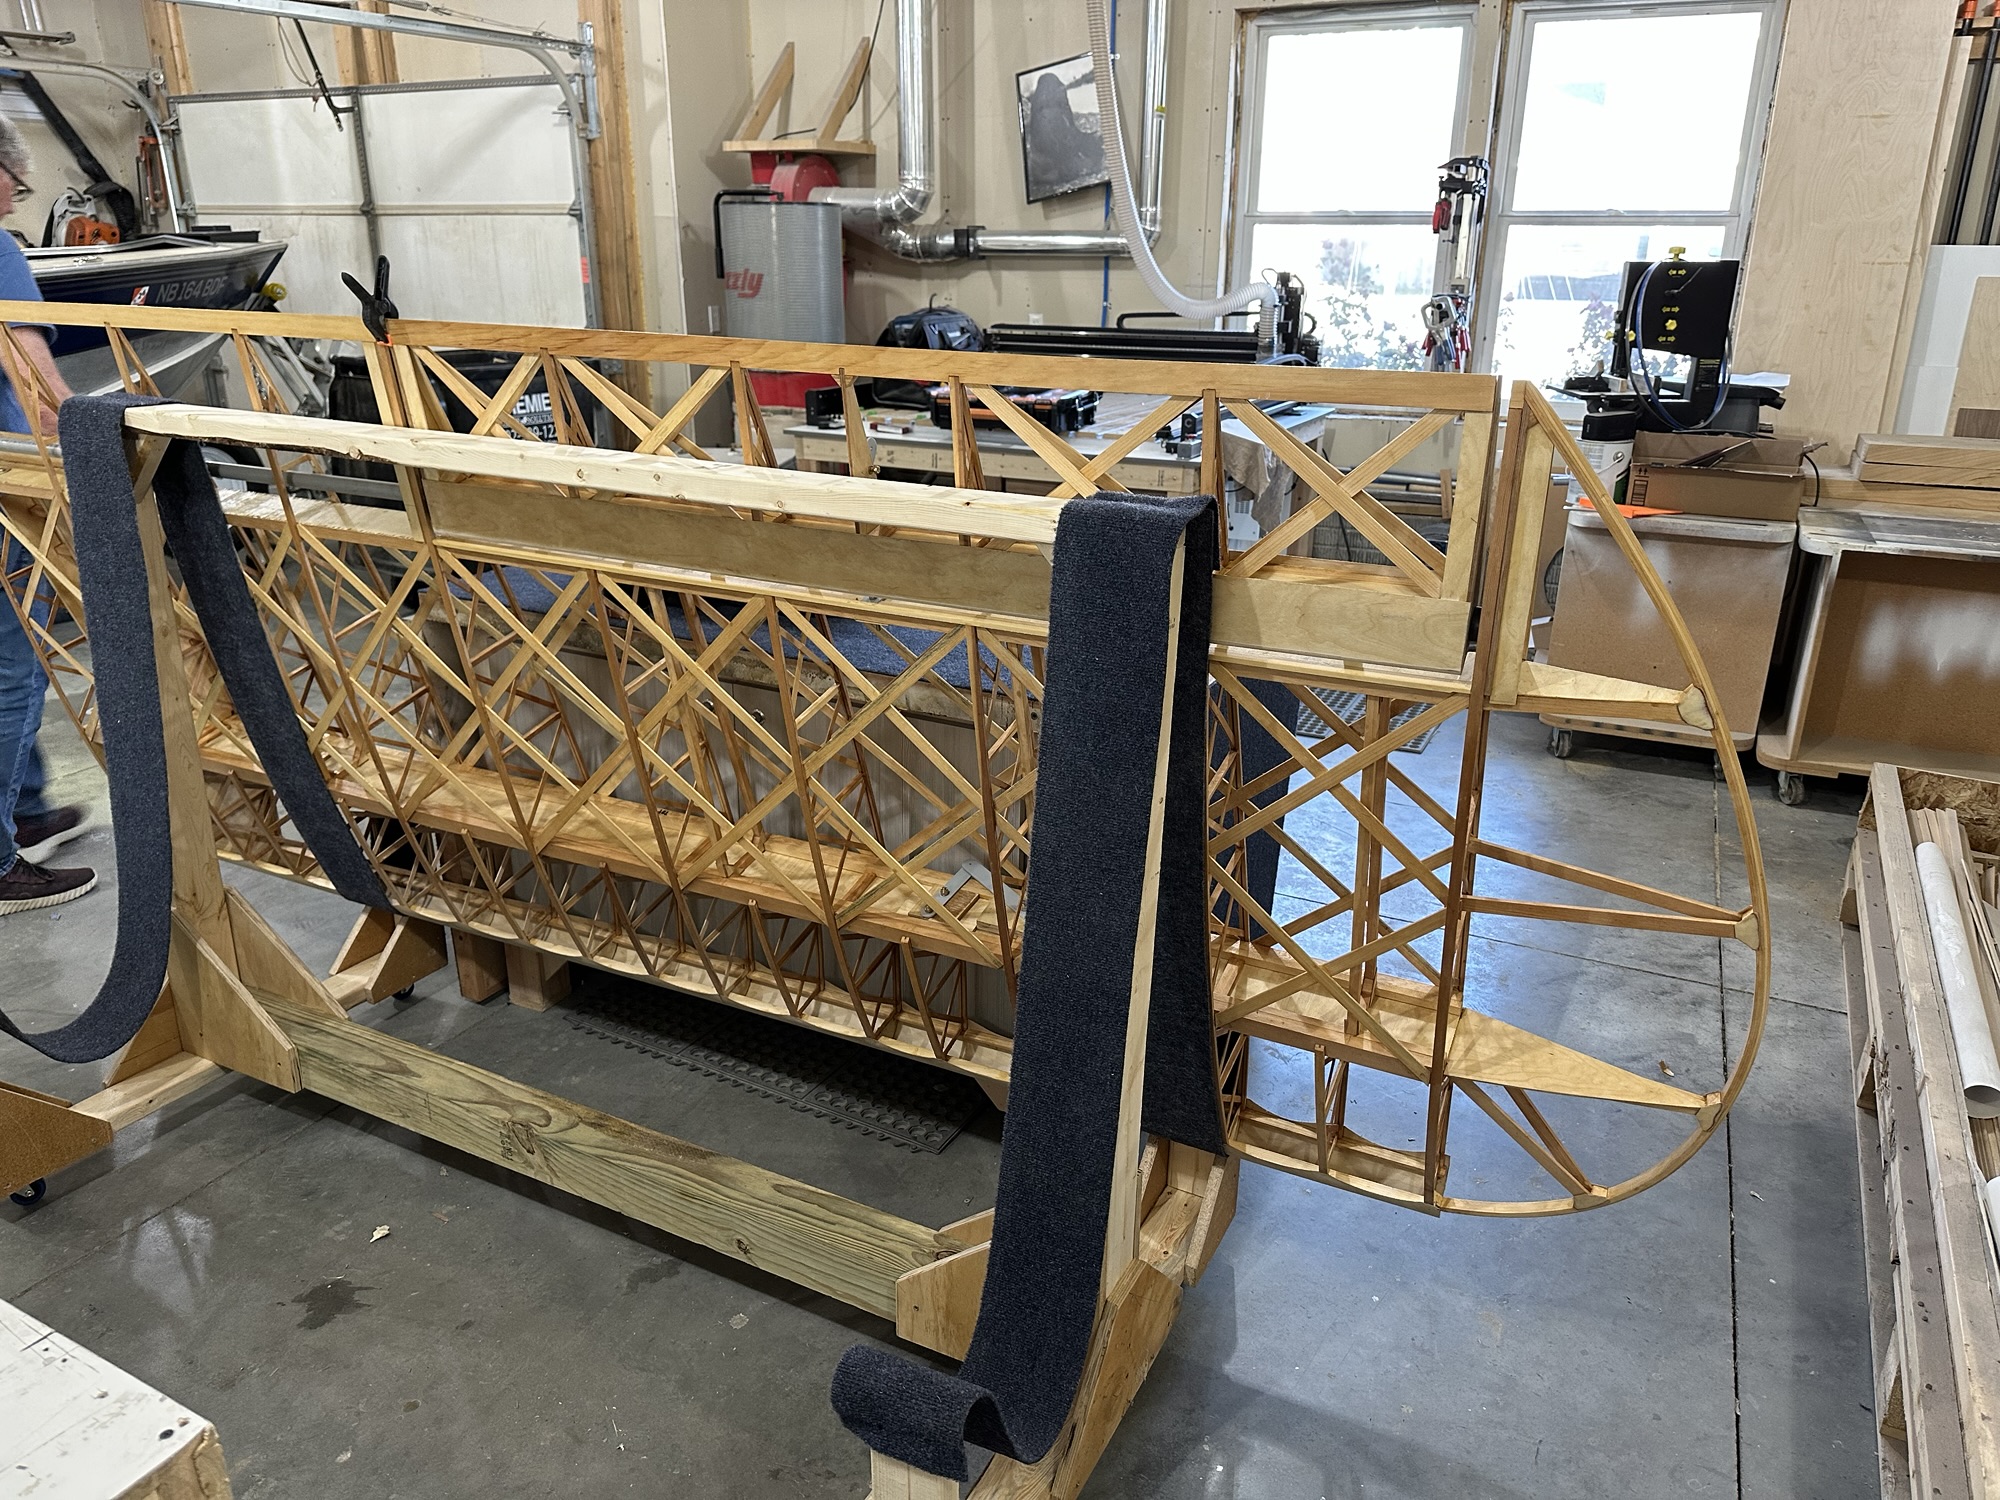
A little different sort of woodworking today. I got a wing rack built so I will be able to move the two lower wings to the airport for storage.

A Fisher Celebrity build project
A little different sort of woodworking today. I got a wing rack built so I will be able to move the two lower wings to the airport for storage.
I heard from Stu today that he needs his shop back. I didn’t ask for how long — I suspect he may be not quite as enthused about having a large part his shop taken over with what seems like an indefinite project, especially when I’m not there for a week or two. I’ve been dealing with a bunch of other things that have been deferred on the house and cars, and admittedly a couple of those days have been just inertia – and trying to figure out the best way to deal with the aileron/bracket interference. I did tell him it would take 2-3 years to get to the point where I was ready to take it to the airport for assembly, but being told that and actually seeing the impact are two different things, of course.
At this point I’ll build a movable wing storage rack for the two lower wings, and move them to the hangar at Millard as soon as I have the left wing varnished. Those wings can live there while I figure out my next move. My garage is not currently in a state suitable for building. It’s too cold in winter to work with epoxy, and unbearably hot for much of the summer. It was workable for aluminum construction on the RV-7, but the epoxy used for this plane is less tolerant of temperature extremes while working on assembly. I’ve been planning to install a mini split heat pump in there for heat and A/C; I think I’ll move ahead with that.
Tail surfaces can be built on a single 4 x 8′ sheet of MDF. I think I can free up enough space in the garage for that, and once done they can hang on a wall either at home or at the hangar. I need to review the fuselage plans to see how much workbench I’ll need for that — with any luck, a 2 x 16′ bench would do, so maybe I can just split the 4 x 8 down the center and make a single long bench for the fuselage. The upper wings will be the challenge. I really need at least 11 x 4′, so I just need to do some planning.
So, I found the plan supplement that talks about the aileron interference. Written in 2010 — seven years before I bought my plans — it notes that the rear spar was changed at some unknown point in the past, by someone, but never really documented, and the “updated plans will be sent out as they are available”. Which, apparently, they never were and probably still aren’t. Then it talks about plans delivered electronically (which they weren’t, and to my knowledge weren’t offered) having an updated sheet with new dimensions for the ailerons. It also says that this is only an issue with the upper ailerons hitting the CAW9 bracket. Uh, no. The lower aileron hits the head of the bolt holding the CAW3 bracket. There is one sheet that seems to show an upper aileron, with no dimensions to be seen anywhere. Wonderful.
So what’s their brilliant solution for fixing an already built aileron? Simply move it rearward to clear the bracket – this means take a hole saw to the wing to move the torque tube back in order to move the aileron. Then just cut off the trailing edge to match the rest of the wing, and sand all of the aileron ribs to match the contour of wing at the new location. Oh, and that’s probably going to remove enough rib cap material that extra bracing will be required… How many ways can this be wrong?
I get the impression that whoever wrote all of that has never actually built a Celebrity wing with 3/4″ rear spar caps. Meaning, whoever it was hadn’t built a Celebrity wing to check this stuff out since 2010. Come on.
I’m currently evaluating whether notching the lower leading edge of the aileron is an option. The actual aileron spar wouldn’t be affected, and the torque tube runs the entire length of the aileron, so it’s not like it could fold up and depart the aircraft. Still, I don’t want to weaken the thing and take the risk of cracking or anything, especially since this structure will all be under fabric and not easily inspected. Stu seems to think it wouldn’t weaken the structure, but he’s a carpenter and cabinet guy, not an engineer (and neither am I).
I’m going to have an actual engineer look at this and give me his opinion. I could always add a layer of 1/32 or even thicker ply if needed, but my gut feeling is that it’s not going to weaken anything enough to matter. In the mean time, I’ll keep pushing on, but this is kind of a kick in the nuts, to be honest. I’m sure a year from now I’ll look back and marvel at how little it actually mattered. I would feel sorry for anyone buying a set of plans now at over $3K and probably still not updated… I hope the new owners of the Fisher IP take the time to fix this kind of stuff.
I keep finding little things that still need to be done on this wing. At least it won’t take as long to do the next one. I’ve been getting over there nearly every day, but the little bits of work here and there didn’t seem worthy of a complete build log post. But since the last update:
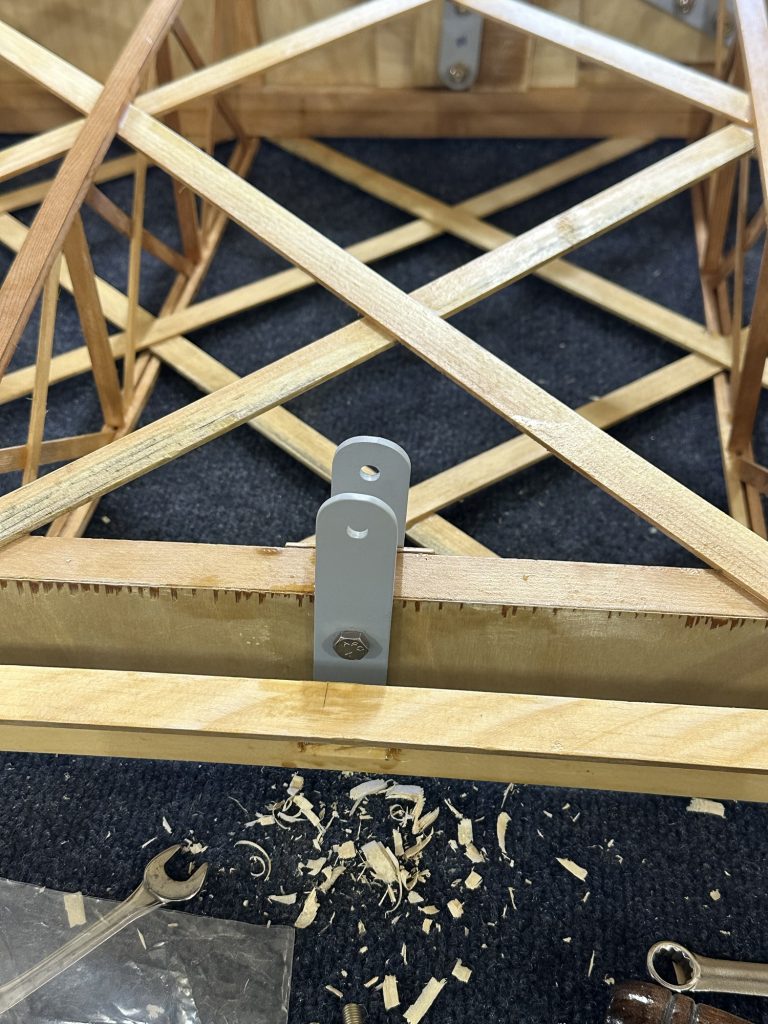
I also found that the aileron DOWN travel is restricted by one of the bolts for a fitting on the rear spar. I recall reading that the rear spar thickness was changed from 1/2″ to 3/4″ at some point, and that causes interference. The aileron should have 22 degrees travel in both directions; I get about 15 – 17 degrees down right now. It would be less if the aileron and wing were covered. I need to dig though the plan supplements and find the section that talks about that and see how to fix it. The obvious choice would be to notch the lower front corner of the aileron leading edge to clear the bolt head, but I’d really prefer some other solution… it sure would have been nice for whoever did the plan changes along the way to have properly documented this stuff on the drawings themselves, rather than just tacking on random pages with these “Oh, by the way…” notes (which are themselves occasionally wrong).
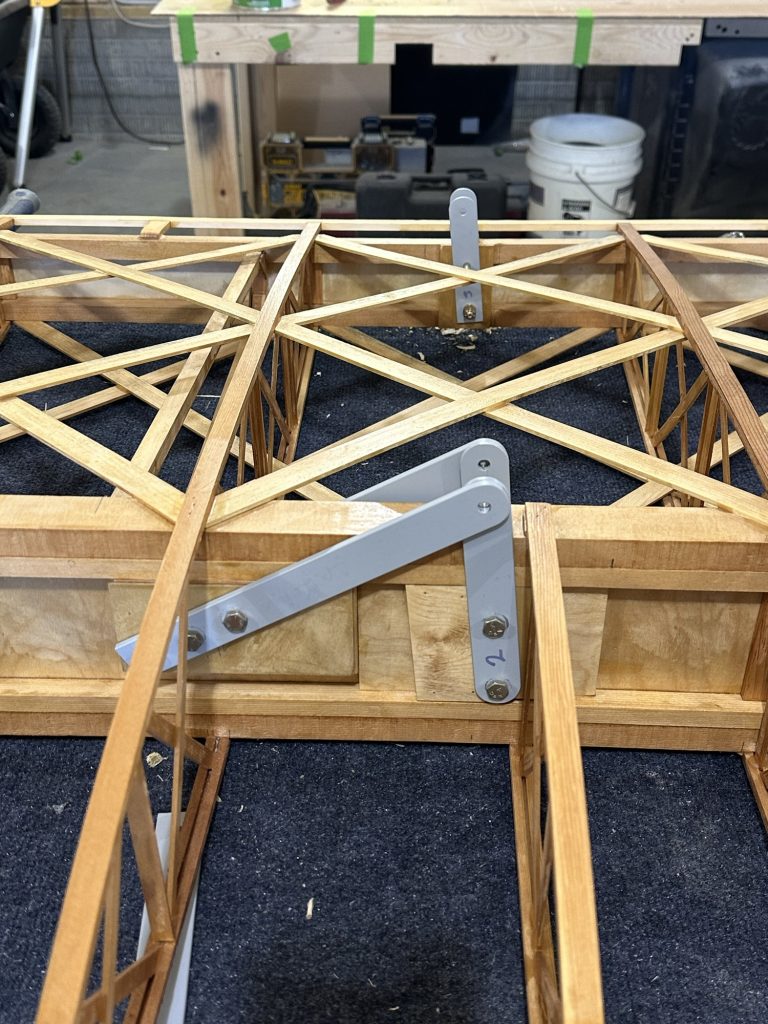
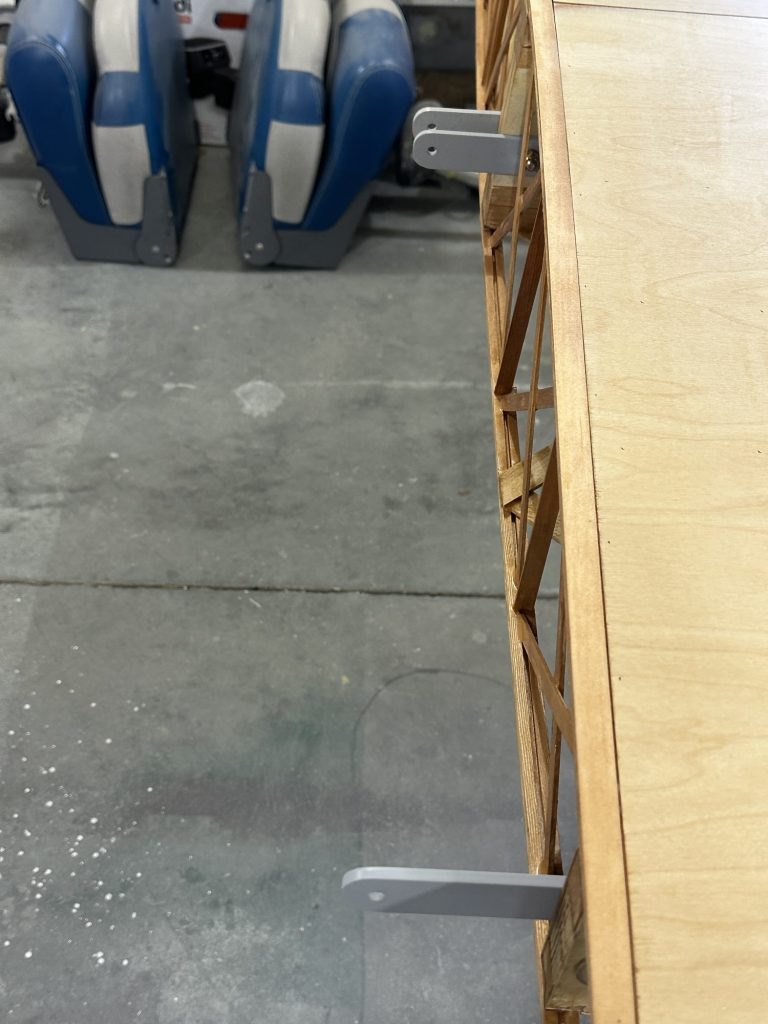
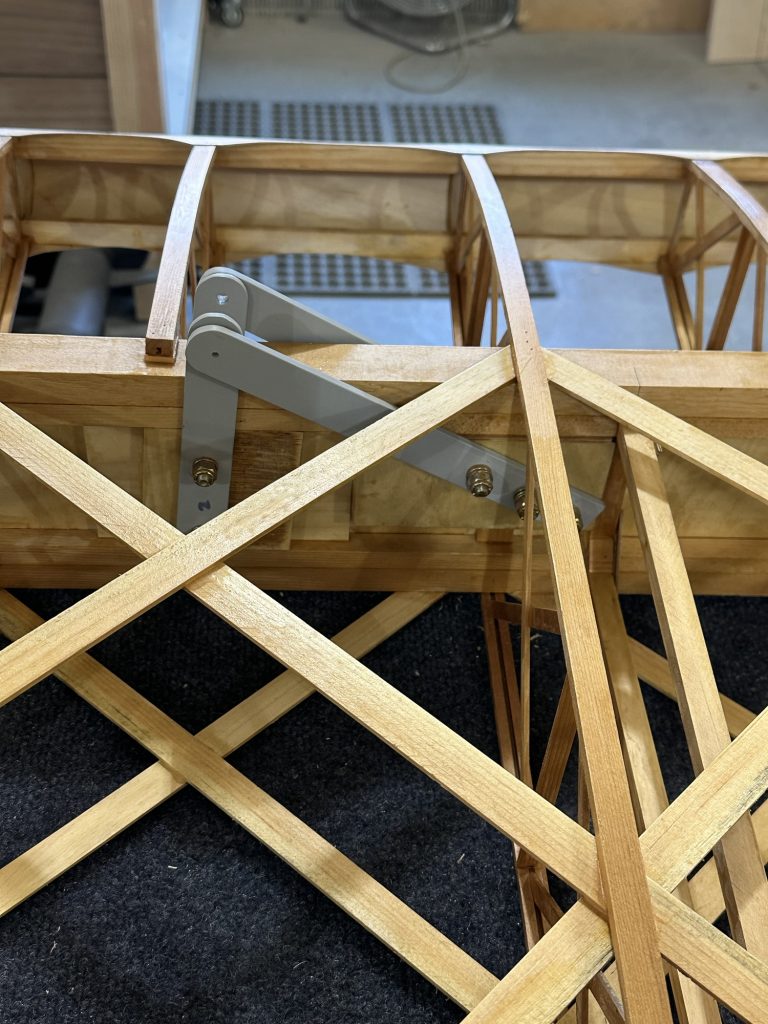
What I thought would be an hour’s worth of work this morning turned into 3-1/2 hours, but I’m feeling good about the end result. I went over to tighten up the bolts on the wing root brackets and install the brackets on the outer portion of the wing, for the N struts and landing wires.
Snugging up the bolts at the wing root went fine. They’re not torqued to spec, I’ll torque all of the bolts during the initial assembly and mark them all with Torque-Seal or some other witness marking paint. With those done, I moved on to the other brackets. I found that with the very slight variations in hole locations, some of the brackets needed a hole adjusted slightly to get everything lined up properly. It was also a real bear getting the bushings back into their holes after varnishing. Let’s just say there’s no play there… they’re fitted nice and tight.
In the end, I got all of them installed and everything lines up the way it should. I need to find one more AN4-16A bolt, but I think I may have one at the hangar. Next step, I think, will be to cut and fit the cover plates for the brackets where the fabric will be glued down where the brackets come through.
As I approach the end of building two wings, I’m faced with the prospect of needing to store large assemblies for a while. Stu’s shop is large and climate controlled, but it’s also Stu’s shop, not mine. There isn’t room to store everything until it’s time to move the plane to the airport and start assembly. I’ll need to store these wings while I build the upper two, and then will need to store all four while I build the tail and fuselage.
Fortunately, I do have a hangar. I will need to build a rack to store these wings without damage, then figure out how I’m going to cover them to keep dripping water and dust off of them for a year or two (or three). I had toyed with the idea of covering them with fabric, and I am not yet ruling that out. It might at least provide some protection for the geodetic bracing. There are several valid arguments against it, though. Either way I’ll need a rack, and I’ll need to figure out exactly how I’m going to transport the wings to the airport. Fortunately, it’s only a couple of miles.
I’ve spent a couple hours this week getting bolt length sorted out and getting some of the wing fittings attached.
My strategy for the wing attach fittings was to make one of each type of fitting, pilot drill the holes with a 1/8″ bit, and use those to mark the location of the holes in the wing spars. Those holes got drilled on a drill press using Forstner bits. Then I cut the rest of the fittings, used the first ones as templates for drilling them, and figured all of the holes should line up.
Well – they’re close. I’m not a machinist, nor am I using tools techniques of suitable precision to produce perfect parts. For example, when looking at the CAW2A wing root mounting brackets, the holes are not perfectly aligned – so there’s a top and bottom to those, meaning until I figured that out it took a few tries to get everything lined up right. No big deal.
Then I discovered that one of the holes isn’t drilled perfectly square. It’s only off by maybe .010 total, but just enough that you can’t run a bolt through the forward bracket, the bushing, and the aft bracket without interference. If the bolts were just going through holes drilled in the wood of the spar, it would be fine – but the bushings are a snug fit, I had to do a little adjusting of that hole to get everything to fit properly.
We finally got the bottom of the aileron leading edge routed so that it’s now in its final state. When fitting the aileron and checking travel, I discovered that I’d messed up just a little when up finishing out the aileron bay. On the first wing, I’d positioned the top beveled strip with the aileron in place, and checking clearance per the plans. On this one, I just measured the first wing and matched it. I don’t have enough up travel on this aileron. After a little more investigation, it’s just the ends that interfere, so easily cleaned up with a couple minutes of work with the razor plane. I’ll need to pay closer attention on the next two wings. I’m thinking just use a length of 1/4″ shim stock to set the spacing with the aileron solidly fixed in its final location.
I’ve missed a couple of updates to work done on the plane over the past week or so. I got the second coat of varnish on the wing, including the aileron. I got all of the bushings in place, and started to attach the various attaching brackets… oops! No torque wrench. And, I can only find one CAW9 bracket. I think I ran out of 3/16″ x 1″ 2024 flat bar stock before I got them all made; I need to go hunting and gathering again. Once that’s done I can finish off the aileron (the lower leading edge needs a pass through the router for its radius) and move on to varnishing the other wing.
Yesterday and today I put a second coat of varnish on the wing, and got the aileron varnished. It’s tedious work, even with the 4” foam rollers I bought for the job.
Spar urethane… it’s not just for spars. It’s for ribs, and geodetic bracing, and plywood, and everywhere. I’ve got to find a quicker and more efficient way to put this stuff on; I’ve spent about six hours so far applying par varnish to this wing and I’m still on the first coat. It’s brutal.