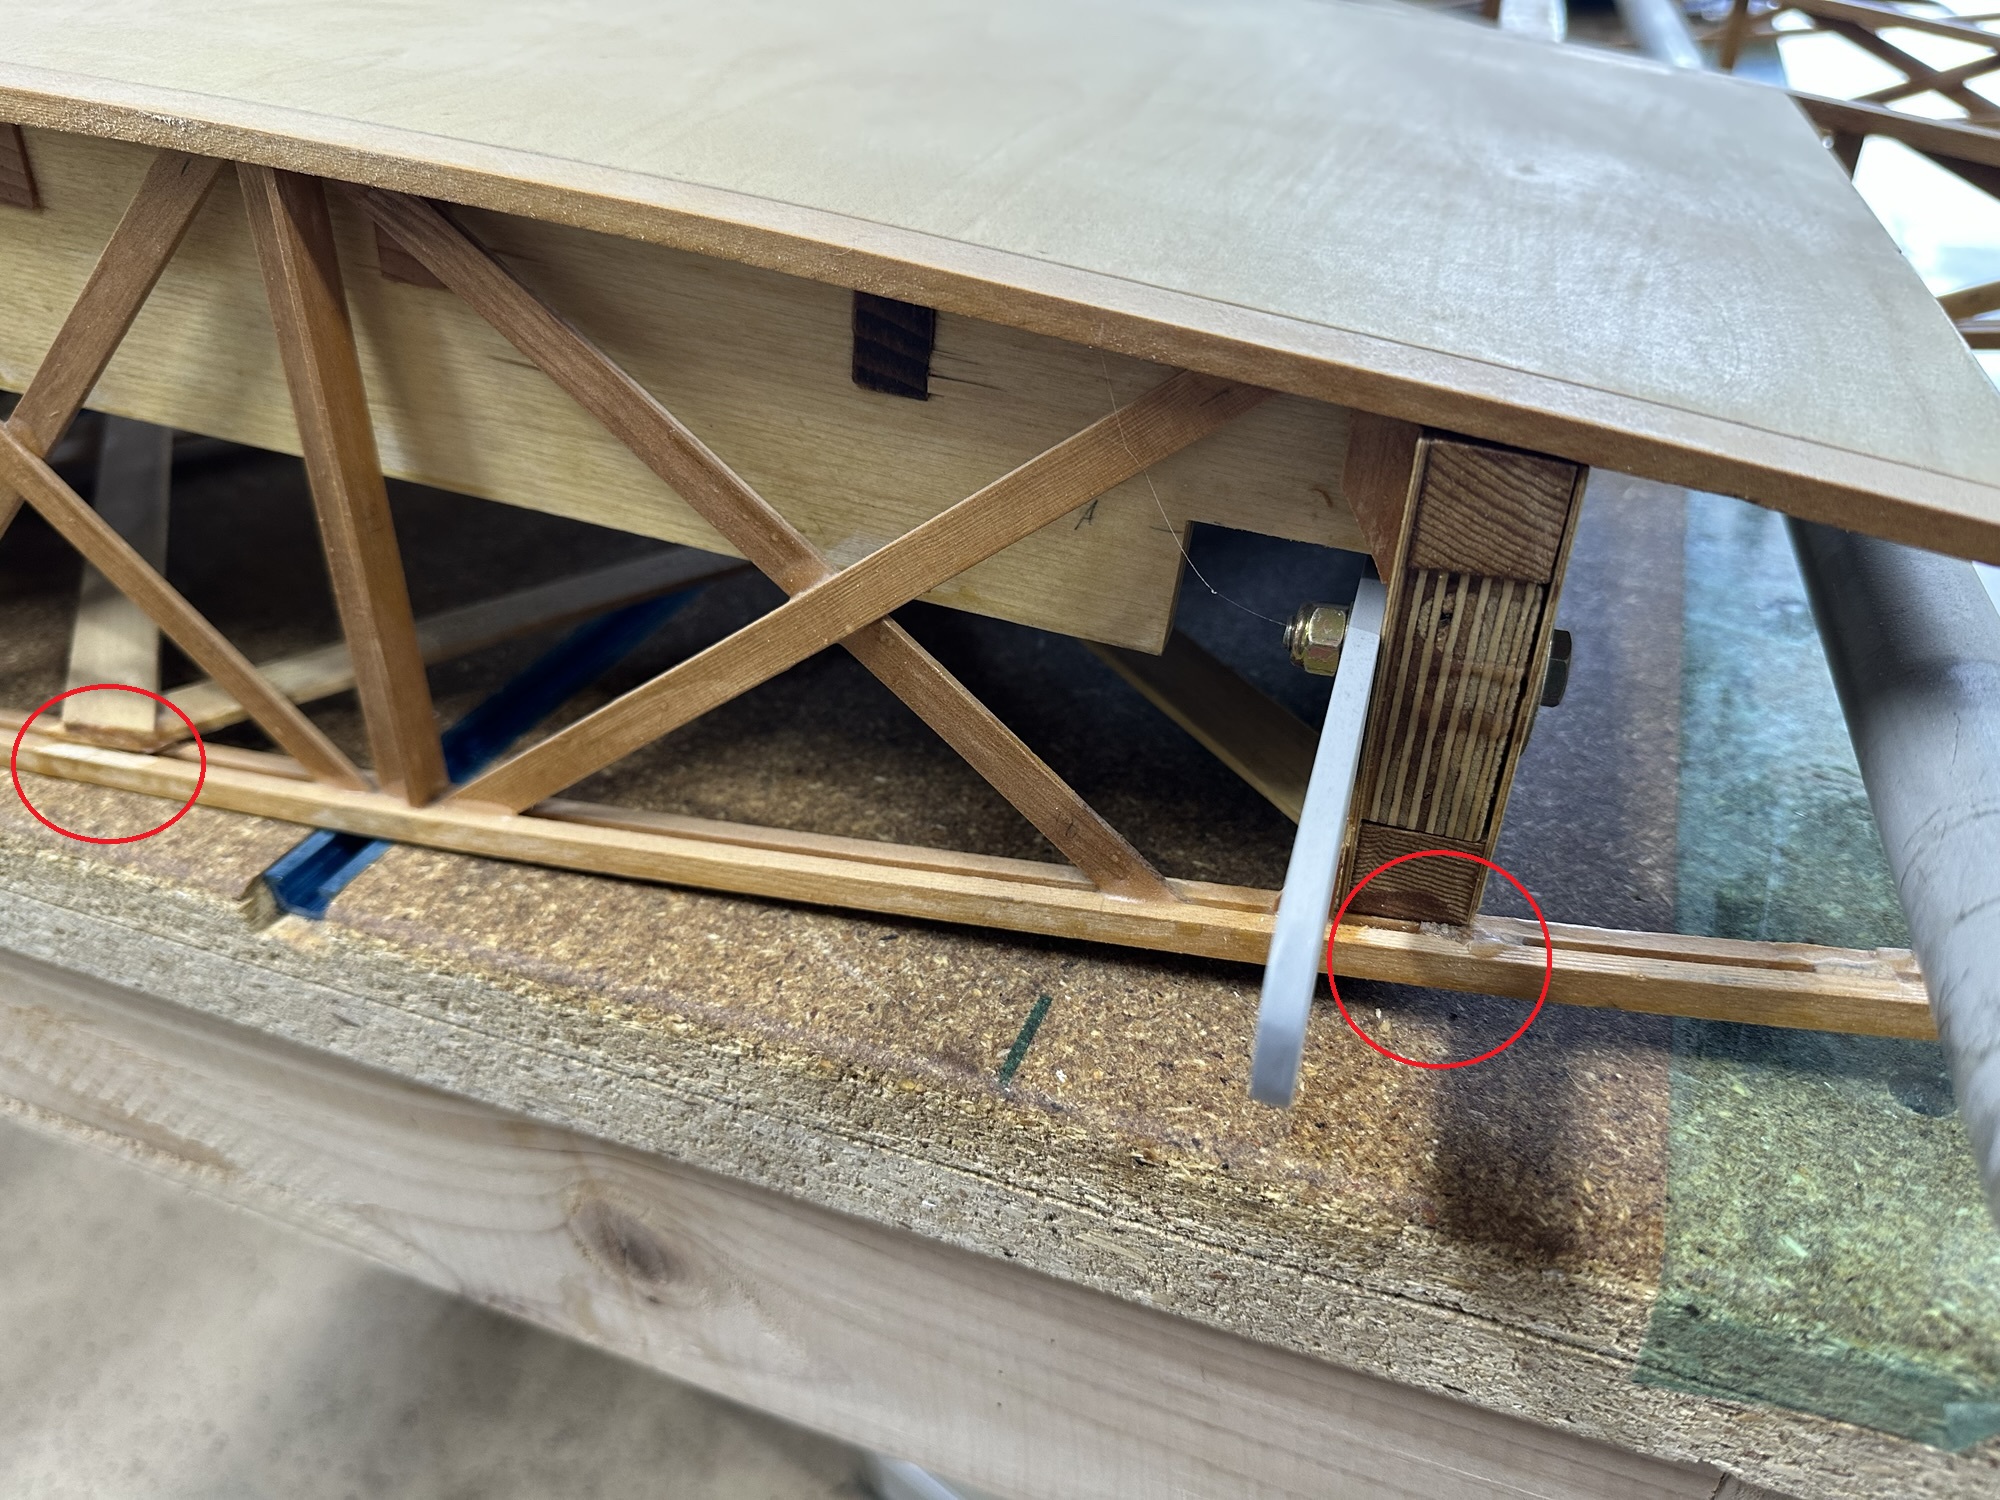
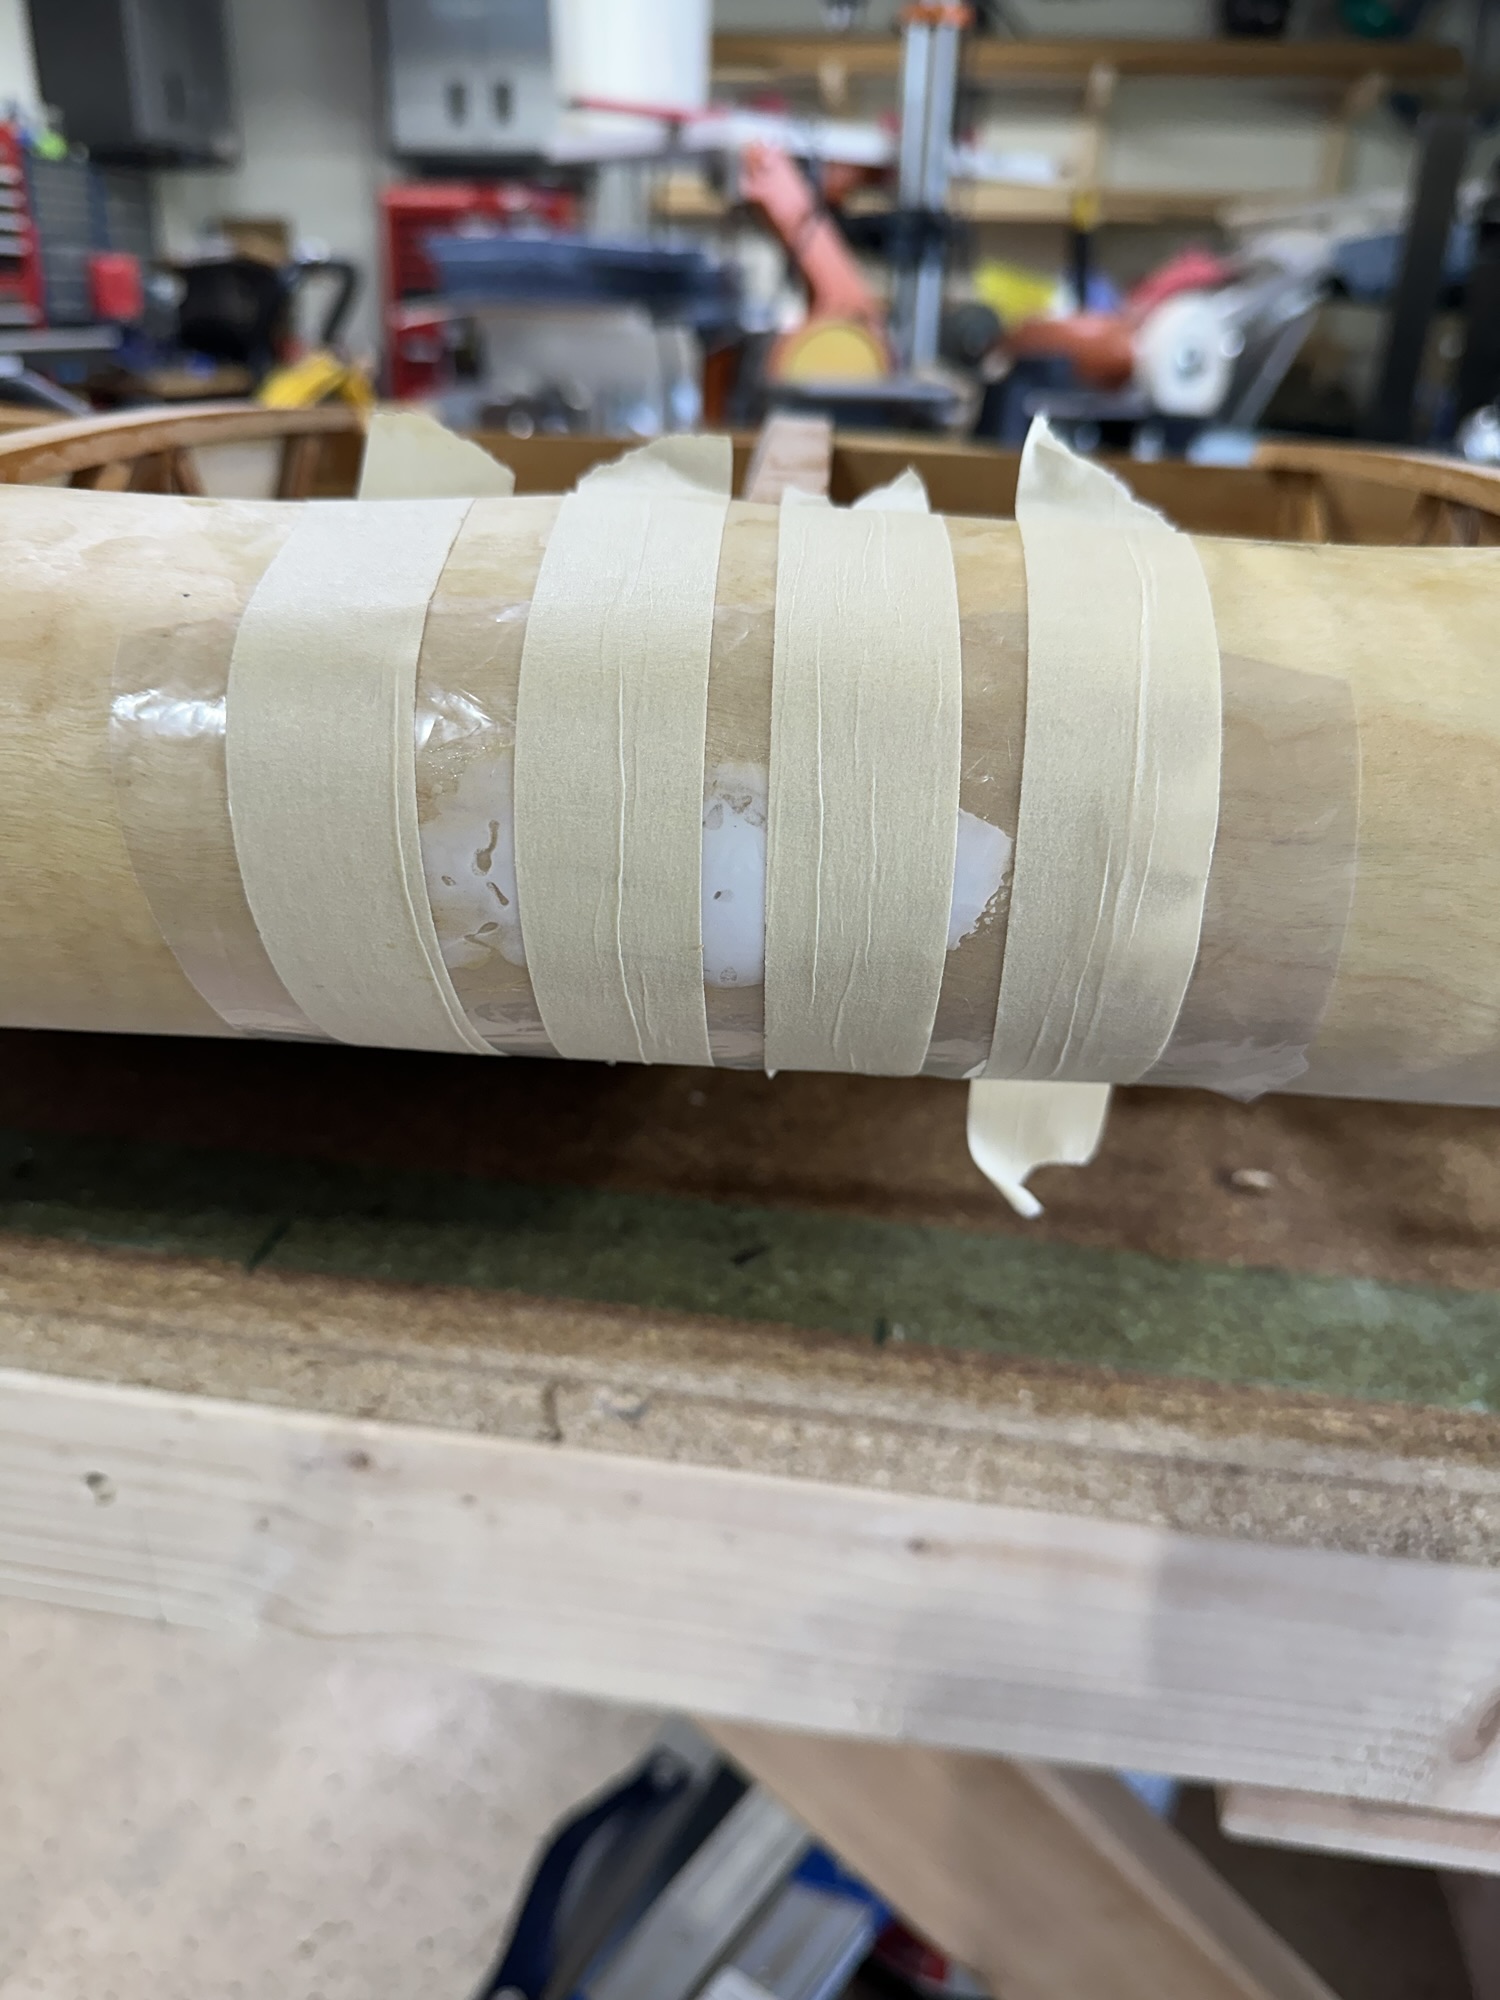
A few months back, I accidentally punched a hole in the aileron nose skin. I had glued a patch over the hole, but it needed a skim coat of epoxy and micro filler to smooth it out. I did that, and used the left over mix to fill in the gaps between the two plywood wing walk skins, and a little gap along the edge where the wing walk skin meets the root rib. Next step is to make the final torque tube bearings, I think, and wait for a hardware order from Aircraft Spruce to finish attaching the last of the brackets – then this wing is ready for storage and eventual covering.
Fixing transit damage
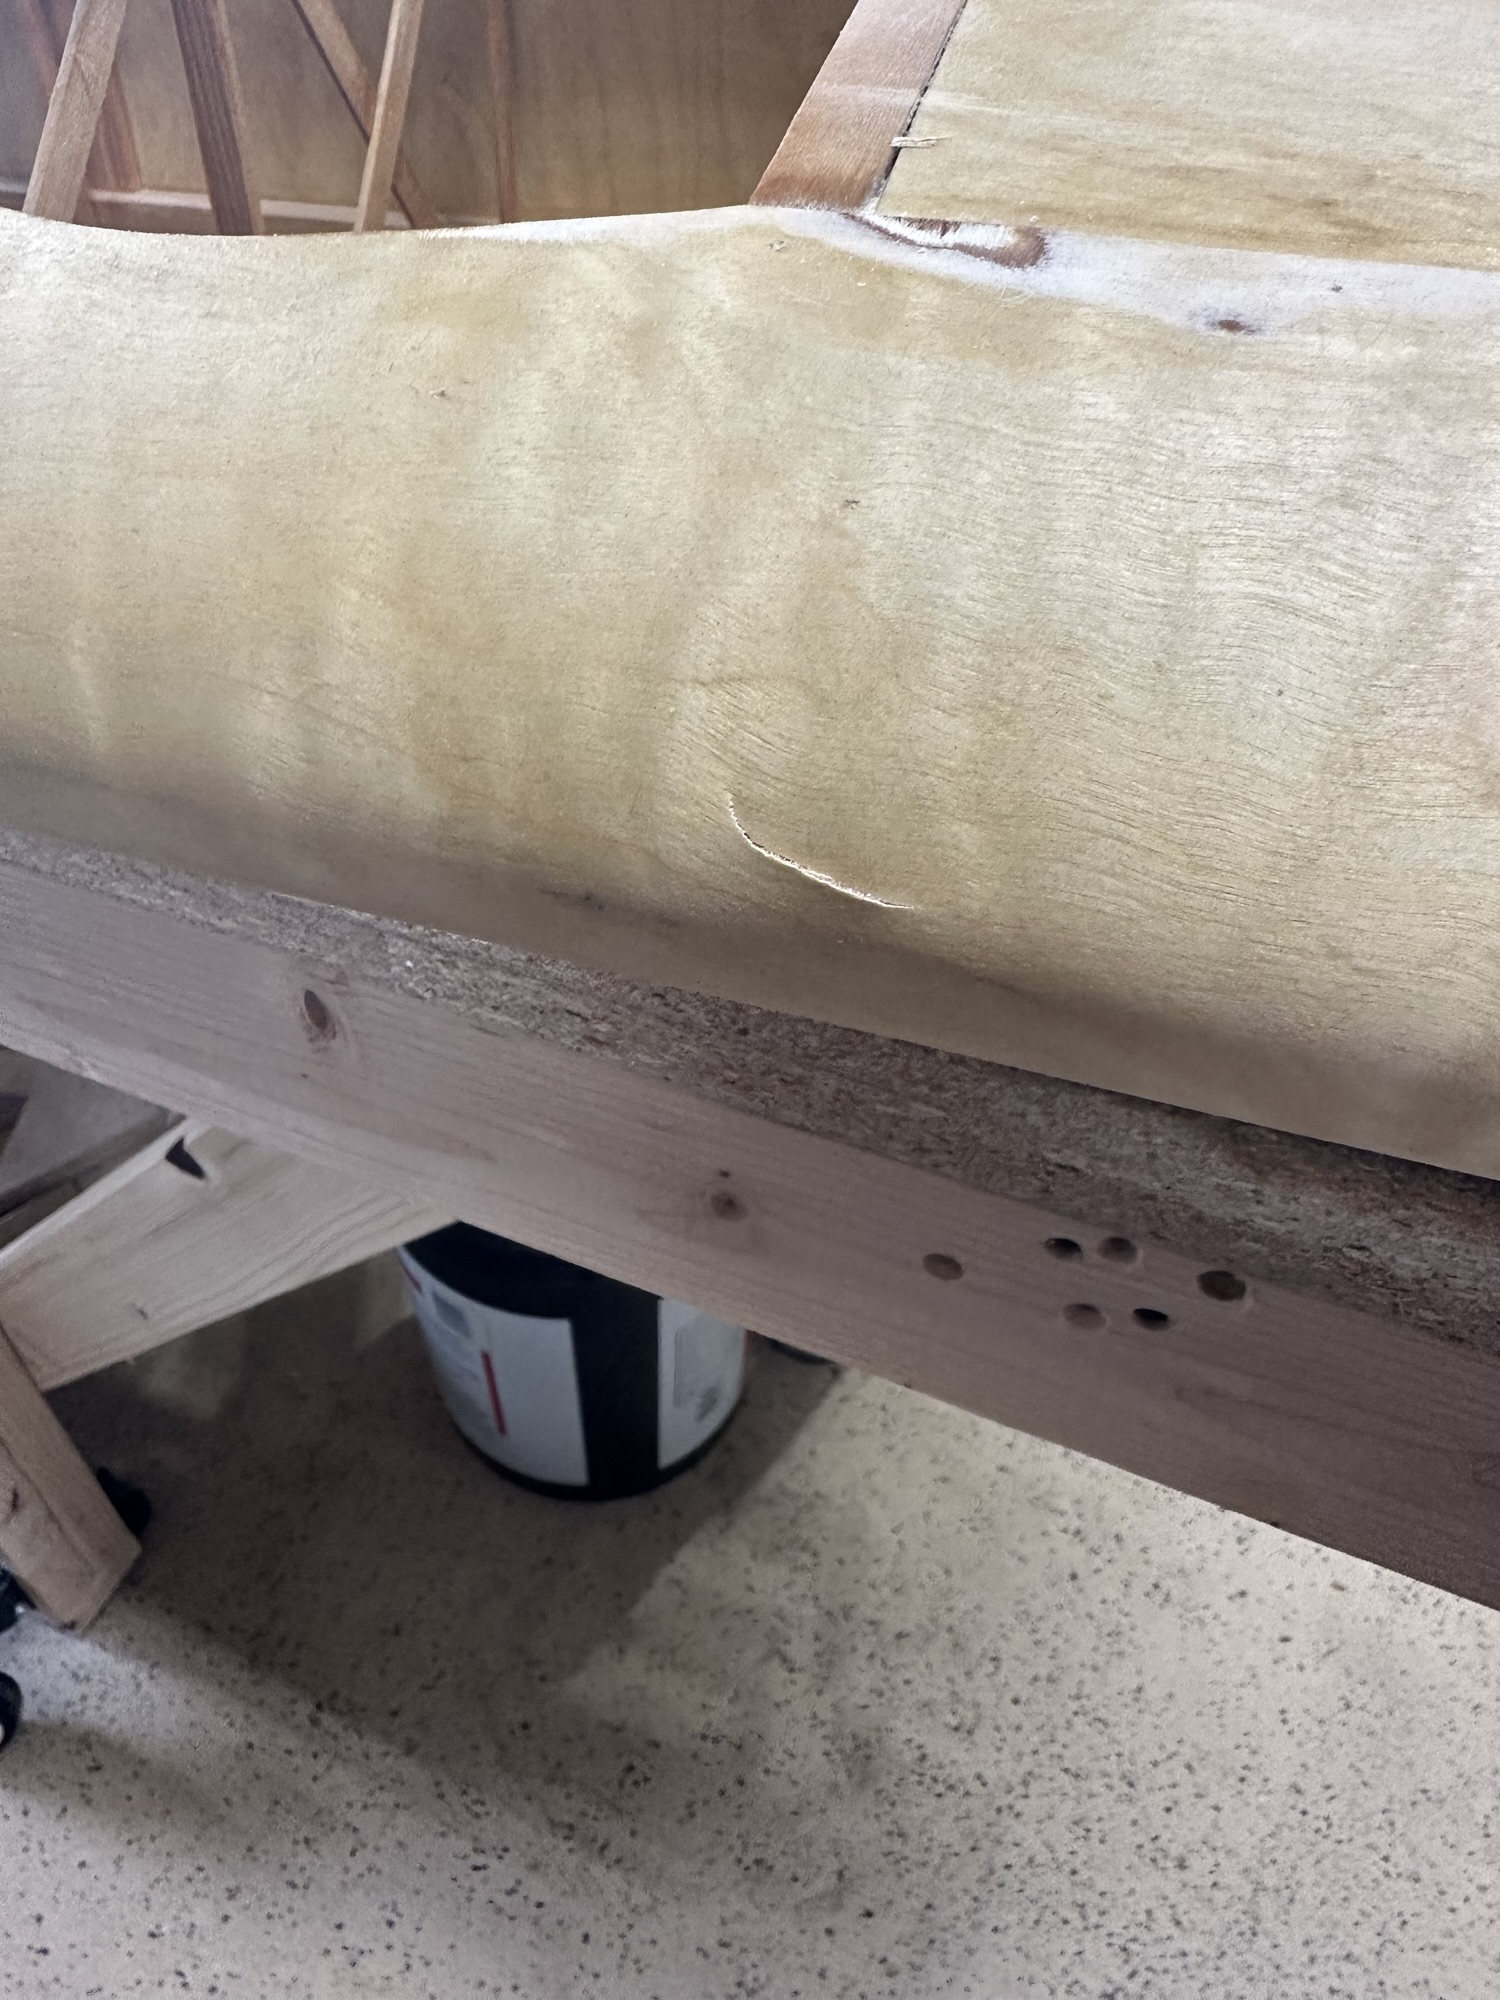
As we were moving the wing, I managed to snag the root rib on the corner of the workbench at Stu’s shop while we were getting it positioned to load into my pickup. This popped a couple of glue joints loose, both of which pulled the wood apart rather than just the epoxy breaking, so that’s as it should be.
I also found an inch long crack in the leading edge plywood in the second rib bay, forward of the wing walk. I don’t know for certain if that happened during the move or at some time prior, when we were moving it off the bench. Doesn’t matter. Unfortunately it’s right on a curved part, and I was afraid I’d do more damage if I got too aggressive trying to pop the edges back together. I laid a layer of heavy fiberglass cloth on the inside of the leading edge. Once that was in place I buttered the outside with epoxy and micro balloons to make a filler, and taped plastic over it to keep it from sagging or dripping. I can sand it to the correct contour. I may add a second layer of glass underneath, I haven’t decided yet. What I did NOT do was remember that I had another place that needed a layer of micro (doh!) where I could have used the left-over I had. I didn’t realize this until the epoxy was well past the workable stage. Geez, I probably wasted two cents’ worth of material because of that!
It’s good to have the wing here; this all took less than half an hour but will take at least 8-12 hours to mostly cure. I can go back out this afternoon or evening and get more done.
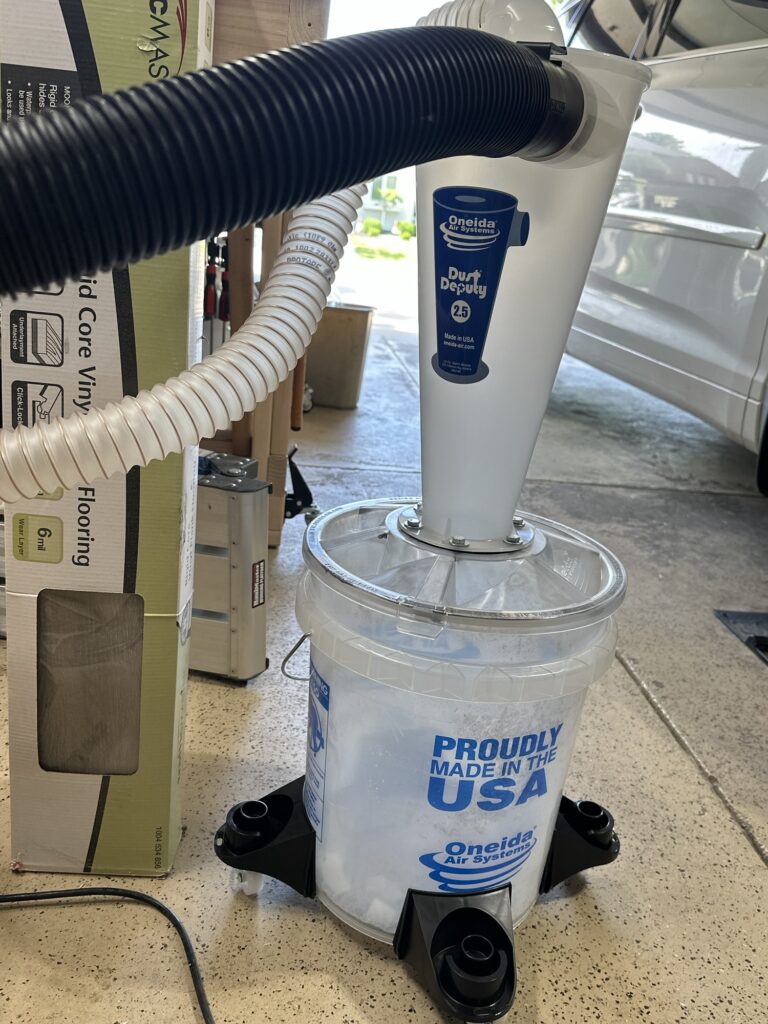
Also, yesterday I picked up a Dust Deputy cyclonic dust separator for the shop. It was brand new in the box, and I got it for about 1/3 price. A welcome addition to the workshop for sure.
Bench tops and bottoms
On Thursday I picked up the particle board and plywood and Stu helped me — er, that is to say, Stu cut the sheets up for the top and shelf of the new bench. He’s got a massive SawStop table saw, and he’s a virtuoso using it. It seems to be a challenge for me to rip a 2×4 in half on a table saw; he can zip a 4×8 sheet of 3/4 particle board through that thing like it was a sheet of paper. I try not to use his saw, because even though I’ve never in my life hit the blade of a running saw with a finger, sure as hell I’d trigger his SawStop and add the ignominy of replacing a blade and cartridge to my list of accomplishments. I have, however, found that when I do use his saw things go a lot easier. My old table saw was a challenge to use — for most of the time I owned it the fence wasn’t parallel to the blade, and once I got that fixed the blade was dull. It was actually halfway decent in the end, for smaller pieces. Once I got it finally set up and a brand new carbide blade on it, some asswipe stole it… so now I get to buy new, some day when I have a place to put one. But I digress.
The tops are two layers of 3/4″ particle board, glued and stapled together. The lower shelf is 1/2 plywood, mainly because I had to buy some anyway for another project. The shelf is in three sections, so I’ll need to join them with some scraps of particle board or something. I plan to build some sort of storage to slide in on top of that shelf.
My casters and levelers also arrived Thursday afternoon, so on Friday I went over and installed those. I also cut the plywood for the lower shelf to fit, cut some corner blocks to keep the top square, and made the diagonal supports for the two extensions. Those are lengths of 2×4, notched on the lower end and with a double 45 cut on the upper end, that will brace between the lower shelf support and the top of the extension on either side.
The last thing to be done before final assembly is to flatten the top. As the bench was built with dimensional lumber on top of a workbench with a carpeted top, it’s “more or less” flat but the 2x4s aren’t perfect by any means. In a perfect world I’d have used a 6 foot jointer and a thickness plane to turn them into perfect boards before building, but I didn’t have access to a jointer. I know for sure one of the long edges of the table frame has a hump in it, and I want the top to be FLAT. I’ll evaluate how much needs to be done to make that a reality and see how I’ll make that happen.
Scallops and metal work
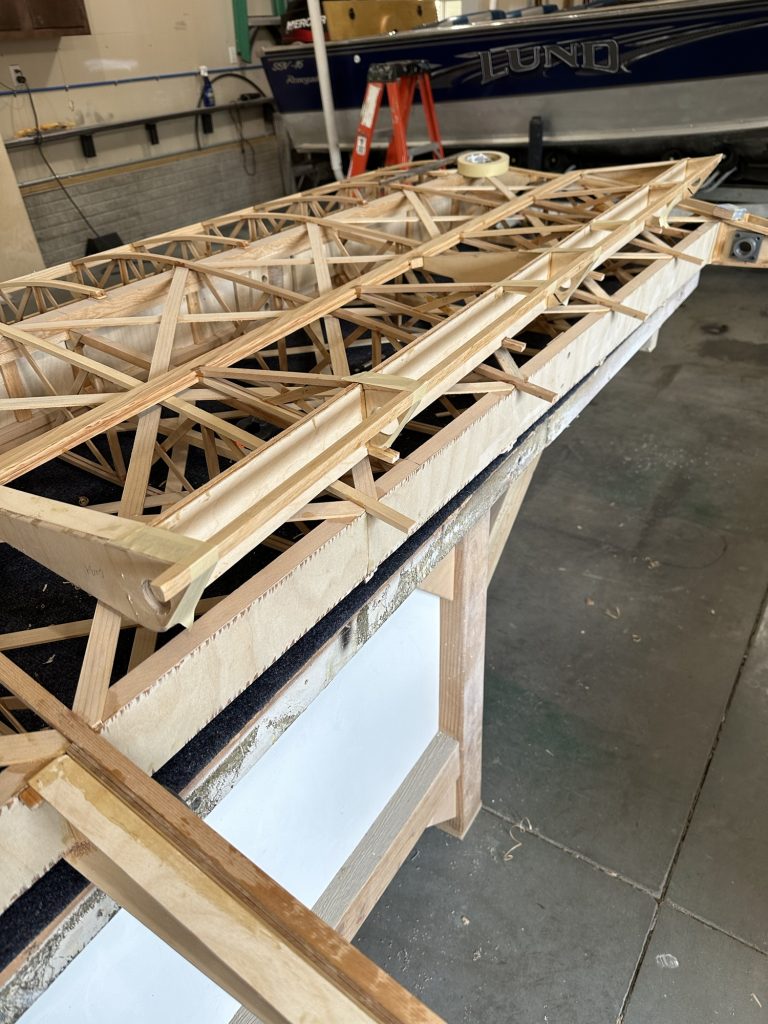
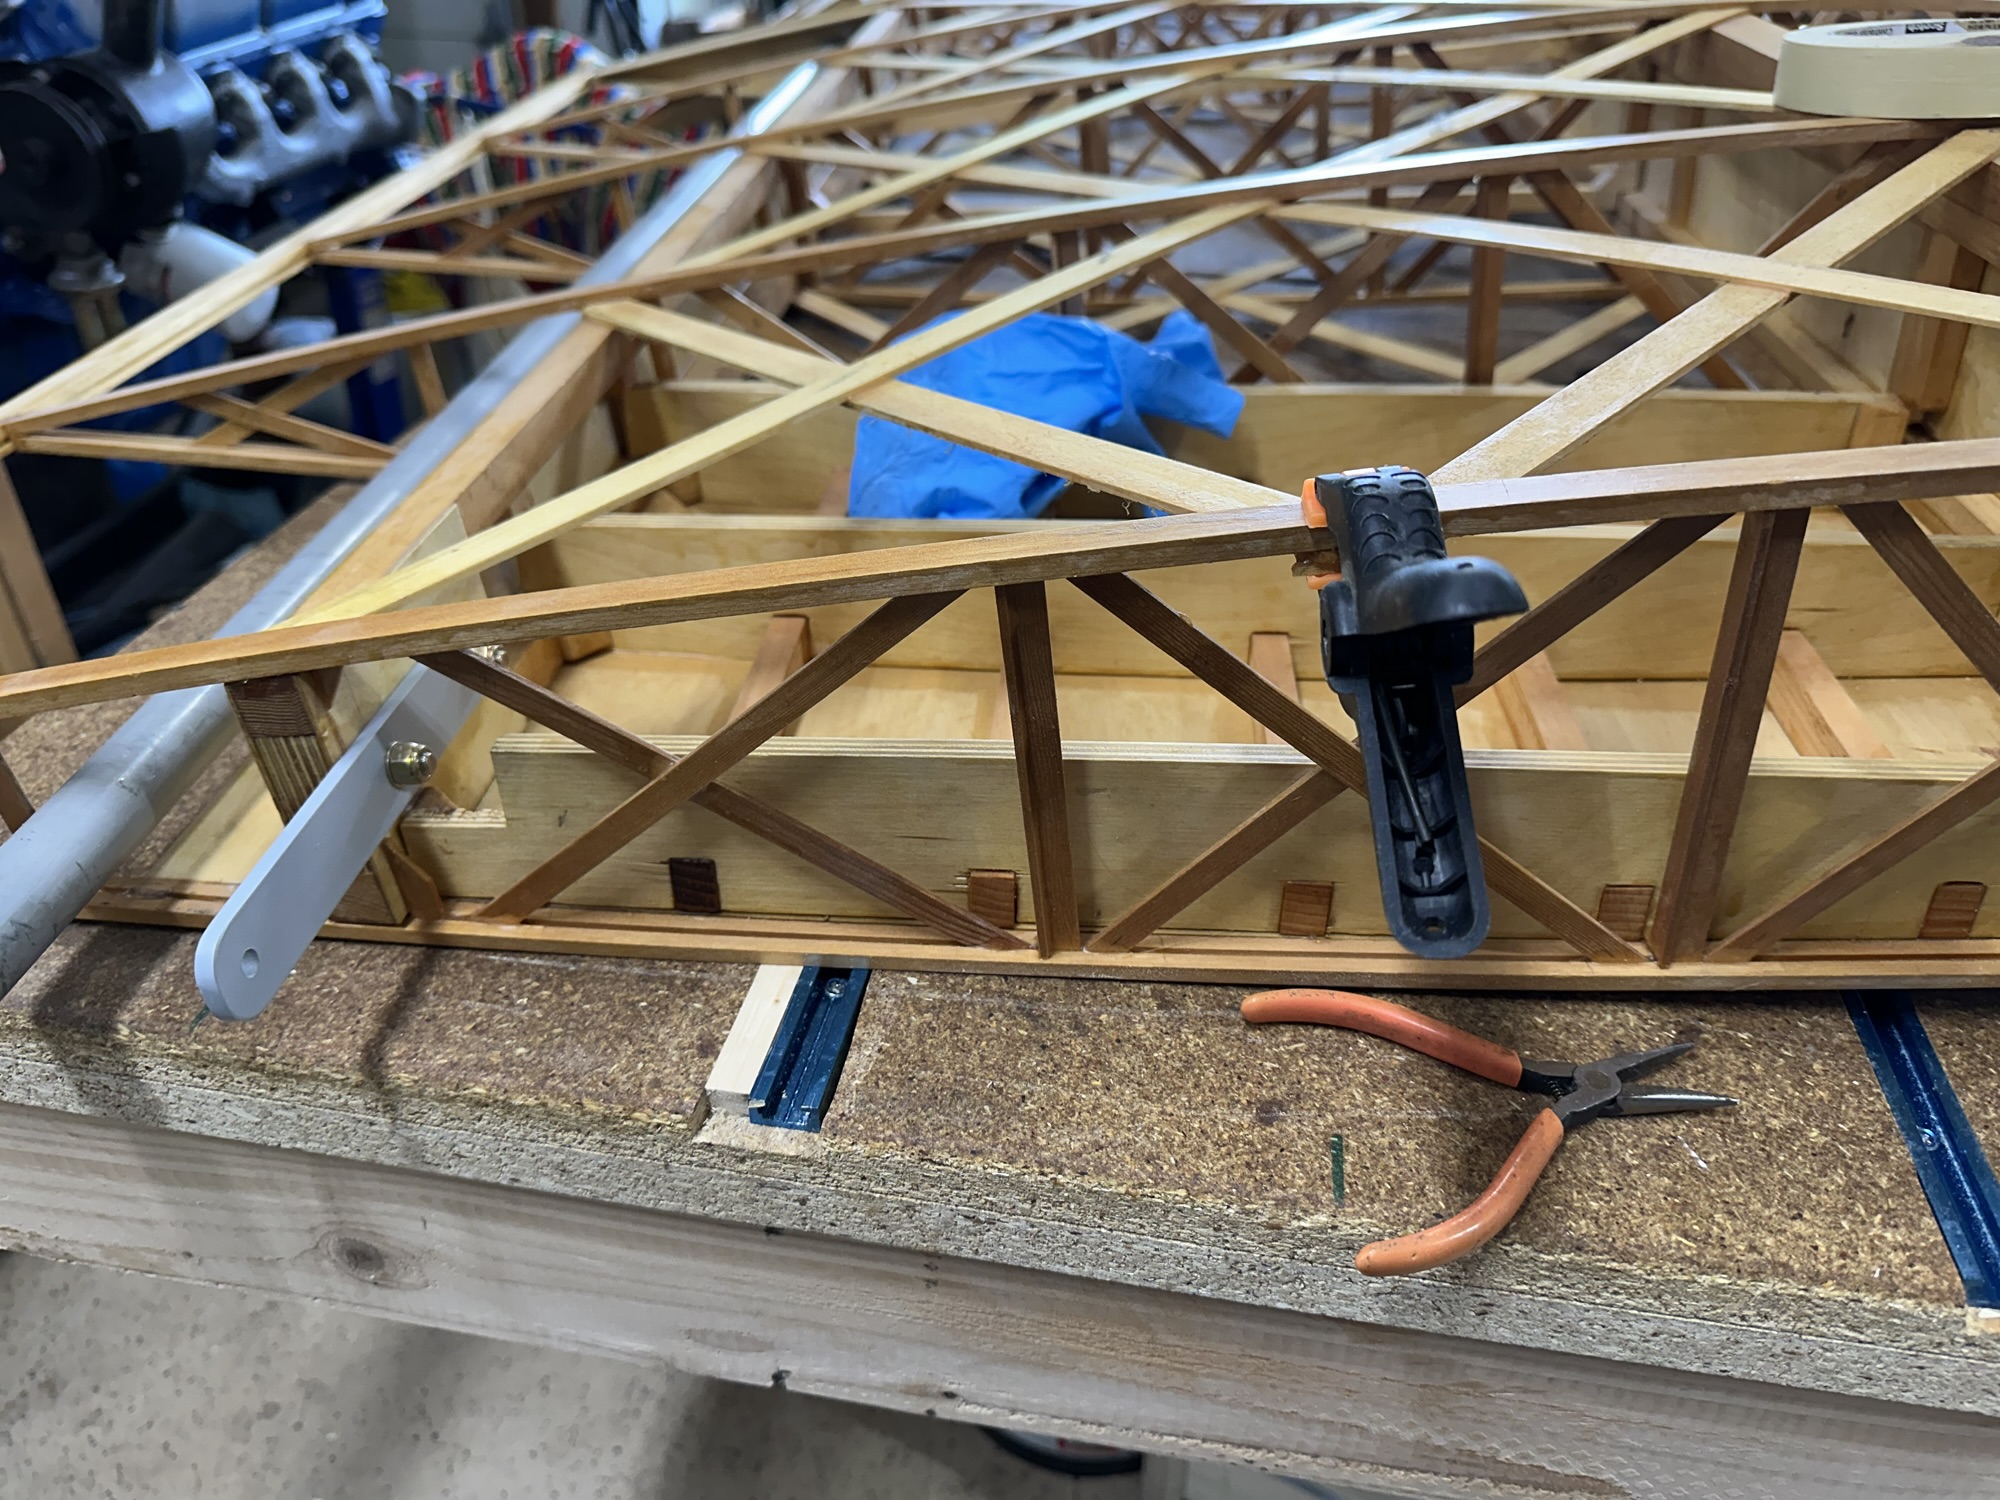
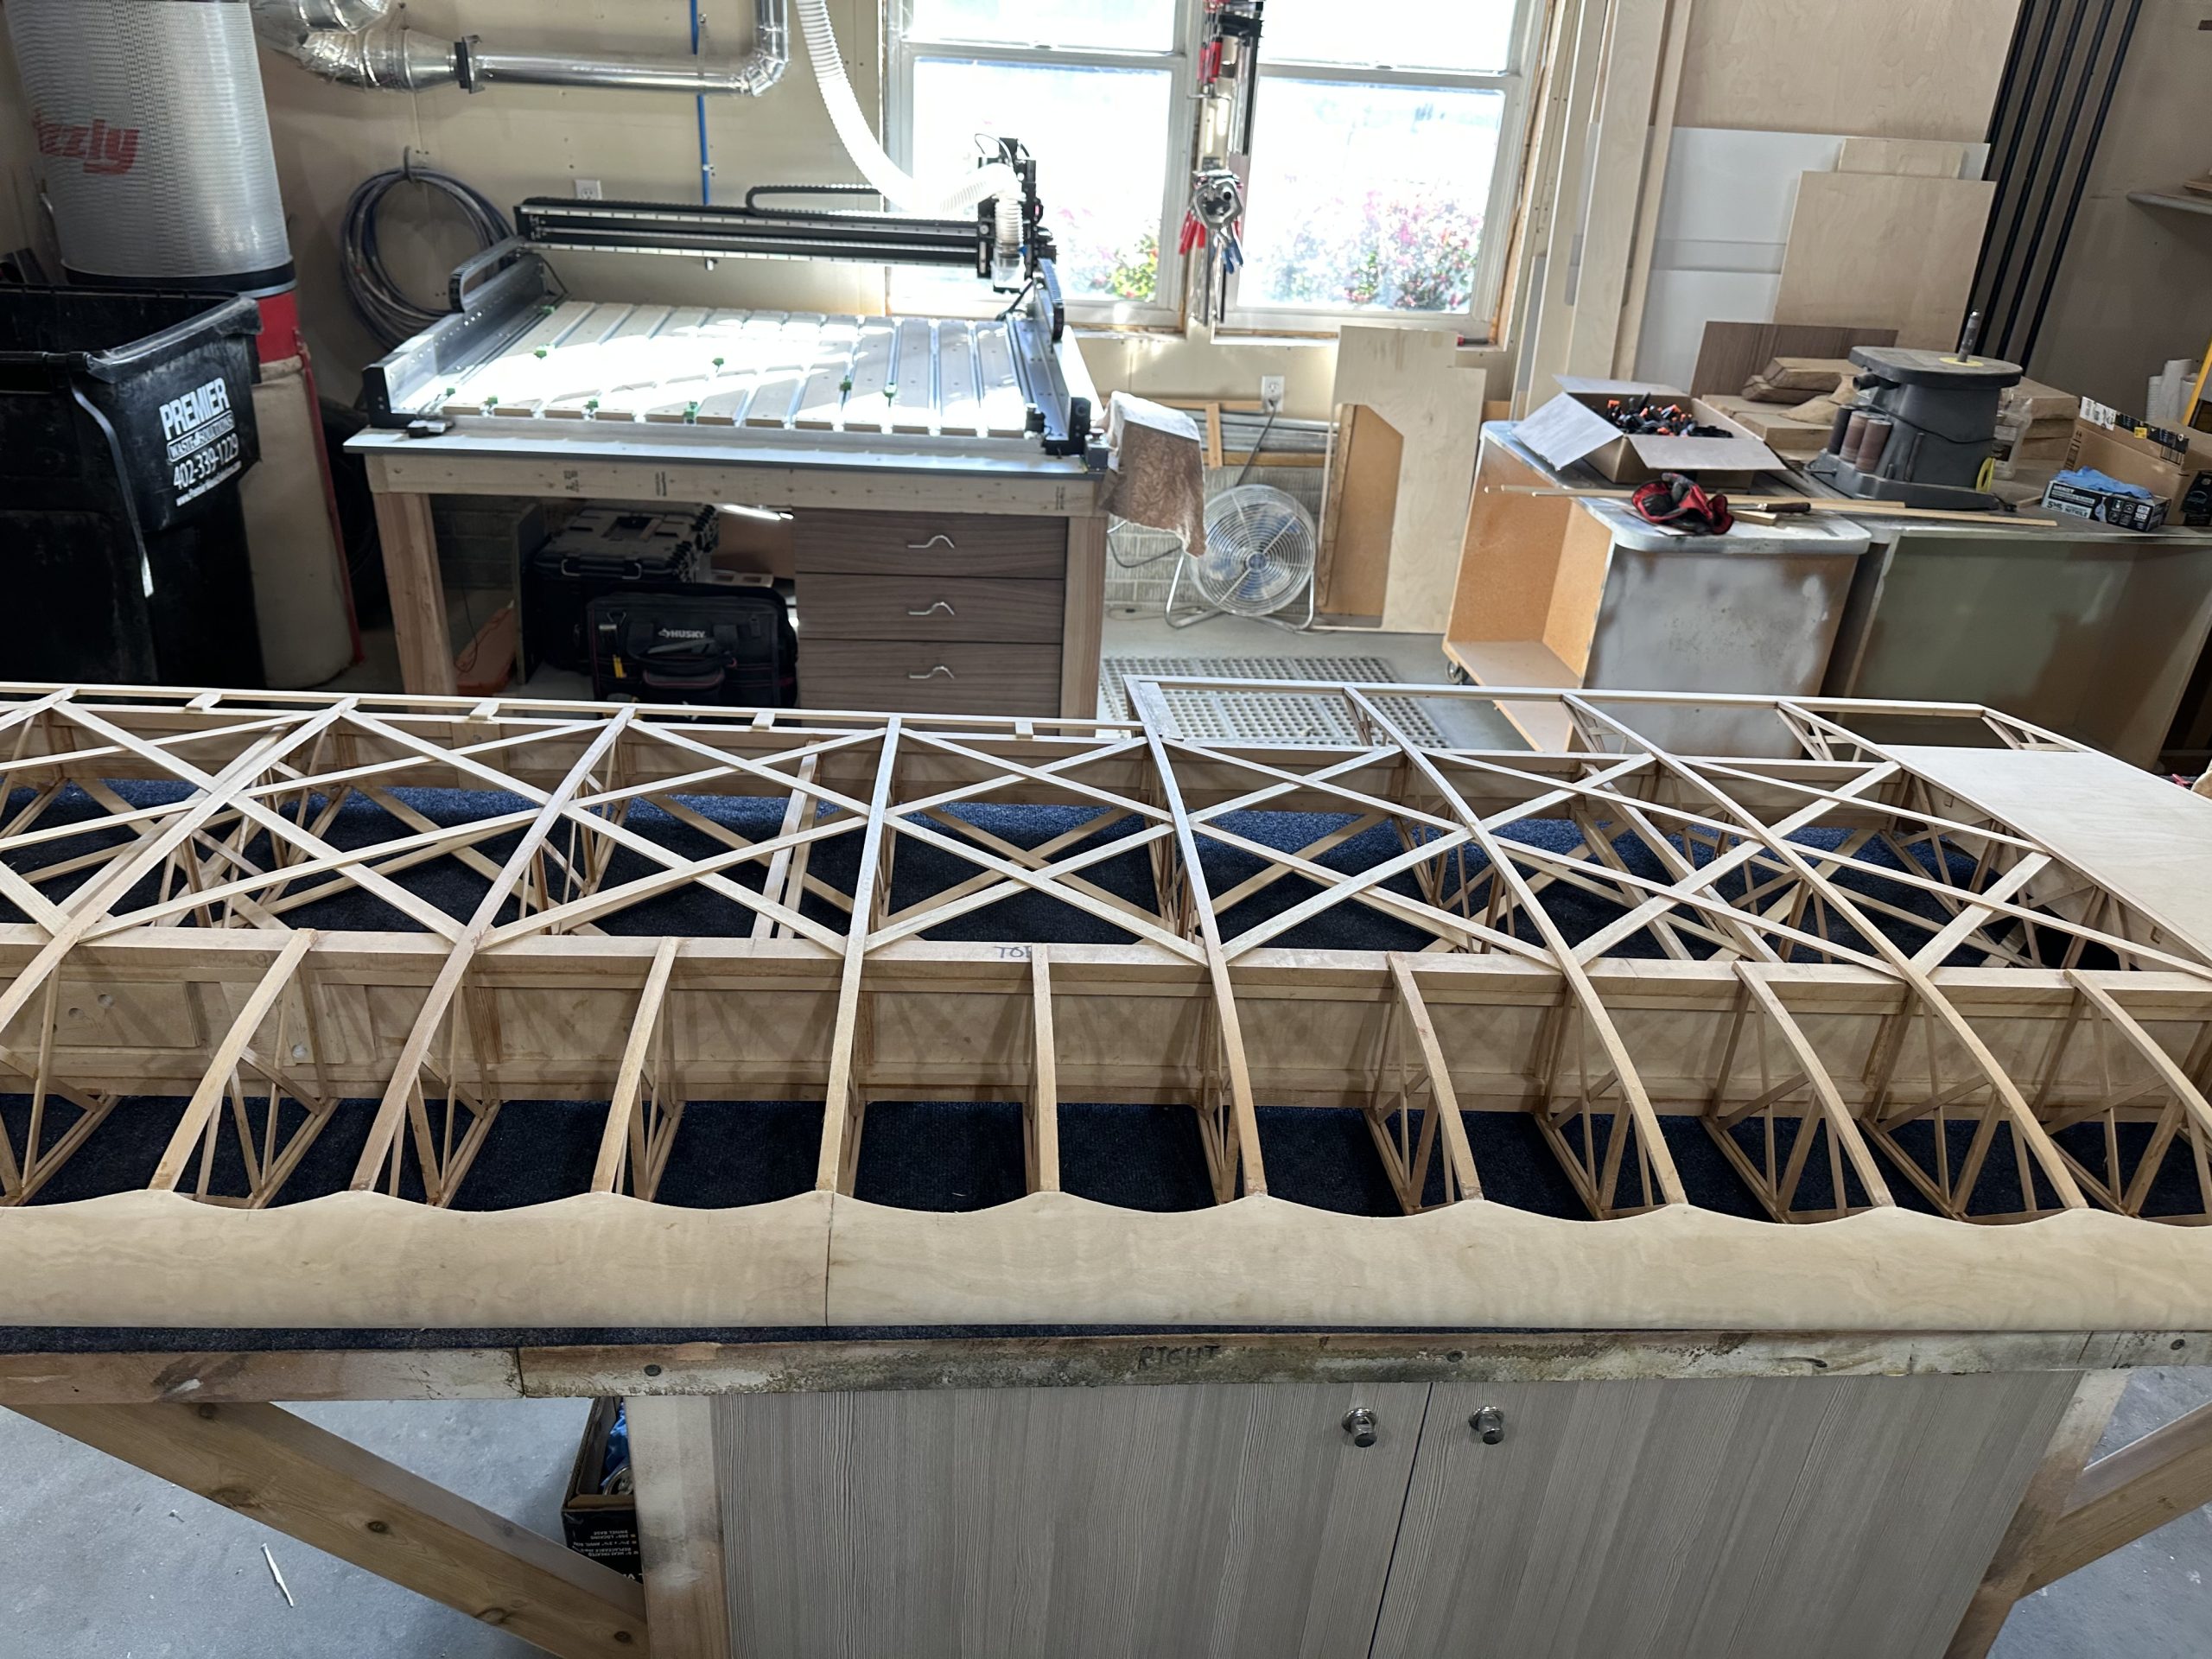
Today I had Stu help me mark the leading edge for the scallops, and got those cut. After getting home, I spent an hour or so rounding up and drilling all of the aluminum wing brackets I have cut so far, which is most of them — all but a couple, I think. I seem to recall I ran out of 2024 with one or two left to go. Anyway, I figure I should get them all done up. I’ll need to cut bushings, mount these, and get the fabric stiffeners cut and fitted — along with varnishing the wings — before calling these two wings “done”. Oh, and I’ll need to get the final torque tube bushings milled out and mounted.
Some detail work
So many little things left to do. Today I made a little jig to mark the leading edge plywood for the depth of the scallops that need to be cut, and marked the center of each bay. I did some sanding on the wing walk to bring the rib caps down flush with the plywood skin — it’s not much to remove, just a few thousandths, but I want it smooth. I glued the LE plywood to the wing walk plywood, since that hadn’t gotten clamped well enough and the edge was loose. I’ll sand a tapered transition on that later.
I’ve got a dozen or two micro pins that I tried to use to stick down some 1/8 spruce to hold down the leading edge plywood. That failed, leaving the pins sticking out, They need to be driven in so they’re below the surface, so I got a few of those done with a center punch. I have a small pin punch I’ll use to do the rest tomorrow when I get back at it.
Aileron skin
Over the past couple/few days I’ve glued the bottom skin on the aileron, then attacked the top nose skin. Trying to get the lower and rear edges of the skin glued down at the same time is, I have concluded, a fool’s errand. I ended up gluing it to the flat front portion, then doing the top edge separately using a long piece of flat board to clamp it to the tops of the ribs and the aileron spar. The front edge I’ll do separately as there’s not a good way to clamp it in place.
A couple days’ work
Saturday: Ripped the CW37 parts down to the proper 1/4″ thickness. These are the strips with one beveled edge that go in the top and bottom of the aileron bay. The parts I got are 1/2″ thick, which won’t work anywhere. Ripped them all down to 1/4″ so I don’t have to do that again for the other two wings. With them cut to the right thickness, I cut one to length and glued it into the bottom of the aileron bay.
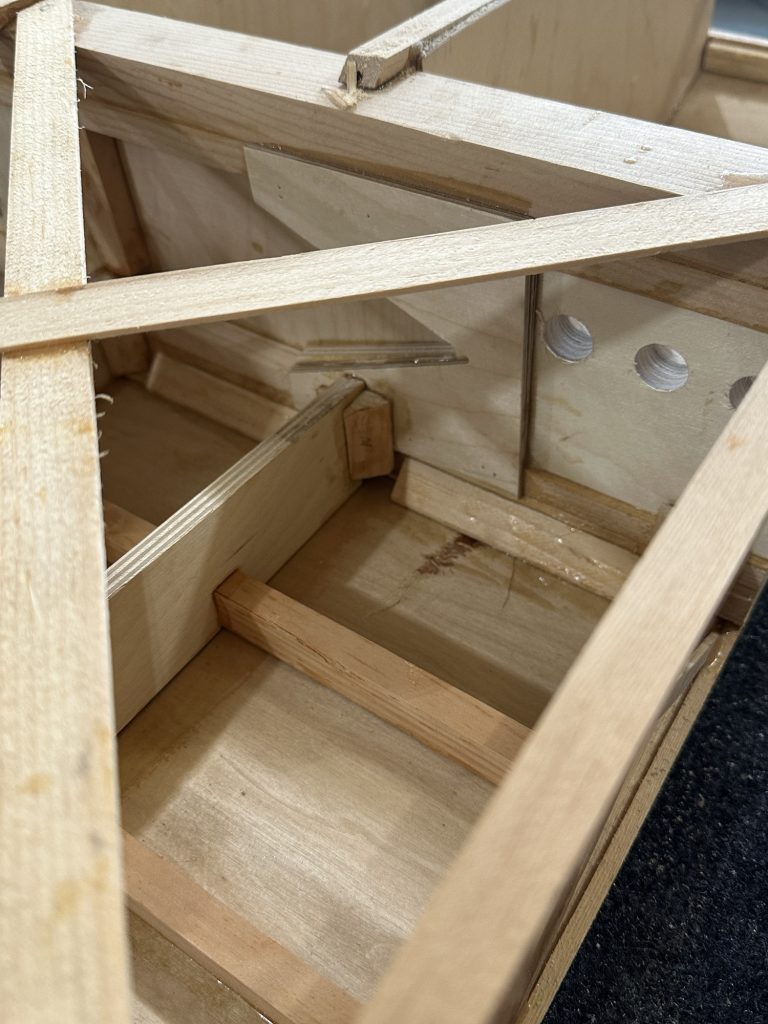
Then I discovered (or confirmed) that I’m an idiot… there were a couple of missing aileron pieces that I found in the bottom of the parts crate. Had I installed them in the first place, the little triangular braces would not have been needed. It’s no big deal; I was able to slot the nose skin support spar and get them glued in.
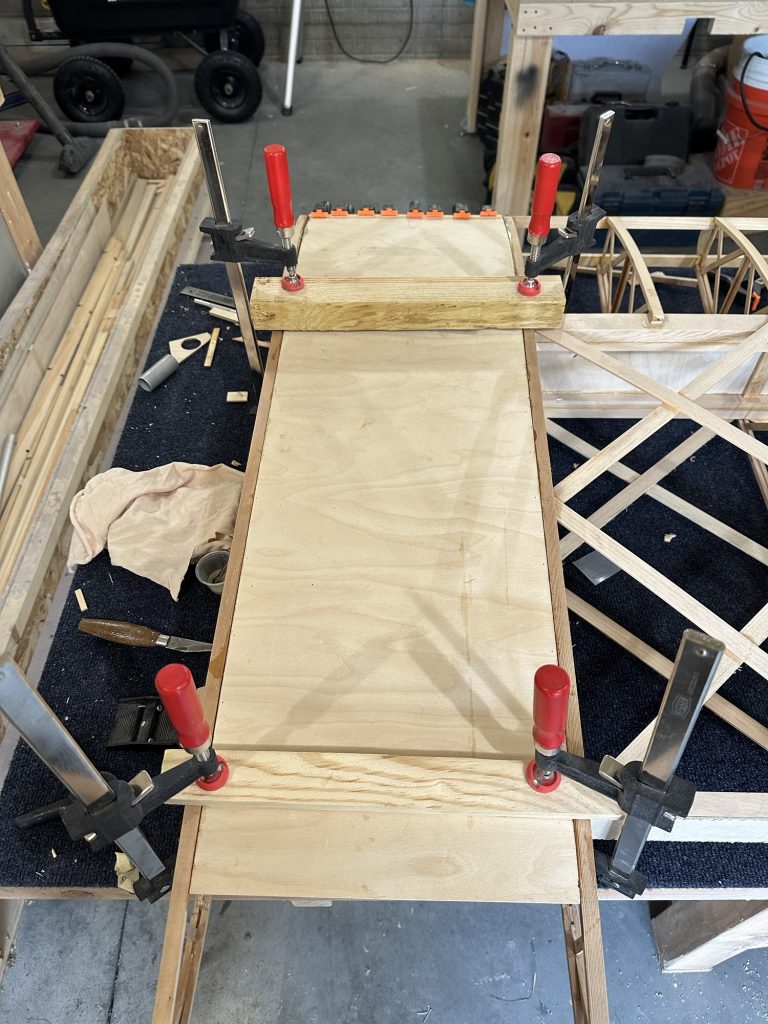
Today: Got the nose skin plywood glued onto the front of the wing. I think there are now about 70 or more clamps on the wing. I had planned to glue the top aileron nose skin in place, but that’s going to take some more work. I see no way to get that ply to stay attached all the way around without some sort of clamping jig. Stu and I figured out a good arrangement, but I’ll need to get some MDF, ply, or pine scrap to cut them out of. I need seven sets of clamping blocks for the nose and trailing edge, then I can use bar clamps to hold everything in place.
I also found that a few batches of glue I mixed up over the past week or two were probably not the greatest. My T88 had started getting cloudy — a sign that the resin is starting to crystallize. Some of my test pieces failed at the glue joint, albeit with a lot of force required, instead of the wood failing before the joint. I’m not really concerned about this. All of the affected glue was used for either the wing walk or adding corner blocking and gussets to the wingtip bow. The wing walk pieces are fully supported and there will be no bending, twisting, or pulling loads applied. The glue is strong, just not AS strong as what I’ve used everywhere else.
I have since tossed the syringe of clouded resin, warmed the rest of my resin supply until it’s crystal clear, and verified that test pieces now all break well into the wood rather than at the glue line. I’ve tried spruce to spruce, which tore apart well into the wood, and spruce to plywood which ripped the plywood apart.
Bracing and gusseting
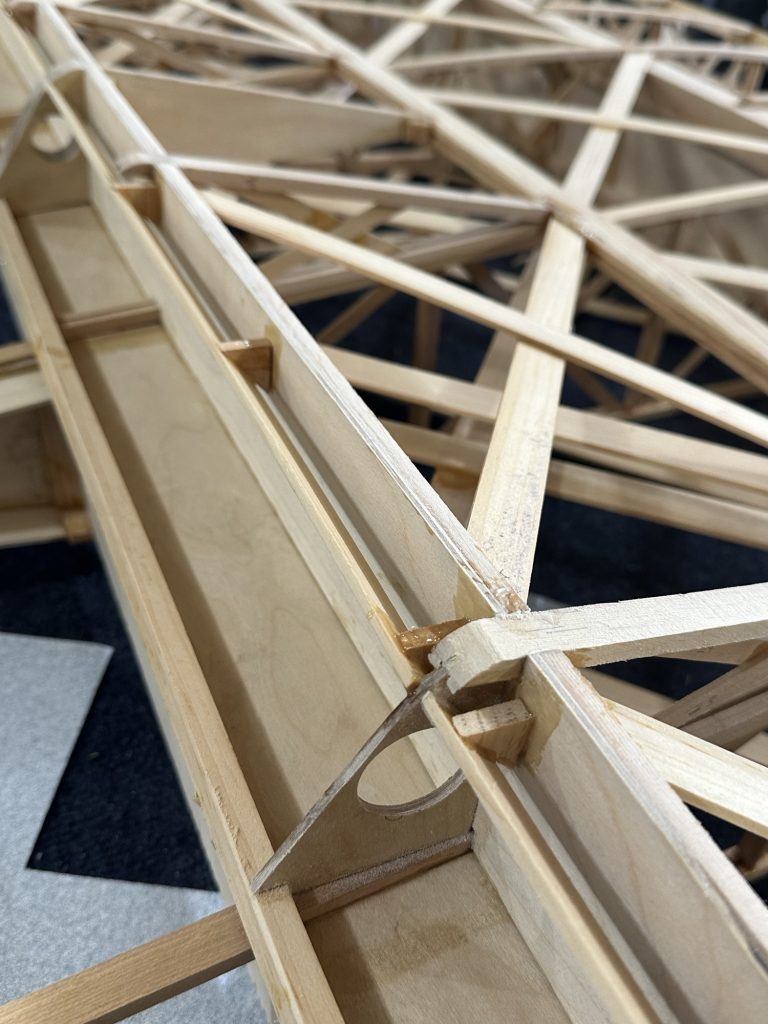
I got all the clamps off of the aileron this afternoon. Everything looks pretty good. Due to the way I had to cut the thin nose skin spar, I felt it best to install some bracing for it. These are just little half inch right triangles that I glued in to keep it straight.
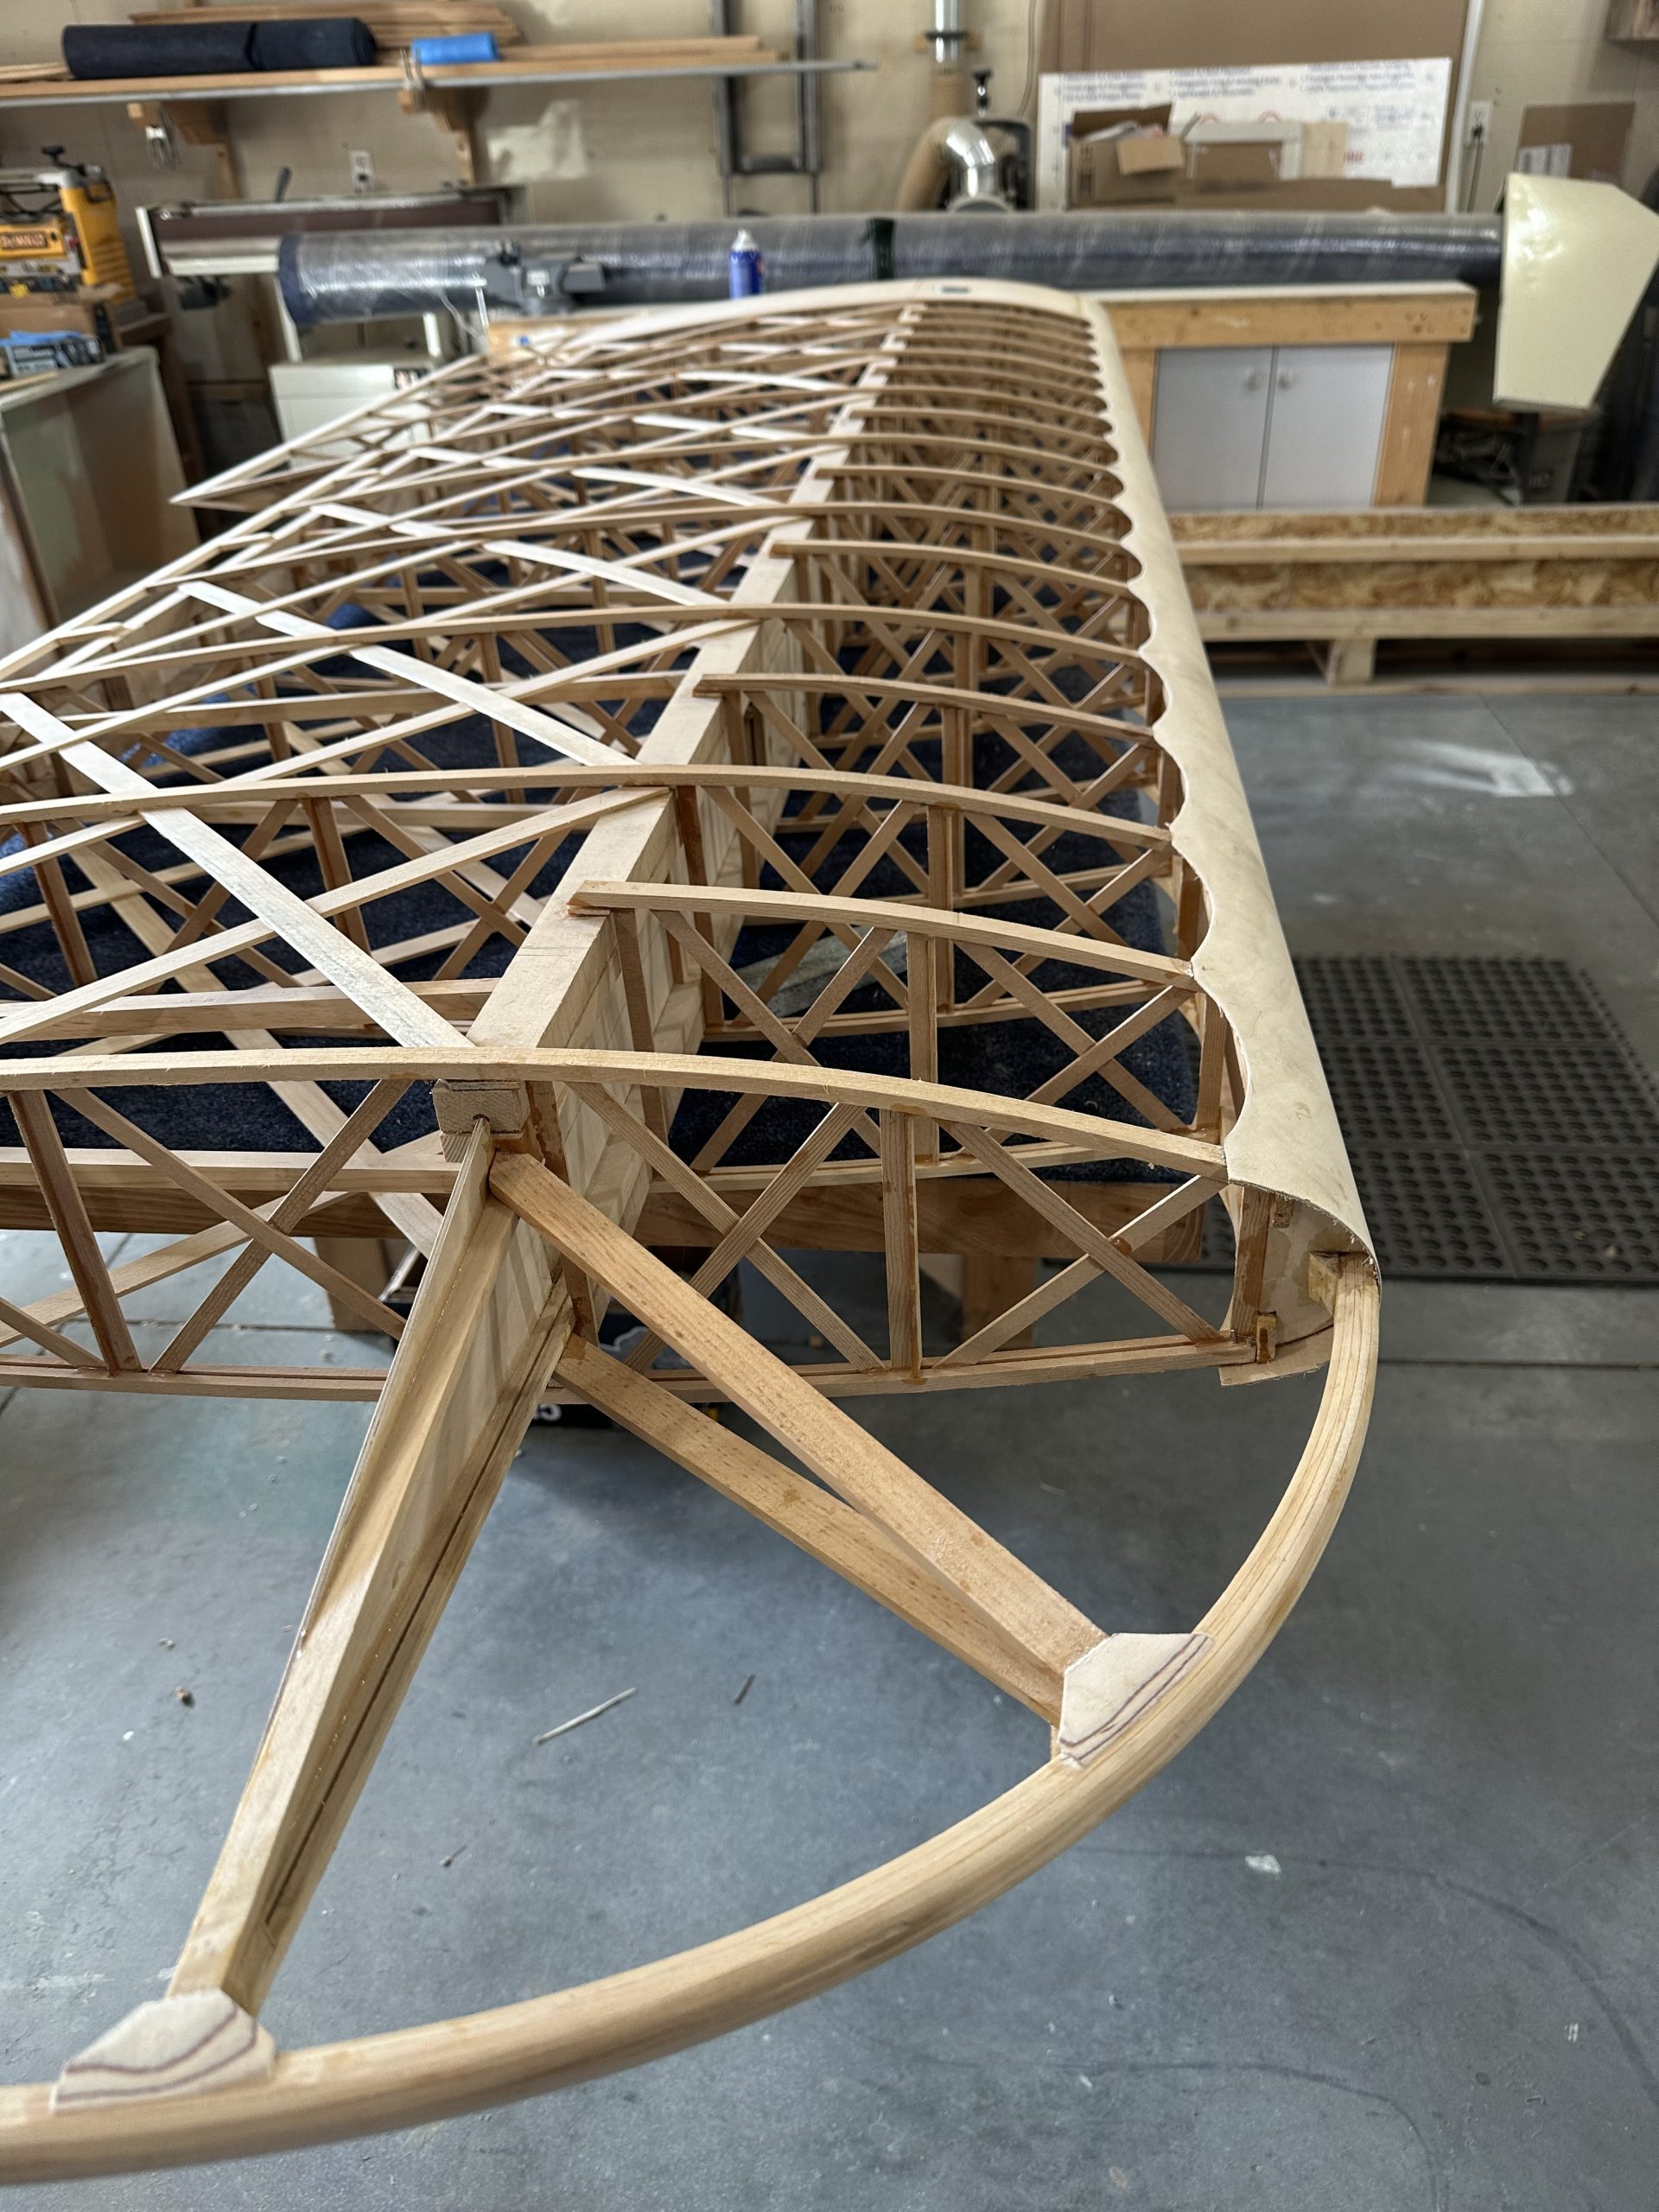
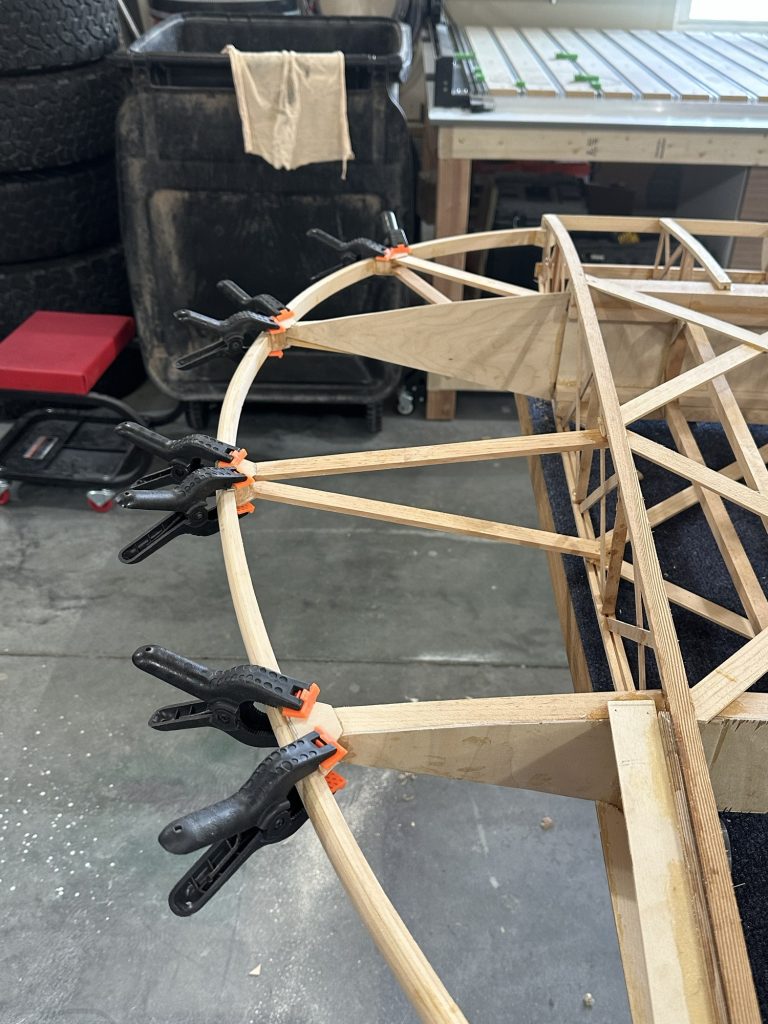
With that done, I removed the clamps from the wingtip bow and sanded down the gussets I’d installed last time. I won’t know if they require any “fine tuning” until I have a chance to get some fabric on it, but I think they’re good to go.
I flipped the wing on its top surface and added some more blocking under the ends of the wing walk. These are just regular corner block stock to tie the plywood to the spar caps. I think everything looks pretty sturdy there now.
With some time and glue left, I sanded down the corner blocks on the underside of the wingtip bow supports. I cut, glued, and clamped the gussets in place and called it a day.
On a roll!
Today I did some work with the razor plane and a new sanding block to get the aileron spar and other bits to their final dimensions. I got the top side geodetic braces cut and glued in place on the aileron. Then I glued the lower aileron nose skin in place – the aileron now has, I think, the maximum possible number of clamps on it.
With that done, I got the blocking sanded down on the wingtip bow supports, and cut and glued the top gussets in place. Only eight clamps there, but I think it’s still feeling the love.
And if you’re a Star Trek: Voyager fan, this makes Seven of Nine days in September that I’ve worked on the plane.

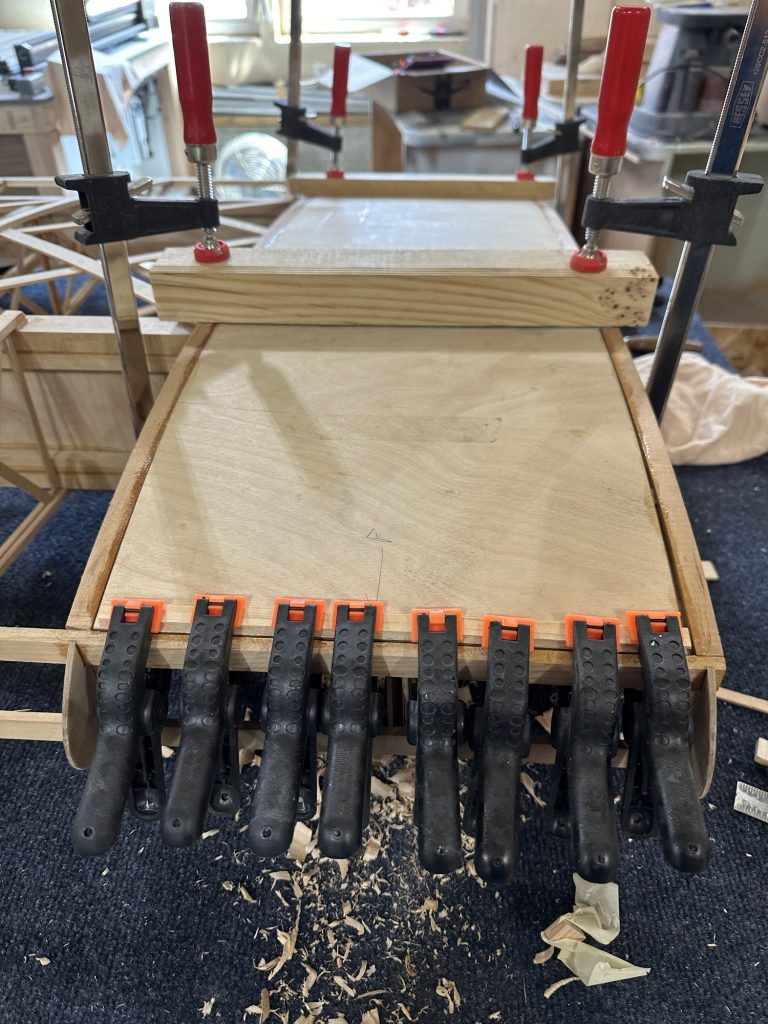
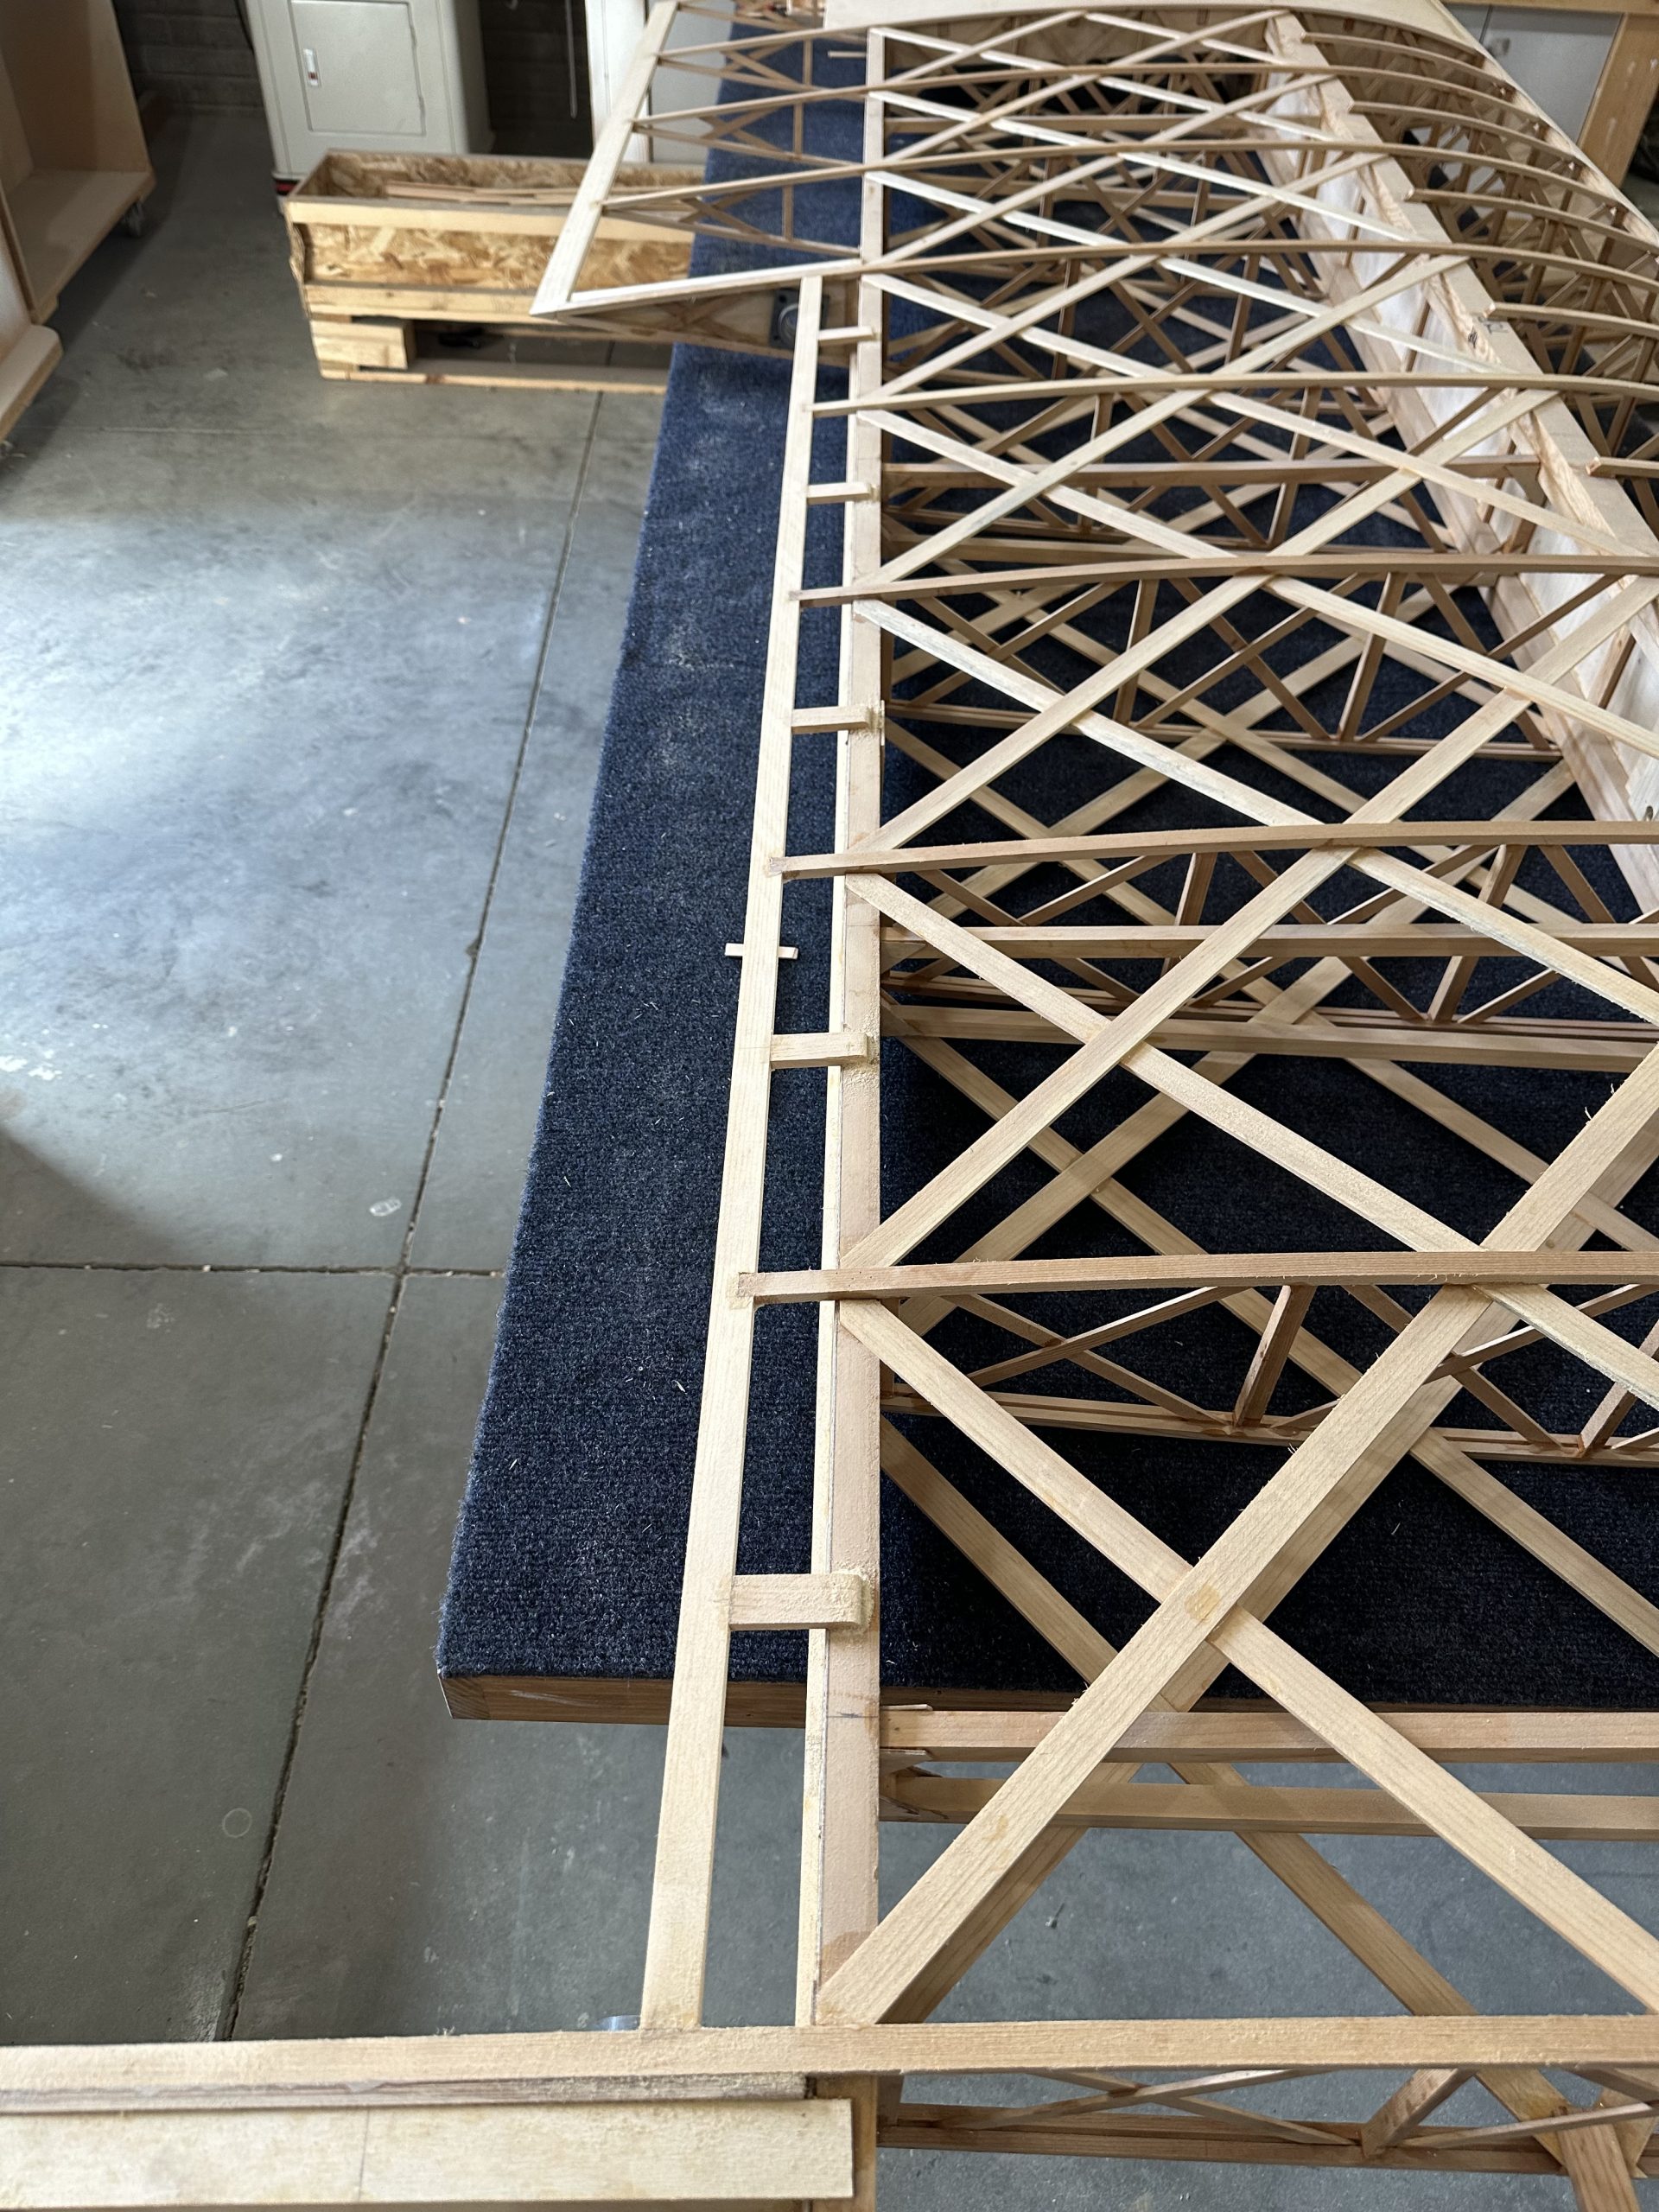
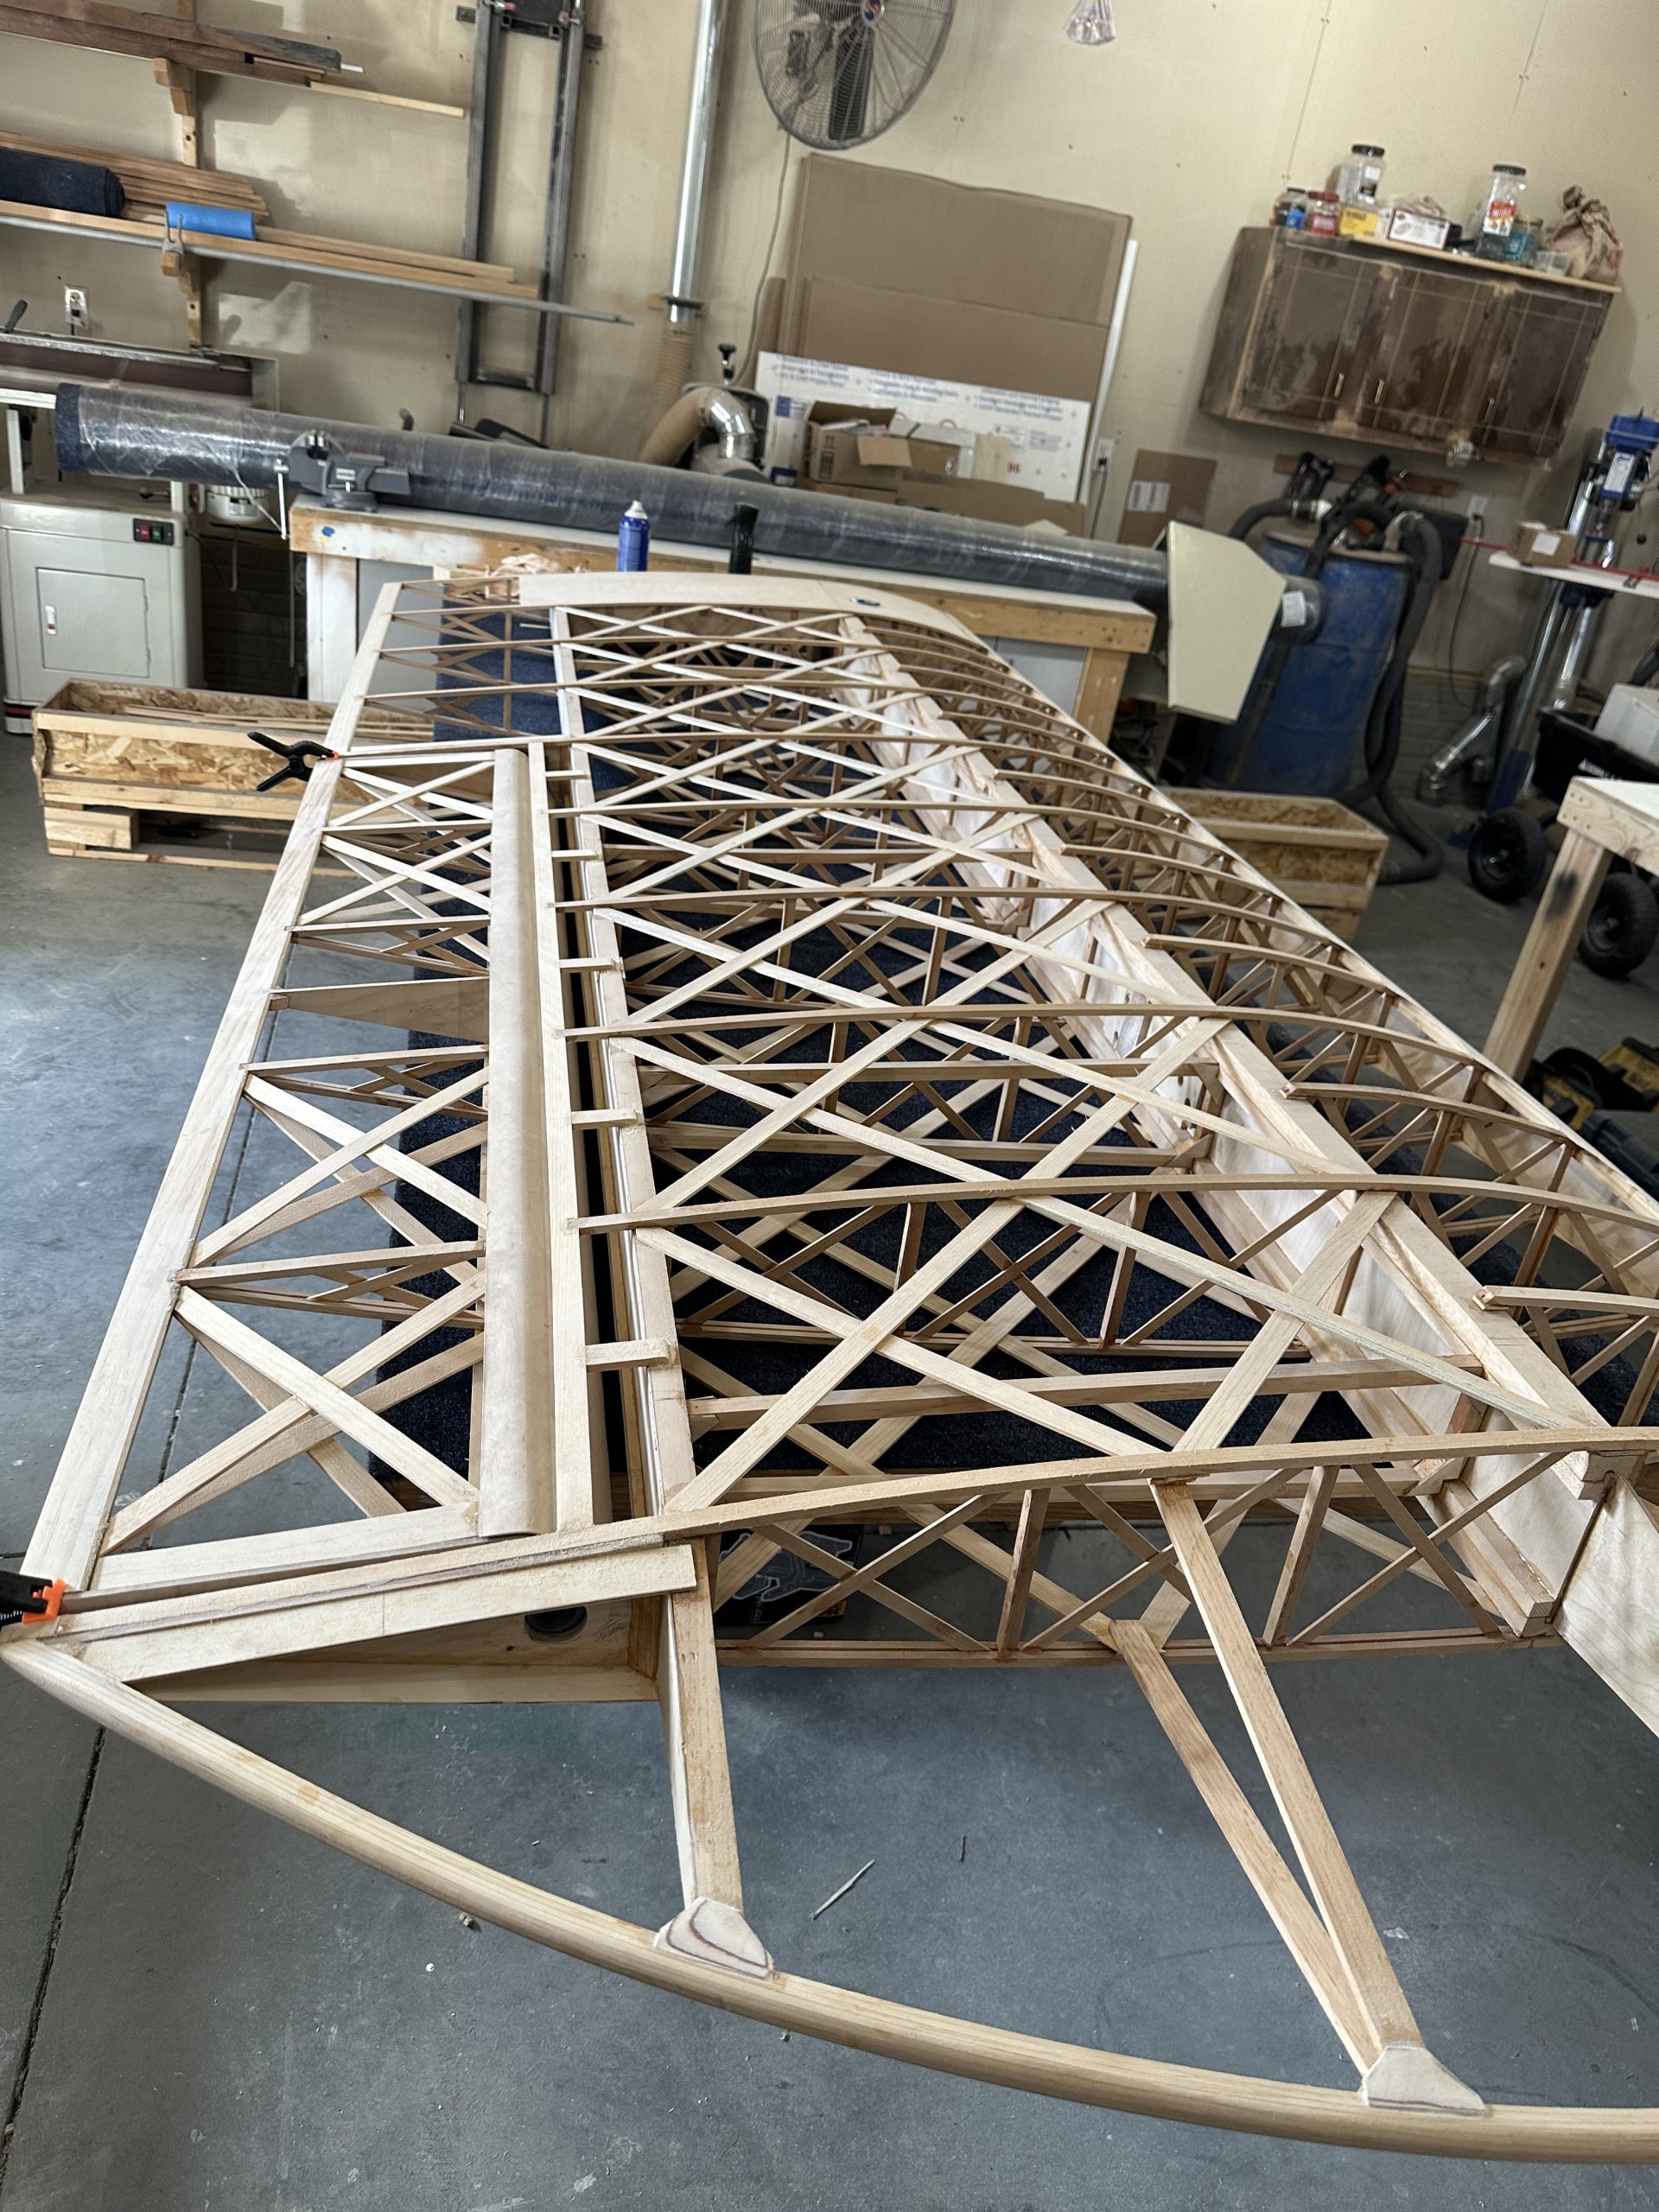
Wing walk skins down
Today I went through more epoxy than I have since gluing the spar caps. After some sanding and test fitting, I pre-glued the wing wall structure and the two plywood skins. Then Stu helped me clamp the edges down, and pinned down any spots that weren’t firmly in place.
As planned, I used some scrap lumber to make clamping bars. I used strips of geodetic material between them and the skins to ensure good pressure and clamped everything together with bar clamps.
With some epoxy left over, I glued the nose spar onto the aileron and did a little more corner blocking on the wingtip bow supports. With all that clamped, pinned, and taped in place it was time for lunch!