Aggravating complication

So, I found the plan supplement that talks about the aileron interference. Written in 2010 — seven years before I bought my plans — it notes that the rear spar was changed at some unknown point in the past, by someone, but never really documented, and the “updated plans will be sent out as they are available”. Which, apparently, they never were and probably still aren’t. Then it talks about plans delivered electronically (which they weren’t, and to my knowledge weren’t offered) having an updated sheet with new dimensions for the ailerons. It also says that this is only an issue with the upper ailerons hitting the CAW9 bracket. Uh, no. The lower aileron hits the head of the bolt holding the CAW3 bracket. There is one sheet that seems to show an upper aileron, with no dimensions to be seen anywhere. Wonderful.

So what’s their brilliant solution for fixing an already built aileron? Simply move it rearward to clear the bracket – this means take a hole saw to the wing to move the torque tube back in order to move the aileron. Then just cut off the trailing edge to match the rest of the wing, and sand all of the aileron ribs to match the contour of wing at the new location. Oh, and that’s probably going to remove enough rib cap material that extra bracing will be required… How many ways can this be wrong?

I get the impression that whoever wrote all of that has never actually built a Celebrity wing with 3/4″ rear spar caps. Meaning, whoever it was hadn’t built a Celebrity wing to check this stuff out since 2010. Come on.

I’m currently evaluating whether notching the lower leading edge of the aileron is an option. The actual aileron spar wouldn’t be affected, and the torque tube runs the entire length of the aileron, so it’s not like it could fold up and depart the aircraft. Still, I don’t want to weaken the thing and take the risk of cracking or anything, especially since this structure will all be under fabric and not easily inspected. Stu seems to think it wouldn’t weaken the structure, but he’s a carpenter and cabinet guy, not an engineer (and neither am I).

I’m going to have an actual engineer look at this and give me his opinion. I could always add a layer of 1/32 or even thicker ply if needed, but my gut feeling is that it’s not going to weaken anything enough to matter. In the mean time, I’ll keep pushing on, but this is kind of a kick in the nuts, to be honest. I’m sure a year from now I’ll look back and marvel at how little it actually mattered. I would feel sorry for anyone buying a set of plans now at over $3K and probably still not updated… I hope the new owners of the Fisher IP take the time to fix this kind of stuff.

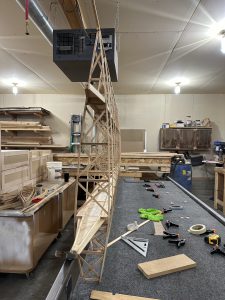
Lower left wing, Day 2

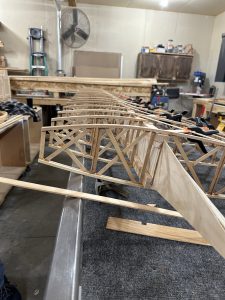
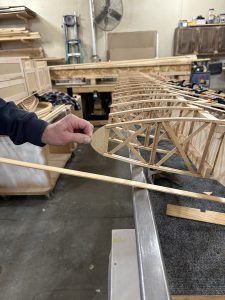
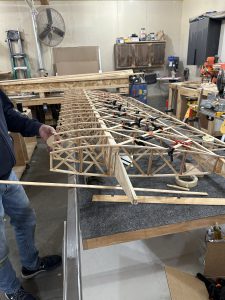
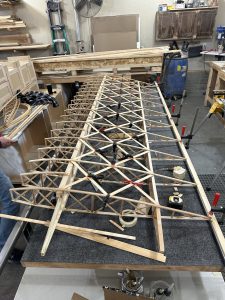
I feel like we accomplished a lot today. This morning Stu and I unclamped the partially assembled wing and found that it was already quite stiff and of course perfectly square. The epoxy where the ribs were glued to the trailing edge material was pretty well stuck to the steel rail, but the careful use of a utility knife blade between wood and steel popped those spots loose. Next time we’ll use poly or waxed paper. Stu sanded the rail to remove the epoxy and applied a couple coats of paste wax.

We stood the wing panel on its nose and slid the main spar into place, then glued and pinned the ribs to the bottom of the spar. The first rib was placed flush with the end of the spar, and the rese were once again set in place using the 11.5″ gauge block that we’d used for the rear spar rib spacing. It perfectly matches the notch spacing on the trailing edge, so everything remains perfectly spaced and square. Once that was done, we rotated it back horizontal and re-clamped the trailing edge to the rail. Now I cut some short lengths of laminating strip material to act as shims between the spar cap and rib caps, so we glued and pinned the ribs to the top rib cap.

With that done, we glued the false ribs in place using a 5.5″ gauge block. Lile the main ribs, these were glued and pinned to the bottom of the spar, then shimmed, glued, and pinned to the top.

As I had some glue left over, I decided to attack the geodetic bracing. I hadn’t really intended to do it all, but in the end all of the top surface geodetic braces are glued and clamped in place. We’ll do the bottom surface after the compression struts are done. What remains is the compression struts, bottom geodetics, nose ribs and plywood, and ailerons. And that’s where it’s all going to get messy. When I modified the ribs to clear the rear spars in the upper wings, I inadvertently put the cross braces right where the aileron torque tubes need to go. Oops. Not a problem on the upper wing, but it is on the lower wing. I think my fix for this will be to simply remove the pair if X braces (that I just installed) on the non-aileron ribs, and glue on a side plate cut from 1/16 plywood to stiffen that part of the rib. Then I can just have a hole for the torque tube. This should make the rear portion of those ribs substantially stronger than using the geodetic bracing, and will be only very slightly heavier. The upper wings should not need this modification, only the lower wings.

The last two wingtip bows came off the forms and are ready to install, so we removed all the screws from the table and stacked them until it’s time to finish them off. We’ll likely sand the top and bottom surfaces to remove the excess epoxy, then run the outer edges through the router table for a 3/8 radius top and bottom.

11/11 update

How many mistakes can one man make? Enough… thank God I’m building this out of wood, so things can be fixed!

With enough of the aluminum bits cut and drilled to get the spars drilled, I started laying out the hole locations for drilling. Along the way I found a couple of places where I’d gotten blocking in the wrong places for various reasons. Fortunately, in each case I was able to simply add some well fitted wood blocks to get the support where it’s needed. So far I figure the plane will be about two ounces heavier for the extra wood and epoxy. I can live with that. Still, it’s caused a bit of angst.

As of this morning, the next step is to cut the slight angle on root ends of the lower wing spars, drill the holes for all of the bolts, then start actually assembling a wing. At last.

Trying out the steam box

The other night I finished up the steam box and made a set of little standoffs for the bottom.  I wanted to keep the wood off the bottom of the box to allow air circulation, but also allow water to run back to the low point at the rear.   I got a little lazy and didn’t put in dowels like most plans show.

Tonight I loaded it up with eight cap strips and let it run for 45 minutes while I went out and hung some outdoor lights on the deck.  When I came back I found that the door had developed a pretty good curl — concave from the outside – and was venting a lot of the steam past the door seal.  The spruce inside was fairly pliable, so I clamped three pieces in my bending form and put four more in the rib jigs.  They would only fit partway down in the jigs, since the wood is swollen.  While the wood cooled down I got all of the geodetic braces ready to install.  I’ll glue these two ribs up tomorrow night.

I did email System 3 about their epoxy.  Some of the ribs were assembled with the capstrips not pre-bent.  They’re fine, but the wood will spring out of shape if it gets hot enough for the epoxy to soften.  I don’t want that to happen. so I was thinking about clamping them in their current shape and steaming them to relieve some of the stress in the capstrip.  Of course that will soften the epoxy, and I wanted to know what that would do.  Their answer is that T-88 will begin to soften at around 120 degrees, but once returned to room temperature will be at full strength.  That’s great news.

I’m definitely not in love with the geodetic rib bracing design.  24 braces, no two alike, and I’m having to hand-fit them all.  It takes for-freaking-ever.  I have to wonder how much heavier 3/32 plywood would be with suitable lightening holes.  A guy could pop sets of them out on a CNC router in no time, save a ton of time and effort on the ribs, and probably end up with much stronger ribs too.   But, I don’t think I’m going to re-engineer the ribs right now.

Fixin’ and cookin’ ribs

Last night I glued the two separated ribs back together.  I cleaned off/out all of the old epoxy, sanded everything clean, mixed up some new T-88 and brought them in overnight.  Just to be extra sure of a good glue cure I’ve got them warming up under a heating pad.  I took one of the others to the EAA chapter meeting, no one seemed to see anything wrong with it…  although the reaction varied from “Wow, that’s cool” to something closer to “You’re nuts, why would anyone do that?”

It’s cold, I’m not looking forward to the next session of shaving down geodetics for the next batch of ribs.  I’ll have to go out tomorrow and do it though.

A little setback

This morning I went out to check on the two ribs I had glued last night.  The epoxy was set, but just a little “tacky”.  It’s pretty cold out in the garage, as the outside temperature has dropped into the 20s and low 30s.  I figured it was cured enough to be OK, and pulled the ribs from the jigs so I could compare the first rib out of the new jig to the others.  It’s a perfect match, so I set them on the bench and went inside.

A couple of hours I went out again to do some cleanup.  I found the two new ribs had pulled apart at the leading edge!  The glue was still pliable enough that the “spring” from the wood very slowly (judging by the long strings of epoxy still joining the pieces) pulled them apart from the main spar forward.  Fortunately I caught it before the glue had completely finished curing.  With some wiggling I was able to remove the geodetics from the capstrips and clean off as much of the excess epoxy as possible without carving into the wood.  I put the ribs back into the jigs, and will re-glue them tomorrow.  I’m pretty sure I can salvage and repair these two, but if I’m not 100% confident in them they’ll be scrapped.

I really want to figure out an arrangement to steam the capstrips.  Soaking in cold water doesn’t really seem to do much good, which is why I had not pre-bent these.  Trying to soak them in hot water works for about 10 minutes until it’s no longer hot water.  Two out of the six or eight I’ve bent in my former have split during that process.