Spar update 10/6/23

Happy birthday to me! 🎂 This morning I glued the two lower rear spars up – webs to caps only, and set them aside to cure. That’s all four rear spars now ready for the addition of the plywood blocks for attachment brackets, flying wires, landing wires, and N struts. The cut-off pieces of 1/16 ply will make shims for the lower main spar strut/landing wire attachment points that need to be 1/8″ above the spar caps.

In the afternoon I went back over and glued in the blocks and plywood plates on the root end of the rear spars. There are other blocks and structure to be installed outboard, where the struts and wires attach, but after taking the time to figure out the plans and exactly what needs to be done it was getting too late to glue those bits up. The plans could benefit from an oblique view to better show how things go together, or at least two views of the area… but they’re old and drawn by hand, and there’s only one view. One has to hope there’s a reason that parts of it are built the way it’s shown. The blocks in the kit are oversized and will need to be trimmed, and I want to make sure I have plenty of time to make sure everything is in the right place.

Spar progress as of 10/4/23

All four main spars substantially built; exceptions are noted below. Two upper rear spars have been started, with plywood web glued to the upper and lower caps – not really caps, but for lack of a better term…

Remaining work: Main spars need to be trimmed to length and dihedral clearance cut made on the lower spars. All holes need to be drilled, bushings fabricated and glued in place. I’ll need to fabricate and glue in shims for the landing wire/N-strut attach brackets on the lower main spars.

Progress, up to a point

During two working sessions today I got most of the assembly of the lower main spars complete. “Most of”, because when it came to laying out the plywood blocks for the landing wire attach points… well, after a while studying the parts and the prints and the spars, none of it makes any sense. The upper wing spars were not exactly straightforward; a few of the parts didn’t match the plans, but the end result looked correct in that the location and final layout of the blocks matches the print, even if the parts making up those blocks are a bit different. I’ll need to spend more time studying the plans for the spars, as well as the plans for the N-struts and landing wires to figure out what needs to be done.

I also ordered a gallon of T-88, hopefully I’ve got enough to last me until it gets here mid-week.

Edit: After looking at print #15 of the plans, things are quite a bit clearer. That drawing shows the flying wire, landing wire, and N-strut attachments, with part of the spars shown. Tomorrow I’ll be able to glue in the blocks for the lower main spars and, hopefully, get them finished. Well… “finished” is a relative term, I suppose. I haven’t started attaching the parts for the wingtip bow support, but I may just hold off on that for the time being.

Main spar progress

It’s been a busy week. The two upper main spars are essentially complete. Spar caps, stiffeners, and all of the filler and reinforcing blocks are assembled. The only thing not done are the outboard ends, where the tapered pieces for the wingtip bow attachment need to be assembled. The two lower main spars are under construction now. Both have the caps and web glued, and one has the stiffeners on one side. I’m planning to finish as much as I can today on the main spars, and hopefully get at least one of the rear spars glued up.

It’s been a real joy working in a place where there’s plenty of room to work. The availability of a large number of bar clamps – in addition to the 40 or so spring clamps I have – really helps as well. I took the day off work yesterday and was able to get over there once in the morning to set up a spar, then again in the afternoon to take that one off of the jig and glue up the next one.

Stu is anxious to get enough pieces built to start getting wings assembled so they look like wings — I can’t say I’m not in agreement. I was a little tempted to build a rear spar after the first main so we could assemble one complete wing, but I’m convinced that this way is a lot more efficient. For one thing, after the first spar we’ve both figured out enough ways to make the process better that each spar is taking less time than the one before. Just as an example, my process for getting epoxy into the grooves in the main spar caps has evolved and gotten much more efficient with each spar. It’s almost a shame there aren’t any more to do. On the last couple I would get some glue on the long edge of a popsicle stick and use that to spread it into the groove. After doing a foot or so, I’d slowly follow through with an acid brush with the bristles trimmed down to about 1/4″ or so, to make sure it was evenly distributed and get any excess out of the groove. The result was the cleanest glue joints of all the spars.

I’ve been going through T-88 like crazy. Gluing 9 and 10 foot long pieces of wood uses a lot of epoxy, and I know the laminations for the wingtip bows and tail surfaces will use a lot as well. Given the price increases since the last time I bought glue, I think I’ll just order a gallon.

Started on the second spar

This morning I went over to Stu’s and finished gluing the root attach blocks and the blocks for the N strut and flying wire brackets to the spar. Other than the tapered extension for the wing tip bow, that’s all of the wood for the first spar. Once the glue is cured, I can start locating and drilling the holes for the attachment bolts and bushings.

With that done, Stu and I started on the second upper wing spar. The bench has threaded inserts set into the edge, and he’s got a long steel rail that bolts on. It’s 2 x 2 inch square steel tubing with mounting brackets welded on. The rails were designed and built to bolt to the table, then he’s got a steel sled that sits on them that he can use to flatten a large wood slab using a router. We bolted one rail to the edge of the table, overhanging the work surface. Now there’s a long work bench with a straight, level steel rail on one edge.

We glued the groove in the spar cap, inserted the plywood web, then glued the other spar cap. One spar cap is clamped against the rail, then the assembly is clamped in place to hold it straight, flat, and properly spaced at 5-3/4″ total spar height along its entire length.

I think about 10 ml of epoxy is plenty to glue one spar cap groove. I mixed two batches today. I’ve been using 60 ml syringes ordered from Amazon to hold and measure the glue – it works wonderfully. I can very precisely measure out even very small quantities.

First spar, continued

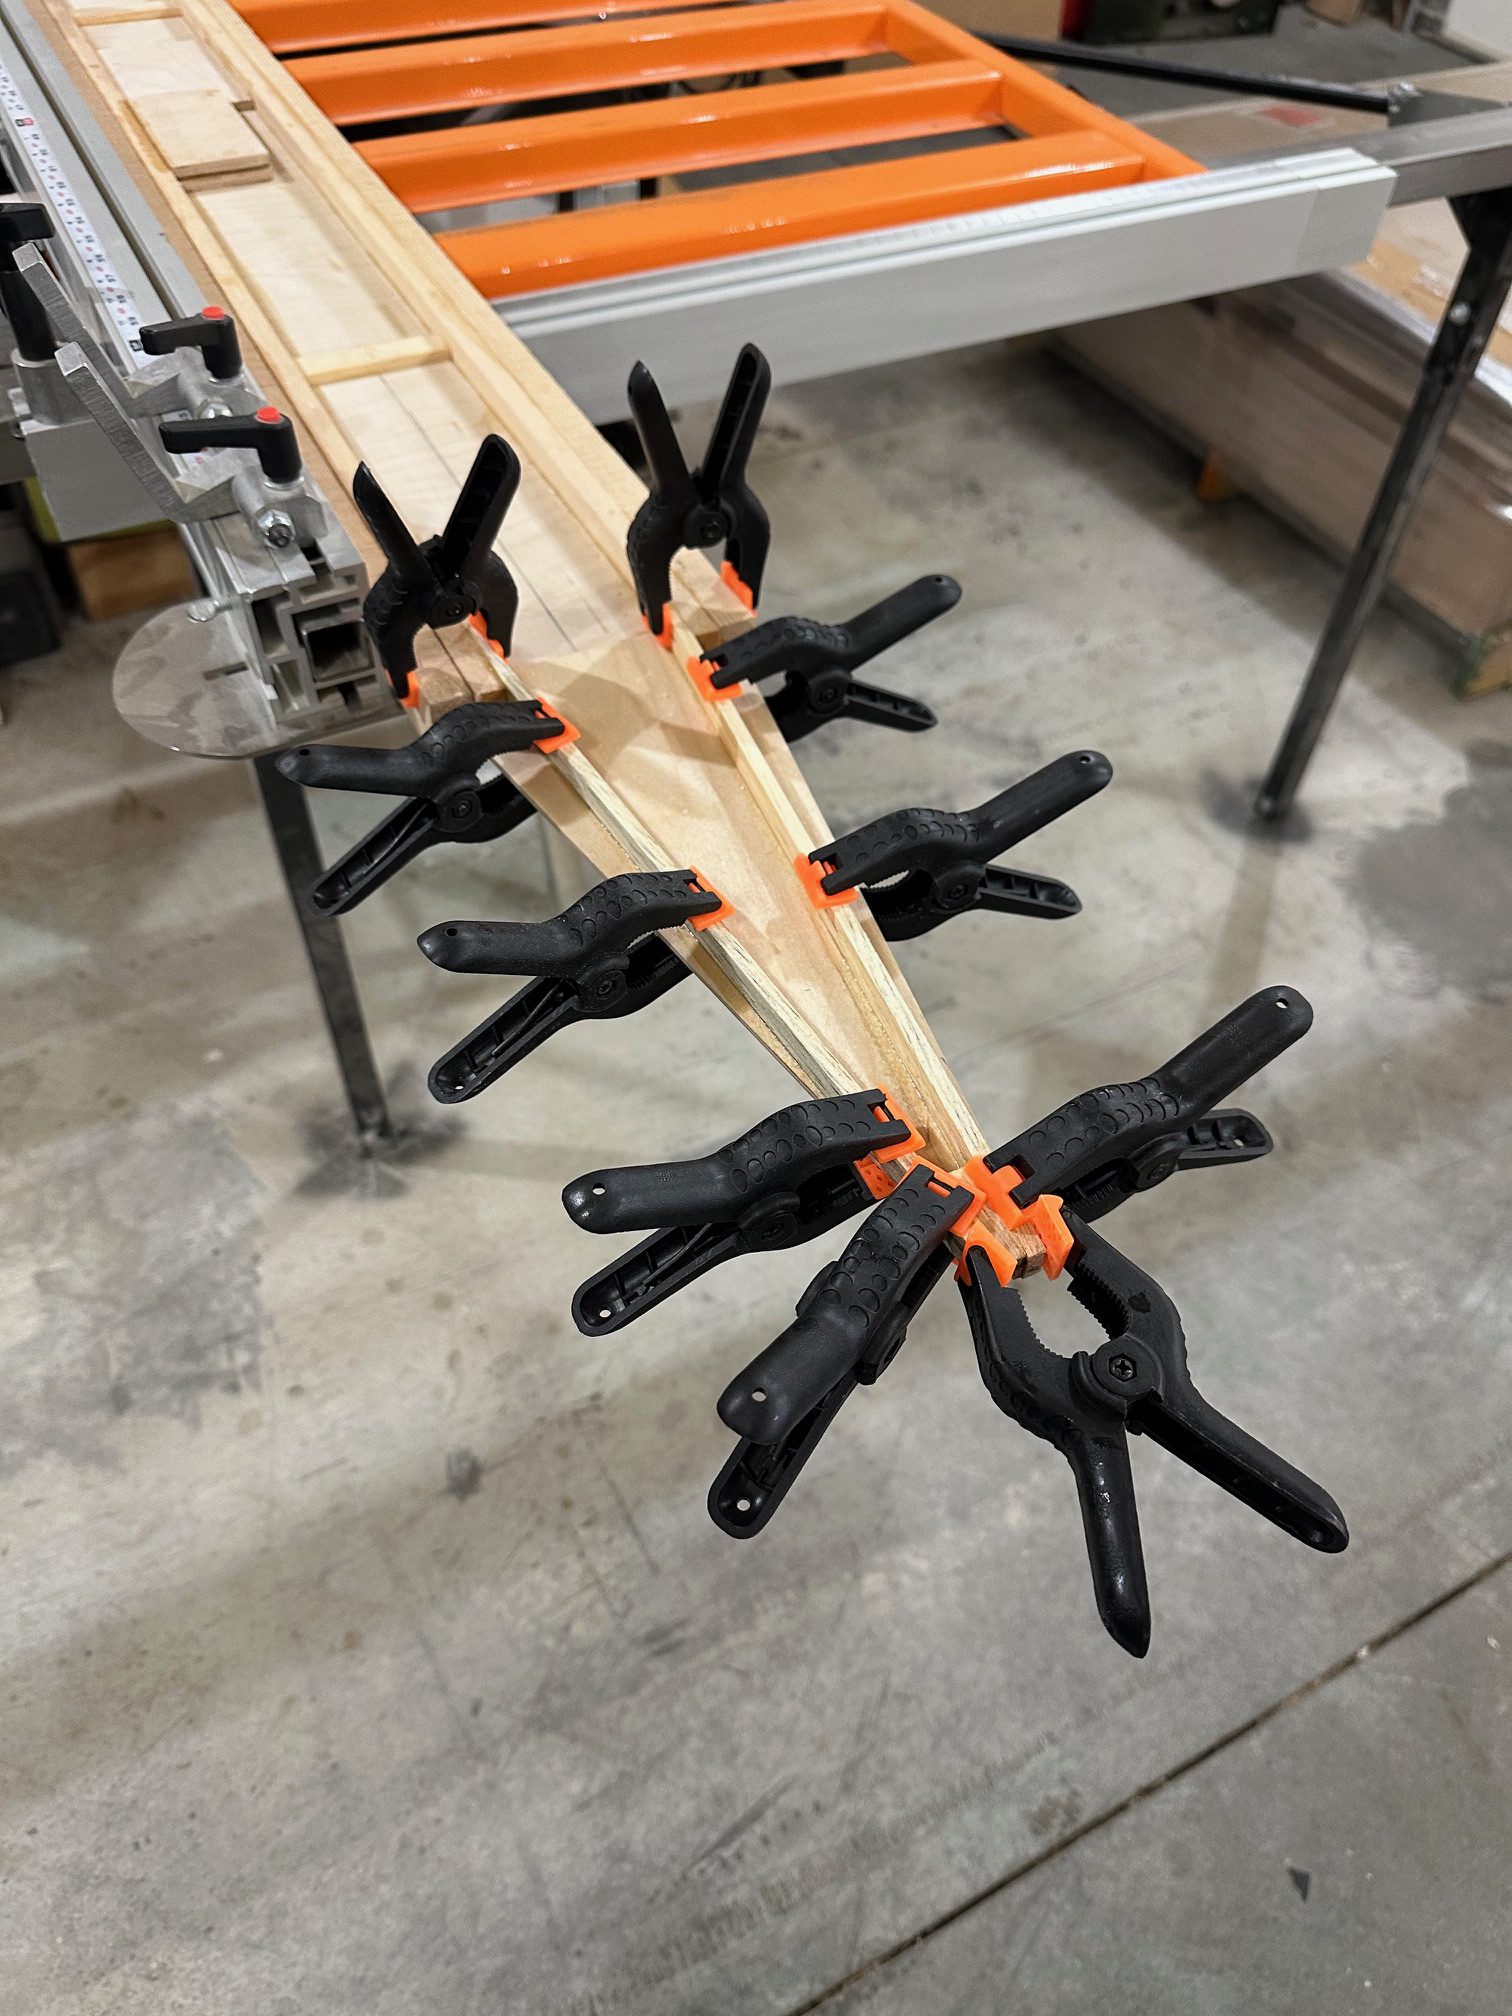
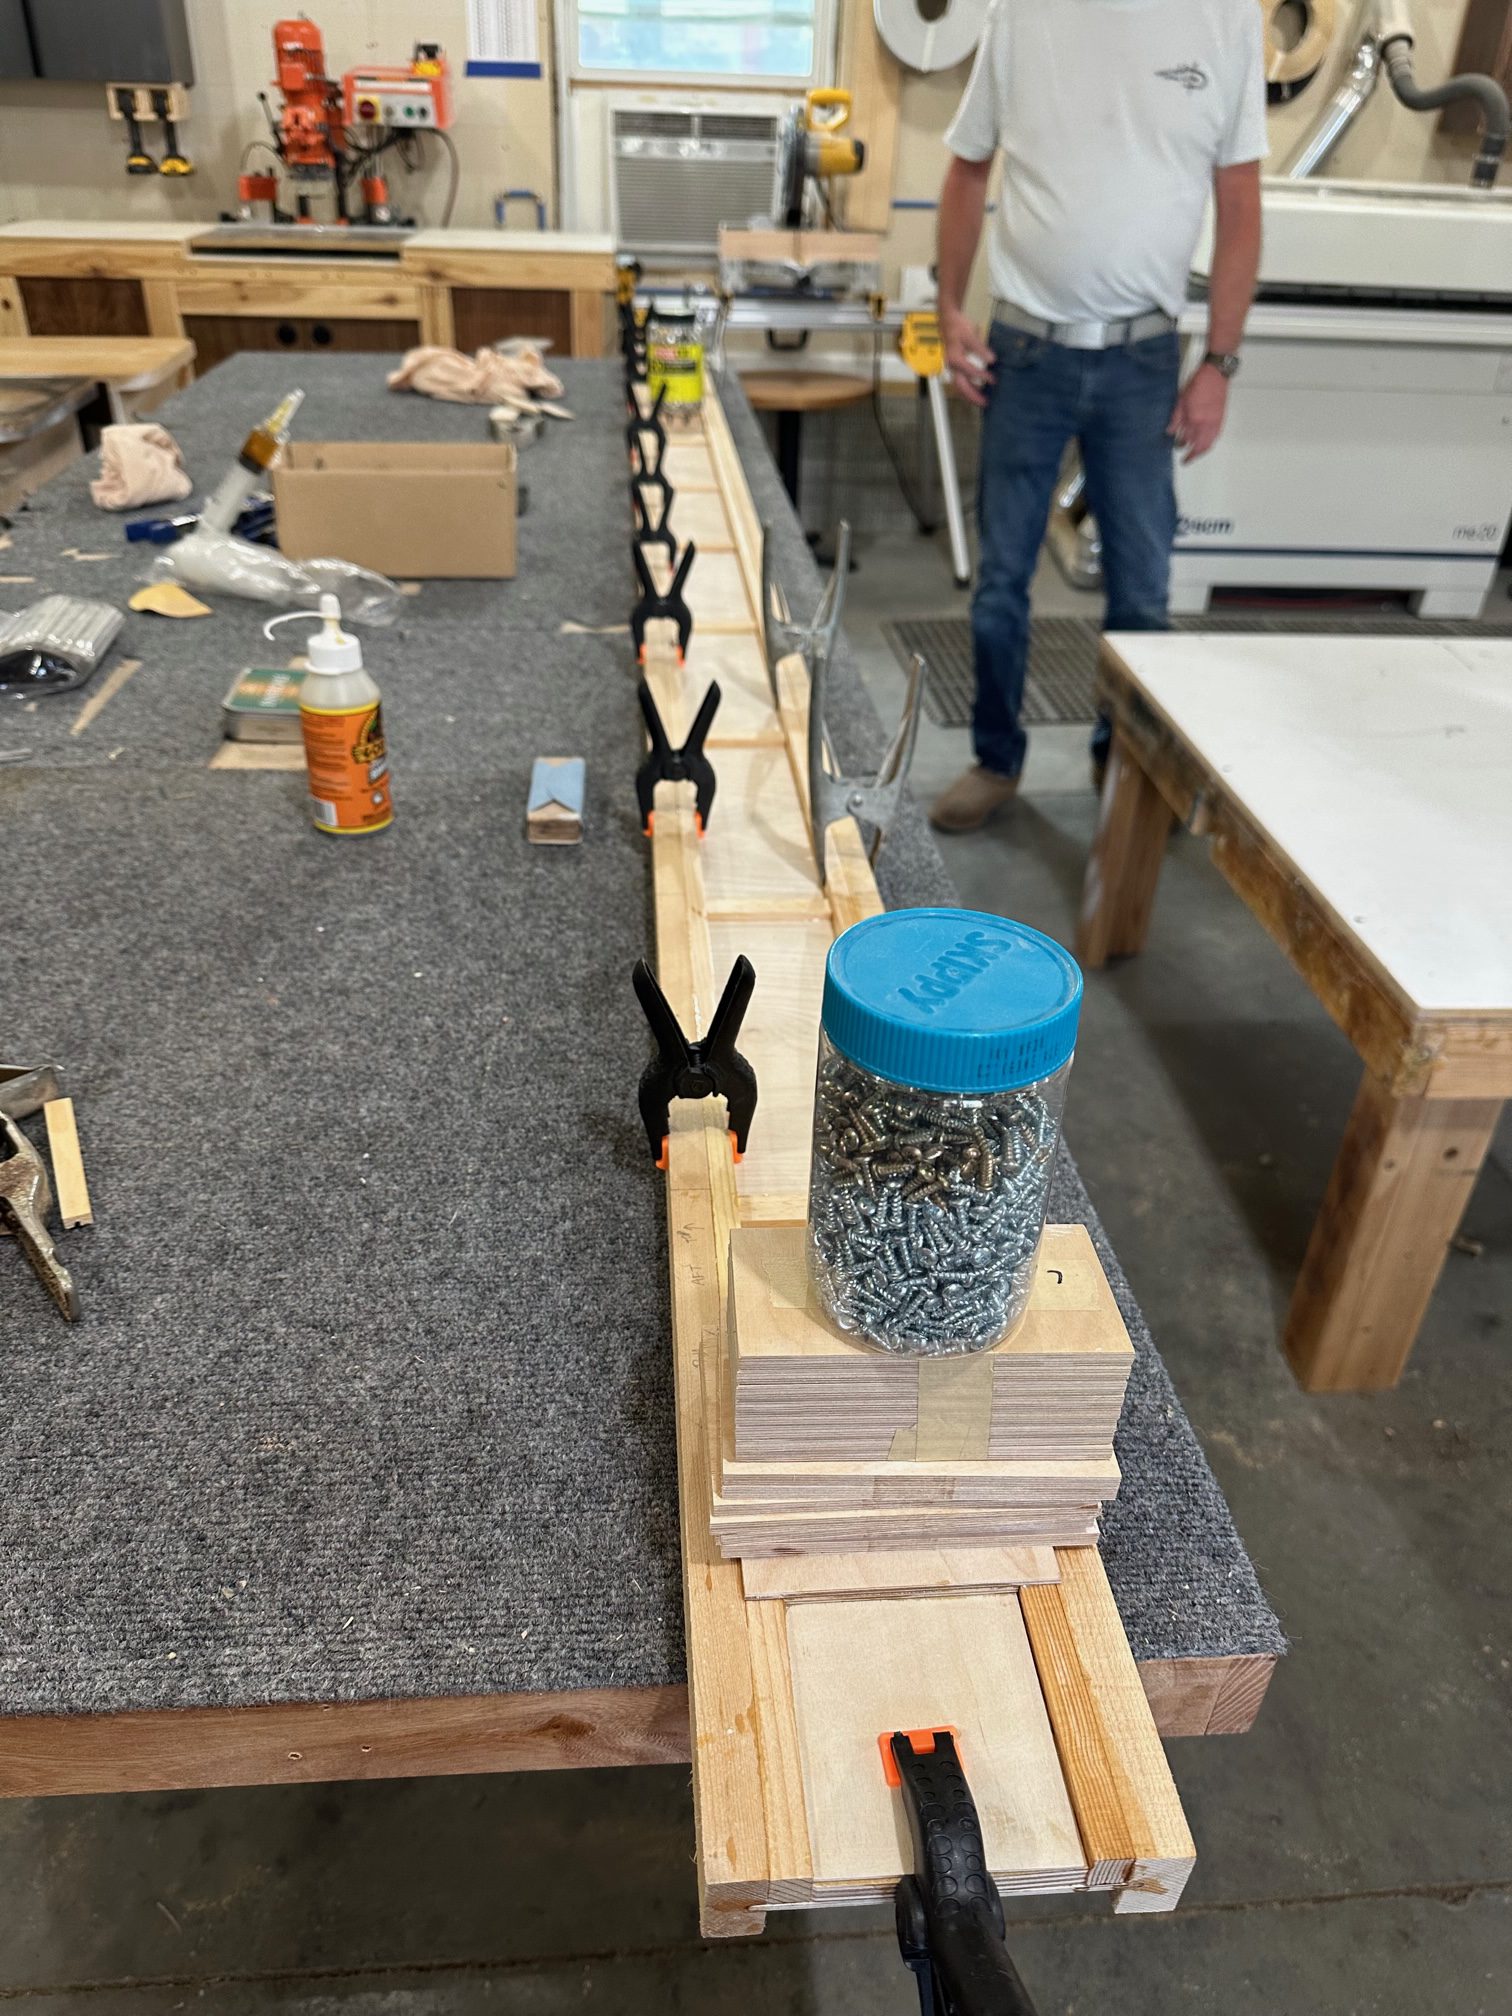
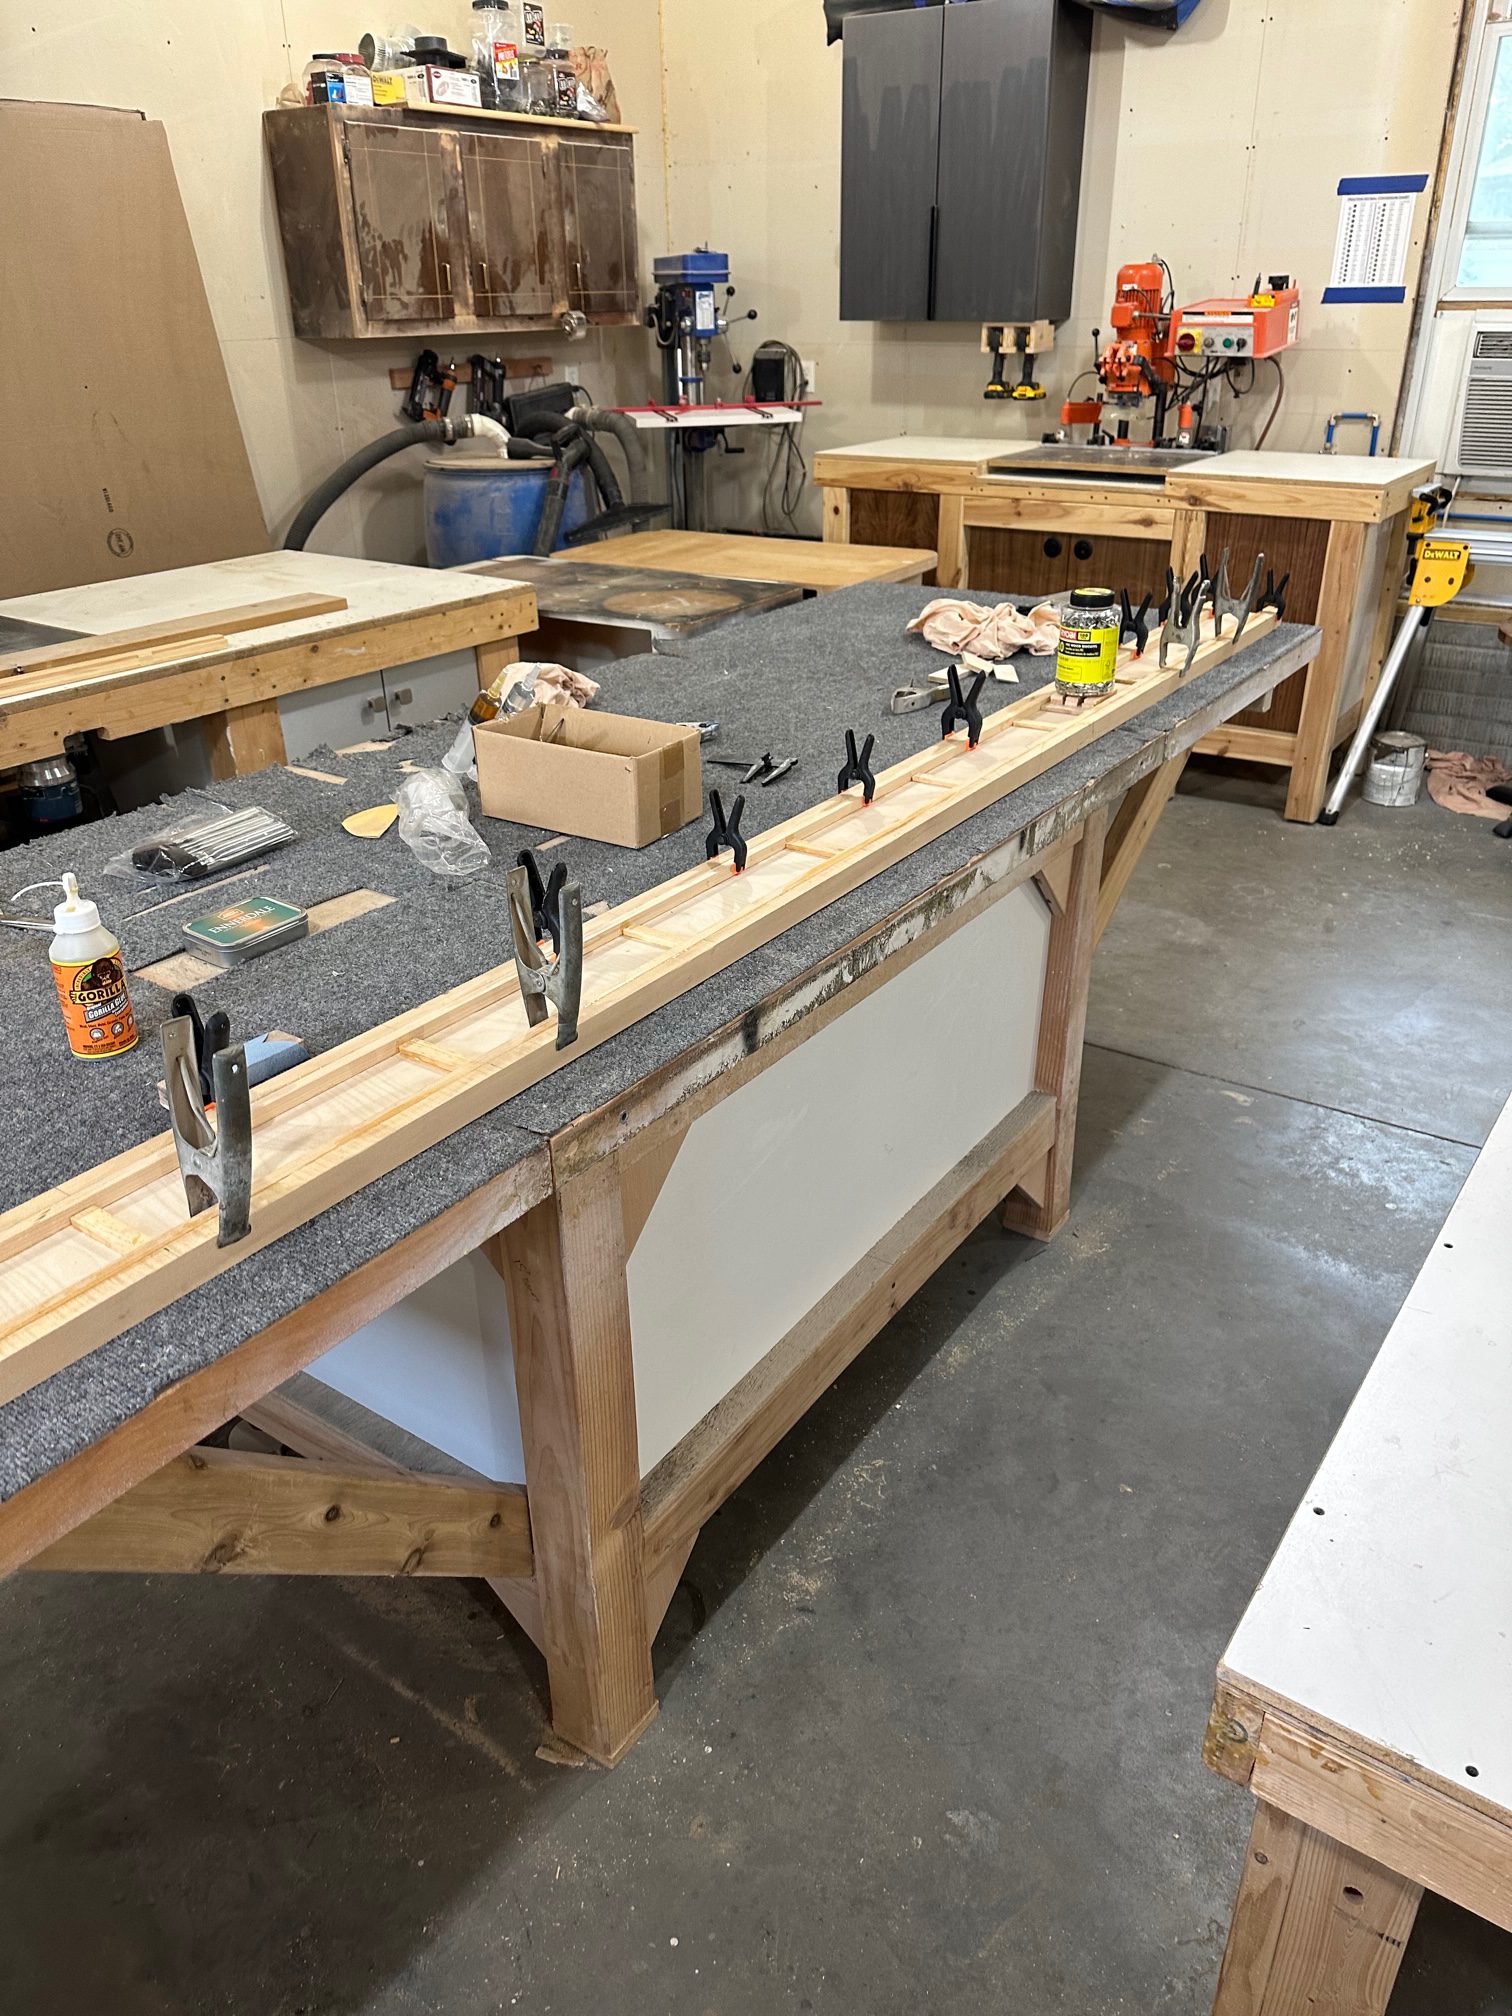
It’s been a bit of a learning experience building this spar. The amount of glue required, of course, is one thing – about 45 ml or so, I think, for the whole thing. There are still a few pieces of plywood that need to be glued, most of them for the flying wire and N-strut attachment brackets. Yesterday Stu showed me his pneumatic pin nailer, which I plan to use. It’s not unusual to use staples or small brads to hold wood together while glue cures. This thing shoots ridiculously small wire pins — 22 or 24 gauge, I think — with no heads. They’re just enough to hold the wood in place, and won’t need to be removed.

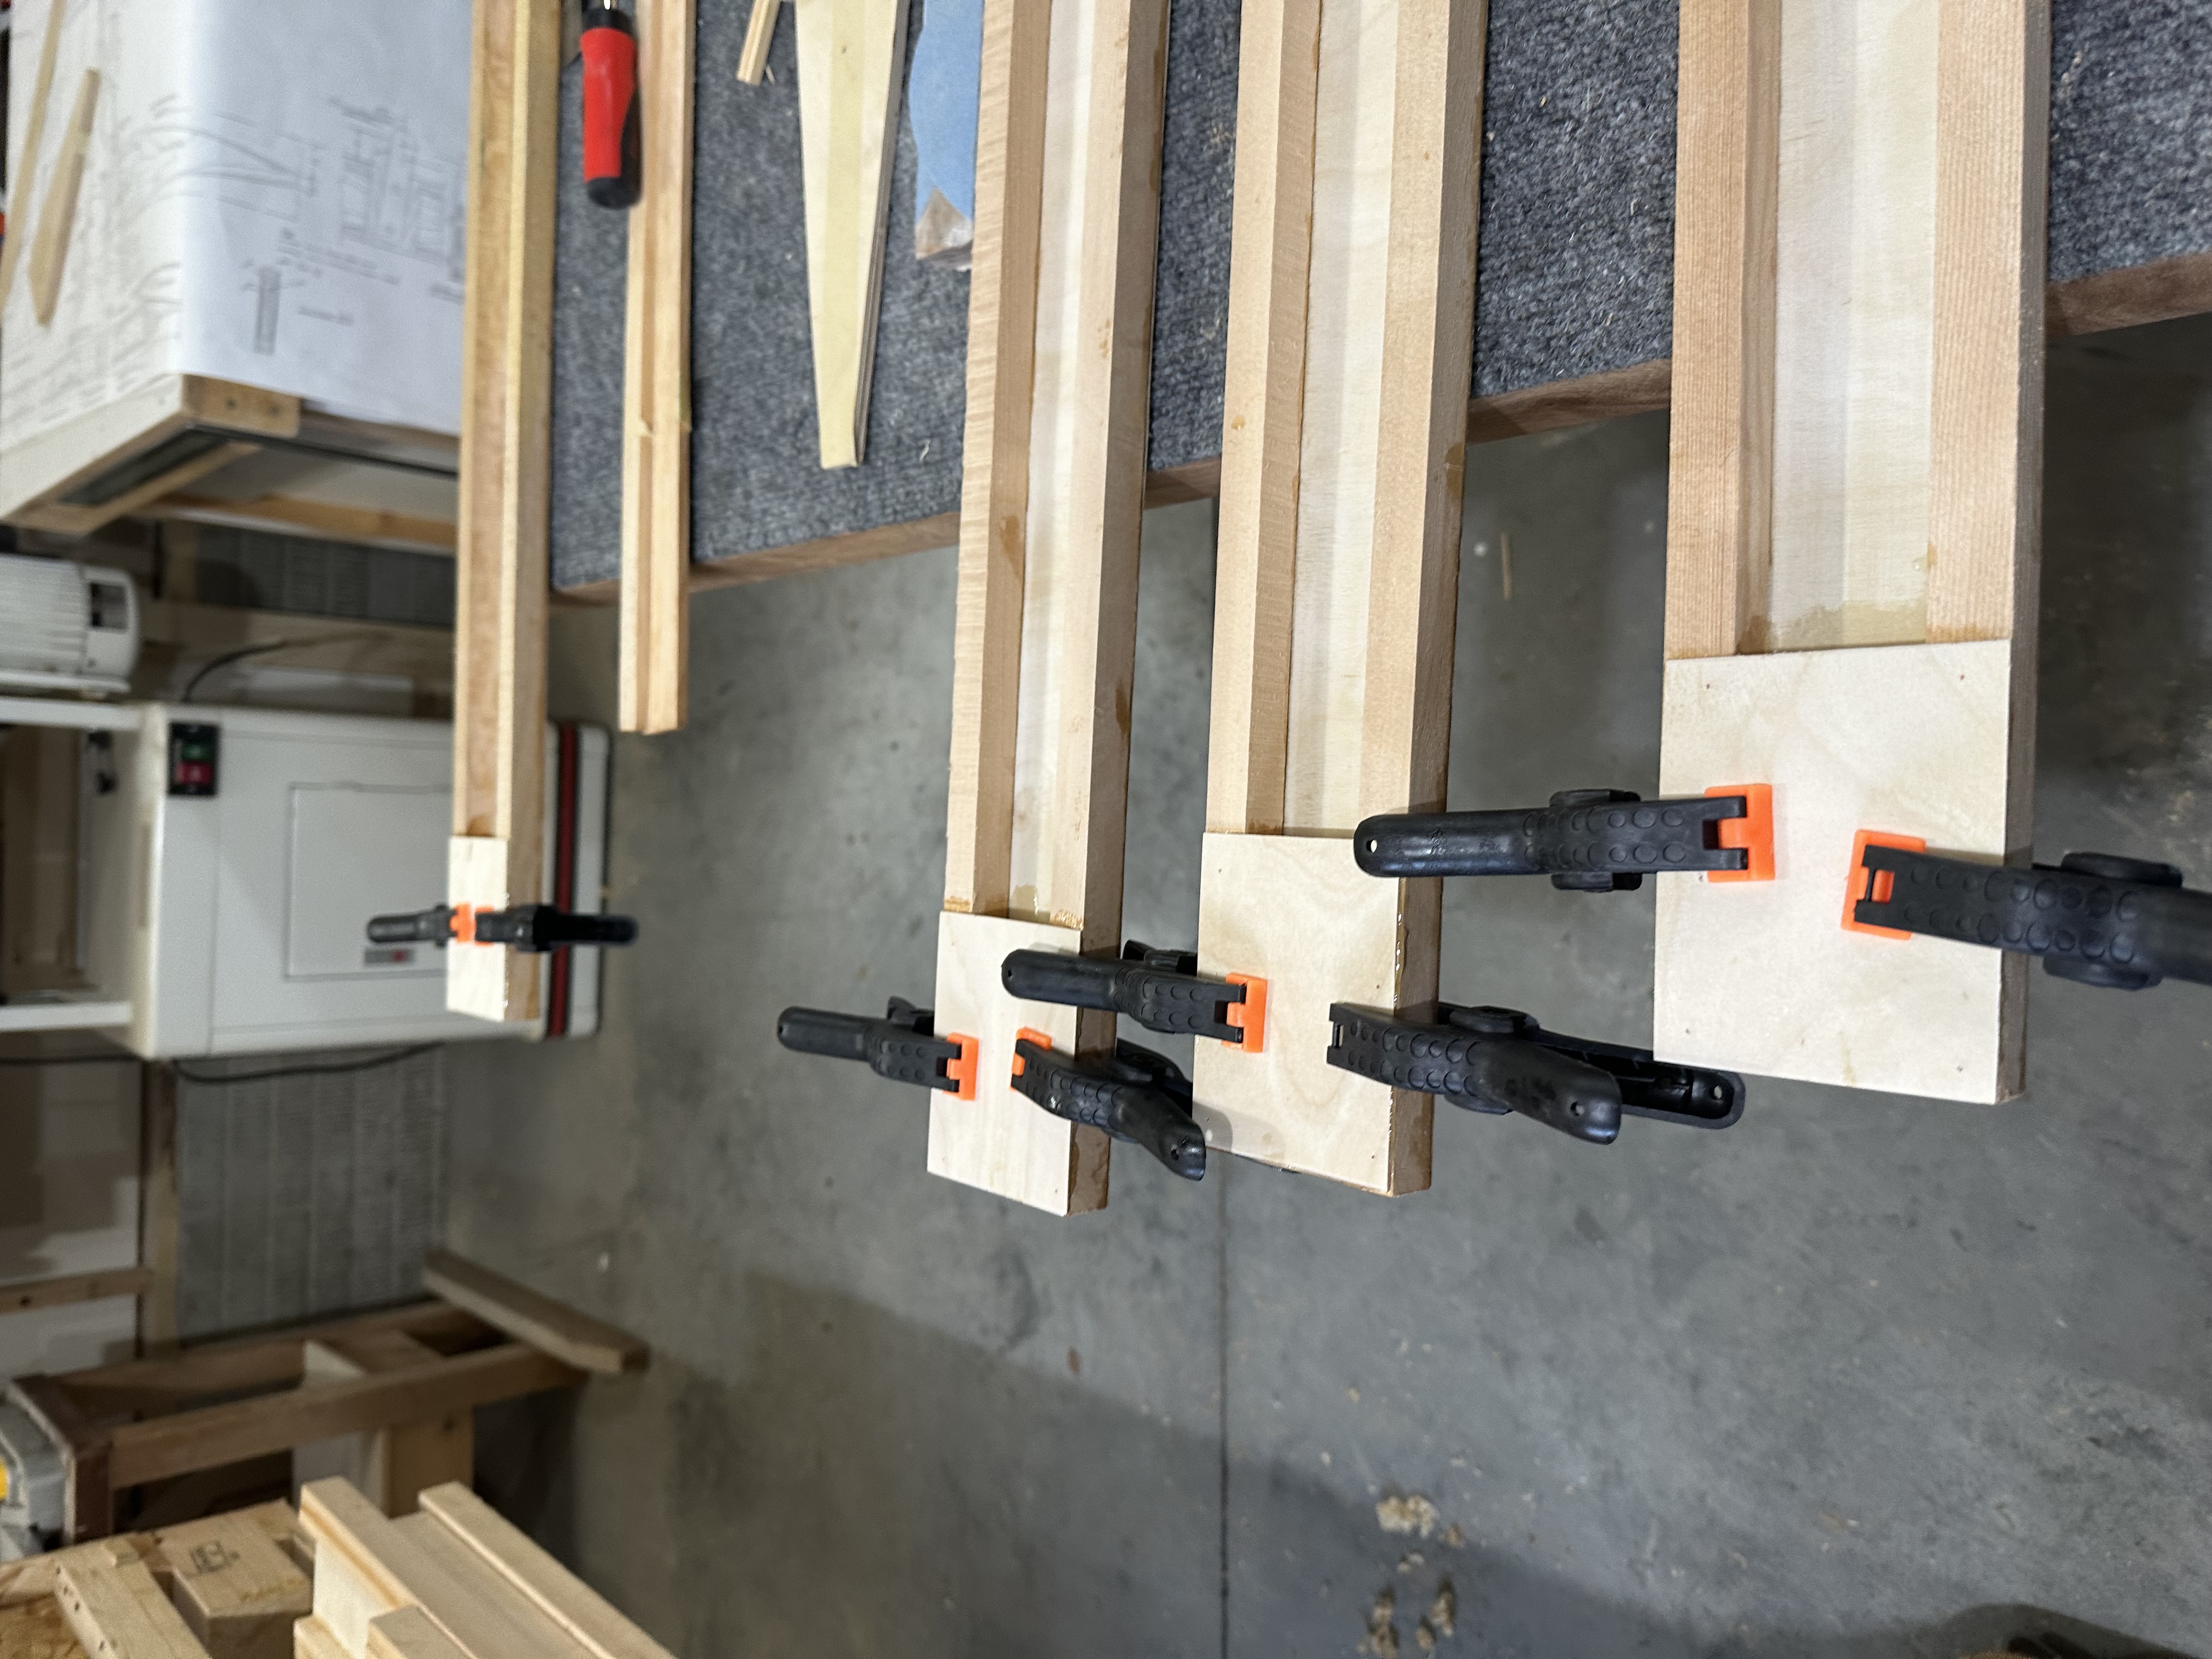
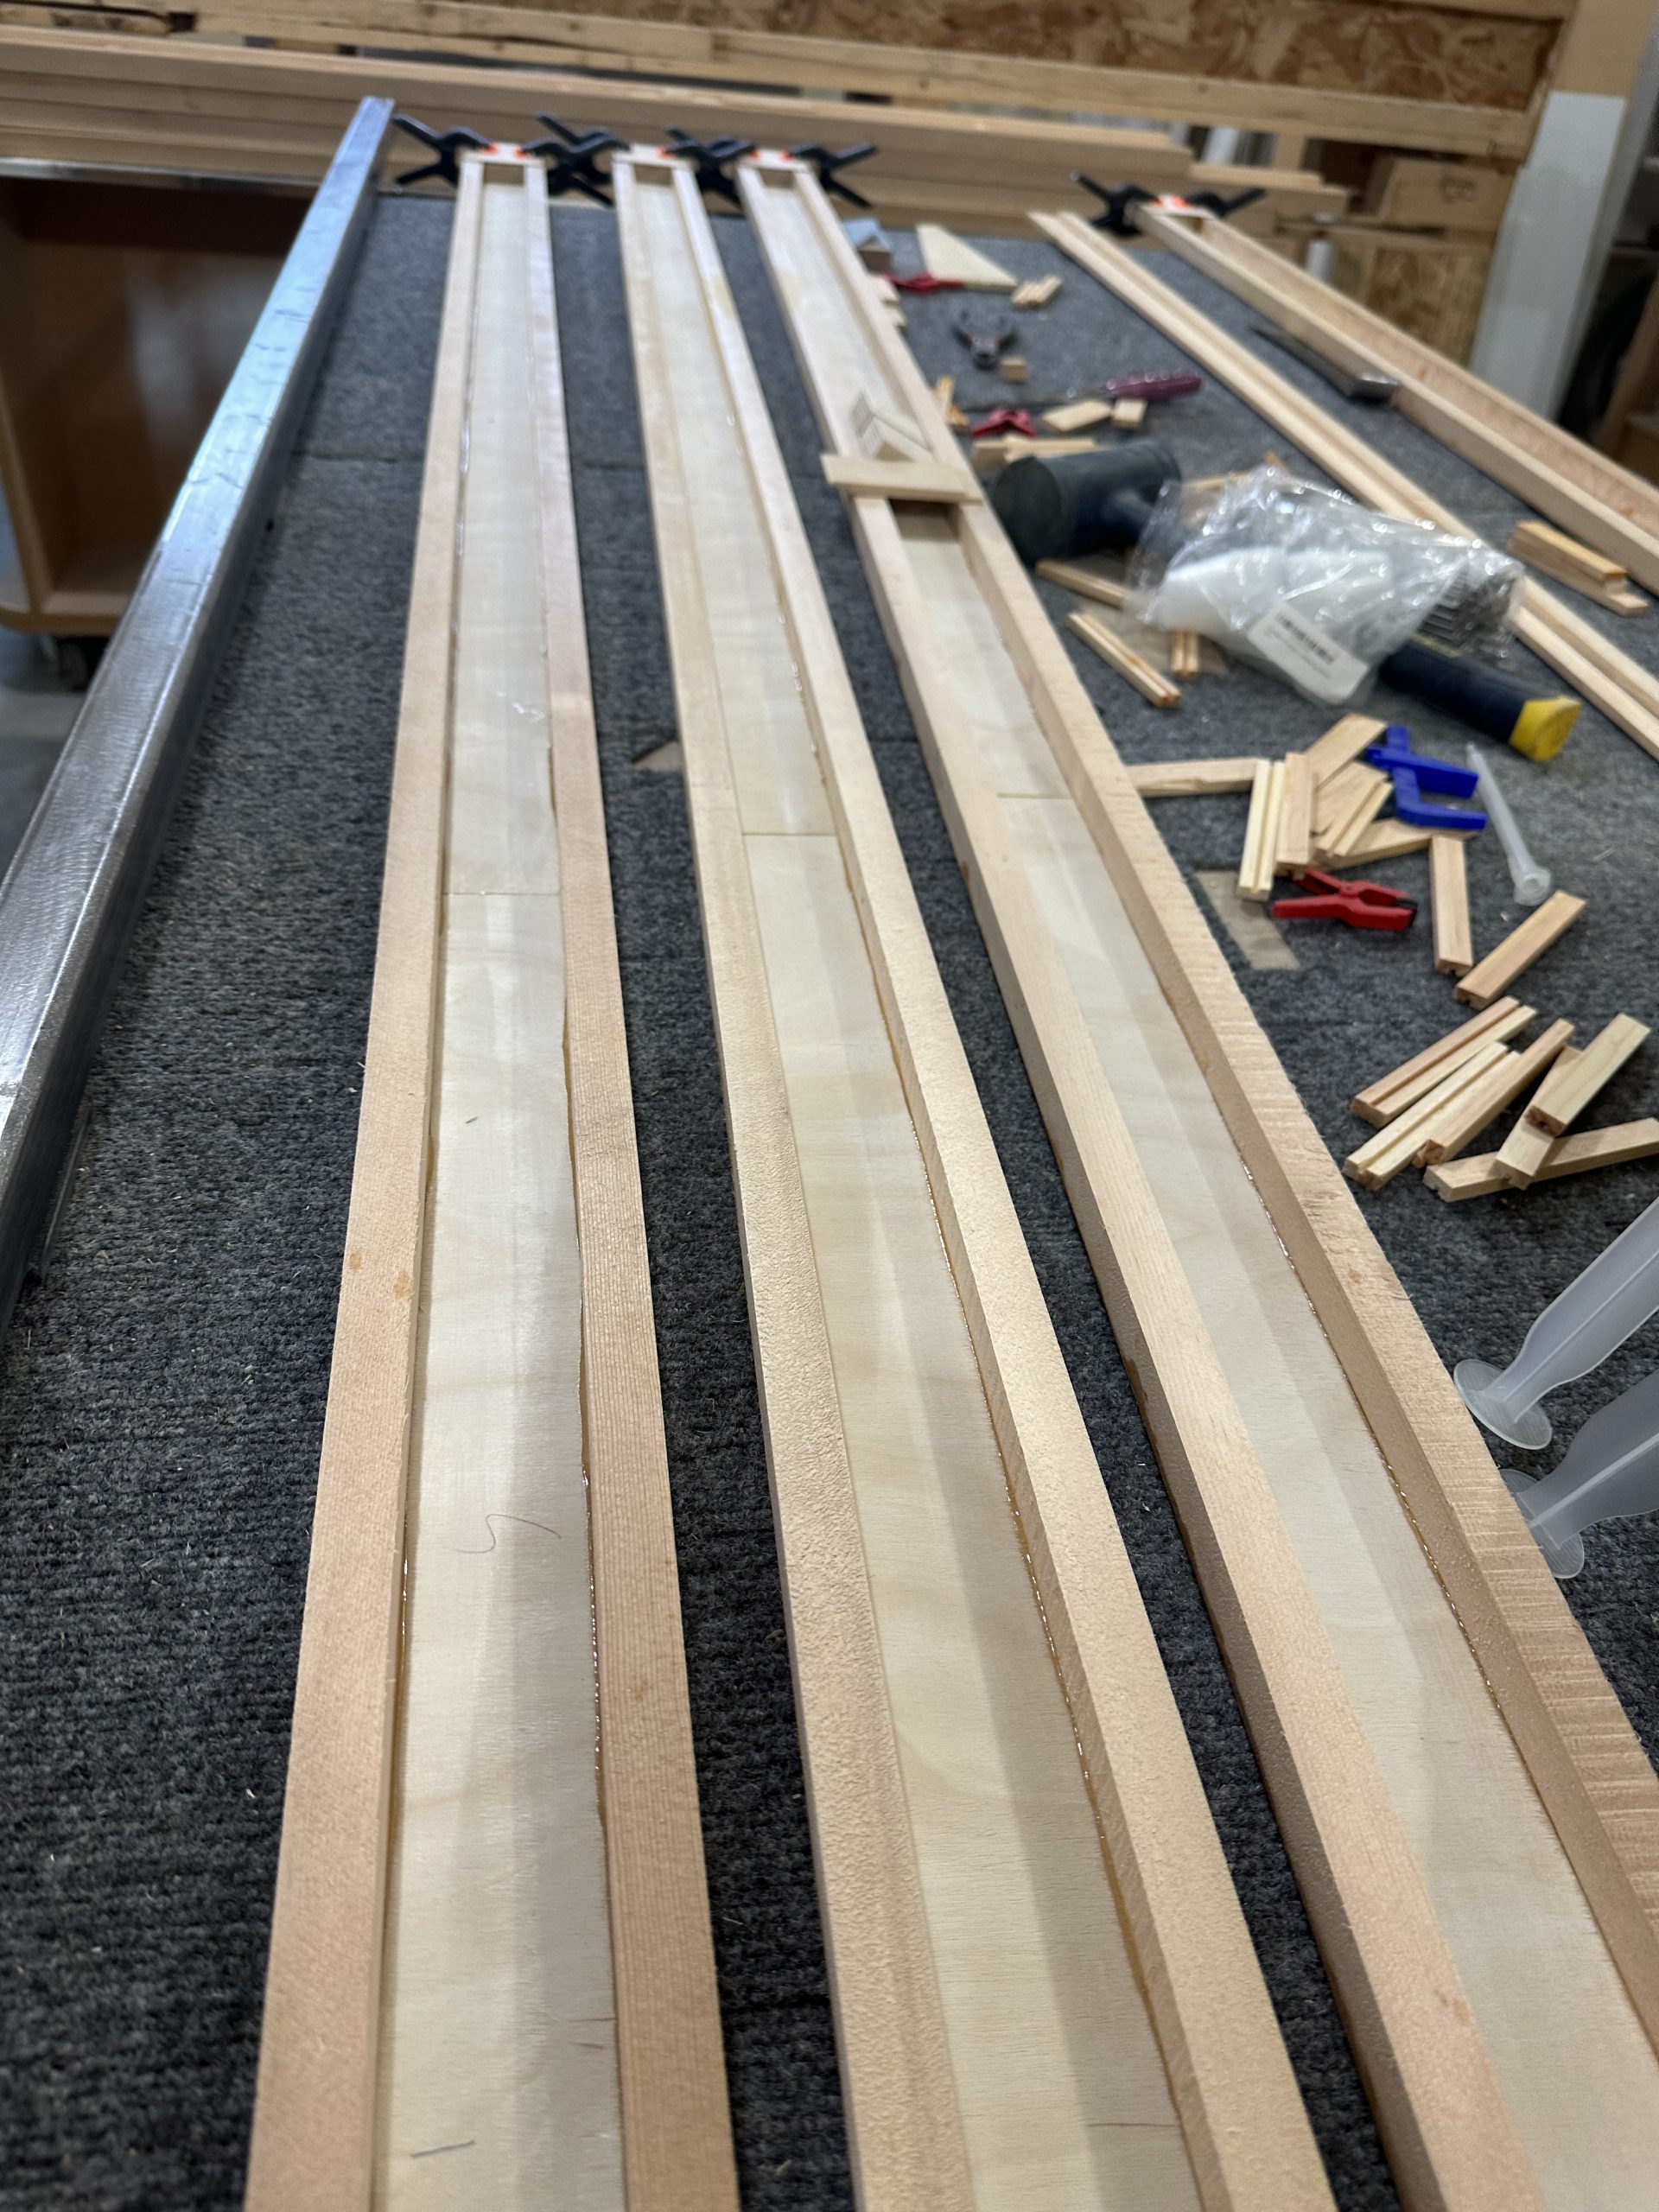
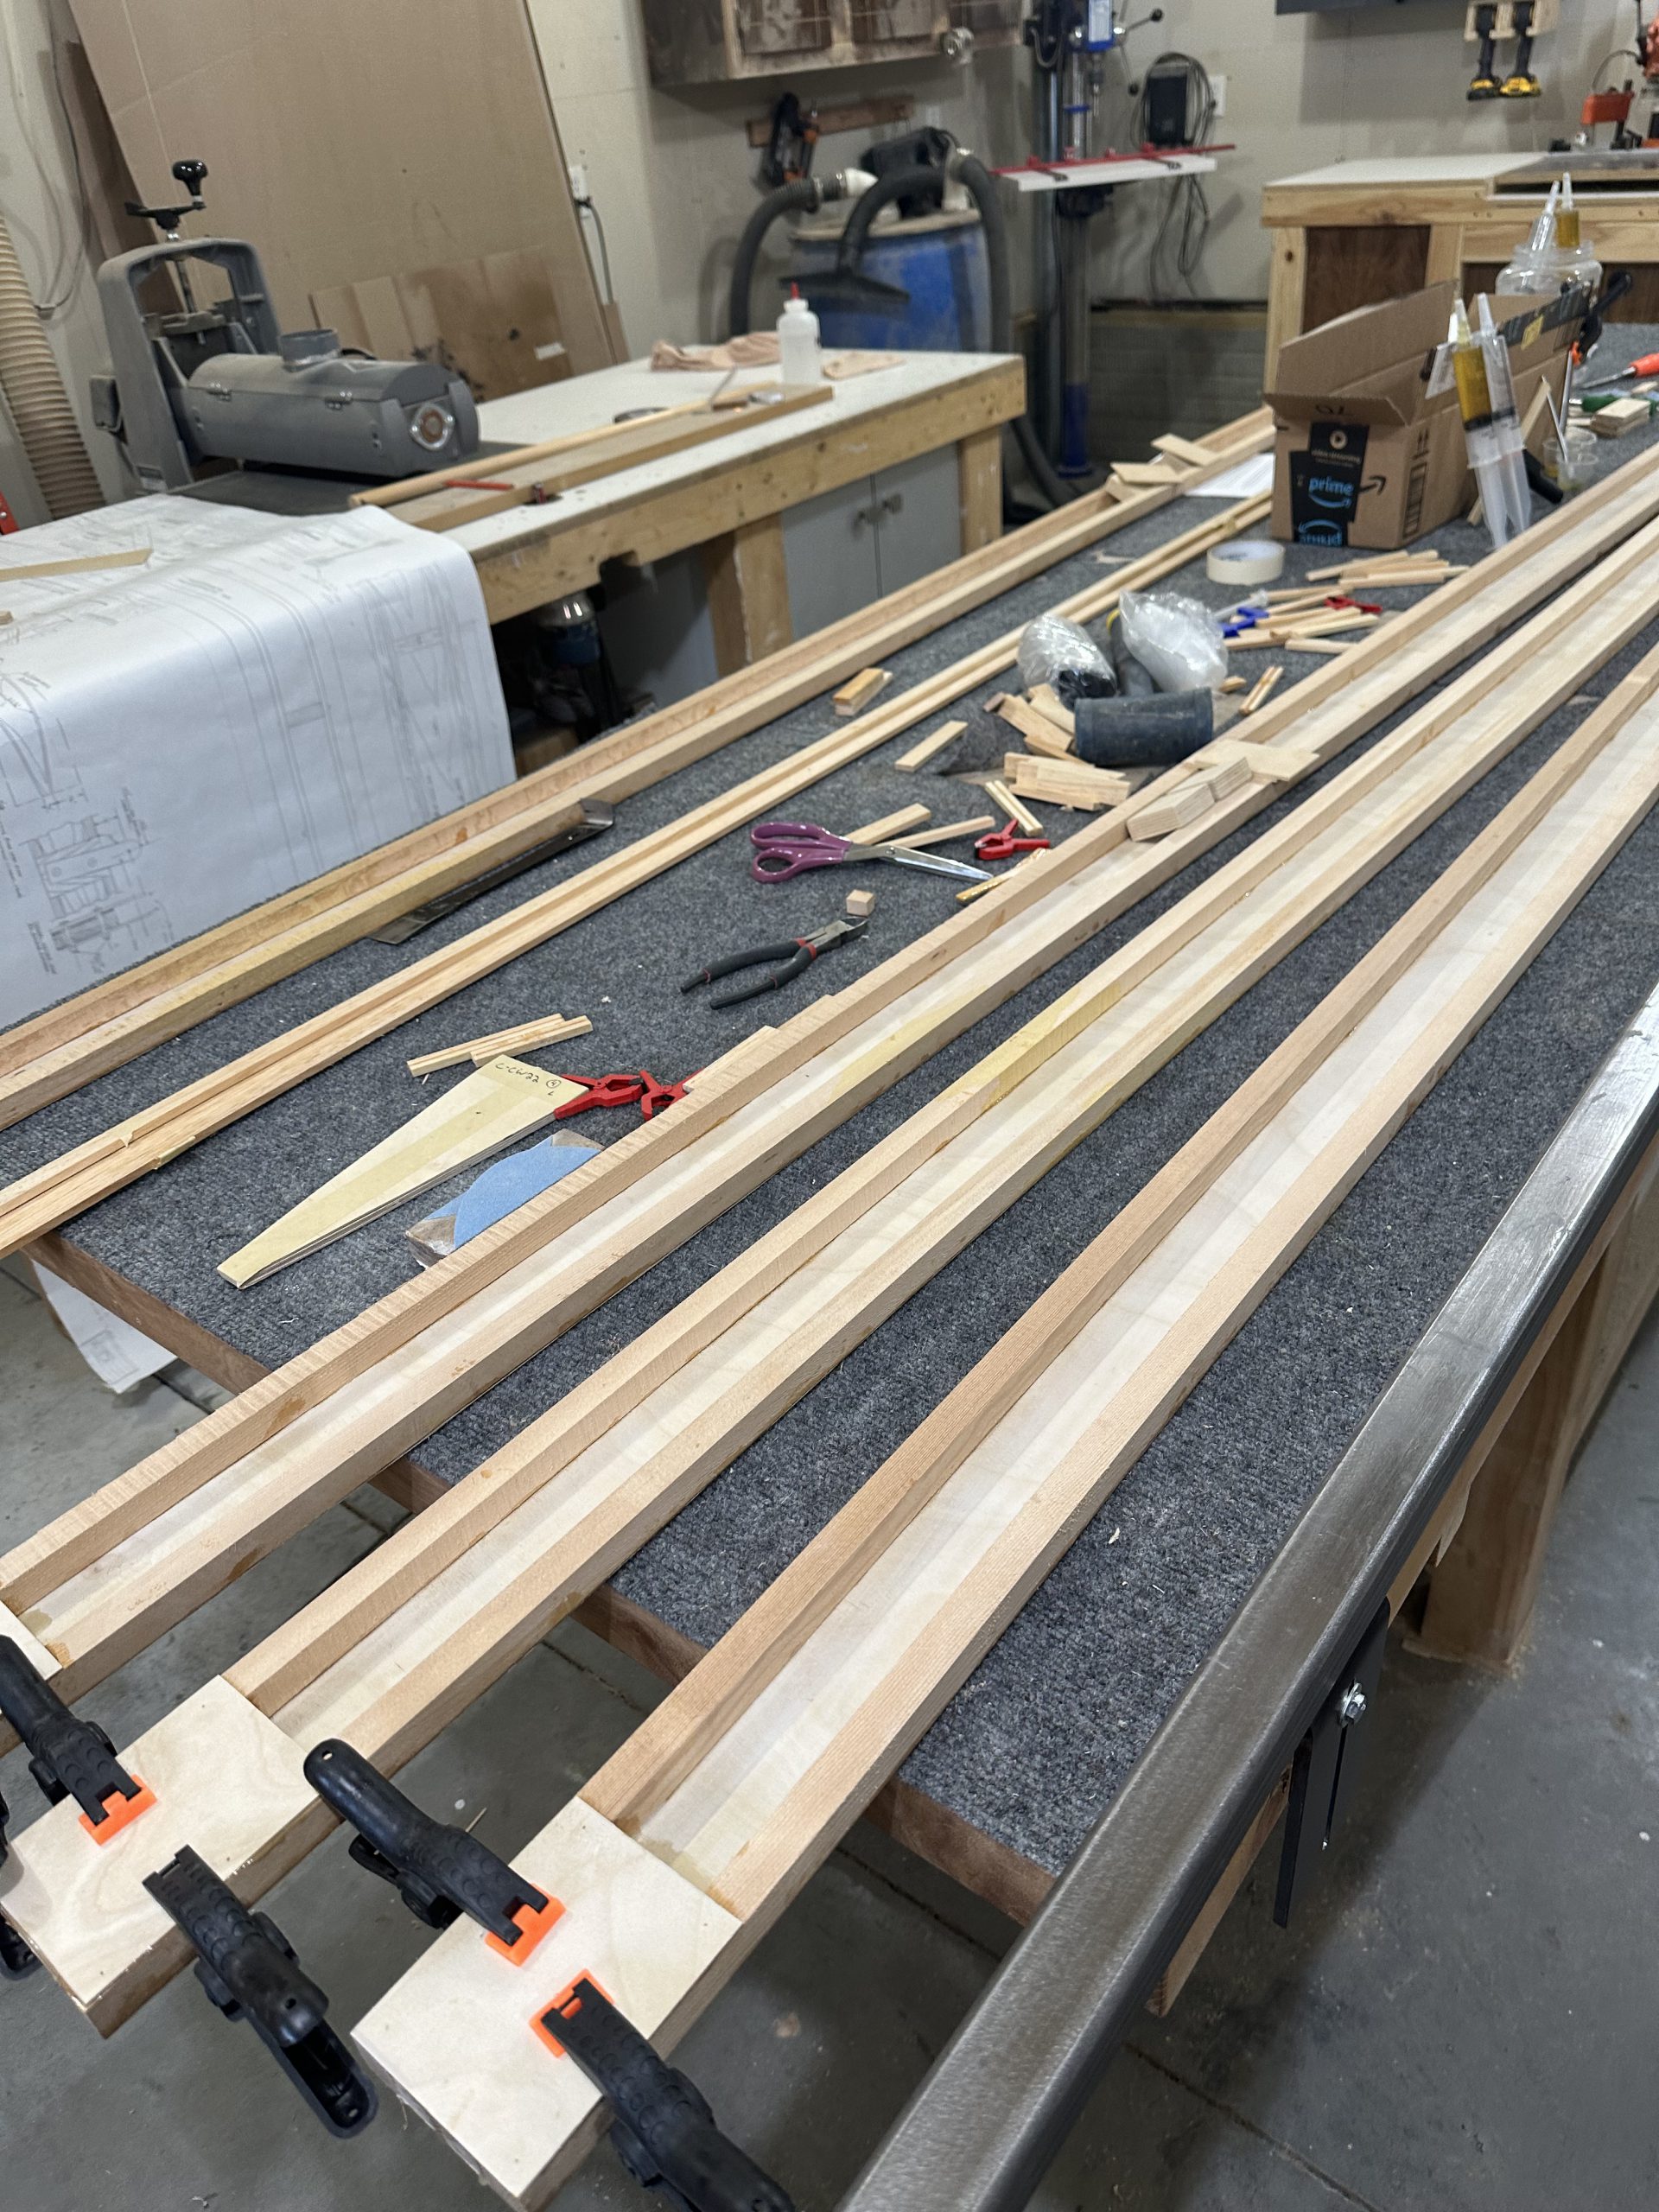
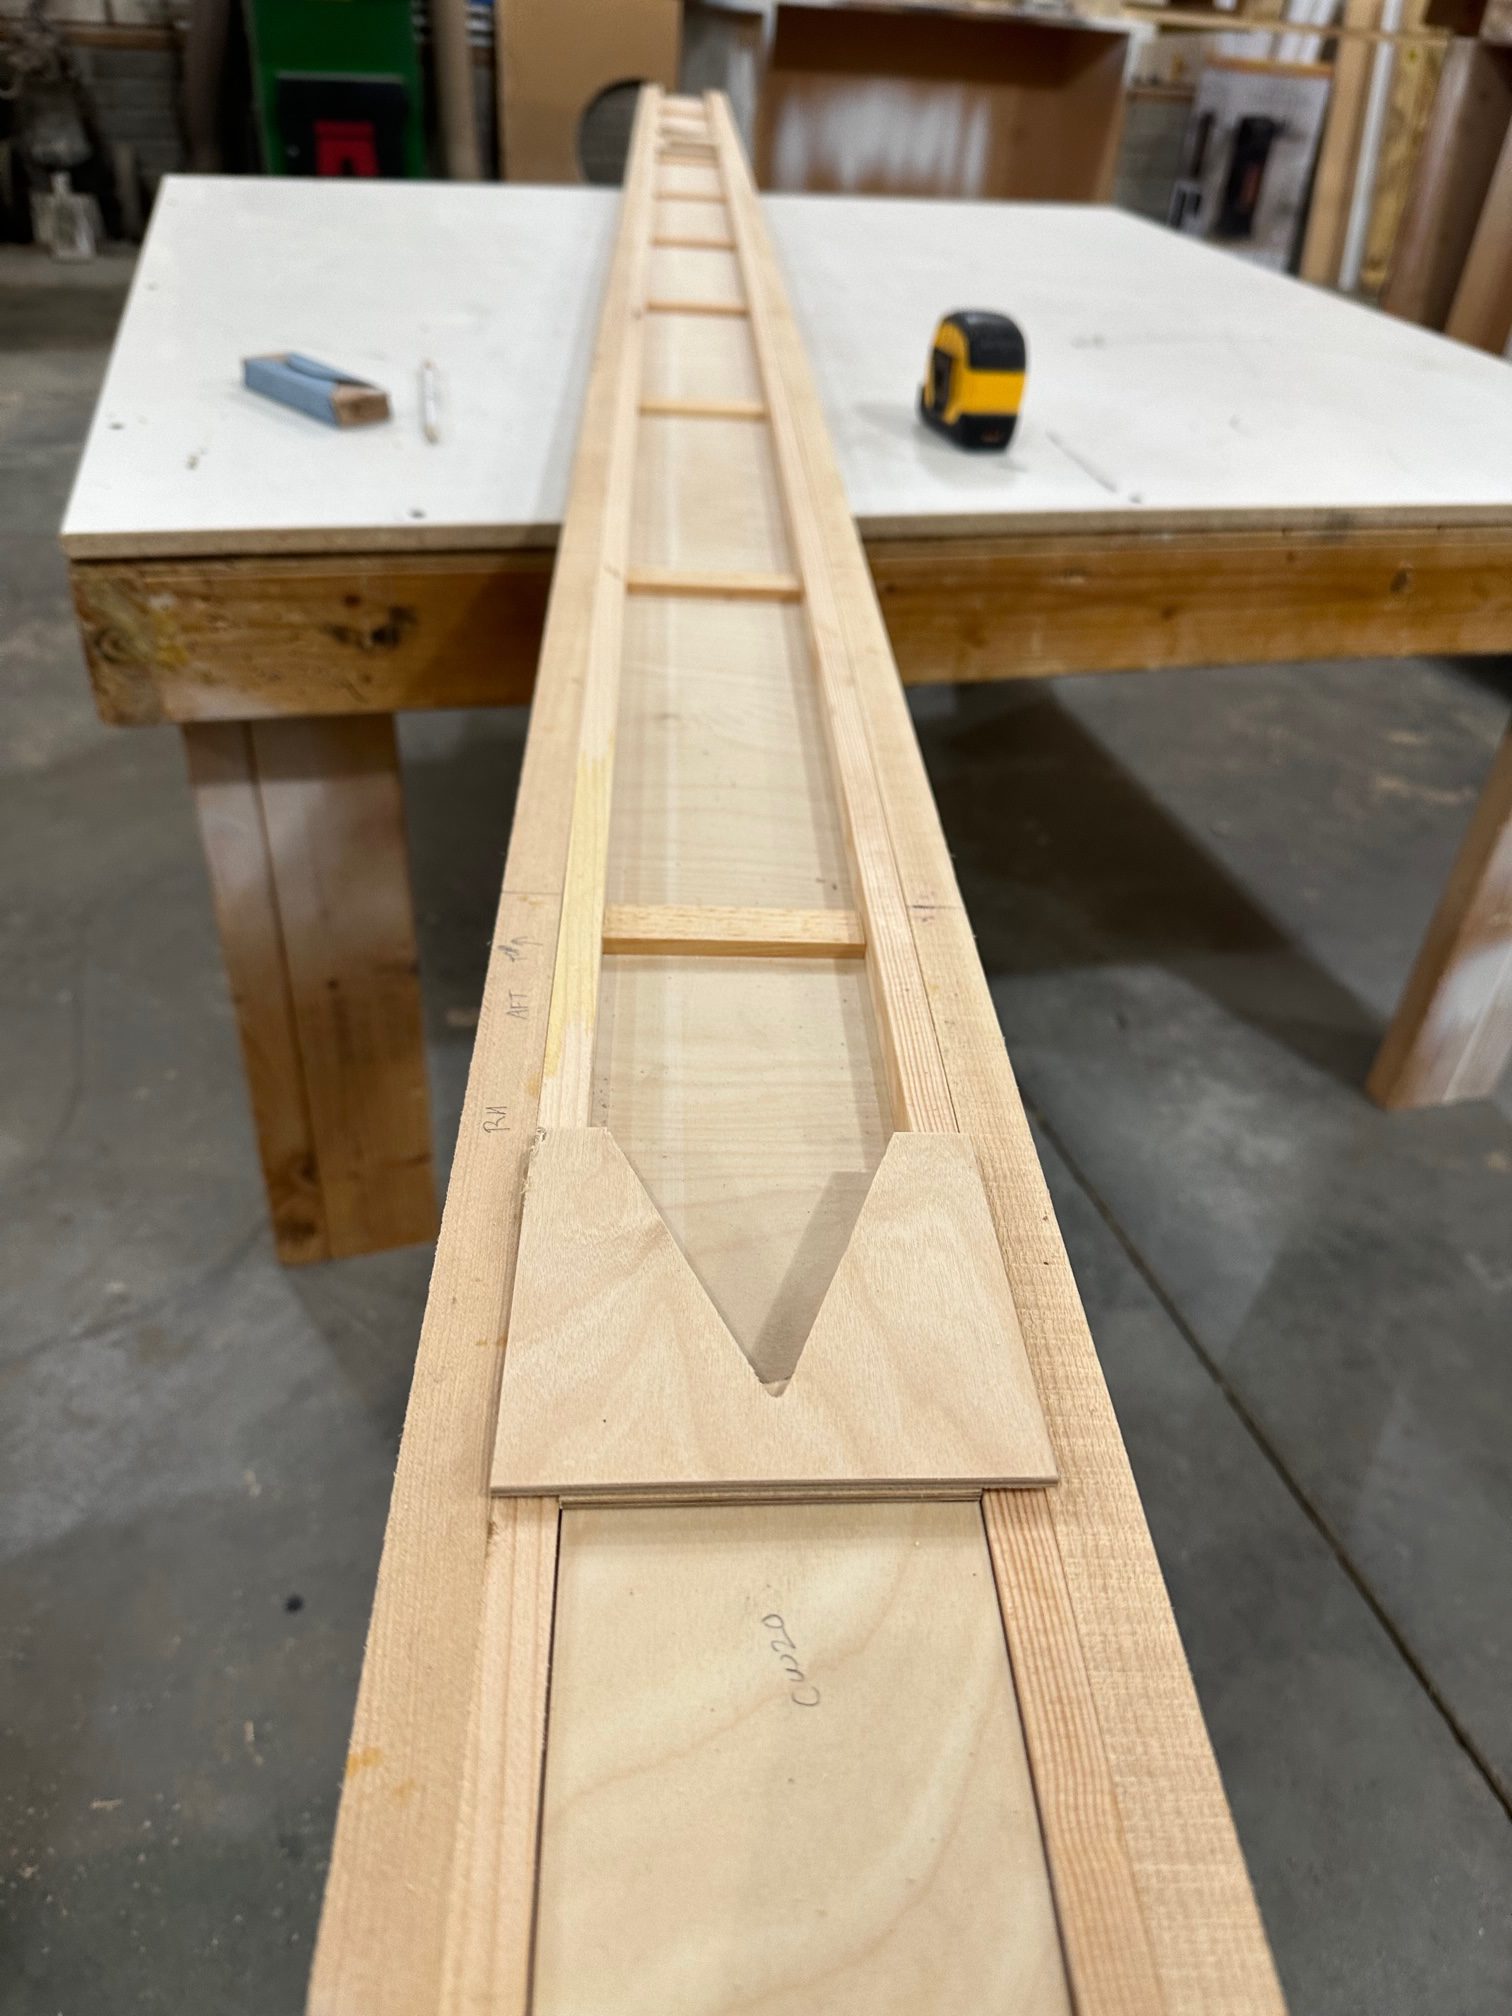
I also found that the spar has about 1/8″ of gradual taper toward the tip end. That was a builder error; it’s supposed to be a constant 5-3/4″ across the entire length. When I assemble the other three they will be correct. It’s not a critical error; I can fix it with shims when the wing is assembled. It’s even noted in the plans that ribs may be shimmed where they attach to the spar. It’s just been an inconvenience. Before I found that taper we’d cut some reinforcing blocks that fit between the spar stiffeners to a constant length. Some needed to be sanded, some needed to be re-cut because they were too long. That’s when I measured the spar height more carefully. I had just measured one end and a spot partway down the spar before — I guess it didn’t occur to me that it would have a taper to it. Everything else is good, there’s no bend, twist, or warping, so it’s good to go.

Other minor things — the plans call out 120-1/4″ for the spar length, but the main caps are 120″. Obviously the quarter inch at the tip isn’t going to make a difference, I’ll just make sure both spars are exactly the same length.

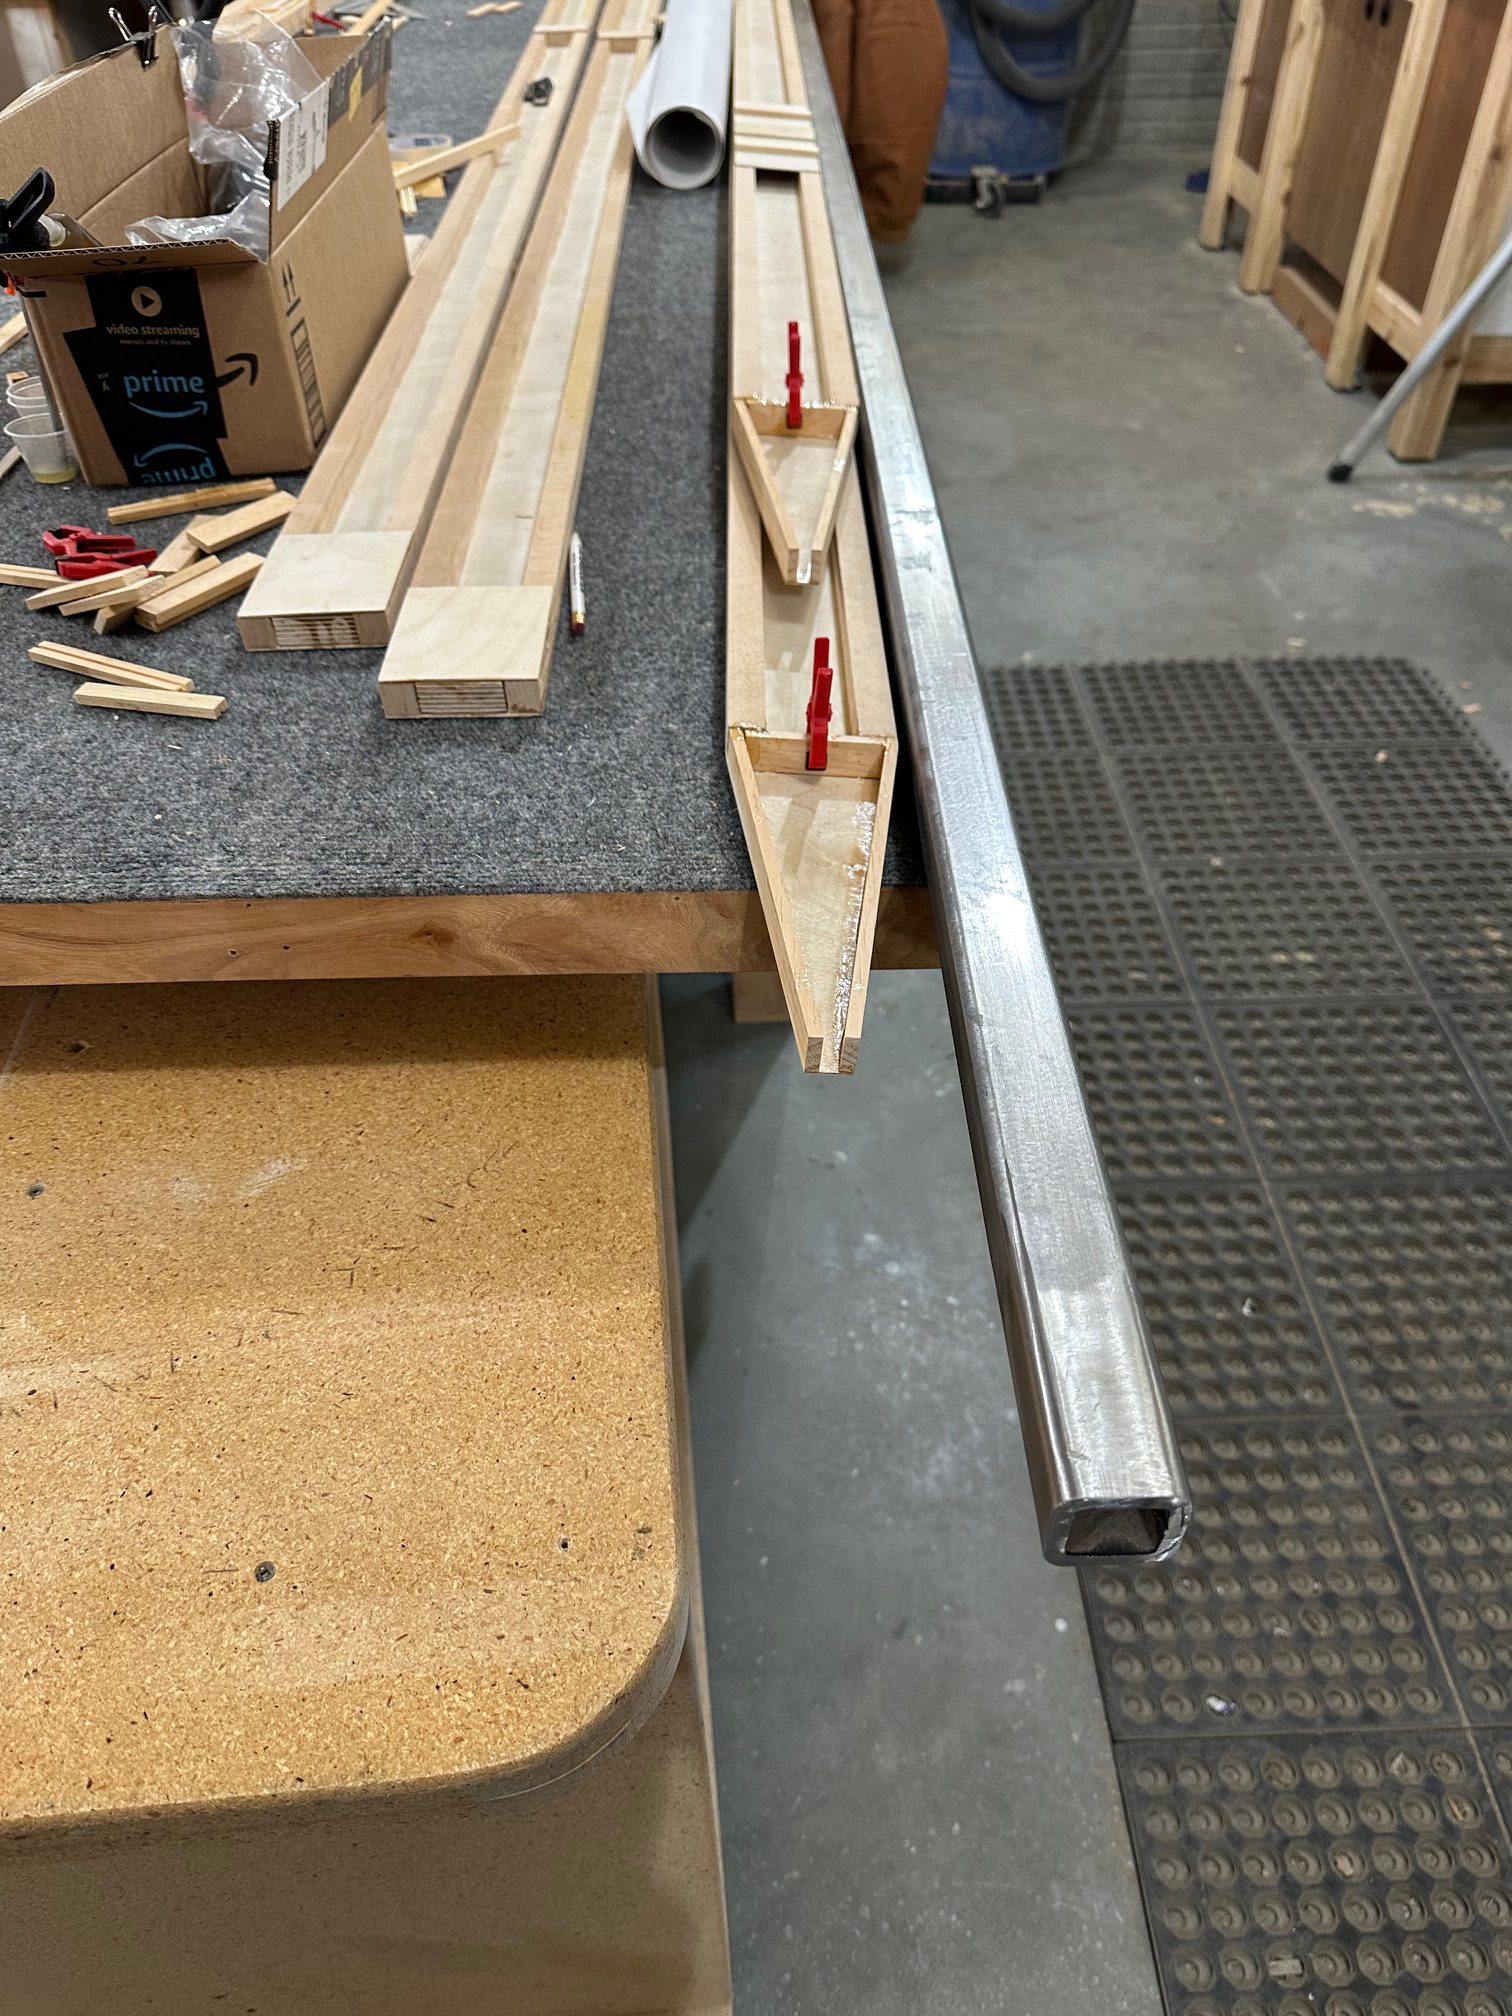
I’ll go over tonight and finish the assembly of this spar, and hopefully get started on the next. I also need to find my box of 4130 steel tubing and see if I’ve got the stock I need to make the bushings for the wings. There are bolts through the wing that hold the attach brackets for the fuselage, struts, and flying & landing wires. All of the holes need steel bushings through them. Simple enough to cut and file to size; I just need the right size tubing. I bought a “grab bag” assortment of random tubing cut-offs from ACS a while back to see if I could learn to weld. If I’ve got a couple feet of the sizes I need, I can use them for this.

Gluing up a wing spar

Yesterday I headed over to Stu’s to glue up all of the pieces to the aft face of the upper right wing spar. There are two full length spruce spar stiffeners, four pieces of plywood at the wing root, spruce blocks placed at each rib location, and four plywood pieces for the flying wire attachment brackets. Then I’ll get to flip it over and do the same on the other side.

When I was building wing ribs, I found that a total of 8 ml or so was about right to make two ribs. Since I did that a lot, I got used to mixing up small batches of T-88 epoxy. Yesterday was the first time I have had to mix relatively large quantities — I went through two 20 ml batches, which is about the most I can do in the little medicine cups I bought for this. Even that left me slightly short. There are a couple of plywood attachment pieces that I didn’t get installed yesterday. System Three makes auto-mixing dispensing cartridges, but they’re substantially more expensive to use. As in, over six times the cost. I think I’ll be sticking to mixing cups. I may need to get some larger ones, though — mixing up 20 ml at a time isn’t going to work for a lot of this stuff.

Last rib done, first spar started

I just pulled the last two false ribs in the jigs. It’s been a long haul — six and a half years since I built the first rib, but now they’re done AND I’ve got the materials and the place needed to continue the build.

Last night I was over at Stu’s place. One of the main spars has been partially assembled; the spar caps have been glued to the web. I got all of the rest of the parts for the aft face of the spar fitted and ready to glue up. I decided to designate this one the upper right wing. I’ll head over tonight and glue it.

I briefly thought about tearing down the rib jigs now that all of the ribs are finished. I decided not to do that quite yet. For one thing, there’s a chance I may need or want to make more of them for one reason or another. I don’t need two jigs, though. I’ll probably leave the first one I made as is, and pull the blocks and plastic from the second copy. It’s not a high priority, since it will only yield a 4′ x 1′ chunk of MDF.

Spar webs

The plans and BOM call for plywood spar webs, cross-cut, 60″ long. The webs are butt-spliced mid-wing, with what seem to me to be fairly narrow blocks of spruce on either side.

Problem is, you can’t buy 60″ wide sheets of aircraft plywood in the US. Aircraft Spruce has ONE size, and not a size I need. Everything else I’ve found is in 48″ wide sheets. And since the web needs to be crosscut, it’s not as simple as just buying a 4′ x 8′ sheet. I’ve contacted Fisher Flying Products as well as another supplier in Canada. Fisher’s tab will be roughly $340, the other place was pretty reasonable for the plywood but wanted over $500 for crating and shipping. To put that in perspective, ACS will sell me the plywood I need for about $100, delivered.

The question is, can I make 48″ long spar webs work in a way that is at least as good, or preferably stonger and better, than the original design? I am no engineer. Especially a mechanical engineer. I’m certainly not qualified to make such a call. Fortunately, I have someone local who is an engineer, and is qualified to help make that decision and recommend another way to do it — if there is one. I’ll be taking the wing plans to the February EAA chapter meeting to go over them with him and see what we can figure out.

If that doesn’t work out, Spruce does sell 5/32 ply in 61″ x 61″ sheets. The spar webs are specified as 1/8″ for the main spar, and 1/16″ for the rear spar. I could just make both webs 5/32 with a slight weight penalty. The plywood would weigh 3 to 5 pounds more, but I’d probably also need to trim 1/32 to 3/32 from the spruce stiffeners, so that might make up for some of it. Again, I’ll need to consult with a real engineer to see if that wold work or not. Ending up with a plane that’s a couple pounds heavier but significantly stronger is OK. Ending up with a plane that is in any way less strong or less safe is absolutely not. And if the ribs need to be modified a little to clear a beefier spar — I’m OK with that.

Tempus fugit

Another year draws quickly to a close, with what feels like not a lot of progress on this project. I have a tall stack of ribs, but really nothing else. I had hoped to have a good start on the tail surfaces by now, but haven’t even started on them. We’ll need the basement for a family Christmas party, so no laying a 4×8 sheet of MDF over the island down there to start laminating pine. No worries, though. I have located some nice clear pine boards at Menard’s that will rip down nicely into 10′ long lamination strips. I have an order of Finnish birch ply queued up on Aircraft Spruce’s web site, ready to place the order once I’m sure I have all the stuff on there that’s going to be expensive to ship. As soon as we’re finished with the post-party cleanup, I’ll have the basement available to work in through the rest of the winter since the garage will just be a bit too cold for epoxy.

I also got a great idea from one of the guys on the Biplane Forum. I’ve been pondering how to store the wing ribs. I think I’ll build short pieces of main and rear spars out of pine and non-certified plywood, just to assemble all the ribs and clamp them together. That way I can surface sand them all together, and maybe if I’m lucky use that assembly to run them through the table saw for trimming as well. Maybe.