Bracing and gusseting

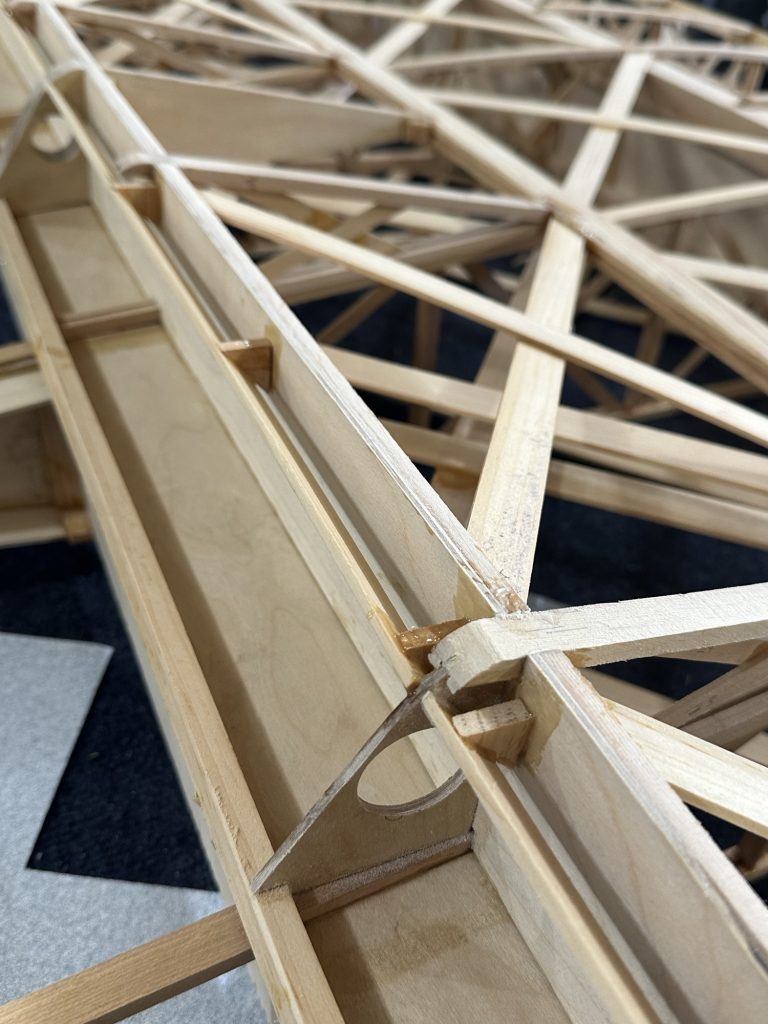
I got all the clamps off of the aileron this afternoon. Everything looks pretty good. Due to the way I had to cut the thin nose skin spar, I felt it best to install some bracing for it. These are just little half inch right triangles that I glued in to keep it straight.

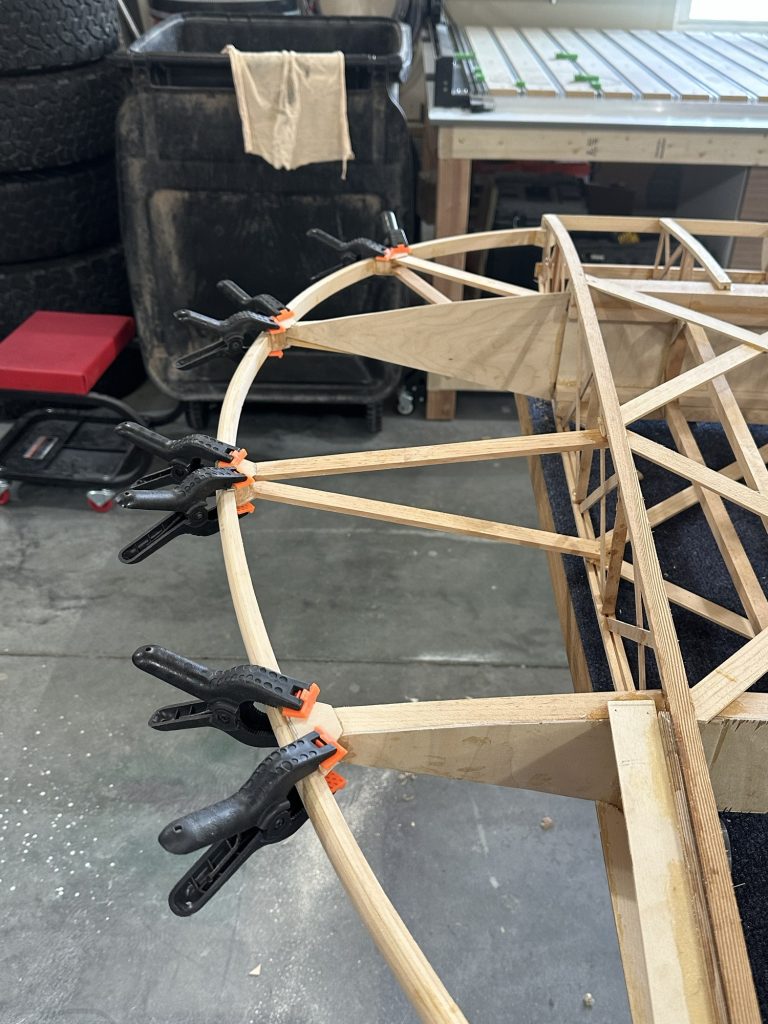
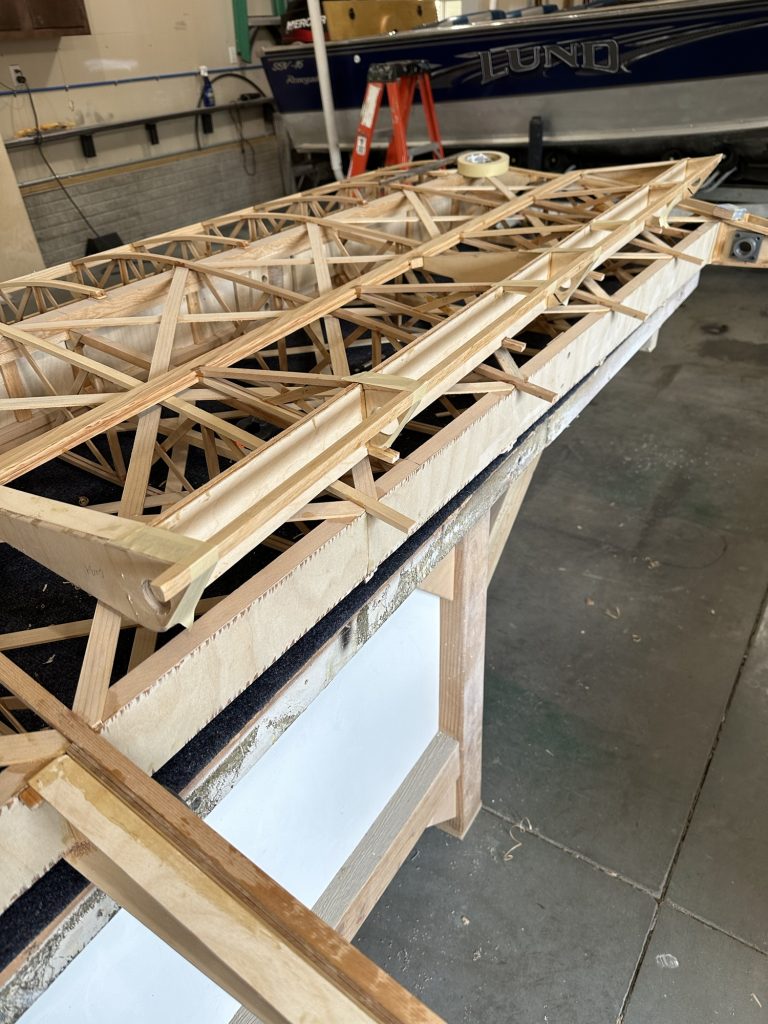
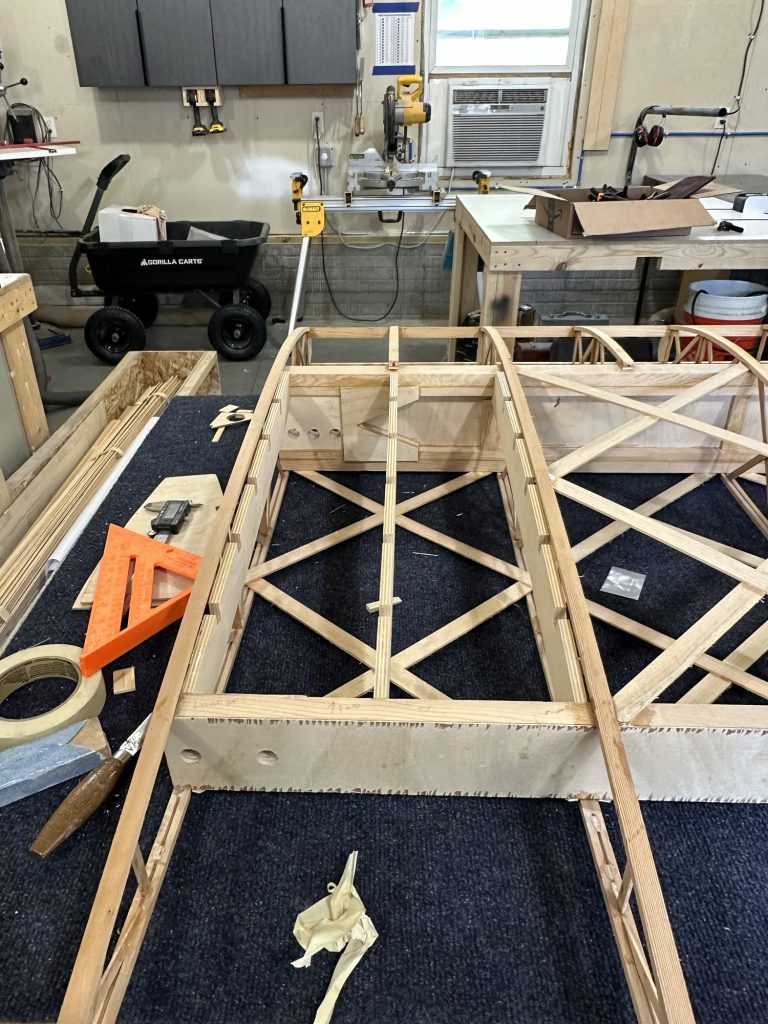
With that done, I removed the clamps from the wingtip bow and sanded down the gussets I’d installed last time. I won’t know if they require any “fine tuning” until I have a chance to get some fabric on it, but I think they’re good to go.

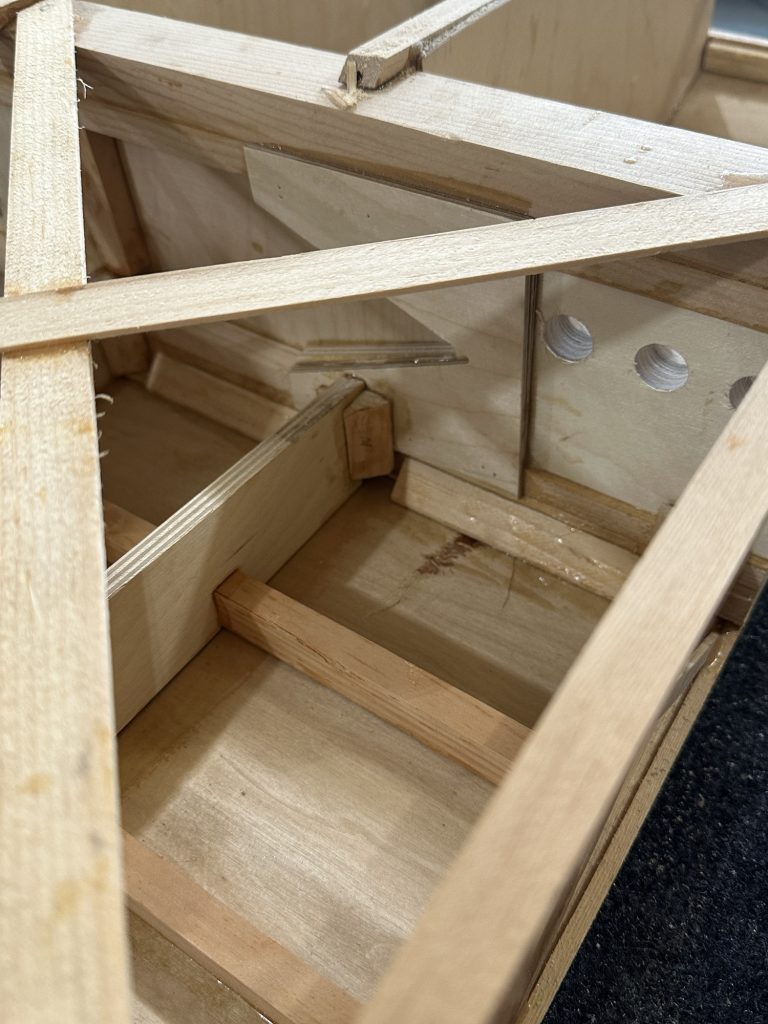
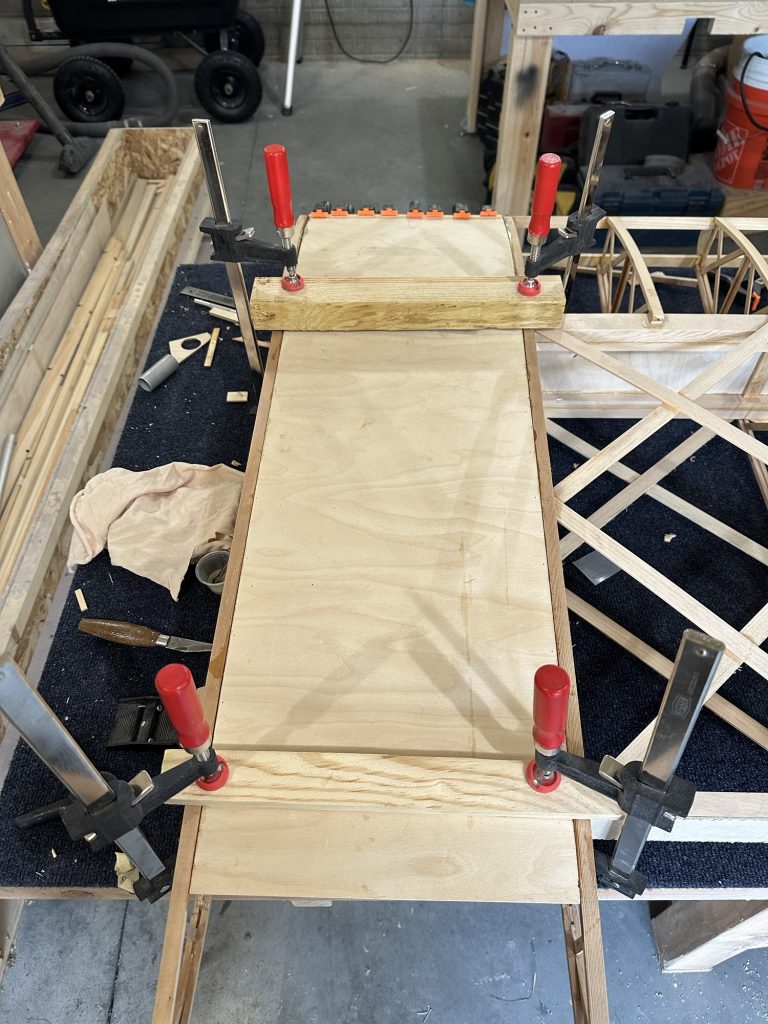
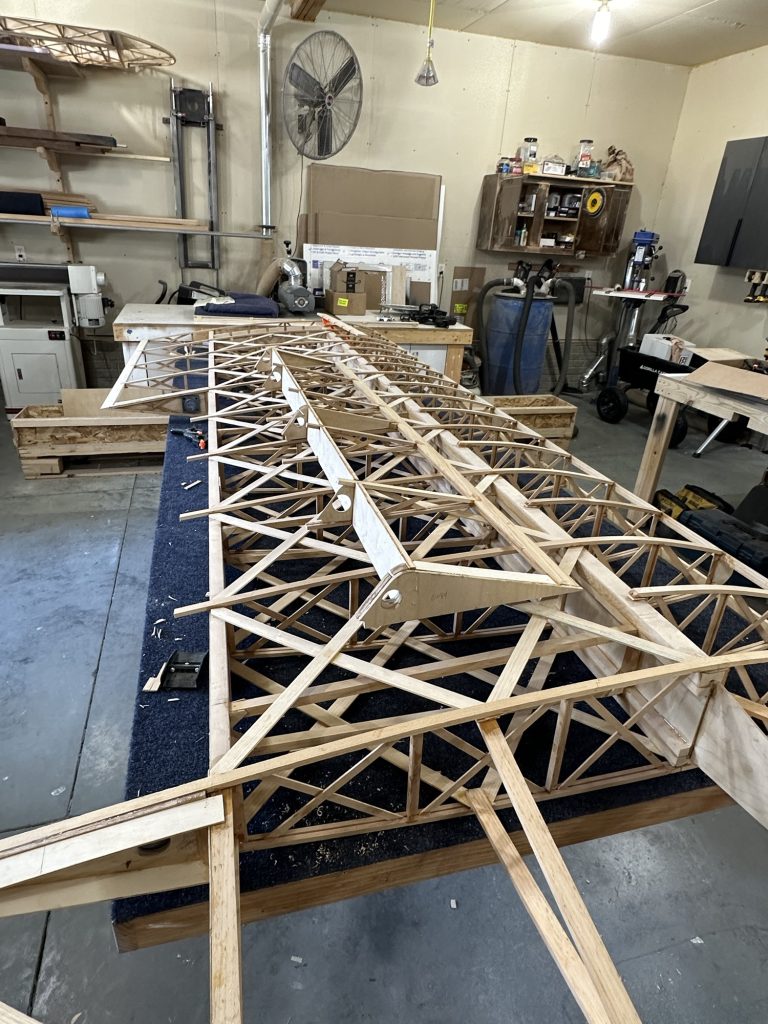
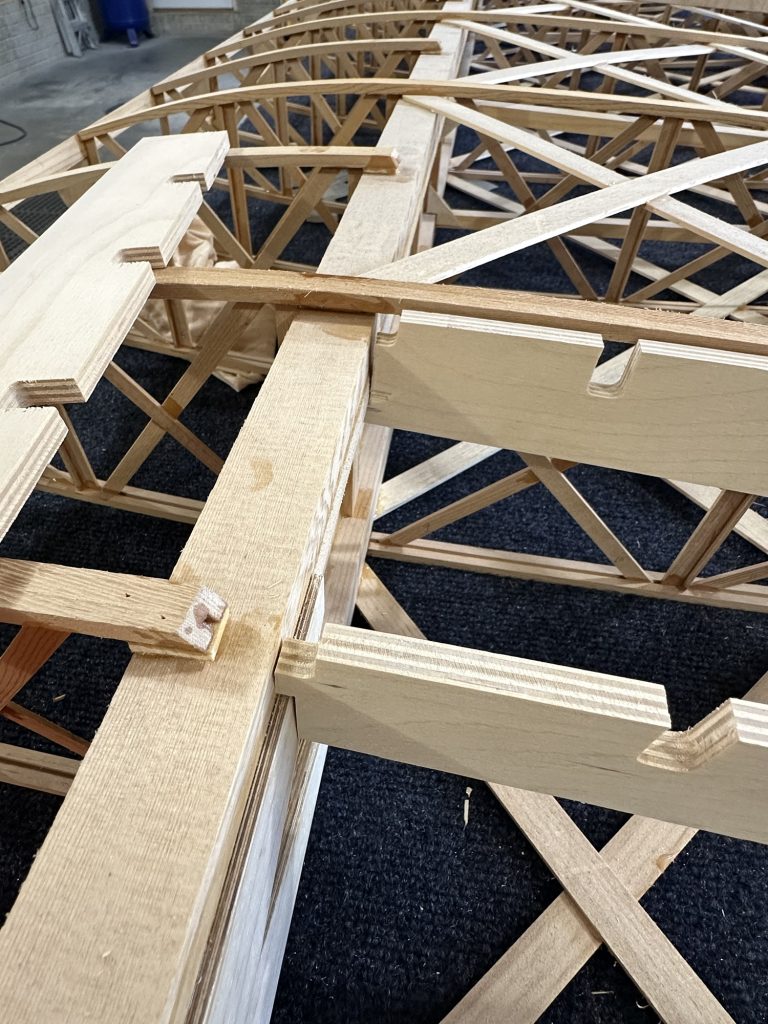
I flipped the wing on its top surface and added some more blocking under the ends of the wing walk. These are just regular corner block stock to tie the wink walk plywood to the spar caps. I think everything looks pretty sturdy there now.

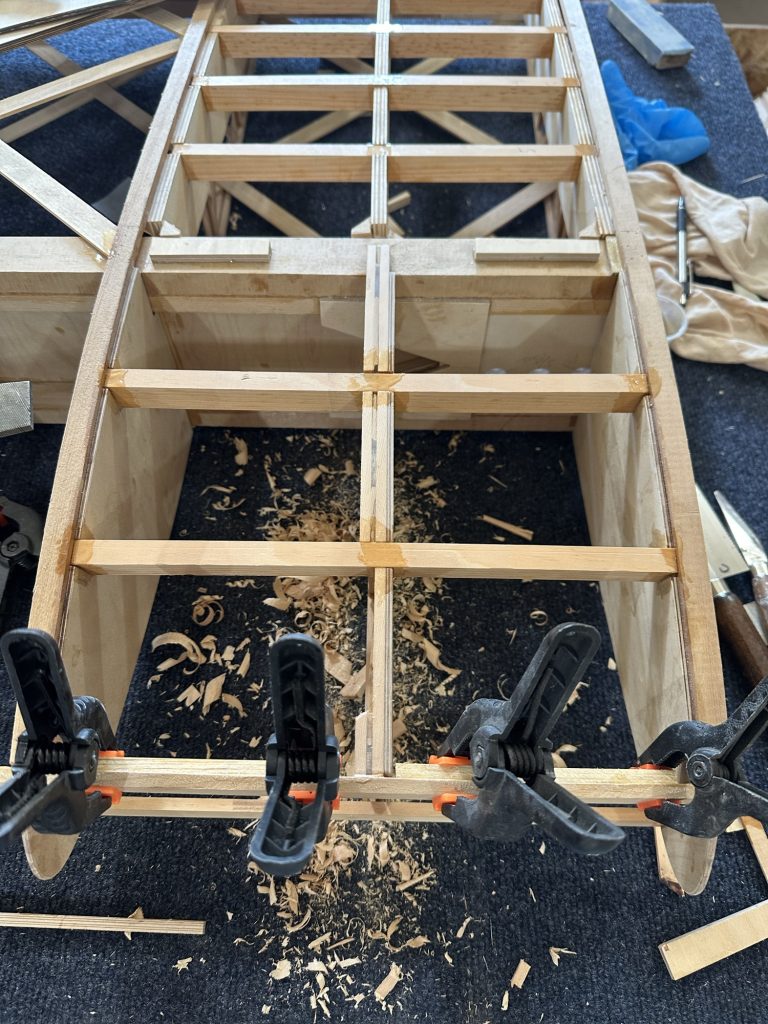
With some time and glue left, I sanded down the corner blocks on the underside of the wingtip bow supports. I cut, glued, and clamped the gussets in place and called it a day.

Aileron work

I removed the clamps from the wing walk skins; all looks good. Once I have the wing flipped upside-down again I’ll have a look at the underside and see if there are any additional opportunities to put in more support for the structure, but I think it’s about as good as it’s going to get.

I cut and installed the lower geodetic braces in the aileron, as well as the aileron skin support (not sure if the plans refer to it as a spar or not). I’m pretty happy with how this one is coming together, especially considering the angst the first one caused.

Wing walk skins down

Today I went through more epoxy than I have since gluing the spar caps. After some sanding and test fitting, I pre-glued the wing wall structure and the two plywood skins. Then Stu helped me clamp the edges down, and pinned down any spots that weren’t firmly in place.

As planned, I used some scrap lumber to make clamping bars. I used strips of geodetic material between them and the skins to ensure good pressure and clamped everything together with bar clamps.

With some epoxy left over, I glued the nose spar onto the aileron and did a little more corner blocking on the wingtip bow supports. With all that clamped, pinned, and taped in place it was time for lunch!

Wing walk extension

This morning I went over to check on the work I did yesterday. The main portion of the walk structure looks good. I still needed to get the extension (front portion) ready for the skin.

The center plywood support is glued to the first false rib, but of course the plywood skin sits between the ribs. That meant I needed to shave about 1/8″ from the top cap of the false rib. I used the razor plane for most of this work but needed to use a file for some of it like the front edge. I cut the cross supports and used them to gauge whether the top of the middle support/rib was level with the other two. In the end I used a DA sander to “fine tune” the high spots until it was all level.

I also wanted to make sure the front and back edges of the thin plywood are fully supported and level with the thicker ply on the rear portion of the walk. I ended up just cutting a couple of support strips to attach to the top of the spar; I use da cutoff scrap of the wing walk for this as it was the perfect thickness. I also cut a couple of pieces of rib capstrip (I’ve got a lot of it left) to glue to the false spar to support the front edge of the walk extension. The plans don’t call for it, but I’ll feel better with a little added structure there.

I can probably remove half of the capstrip on the center one. if it’s not going to provide any strength, there’s no need for the extra weight!

The plans call for using nailing strips and brads to nail down the plywood skins while the glue dries. That’s one way, but I’m thinking another way would be longer clamping strips and long clamps. One strip would hold down the aft end of the main walk and get clamped to the rear spar. One would hold both the forward end of the main walk and the aft end of the extension and get clamped to the main spar. A third would hold down the forward end of the extension… I’m not entirely sure how that one would get clamped, but since it’s 1/8″ plywood it won’t need a lot of clamping force. I’ll find a place, I’m sure.

Wing walk work

Today’s session was pretty much all wing walk. I got the notches for the cross pieces all properly fitted using a large file. I got the nose walk supports similarly modified to fit the cross pieces, and cut to fit the spar. Then I glued on all of the long supports as well as the cross braces under the main portion of the wing walk. The front extension portion will have to wait until I figure out exactly how I’m going to deal with the false rib in the center.

Along the way I also glued the top of the root wing rib to the top of the spar. The root rib is angled slightly to accommodate the dihedral, so the wing walk skin will need to be cut in an irregular shape to fit, of course. It has to be; cutting a simple rectangle would be far too easy.

Aileron freedom – and wing walk work

Today I located and temporarily screwed the bearing blocks in, and cut the aileron free from the wing.

With that done, I decided to have another look at the wing walk situation. I don’t know why the support bits were the way they were, but I decided to just get on with making them work. When I look at the plans, especially the oblique view, indicate that the parts may have been cut in an attempt to match a much earlier version of the wing without much of the reinforcement at the main spar root. Anyway… Two of them had the aft end cut well enough to work at the rear spar. The inboard support needed to be trimmed at both ends. All had to be modified to fit the main spar.

In the end I got all three to fit, though I’m not terribly thrilled with the lack of good options for supporting and blocking the ends.

Next up were the notches for the cross braces. Most were too shallow and look to have been cut out with an end mill or router; the corners were rounded. I used a file to square up the corners and deepen the notches to fit the 1/2 x 3/4 pieces.

I figure I’ve got another hour or so of work to get all of the blocking and support in place before mixing epoxy. Probably more; I still haven’t figured out what I’m going to do about the extension of the walk forward of the main spar. If I build it to plans I’ll need to remove or hack up the first false rib. And of course the plywood pieces require significant modification.

On the bright side, the plywood skin for the wing walk curves nicely and won’t be a problem to get glued down. I’d been worried about that, and had visions of needing to make my own laminated piece there, but it’s fine.

Miscellaneous work

Today came and went without mixing up any glue. I sorted out the nose plywood, then went through all of the aileron pieces and got them cleaned up, marked, and re-taped for the three remaining ailerons. I got the aileron spar web and marked it for the notches to clear the ribs, then brought it home and started cutting those notches on the bandsaw. I pulled a wingtip bow down and checked its fit; it looks like minimal trimming will be needed.

I also collected all of the aluminum pieces I had at Stu’s shop and brought them home, and cut the ends on the bandsaw. They’re all CAW2 pieces, I think — I need to dig out the rest of the pieces and get them all drilled and finished off. I’ll finish them on the belt sander and Scotchbrite wheel before priming them. My little 3D printed guide button worked great for this. I don’t recall if I described it or not, but it’s just a 1″ diameter by 1/8 thick disk, with a 1/4″ diameter by 1/8 thick nub in the center. Put the little piece in a 1/4 bolt hole, and the larger piece gives you a perfect guide for shaping the end of the bracket with a 1/2″ radius. They’re disposable if you nick or break one, and only take a little while to print up. I’ll probably print a few more in case I destroy any while using the belt sander.

I spent some time trying to determine whether the wing walk pieces will be of any use to me or not. The plan sheet and plywood supports all seem to be made for some earlier version of the wing. The notches on the supports don’t work (or even come close to working) with the root blocks on the main spar or rear spar. The forward plywood bits are too long, and even if cut off don’t match the curve of the wing ribs. There are supposed to be three installed forward of the spar — but that would only work if I removed one of the false ribs. I still don’t know what I’ll do for the wing walk. I do know that 1/4 plywood for the rear portion would need some curve in it, and I’m not sure about that. The plan notes say to nail it in place until the glue dries… ::shrug:: This is why I’m considering a laminated layup with some wood and maybe a layer or two of carbon fiber.