As often (always?) happens when a new large work table appears in a garage, it immediately got covered with a raft of postponed and opportunistic projects. Vegetable and tobacco seedling trays, a couple of 2-stroke implements that needed new carburetors, some engine work for the Mustang, a furniture project, and a bunch of random other stuff that just… collected, as these things so often do. I also routed grooves and installed a couple of T-tracks in each of the extension wings, just because it’s not uncommon for me to need to clamp something down to the bench. Now I can.
Today I got everything cleared off and wiped on one more coat of linseed oil just to try and keep the top of the bench from getting crumbly and maybe provide a little bit of paint/oil/glue resistance. Assuming the weather doesn’t turn nasty early tomorrow, I’m hoping to bring one of the wings home. I need to get the aileron interference issue fixed, the last of the strut brackets installed, and the second (right) wing varnished so it can go to the airport where the wing stand awaits it. Then I can bring the left wing home, fix that aileron and brackets, and get it to the airport as well – and finally start on the top wings.
For a while I’ve been pondering how to set up the new wings on my bench. He’s got a pair of 10′ long steel rails, made from square tubing with slotted brackets to bolt them to his bench. He had put those together to support a router sled for flattening slabs of wood. Early on I figured out that we could attach them to the bench to properly orient the wing ribs for attaching the trailing edge and spars. The trailing edge stock needs to be glued on so that the taper exactly matches the angle of the aft end of the wing ribs, and the easiest way to do that is to have a flat surface that aligns the bottom of the TE stock witht he bottom cap of the ribs.
The plans call for attaching a 2×4 on edge to the edge of the work table with a shim under one side. This tilts the top edge of the 2×4 to the correct angle, which I measured at bout 14 degrees, to establish the right pitch to align the trailing edge and ribs. I was concerned about finding a perfectly straight, flat 10′ long 2×4, as well as shimming it consistently. All in all, I was nervous about how to set up the new wings on this bench.
A few days ago, I grabbed one of the ribs I have here along with a short cut-off piece of trailing edge stock. I started exploring different ways I could jig up a wing on the bench, and came to a surprising (and happy) discovery. With the TE stock flat on the front edge of the bench and the rib inserted into the notch, a standard 2×4 on the opposite side of the bench will perfectly support the rib right under the main spar location. So, I could clamp the trailing edge down on some release tape or waxed paper (to keep the epoxy from sticking to the bench), support the other end with a 2×4 – or multiple shorter pieces of 2×4 – and assemble the wing that way. Sweet! I’ll test that configuration when I bring the lower left wing home, which is built but not varnished yet. I’ll need to apply the varnish before taking it to the hangar for storage, and I can check to make sure my jigging idea will work as well as I think it will.
Well, it’s now been close to five months since I did any meaningful work on the actual – you know – airplane. I’ve built the new workbench, cleared out some space in my garage, and moved the new bench to said garage. I built and installed a wood storage rack. I fitted and leveled the bench extensions, which involved a little fine-tuning of the support braces. Along the way I had to remove the extensions and plane off an angle on the bench and extensions to clear the hinges that attach the extensions to the bench.
As will happen any time there is an available, clear horizontal surface, “stuff” accumulated. Tobacco jars, pipes, tools, a furniture restoration project, more tools… sigh. Then I decided to install some T-tracks for clamping and whatever else one would use T-tracks for, so I did that. Now I have a 10′ long bench with T-tracks on each end, with the extensions flattened and leveled relative to the main bench top. I have no illusions whatsoever about the bench being perfectly flat, but it’s close enough for my purposes. I’d say no more than 1/8″ variation anywhere along the 10′ by 3′ surface. I’m building a wooden biplane, not a supersonic jet or spacecraft.
All of this hasn’t been the sole cause of delays. For most of the winter it’s really been too cold out there to work with epoxy. Climate control has not been stellar. Our old small space heater died, so I bought a new, larger one – which holds the temperature at a level tolerable for humans, but not a temperature I’d trust for woodworking and epoxy. But, we’re close to being in the warmer part of the year. I’ll have a mini-split heat pump installed at some point, but that’s not a limiting factor right now.
Today I got 7-1/2′ of the bench cleared off and clean, tools put away, and various other “stuff” rearranged and cleaned up. I now have a clear path around 3 of 4 sides of the bench, with one end still a little cluttered. The drill press is repaired and back on its stand, and I got the runout down from its original .007 or so down to .003 or .004. Still not fantastic, but I think it’s mostly chuck. The spindle now shows about .001 after I removed and cleaned it with mineral spirits. I may need to tweak things just a little more.
Unfortunately, as much as I’d like to clear off the remaining extension and start the next wing, I need to build some storage for the bench or things will rapidly deteriorate. I want to put a rack for clamps on the front side, and some storage drawers or at least shelves. I want the spindle sander and small shop vac in the back, at a minimum. I need to build this stuff, and for that I need either a table saw, a trip to Stu’s to use his, or some other acceptable way to cut down plywood sheets. I’m thinking seriously about a new, relatively small circular saw and some way to hold a sheet off the table so I can clamp guide rails and cut the sheets up that way. I’m going to try to get to Home Depot tomorrow for some 1/2″ ply and circular saw. I have one, but it’s probably 60 years old and I’ve been fighting it to get straight cuts – I think there’s probably something better out there. Maybe even cordless.
Between other projects and bitter cold weather, I haven’t gotten anything done on the plane for a while. With one project essentially finished and the workbench finally cleared of it, I took the opportunity to fit the entire bench top. It looks like I’ll need to shorten the supports on the left end to get the left side extension level… I’ll need the chop saw for that.
On Thursday I picked up the particle board and plywood and Stu helped me — er, that is to say, Stu cut the sheets up for the top and shelf of the new bench. He’s got a massive SawStop table saw, and he’s a virtuoso using it. It seems to be a challenge for me to rip a 2×4 in half on a table saw; he can zip a 4×8 sheet of 3/4 particle board through that thing like it was a sheet of paper. I try not to use his saw, because even though I’ve never in my life hit the blade of a running saw with a finger, sure as hell I’d trigger his SawStop and add the ignominy of replacing a blade and cartridge to my list of accomplishments. I have, however, found that when I do use his saw things go a lot easier. My old table saw was a challenge to use — for most of the time I owned it the fence wasn’t parallel to the blade, and once I got that fixed the blade was dull. It was actually halfway decent in the end, for smaller pieces. Once I got it finally set up and a brand new carbide blade on it, some asswipe stole it… so now I get to buy new, some day when I have a place to put one. But I digress.
The tops are two layers of 3/4″ particle board, glued and stapled together. The lower shelf is 1/2 plywood, mainly because I had to buy some anyway for another project. The shelf is in three sections, so I’ll need to join them with some scraps of particle board or something. I plan to build some sort of storage to slide in on top of that shelf.
My casters and levelers also arrived Thursday afternoon, so on Friday I went over and installed those. I also cut the plywood for the lower shelf to fit, cut some corner blocks to keep the top square, and made the diagonal supports for the two extensions. Those are lengths of 2×4, notched on the lower end and with a double 45 cut on the upper end, that will brace between the lower shelf support and the top of the extension on either side.
The last thing to be done before final assembly is to flatten the top. As the bench was built with dimensional lumber on top of a workbench with a carpeted top, it’s “more or less” flat but the 2x4s aren’t perfect by any means. In a perfect world I’d have used a 6 foot jointer and a thickness plane to turn them into perfect boards before building, but I didn’t have access to a jointer. I know for sure one of the long edges of the table frame has a hump in it, and I want the top to be FLAT. I’ll evaluate how much needs to be done to make that a reality and see how I’ll make that happen.
I guess I missed a chance to make this Episode IV for a catchier title. Ah, well.
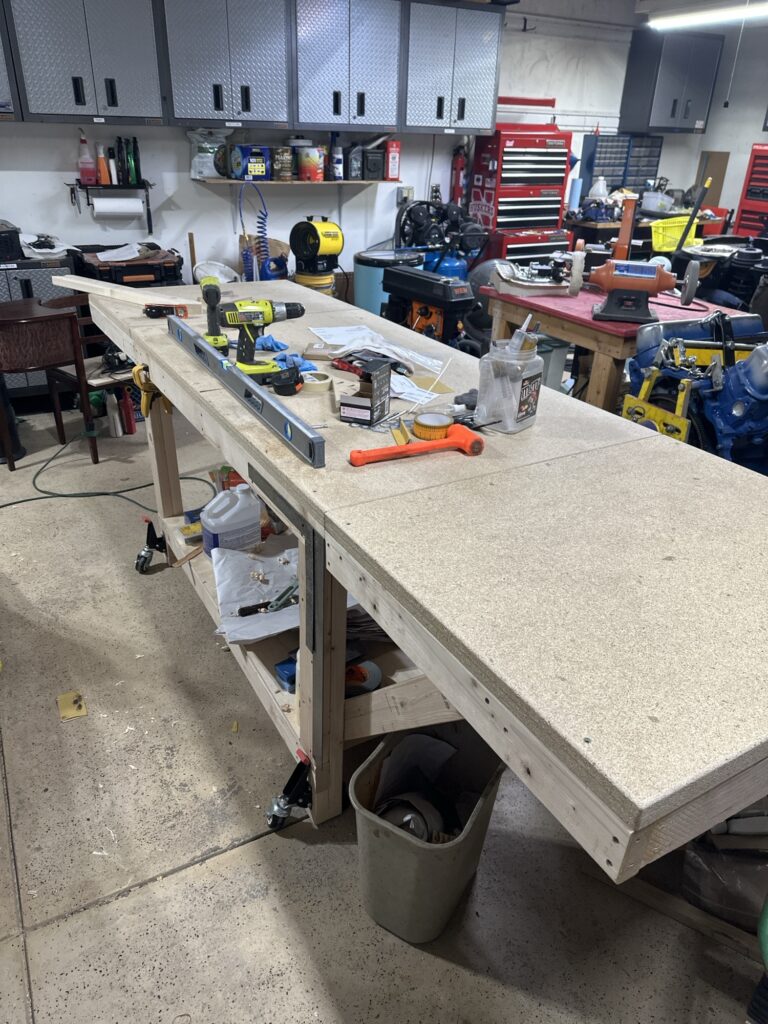
Today I bought some 2x4s, did some measuring and cutting, gluing, screwing, clamping, and ended up with a new work table mostly built. I’ll try and finish it up tomorrow. The main section is 60″ long by 36″ wide (that’s roughly 152 x 91 cm for you metric folks). Each end has a 30″ folding extension, so you can have a 5′, 7.5′, or 10′ total length depending on your needs. For most of the airplane build I’ll likely have it fully extended, but it will be nice to be able to shorten it when needed.
I used the basic EAA 1000 work table plan, with a few changes. The width is increased, of course, from 24 to 36 inches. The folding extensions are another departure. I also lowered the shelf to about 4.5″ from the bottom of the legs rather than the original 8.5″. In hindsight, I kind of wish I’d made it even lower, but it’s fine. Tomorrow I’ll be adding some corner blocking to keep it perfectly square and solid. I still need to install the top (two layers of particle board) and the supports for the extensions. Those will be simple lengths of 2×4, with one end notched and the other cut to fit into the extension, Stu has a similar setup on the work table I have been using at his shop, and it’s absolutely rock steady and completely flat.
I thought long and hard about how to put retractable casters on this bench. I’ve seen a lot of different ways to do it. I had another work table, 3′ x 8′ with a setup on it that worked, but was a little more involved than I wanted. I’ve seen a few more designs on Youtube, several of which look kind of fidgety – making custom steel latches, etc. Anyway, in the process of working that out I managed to forget to re-add 1.5″ to the legs that I’d subtracted for one of the designs. Then I came up with what I think is an absolutely brilliant method, and I think it would work really well… on any workbench that does NOT have folding extensions that will block access to the end of the bench. In the immortal words of Homer Simpson…
So, I have ordered some retracting casters from Amazon that will be here tomorrow, and will cut some blocks of 2×4 for the bottom of the legs. No biggie. Perfection is the enemy of completion.
I think it’s very likely that I’ll build some sort of cabinet, shelving, and/or drawers under the top. I can only imagine how handy it would be to have all of the woodworking tools, clamps, glue, and so on right there at hand, and storage to keep it well organized and clean. That will wait until I have the bench at home and set up in the garage; that way I can cut the wood and do the assembly there. I can think of a long list of items that I will want to always have within easy reach, and more importantly have a place to put it within easy reach so I don’t end up with tools and supplies scattered everywhere.
Of course the very first thing the new bench will be used for is finishing the rebuild of the “gossip bench”. The veneer for that should arrive later this week.