Fixing up the steamer

I built two more ribs last night and took them out this morning; I’m up to 14 now.  I’m trying to 3D print some clamps too use on one of the jigs that has locating blocks too thick to use the small red sprig clamps I bought.  of course first I have to fix the 3D printer…

When I used the steam box, the door warped — no, curled outward.  I flattened it out, but because everything isn’t perfectly square it really only fits on one way so I can’t just flip it over.  Tonight I cut a couple of 3/4″ square stiffeners and epoxied them to the outside of the door.  I need to bend some more pieces of capstrip, and I can’t do that until the door is usable.  We’ll see if this is enough or not, should be interesting at least.

Still building ribs

I got two more ribs glued up last night, and popped them out of the jigs this morning.  That makes 11.  One jig needs some minor alterations to avoid gluing the ribs to the jig, so I’m gluing up one rib while I make those changes.  That will give me an even dozen ribs, and hopefully I’ll get another pair glued up tonight.

Trying out the steam box

The other night I finished up the steam box and made a set of little standoffs for the bottom.  I wanted to keep the wood off the bottom of the box to allow air circulation, but also allow water to run back to the low point at the rear.   I got a little lazy and didn’t put in dowels like most plans show.

Tonight I loaded it up with eight cap strips and let it run for 45 minutes while I went out and hung some outdoor lights on the deck.  When I came back I found that the door had developed a pretty good curl — concave from the outside – and was venting a lot of the steam past the door seal.  The spruce inside was fairly pliable, so I clamped three pieces in my bending form and put four more in the rib jigs.  They would only fit partway down in the jigs, since the wood is swollen.  While the wood cooled down I got all of the geodetic braces ready to install.  I’ll glue these two ribs up tomorrow night.

I did email System 3 about their epoxy.  Some of the ribs were assembled with the capstrips not pre-bent.  They’re fine, but the wood will spring out of shape if it gets hot enough for the epoxy to soften.  I don’t want that to happen. so I was thinking about clamping them in their current shape and steaming them to relieve some of the stress in the capstrip.  Of course that will soften the epoxy, and I wanted to know what that would do.  Their answer is that T-88 will begin to soften at around 120 degrees, but once returned to room temperature will be at full strength.  That’s great news.

I’m definitely not in love with the geodetic rib bracing design.  24 braces, no two alike, and I’m having to hand-fit them all.  It takes for-freaking-ever.  I have to wonder how much heavier 3/32 plywood would be with suitable lightening holes.  A guy could pop sets of them out on a CNC router in no time, save a ton of time and effort on the ribs, and probably end up with much stronger ribs too.   But, I don’t think I’m going to re-engineer the ribs right now.

Built a steam box

Last night I built a steam box out of 1×6 boards.  All that remains to be done is to put some foam weatherstrip on the door and run a few dowels through it to get the wood off of the bottom of the box for steam circulation.  The steam generator arrived a few days ago, so once I get the box finished up it will be ready to go.  I found that the Wagner steamer hose will mate with 1/4″ pipe fittings.  I spent a little extra for brass rather than galvanized iron.  I also re-worked my bending form with a gentler curve, providing a fairly close match for the rib shape.  It won’t give me a perfect fit, but will get the capstrip close to the curvature needed.


Finally — two more!

Glued up two more ribs tonight, at last.  I had dry fit the parts a couple of nights ago.  I really need to break down and build a steam box.  I ordered a Wagner 715 steamer, and will start on the box while I wait for delivery.

More geodetic stock prepped

Last night I ran another 20 sticks of geodetic capstrip stock through the sander.  I had to adjust one of the guide boards for thickness; due to temperature and humidity changes it was too close to the drum by about .014 or so.  So, 20 more down, a hundred or so to go.  Sounds like a lot, but if I can do 20 in a night it’s another week before they’re all done.  Then it’s just measuring, marking, and cutting them in stacks on the bandsaw.  Over lunch today, in fact, I ran another ten through the process.  It took about 40 minutes start to finish.

I can totally understand why people like plywood ribs.  I could be knocking out plywood pieces, or more traditional braces for “normal” non-geodetic ribs.  Would it be less work?  Probably not.  I’d still have to make precise cuts and no two pieces in a rib would be identical.  There might be fewer of them, but with this method at least I have a very small amount of leeway on the exact length and angles.  If a piece is 1/64″ or 1/32″ longer or shorter than the next, I can adjust the angle or position to make it fit without causing problems.  I think wing ribs are just going to be a lot of repetitious work no matter how you do it.  My only regret here is not calling Wicks or ACS on the phone to see if they would custom cut my capstrip to 1/32″, that would have saved a lot of work and waste.

Sensor scored!

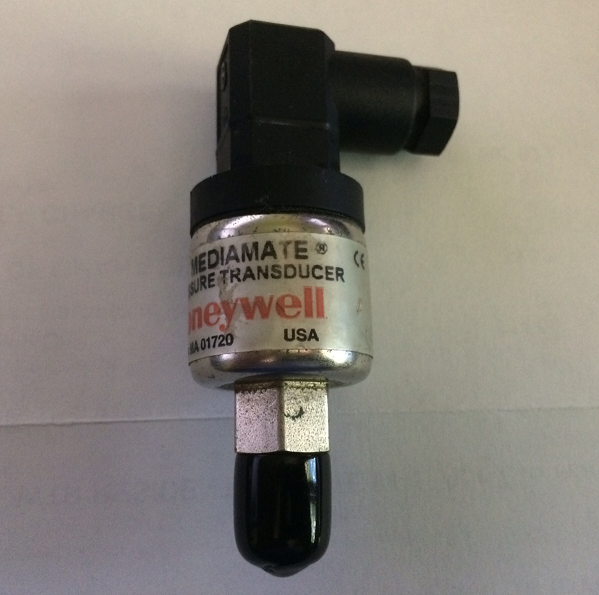
An update on the oil pressure sending unit.  I had found exactly one of the correct sending units for sale, a NOS Honeywell part that was listed on eBay for a couple hundred bucks.  I didn’t buy it, but I was watching the listing.  They dropped the price, I made a lower offer and they accepted.  I ended up paying roughly what a normal oil pressure sending unit would have cost from a source like Aircraft Spruce.  And, it’s got the exact output that the Westach quad gauge needs.  Now I won’t have to build a conversion unit but can just wire this one up directly.  These transducers are no longer in production, and if you can find one you’ll pay 8-10 times what I got this one for.  If it ever fails, I’ll probably replace it with a cheap one and a converter board — now that I have that figured out.

Update 5/4/17:  Transducer arrived, NOS as advertised with a nice sealed electrical connector.  This thing will likely outlive me.