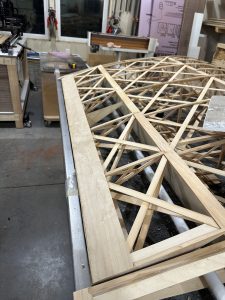
Waiting…

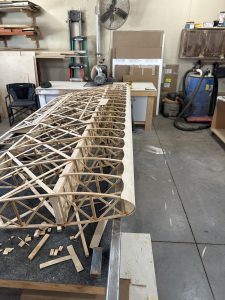
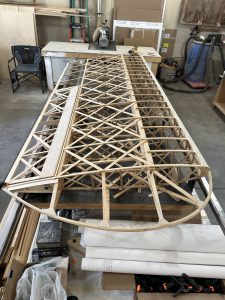
Well, I placed my first order for wood from Aircraft Spruce.  I ordered what should be enough spruce capstrip stock to build all f the wing ribs.  Should be here in a couple of weeks.  I guess I wasn’t thinking…  maybe I figured they kept this stuff in stock.  If I’d known there would be a 10-day lead time, I’d have ordered it two or three weeks ago.  Live and learn.

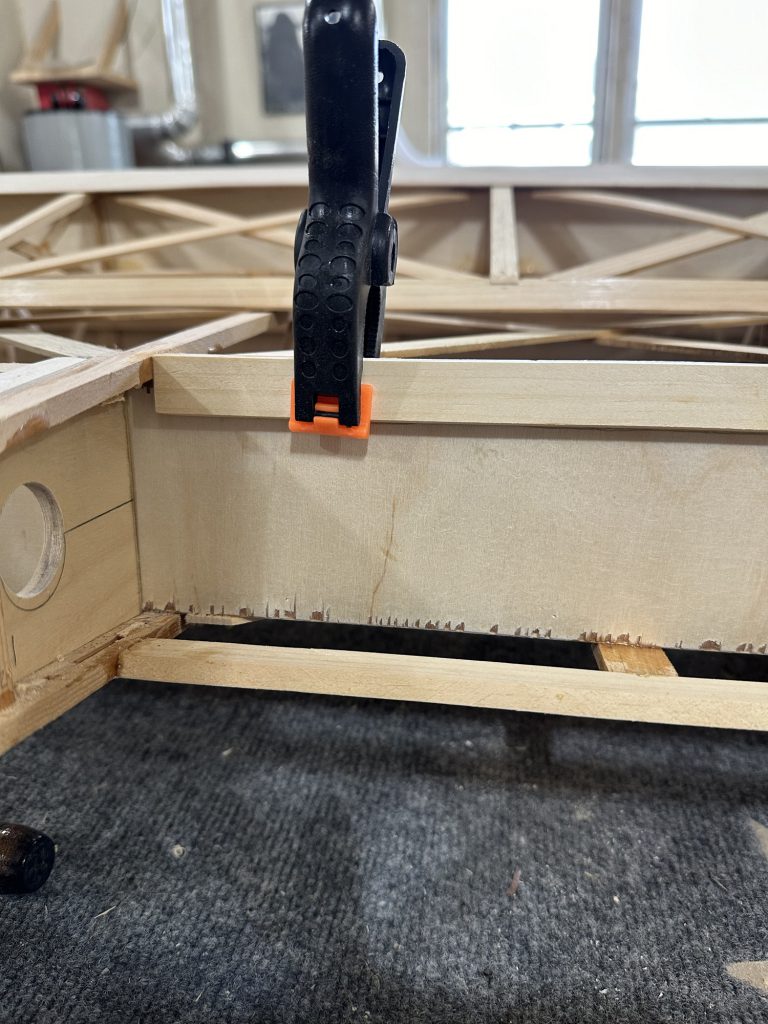
In the mean time, there’s not a lot to do.  If it warms up at all I may try to rip some 1/2 by 1/4 stock out of pine and get the saw set up to groove the rib capstrips.  I’d love to finish up the rib jig before the wood gets here.

Flying wires vs. lift struts

I emailed Dave at Fisher Flying Products asking about the lift struts I have seen used on several Celebrities that I’ve seen in pictures.  I still have not seen an actual Celebrity “in person”, nor any other completed Fisher design for that matter – just a partially built single seat ultralight at Oshkosh.  It seems you have a choice between lift struts or flying wires.  Personally, I like the look of flying wires a lot better.  It just has that classic wire-braced biplane look.  I know that a cylinder shape, such as a wire, has much higher drag than streamlined tubing.  A cylindrical object will have 10 times the drag of a streamlined shape of the same frontal area.  The wires, however, will be much thinner than struts, 5/32″ — meaning that they would produce drag roughly equivalent to 1-9/16″ wide streamlined struts.  BUT…  the plans call for 1-1/8″ and 1-1/4″ round tubing for the lift struts.  The flying wires would have far less drag than those.  I could probably replace the round aluminum tubing with smaller streamlined steel and pick up some drag reduction there, but the fact remains — I just don’t like the look of the lift struts.

It’s not like this airplane will be a speed demon no matter what I do, so I’m not really worried about what may be a small drag penalty for the wires.  If I wanted to fly faster and more efficiently without regard for anything else, well, I have an RV-12 for that (acknowledging that “faster” is entirely relative here).  It looks like I can have the wires made to my specs by Aircraft Spruce, swaged and tested with professional equipment so I don’t have to worry about getting it perfect on my first try.

More jig work and research

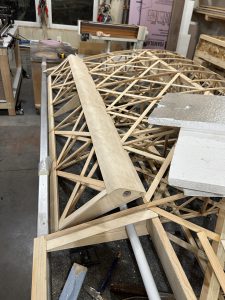
I did some additional work on the rib jig yesterday, including installing the main spar locating block and cleaning up a few nail points that were poking out the bottom.  I cut a bunch of blocks to locate the outer shape of the ribs, but did not install them yet.  I want to wait until I have some spruce stock to put in place, so I make sure it’s all in the right place.  I really want these to turn out as close to perfectly consistent as possible.  I had planned to use some pine cut down on the table saw to set up and test the jig, but it occurred to me that I had no way to know for sure my pine strips would be the exact same size as the capstrip stock supplied by Aircraft Spruce.  So, it’s time to order some wood.

Started rib jig #1

I spent some time yesterday working on the first wing rib jig.  The workbench needed a new top surface, so I picked up a sheet of 3/4″ MDF at Lowe’s.  They were nice enough to cut it for me.  I ended up with one piece 3′ x 8′ for the bench, and two 1′ x 4′ chunks for rib jigs.  Nice how that worked out.

I marked a center line on the MDF and laid out the rib setup from Sheet #1 of the plans over it, then trimmed the paper to fit the jig.  I hate cutting up plans, but there’s an extra copy of that page for this reason.  I made all of the little chunks of plywood for the locating blocks, and cut a few small pieces of pine stock as needed.  Then I cut out the places where I would need holes to accommodate clothespins, marked those on the MDF and cut them out with a scroll saw.  I used some spray adhesive to stick the plans down to the MDF.  So far so good.

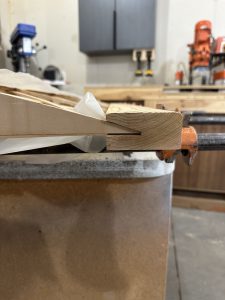
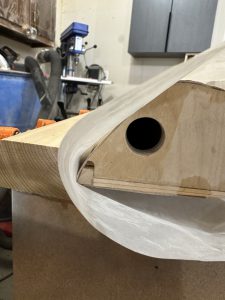
Next I had to find some clear poly to cover the plans sheet.  I finally remembered the nearly 4′ long bag in which the plans were shipped; it fit just fine.  With that in place I started nailing the locating blocks in place over the plan sheet.  I got most of them done before knocking off for the night.  I still need to make one more plywood block for the main spar locator, and make the blocks for the top and bottom capstrips.  I haven’t decided for sure how to do those.  I had thought about using a couple pieces of pine bent to fit, but that seems like a great way to mess up the jig trying to get them perfectly in place, and the jig needs to be as close to perfect as I can make it.  I’ll probably go with closely spaced pine blocks, nailed in place.

It’s official!

I received a quart of T-88 epoxy yesterday, so the first batch of glue is covered.  Today the mail carrier brought the plans, tightly rolled and somewhat bent from their trip from the nether regions of Canada.  I will be building Celebrity serial number CE164.  So now I have a number of jobs that need to be completed…

  • Get the plans unrolled to flatten out so they’re usable
  • Get an inventory of the drawings, figure out how and where to store them so that they’re protected.  I may add tabs or some sort of externally visible identification so I’ll be able to quickly locate a drawing.  One of the irritations encountered while working on the RV-7 was sorting through a pile of drawings to find the one I was looking for.   That was a time waster.  These drawings are in at least four or five different sizes, a few of them 16′ long.  Fortunately, it does not SEEN as though I’ll need to frequently switch between several drawings as I did while building the RV.
  • Replace the workbench top with fresh MDF.  It’s a good solid bench, but the old hardboard top is scrap.  As a bonus, a 4×8 sheet of MDF will be one foot wider than the bench, giving me a 1×8′ cut-off.  That will make two 1×4′ wing rib construction jigs.
  • Figure out where to begin construction.
  • Order up some wood!

I’ll start with the wing ribs.  They use only two sizes of stock, and construction is simple and repetitive.  I can build the first two or three out of locally sourced pine, just to get the jigs built and get my process sorted out.  I can scrap them or use them as wall decorations in my office.  The jigs do not need to occupy the entire work bench, so the bench can be used for other things while working on the ribs.

Sourcing wood

While waiting for the plans from Fisher, I asked for and received a PDF copy of the bill of materials for the airplane.  While I’m sure there may be some errors and omissions, it’s a good place to start in my efforts to obtain the materials I need to start building.

Much of the wood is aircraft grade Sitka spruce (naturally), and that I’ll be buying from expert and trusted sources like Wicks and/or Aircraft Spruce.  There are a few (very few) other sources for aircraft spruce in the country, but those two seem to be the biggest and most readily available.  There certainly aren’t any near here, so no running down to the local supplier with the truck to pick out my own bits and pieces.

There is, however, also quite a bit of pine used in areas where spruce is not required and there is some money to be saved.  A good little bit of money, in fact.  For instance, the outer frames of the fin, stabilizer, elevators and rudder are all laminated from 1/8″ x 3/4″ pine, as are the wingtip bows.  You could use spruce as well, of course, but spruce doesn’t come cheaply.  Just the pieces to make those laminations would cost over $155, plus truck freight, from ACS.  Wicks seems to be a little cheaper for those pieces, but still well over $125 plus freight.

Finding clear, straight- and tight-grained pine won’t be easy, nor the boards cheap – compared to the so-called “stud grade” garbage typically sold at big box stores.  That stuff is mostly more suited for a pulp mill than anywhere else.  I’ll have to re-saw any pine boards I do find down to size, probably recovering only a small fraction of the wood as usable stock.  Still, even if I could only get a few strips (these are 1/8″ x 3/4″, remember) from a typical select grade 1×6 from a local lumber yard, it could still cut the cost down by  a hundred bucks or so.  So, I think I’ll visit a couple of the local lumber yards to see what I can find.  I have the option of slicing pieces from millwork like baseboard and flooring too, so I’m hopeful that I’ll be able to find something.  I printed a chart to help me quickly figure out acceptable grain slope on two axes.  That and my Incra ruler should help sort out any good boards I may find.

The worst case would be not finding anything usable at all.  That just means I would instead use aircraft grade spruce for all the parts called out as pine in the plans.  It would be somewhat more expensive, but certainly no compromise of quality, weight or difficulty.  I figure about an extra $700-750 added to the build cost if I have to go all spruce, maybe a bit more or less.  It’s not enough to derail the project, but it is enough to see what I can find and maybe make some sawdust.

Tooling up (part 2)

I spent some time today going through the table saw setup and adjustment.  As it turns out, my saw (a Ryobi BT3100) has a pretty decent following.  I did figure out why I’d never been happy with the rip fence.  I’d always used the grooves in the casting to align it.  As it turns out, this saw is not like others.  You don’t align the blade to the table.  You align everything off the blade.  I got the miter slot (an optional part), sliding miter table, and front scale all adjusted to the blade, lubed the jack screw that raises and lowers the blade, and checked the rip fence.  Turns out, it’s pretty close to dead nuts on and always locks itself in place perfectly aligned…  you just have to ignore the grooves in the table.  Who knew?  Anyway, I cleaned it up and gave the table a coat of wax, and cut a feather board and some trim strips for a remodeling project.  It’s awesome.  One down.

Tooling up (part 1)

If I’m going to be building something big out of wood, I’ll need to tool up for it.  Right now I have some basic tools that will work, but what I have in the garage is more geared toward building an RV (and even a lot of those tools are now gone).

My bandsaw is a very inexpensive, small Harbor Freight model.  I have tuned it up a little and adjusted it so that it works much better than it did out of the box, but it’s a very light duty saw.  It’s also WAY too fast for cutting 4130 steel.  I’ll need to at least get some good quality wood cutting blades for it, since it’s mostly been used for aluminum.  I was looking for a better bandsaw, like a 14″ Delta or Rockwell, but I may hold off on that.  This one might work, if I can come up with a solution for any steel parts that need to be cut.

The table saw I have is a fairly decent Ryobi.  Not as solid or as precise as I’d like, but if I can figure out how to get the rip fence parallel to the blade it should be serviceable.  But, for most things the radial arm should work anyway.

Belt sanders — I have two.  One is a small bench-top Harbor Freight unit that is fine for very small jobs.  The other is a 1950s vintage Craftsman that weighs well over 100# with its cast iron base and stand.  I need to get it moved back home, cleaned, lubed and a new drive V-belt installed.

Drill press — The one I have is a complete piece of crap, and I don’t think there is a way to make it any better.  I’m watching for a better one, preferably old and solid.

Chop saw — I have a De Walt 12″ compound miter saw.  It works fine, but takes up a lot of space.  In a shop environment I’d rather use a radial arm saw.

Radial arm saw — This could possibly be the secret weapon.  I need to retrieve it from my sister’s place, but there is a Magna Sawsmith radial arm saw.  My Dad used this to make a lot of furniture and other stuff, and it will do just about anything.  My brother in law (ex, actually, but still a pretty damn good guy) told me the motor had burned out — I’m hoping it’s something more like a bad motor start capacitor, since those are easy to replace and the original motors are long out of production and nearly impossible (and expensive) to find.  We’ll see how this one shakes out.  Honestly, I can see myself taking on a lot more non-airplane woodworking projects if this saw can be returned to service.

Dust collection — I have none, other than a shop vacuum.  The table saw, small belt sander and band saw all have dust collection fittings on them; the old (large) belt sander doesn’t.  Not sure about the Sawsmith.  I want to rig up something to suck up as much dust as possible, and I’ll for sure want to build a dust separator to keep from clogging up the shop vac.

Jointer/planer — I have none.  I may need to fix that.  This is an entirely new area for me, I’ve never used either tool and don’t know much about them.  But, I may need to plane down wood for cap strips.  We’ll see what the BOM that comes with the plans will reveal.

Plans ordered

I don’t know where all this will lead.  Maybe I’ll end up building and flying a new airplane.  Maybe I’ll end up with some interesting wall decorations.  All I know is, I feel the need to explore this and see where it goes.  Yesterday I ordered a set of plans for a Fisher Celebrity.

I’m already thinking about various modifications…  mostly trying to de-drag some of the structure by using streamlined tubing or even wood for struts and such.  And I’m keeping an eye out for possible engine choices.  I’m kind of torn on the whole electrical system question.  part of me says keep it light and simple — no electrical system, no transponder, handheld radio.  The other part doesn’t want to have to hand prop the engine.

We’ll just have to see where it goes.  Who knows?  Maybe I just end up making really cool looking furniture and never finish it.