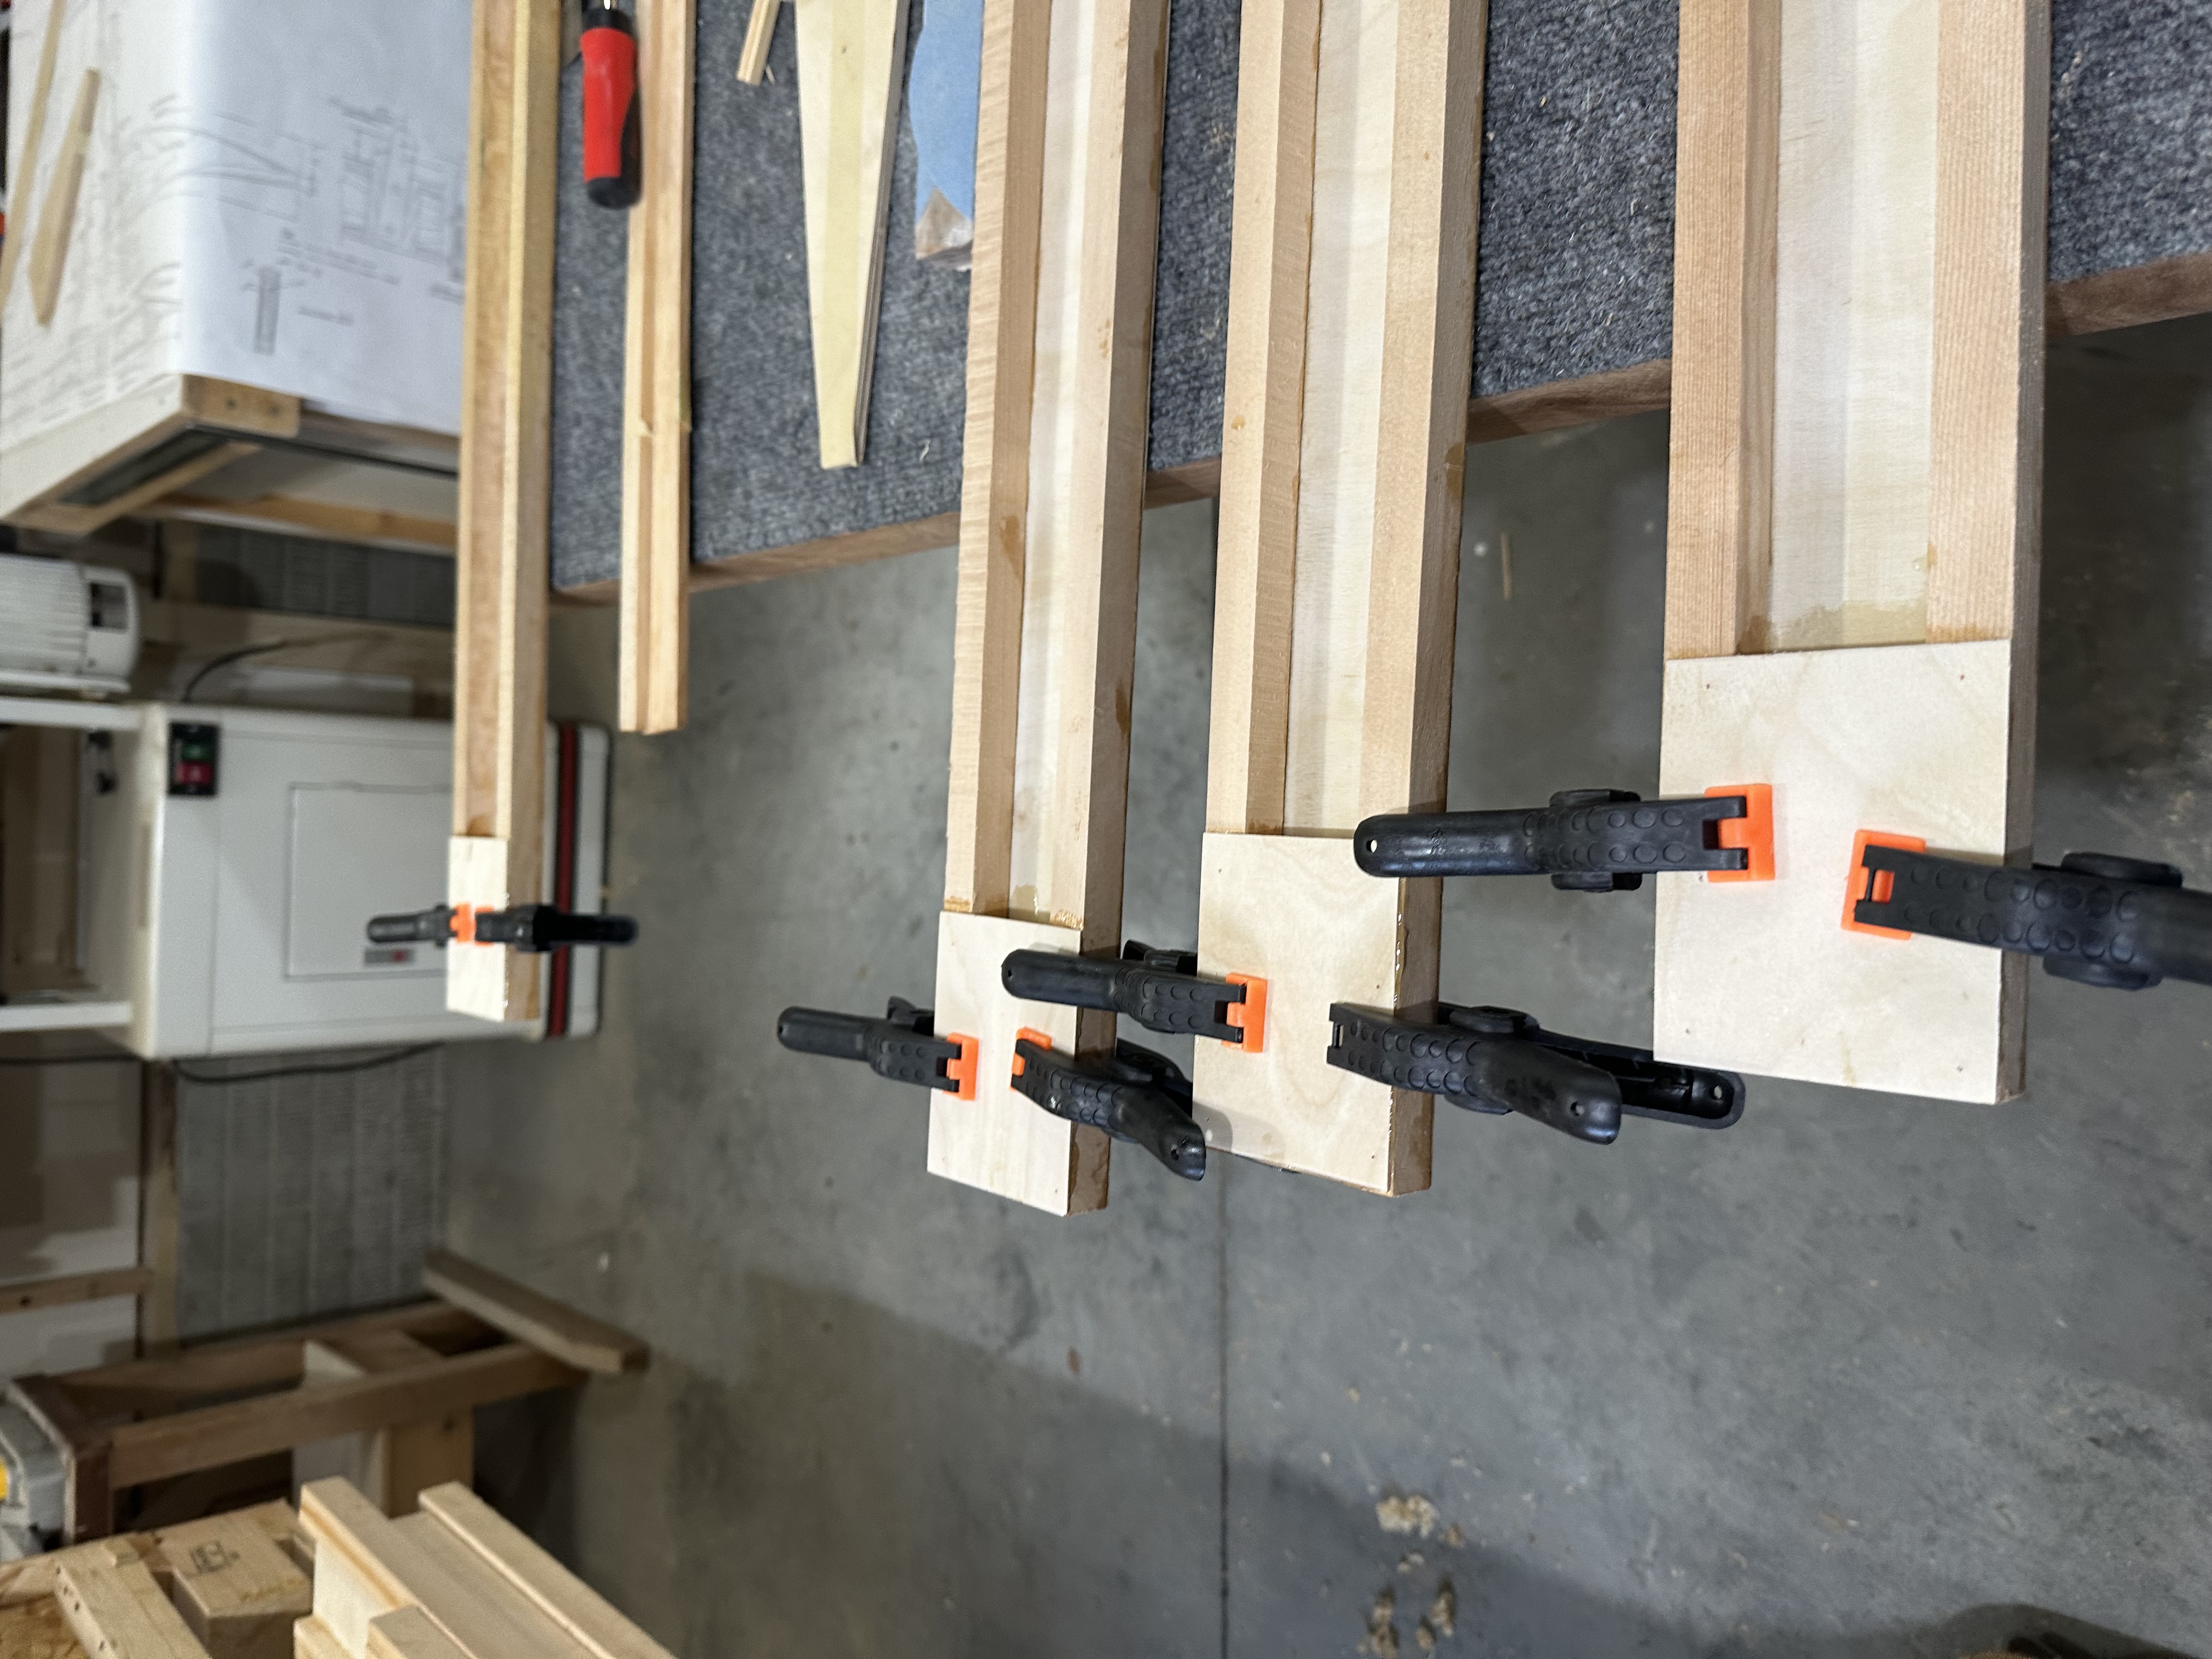
Happy birthday to me! 🎂 This morning I glued the two lower rear spars up – webs to caps only, and set them aside to cure. That’s all four rear spars now ready for the addition of the plywood blocks for attachment brackets, flying wires, landing wires, and N struts. The cut-off pieces of 1/16 ply will make shims for the lower main spar strut/landing wire attachment points that need to be 1/8″ above the spar caps.
In the afternoon I went back over and glued in the blocks and plywood plates on the root end of the rear spars. There are other blocks and structure to be installed outboard, where the struts and wires attach, but after taking the time to figure out the plans and exactly what needs to be done it was getting too late to glue those bits up. The plans could benefit from an oblique view to better show how things go together, or at least two views of the area… but they’re old and drawn by hand, and there’s only one view. One has to hope there’s a reason that parts of it are built the way it’s shown. The blocks in the kit are oversized and will need to be trimmed, and I want to make sure I have plenty of time to make sure everything is in the right place.
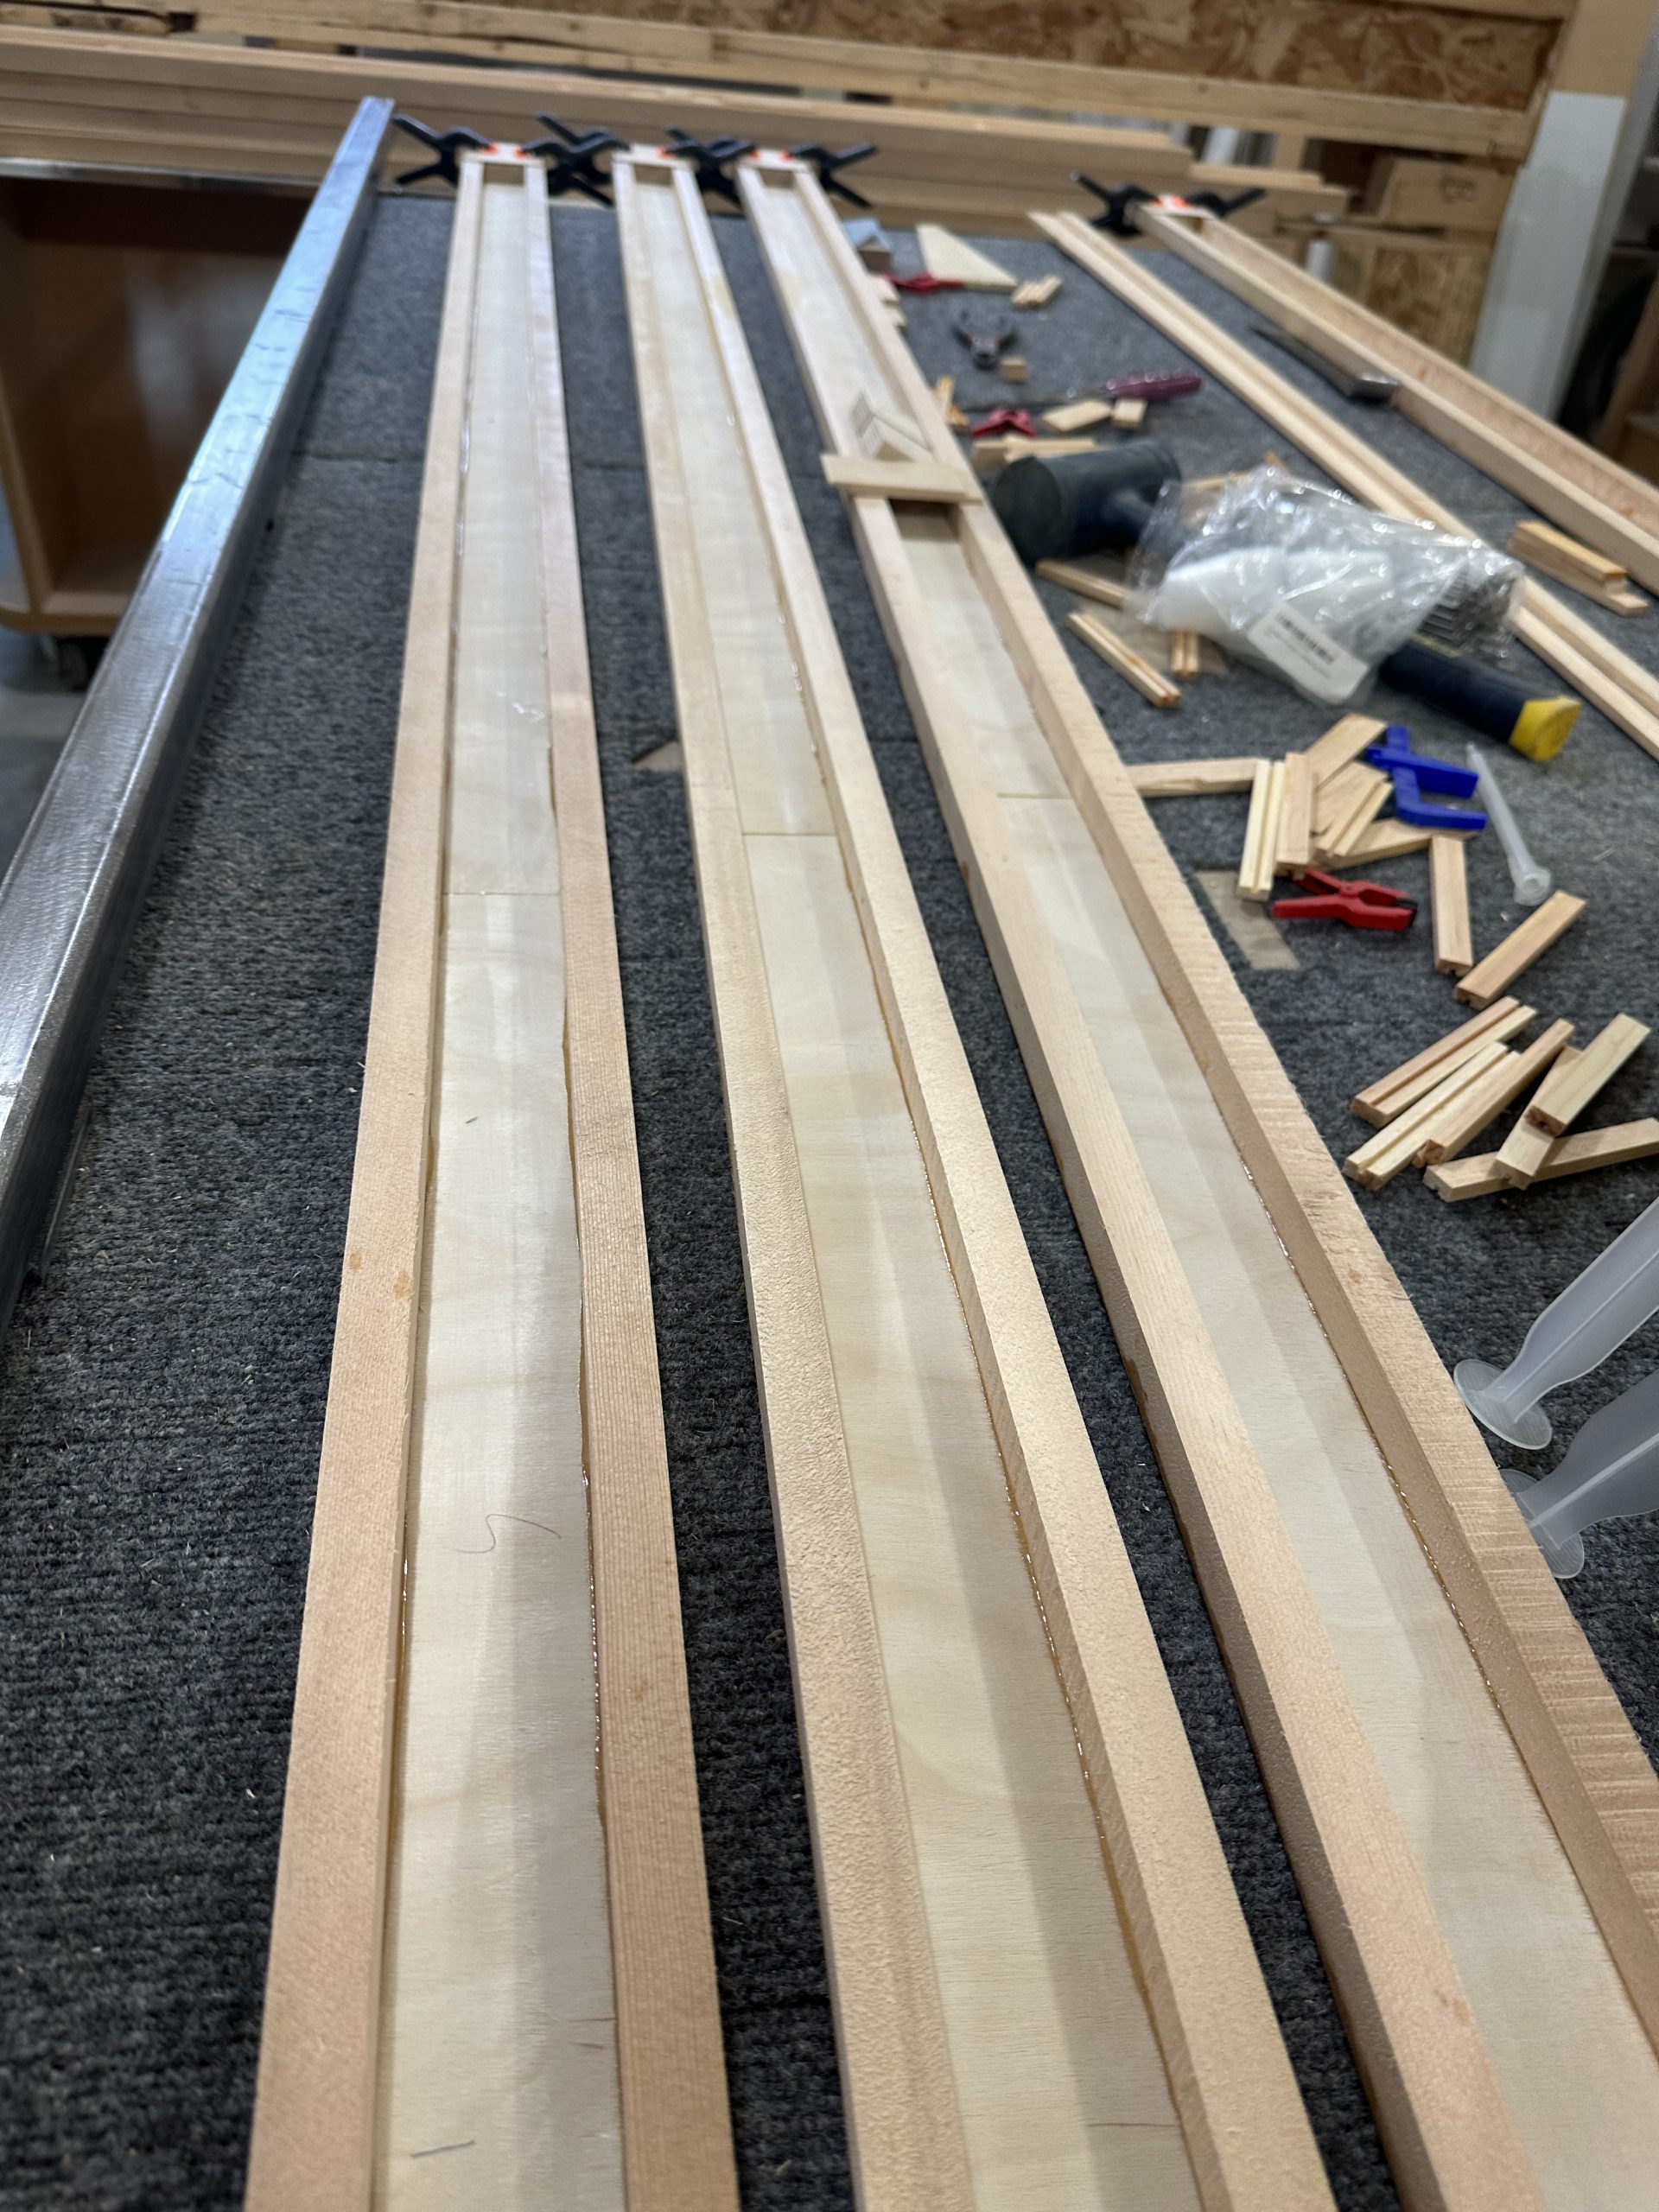
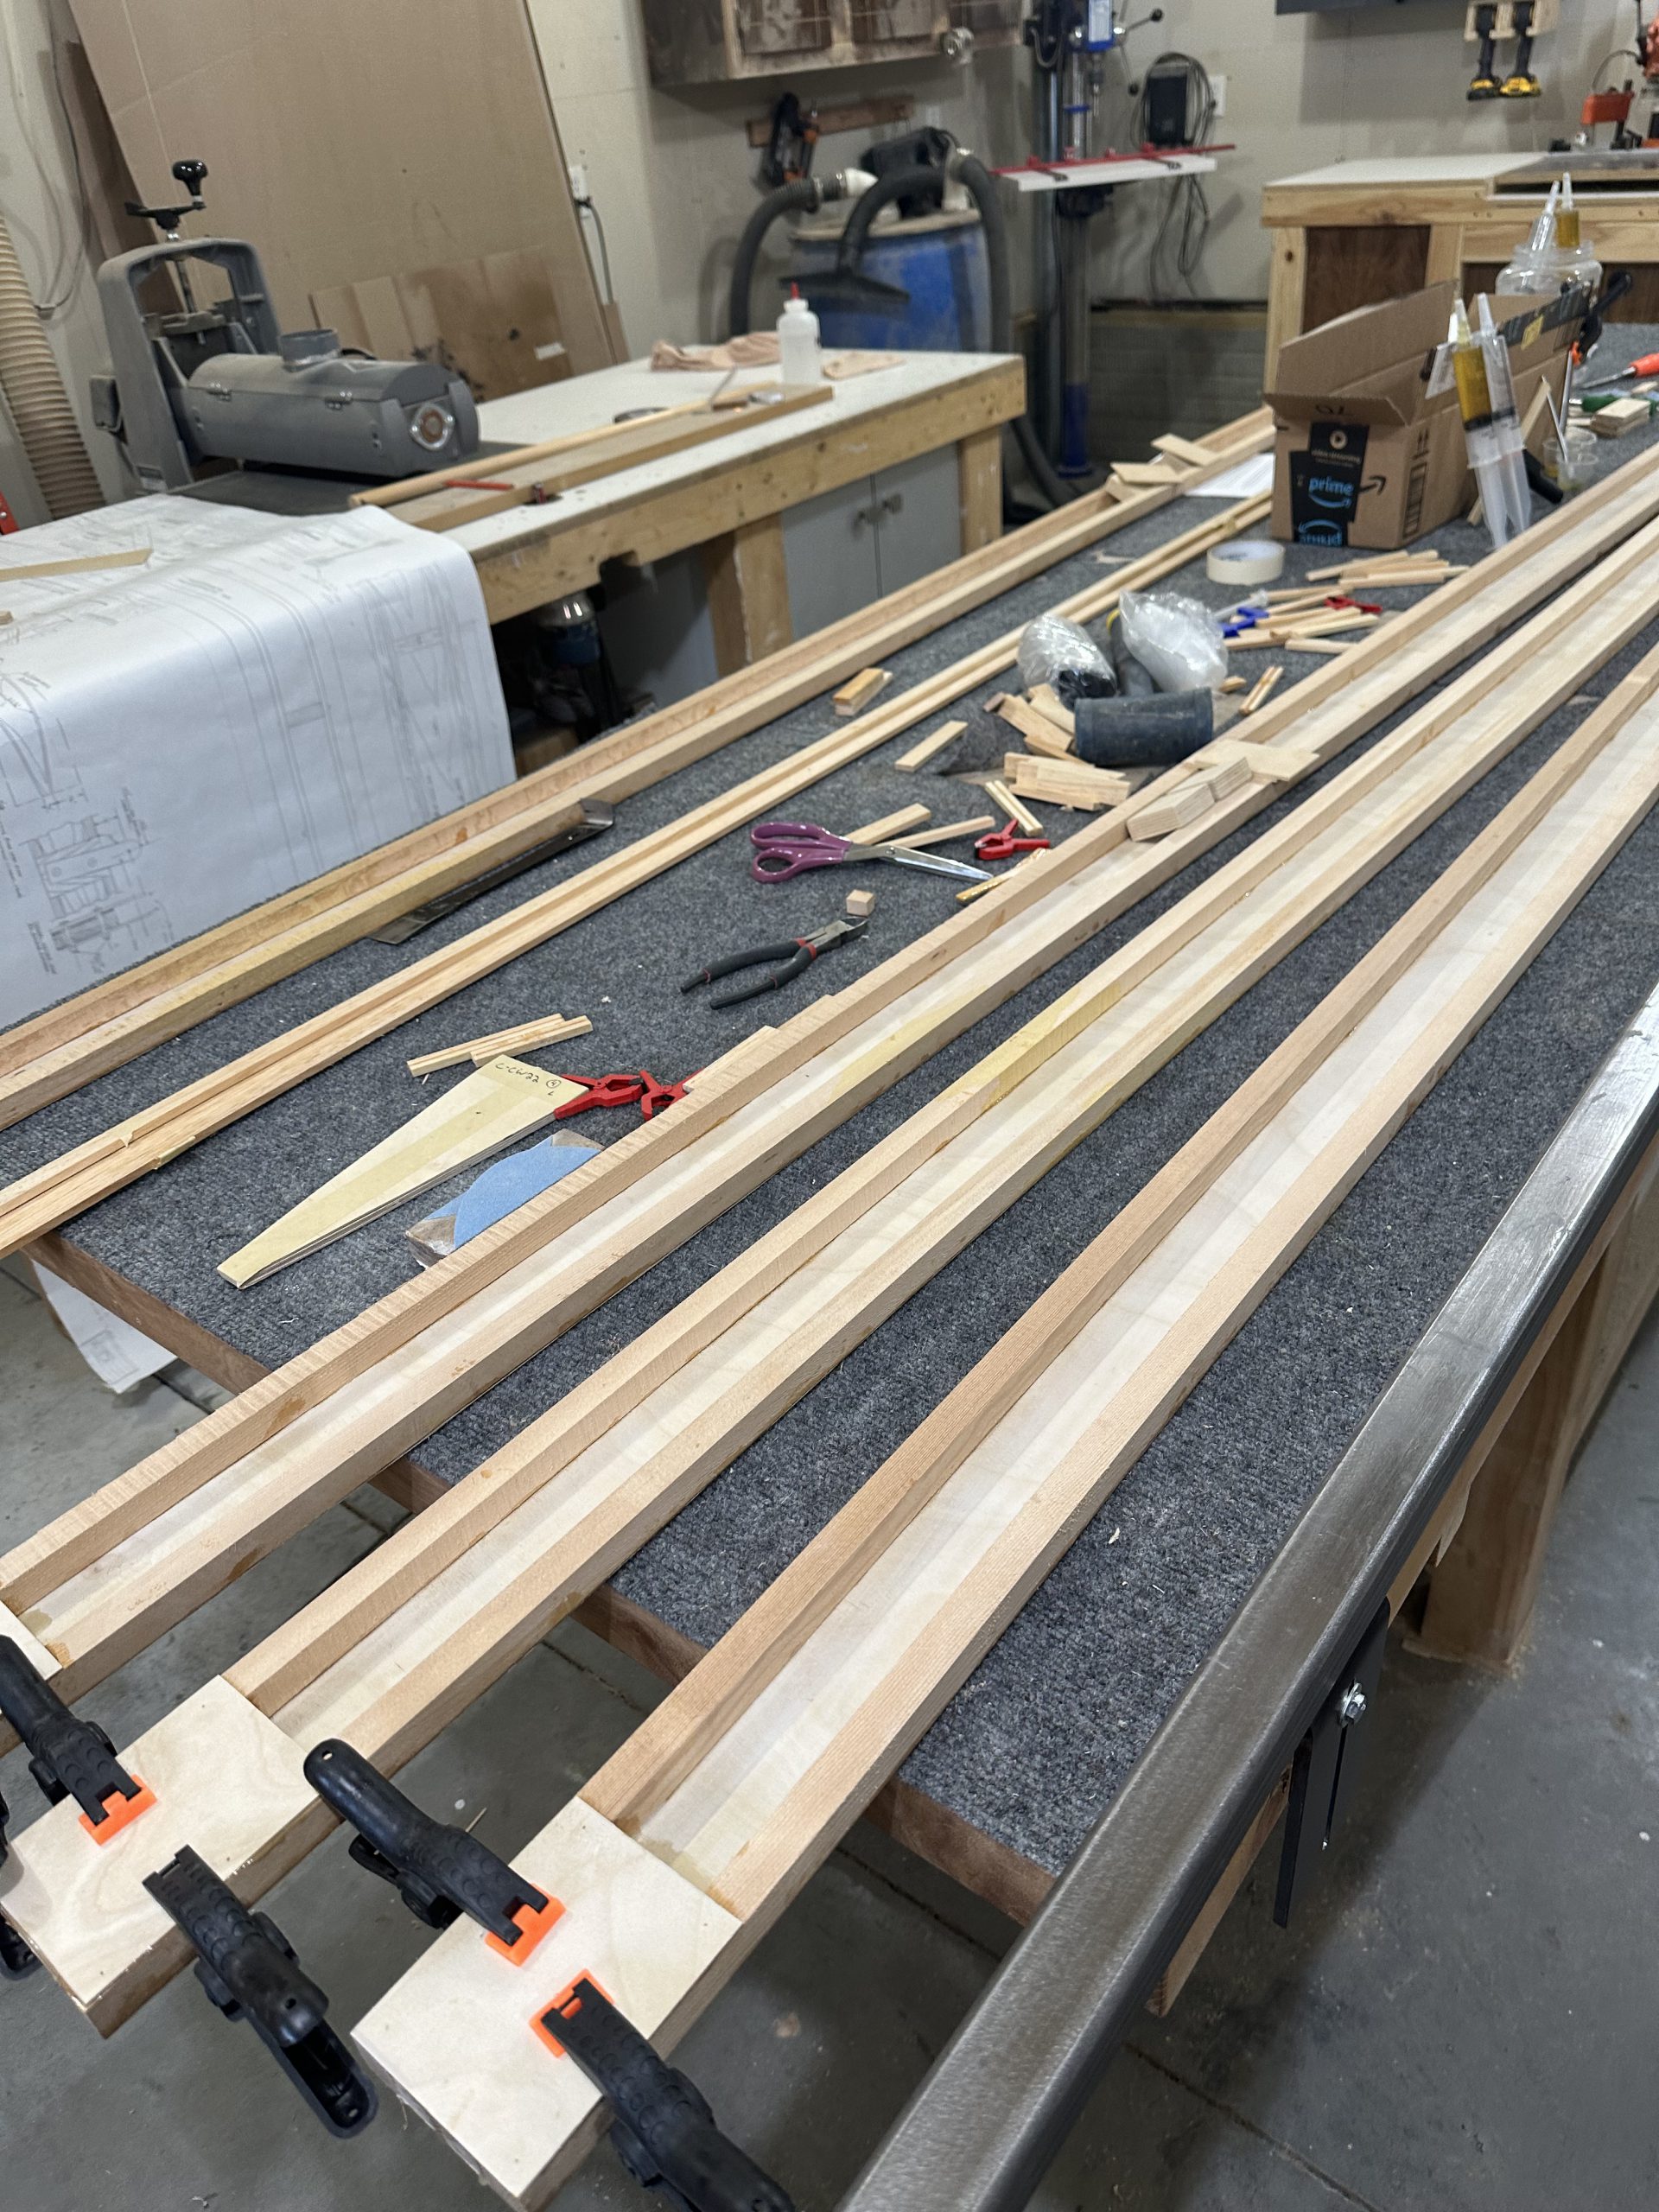
All four main spars substantially built; exceptions are noted below. Two upper rear spars have been started, with plywood web glued to the upper and lower caps – not really caps, but for lack of a better term…
Remaining work: Main spars need to be trimmed to length and dihedral clearance cut made on the lower spars. All holes need to be drilled, bushings fabricated and glued in place. I’ll need to fabricate and glue in shims for the landing wire/N-strut attach brackets on the lower main spars.
I just pulled the last two false ribs in the jigs. It’s been a long haul — six and a half years since I built the first rib, but now they’re done AND I’ve got the materials and the place needed to continue the build.
Last night I was over at Stu’s place. One of the main spars has been partially assembled; the spar caps have been glued to the web. I got all of the rest of the parts for the aft face of the spar fitted and ready to glue up. I decided to designate this one the upper right wing. I’ll head over tonight and glue it.
I briefly thought about tearing down the rib jigs now that all of the ribs are finished. I decided not to do that quite yet. For one thing, there’s a chance I may need or want to make more of them for one reason or another. I don’t need two jigs, though. I’ll probably leave the first one I made as is, and pull the blocks and plastic from the second copy. It’s not a high priority, since it will only yield a 4′ x 1′ chunk of MDF.
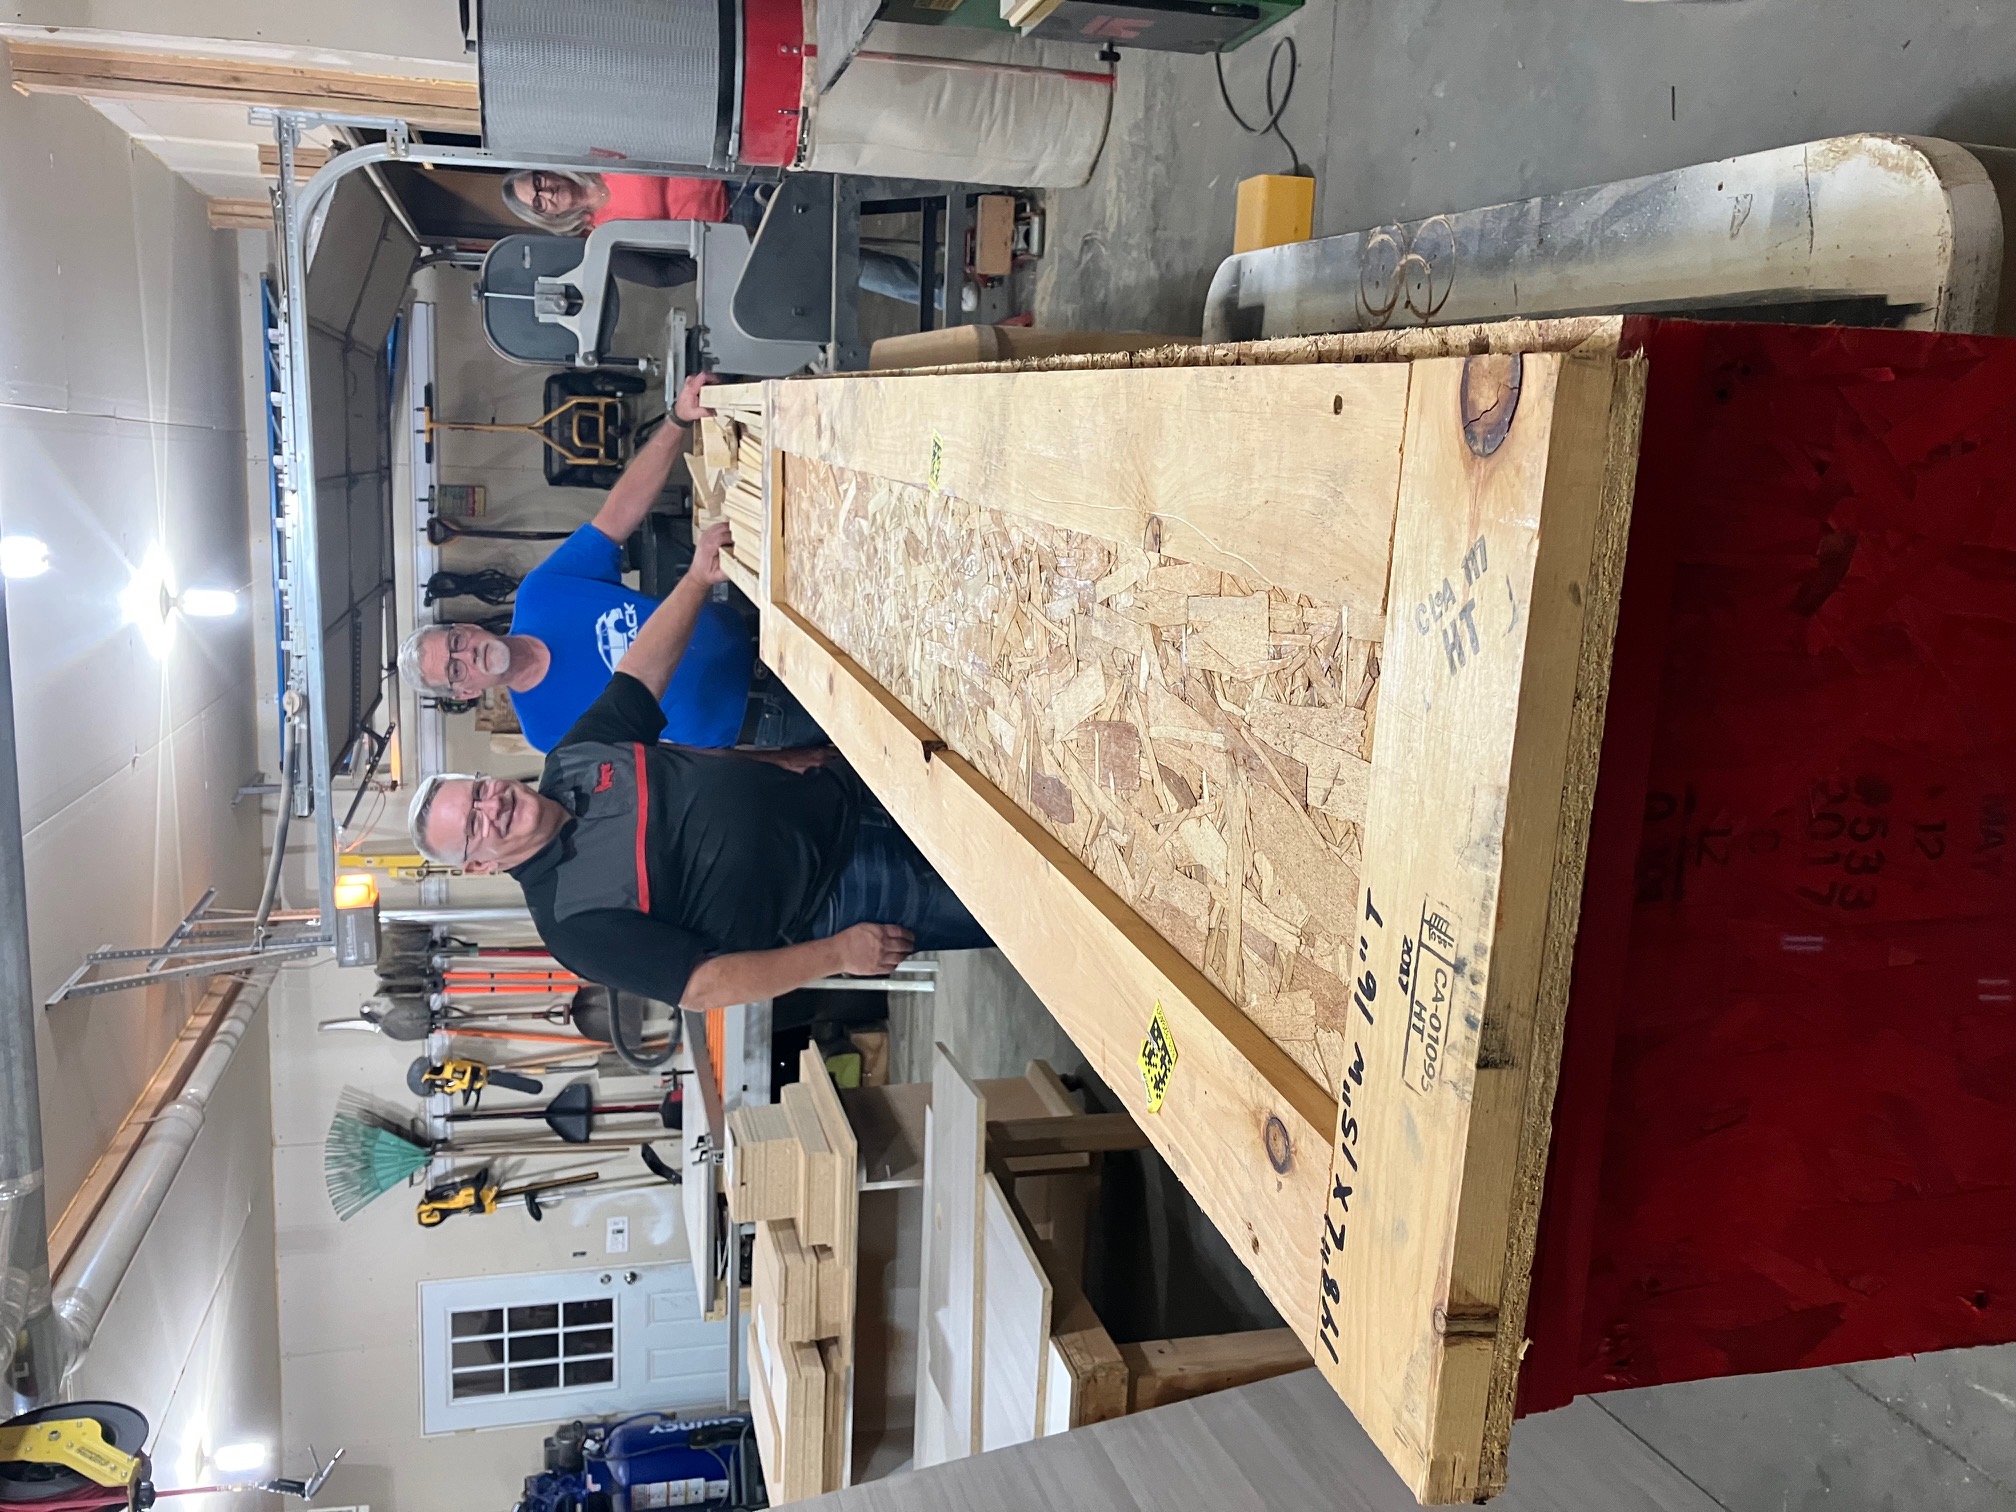
I met with Stu over the weekend to figure out where and how we’d set up the spar assemblies. I was concerned about the lack of any long workbenches in his shop. He’s primarily set up for building cabinets, and most of his work tables are smaller, low to the ground, and on casters. As it turns out, one of the tables has folding extensions that make it 9 or 10 feet long. The top is very thick, heavy, rigid, and very flat — he uses it to mount rails and a sled for a router to flatten large slabs of wood. He put threaded inserts on the edges of the table where a set of heavy welded steel rails can be attached. With those installed, there will be a built-in straight edge for blocking and clamping the spar caps. It’s not something I would have thought of; the “normal” practice is to lay out a chalk line and nail wood blocks to locate the spar caps during assembly. I think, however, that this setup will be more than adequate for spar construction. I may need to build a matched-height extension for the wing assembly, but that’s a decision for another day.
The wing kit contains no hardware at all. Fortunately it looks like all of the hardware required is made from readily available material and requires simple manufacturing. It’s all flat aluminum stock, some 4130 tubing for bushings, aluminum tubing for aileron torque tubes, and so on. No brake, lathe, welder, etc. required yet. Some of the material I may already have on hand, in fact. The rest can be ordered or even found locally.
While I was there, I grabbed a few pieces of rib capstrip so I could finish off the last of the false ribs. I made two on Sunday, and set up two more this morning.
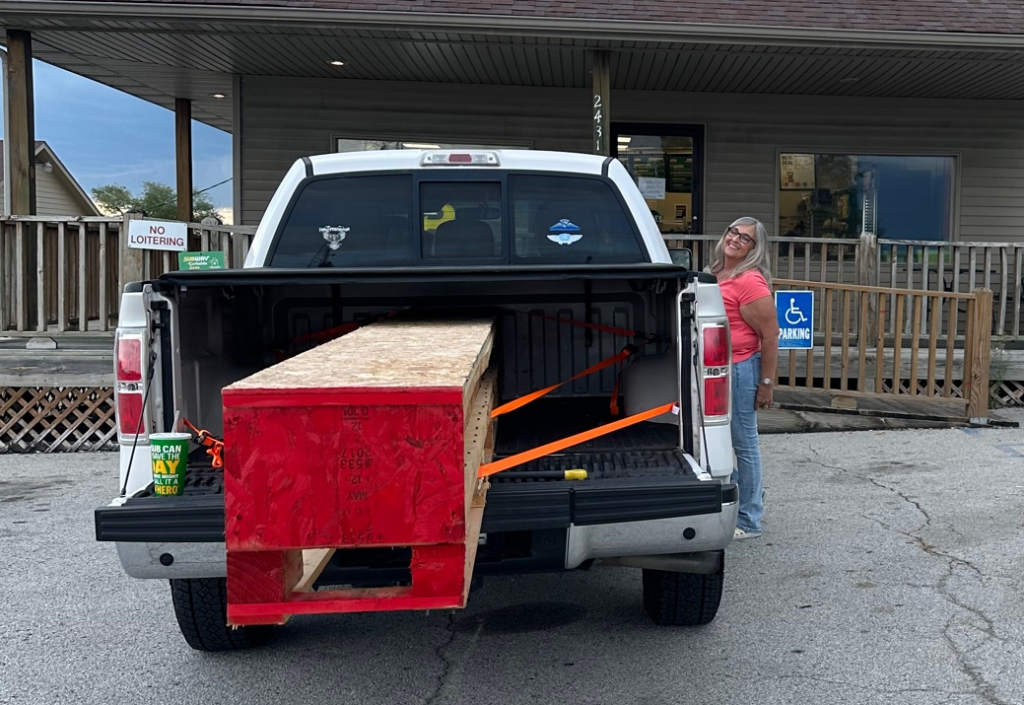
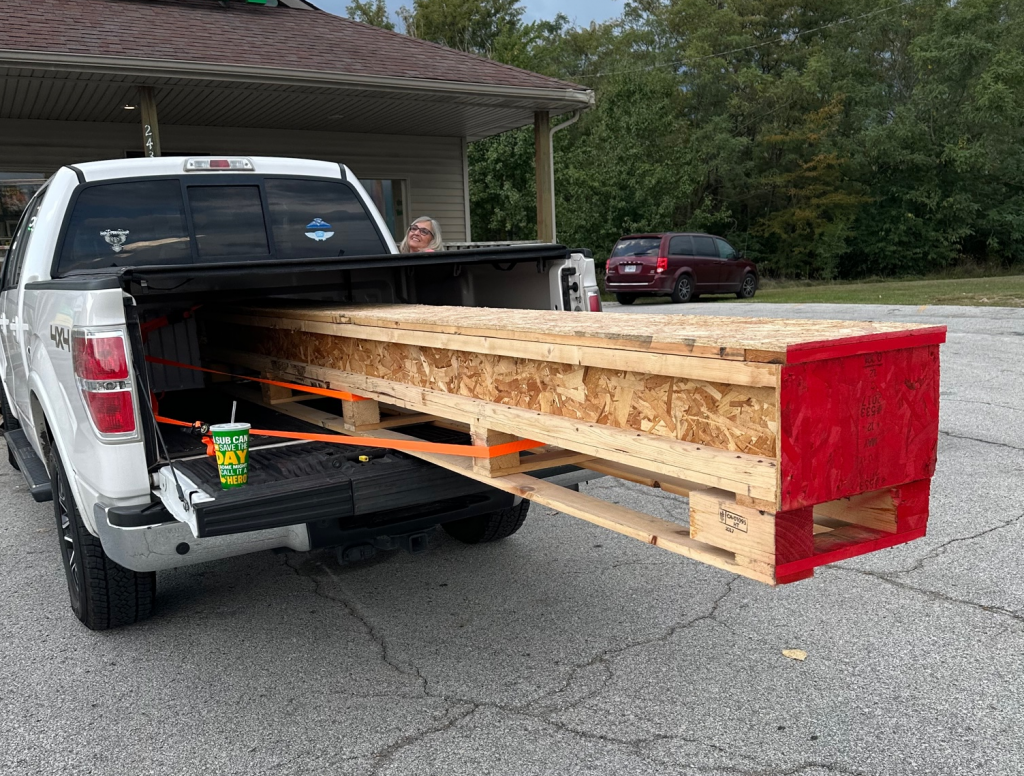
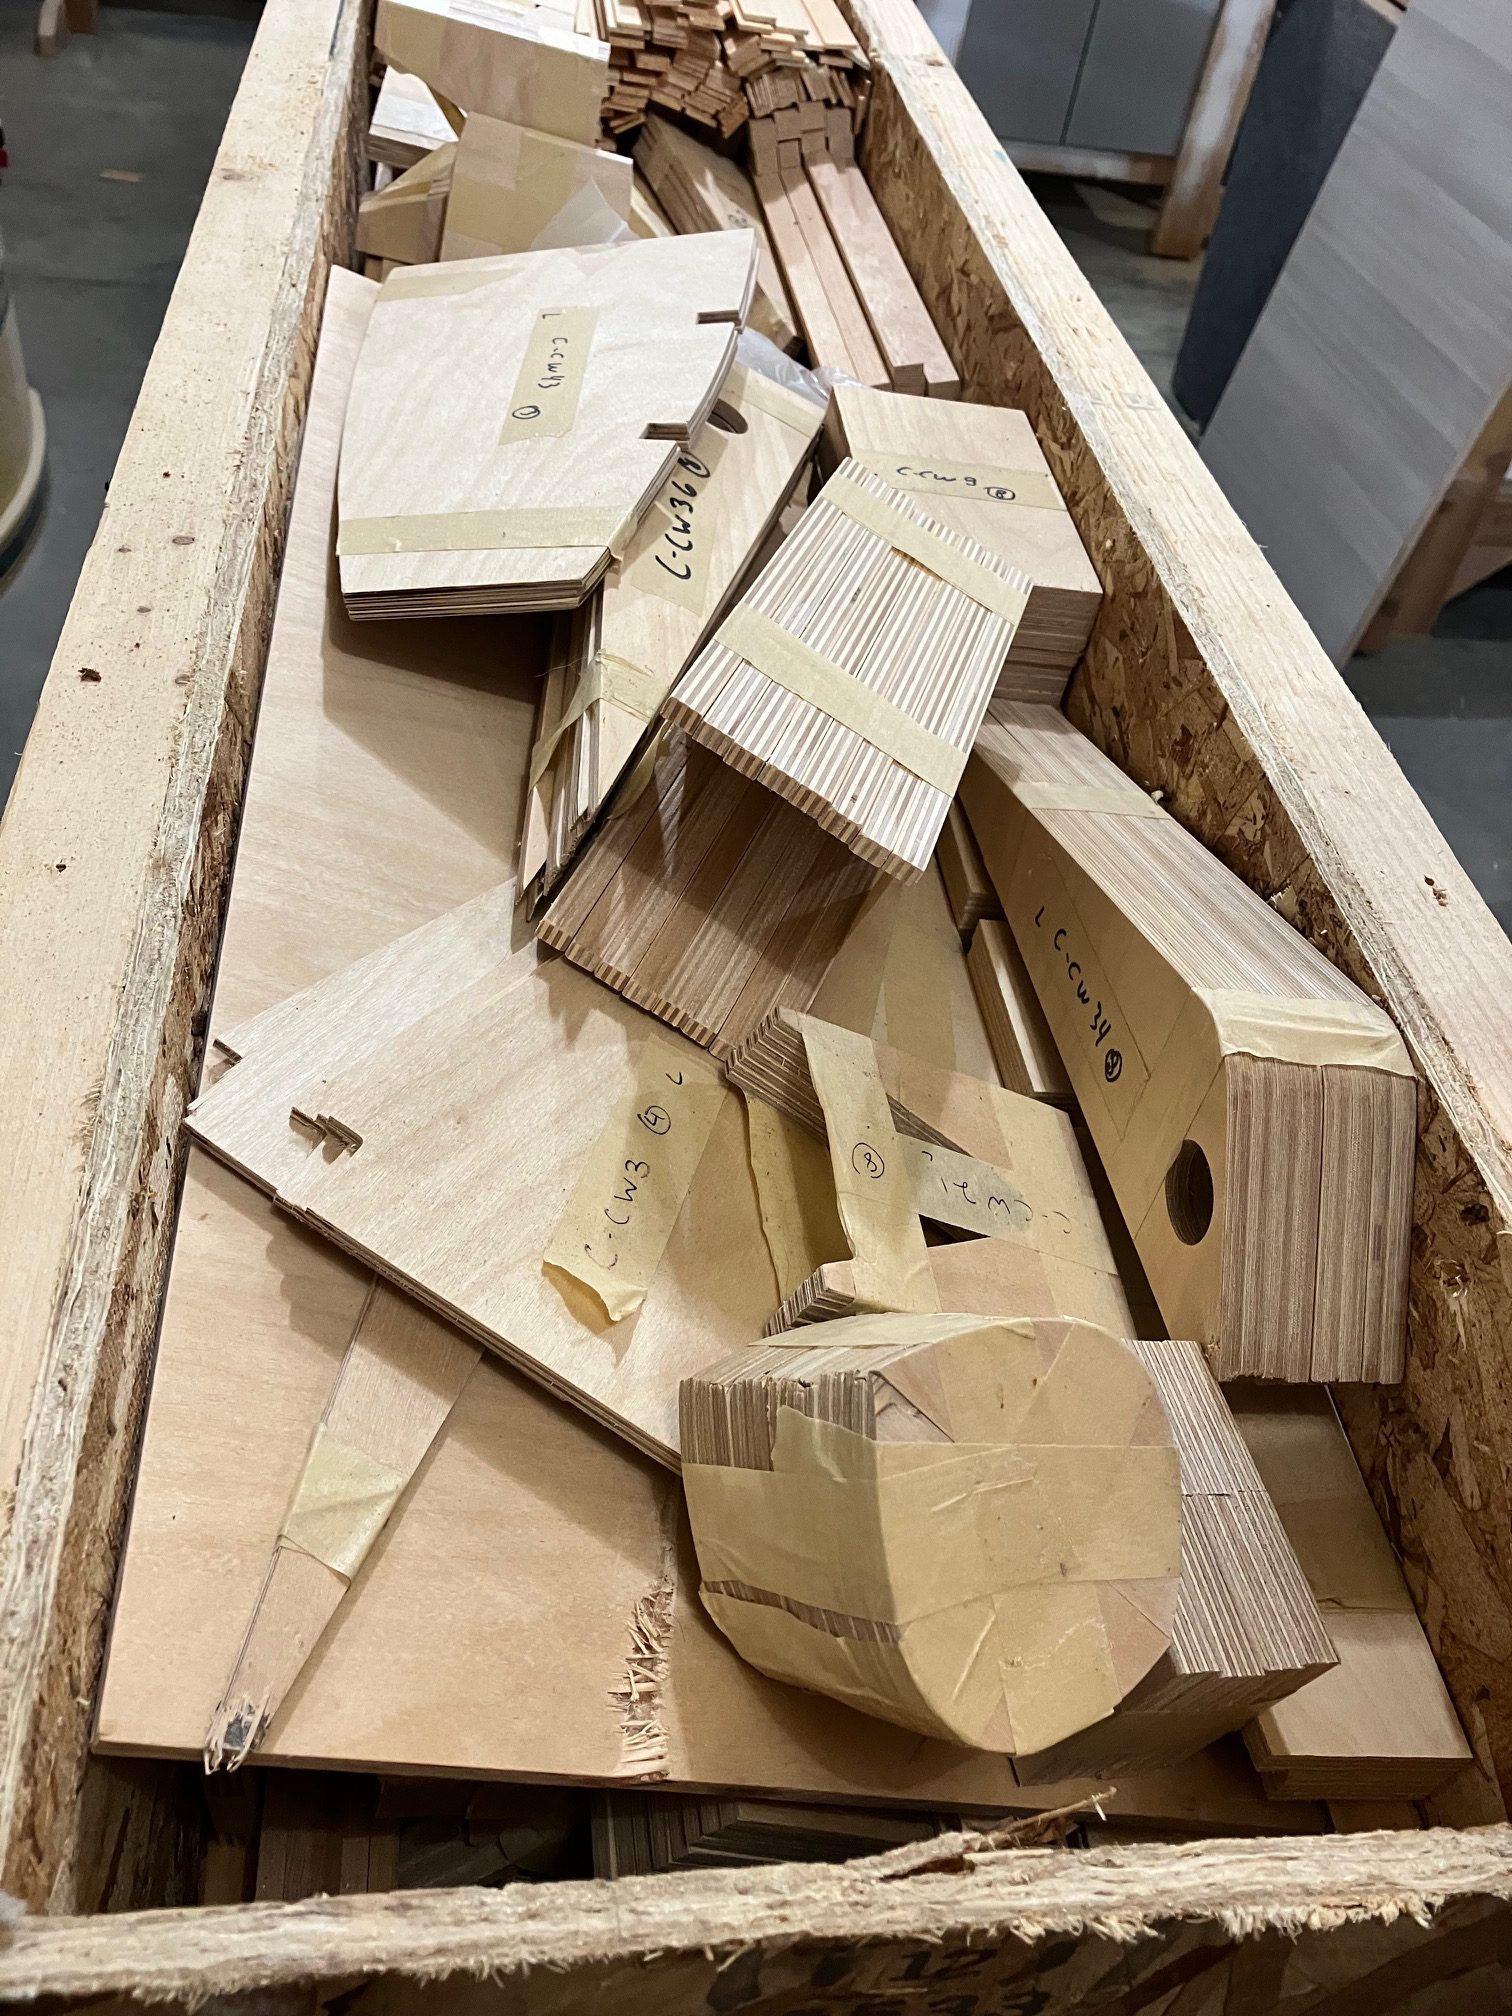
Yesterday (9/16/23) we drove to St. Charles, MO. Normally I wouldn’t do such a thing, but a guy had advertised a Celebrity wing kit and plans on Barnstormers. Apparently the original owner of the kit never had a chance to start building before age took its toll, so I was able to pick up all of the wing parts for less than it would have cost me to buy just the spruce for the spar caps. I’ve really been kind of stalled up until now because I just couldn’t get past the cost of buying the wood from ACS, then paying truck freight go get some oversized but very lightweight pieces of wood shipped here. The total cost of our trip was less than the shipping cost for just the longer spar pieces, and I’ve got all of the pre-cut plywood parts as well. Rib nose pieces, trailing edge stock, aileron ends, spar reinforcements, all of it. I’ve also got a second complete set of plans and documents that I can put up for sale, since they have never been used and I don’t need two.
The other thing that has kept me at a standstill has been the lack of a suitable place to work. My garage has, unfortunately, been occupied for the past few years with a “project” car that I probably never should have bought. My own fault, but is it better to have one project stalled, or two? I had plans at one time to put a sheet of MDF on top of the island in our basement to build the tail surfaces, but that is now part of a very busy sewing room. Zero complaints about that, of course! It just means I can’t work in there.
Anyway, a couple of weeks ago I was talking about the airplane with my friend Stu. He’s been building cabinets for the past couple of decades and has a large woodworking shop next to his house. Not only is it well equipped, but it’s also climate controlled and well lit. Quite frankly, it would be the envy of most people who would want to build stuff – certainly myself included.
Stu offered to let me use his shop and help with the build. I doubt he’ll ever want to fly in the finished airplane, but he thinks the idea of building an entire airplane out of wood is pretty cool. I can understand that; I think so too. When we got back from the road trip yesterday we unloaded the crate at Stu’s shop. It was late, so all we did was pop the top off and have a quick look, and grab the Fisher assembly video DVDs that were in there.
I’m pretty pumped, to be honest. This means I’ve now got everything I need to complete all four wings and the horizontal stabilizer & elevator, and a place to do it. I’m hoping to get the last few of the false ribs knocked out this week and lay out the pieces to assemble the main and rear spars.
Yeah, it’s been a long time, no updates, and so on. I bought a few more pieces of capstrip from ACS to finish out the last of the false ribs, but honestly the lack of any place to assemble wings or build the tail surfaces — or really any other parts of the plane — has had me less than enthused about getting much done. I’ve got a tall stack of full wing ribs and an almost-as-tall stack of false ribs sitting on a bench on my basement, doing nothing.
From time to time I check Barnstormers to see if another Celebrity pops up for sale. Occasionally one does. The two that really gnaw at me? A gorgeous, Rotec radial powered Kitplanes Magazine article centerfold that was advertised for probably less than the engine would cost me, and one a couple hours’ drive from here with no engine that was listed at about $5K or so. In both cases the timing just was not right (hell having not frozen over quite yet).
Now I’m contemplating a run down to St. Louis. The purchaser of Celebrity serial number CE165 – one later than mine – had apparently never started building, and a crate with the complete wing kit is for sale. The seller is asking a fraction of the cost of a new kit, and it appears to be complete. I did some plotting, and even just ordering the wood for the wing spars – not the entire wings, mind you, just the spars — would cost more than he’s asking plus my gas for the trip, and that’s before I pay LTL freight costs to have it shipped from Aircraft Spruce. Plus it’s a complete wing kit, with all the pre-cut plywood pieces, laminating strips for the wingtip bows, trailing edge pieces, all of the bits that would add cost and time and aggravation to a scratch build. I can’t pass it up. I’d also have a full set of plans that I could sell to help defray a little of the cost.
A friend with a large woodworking shop has offered to let me continue building there in his shop — heated, air conditioned, lots of space, plenty of power tools, and this all feels almost too good to be true. I’ve just got to make a 13-14 hour round trip with a pocket full of cash.
I glued up two more last night, and will do two more tonight. That will make 18 down, with 20 19 more to go. I’ll typically take some time at lunch to cut out the cross brace pieces and get everything set up. Then after work I’ll mix up some T88 and glue the ribs up, then let the glue cure overnight. By the next morning I can pull them out of the jigs and start again.
I’ve run out of cross-brace stock that’s been sanded down to 3/32″, so I’ll have to stop while I retrieve the small shop vacuum from the project house where it is now and run some more 1/8″ stock through the drum sander. It’s a pain, yes, but it has to be done.
I’m already debating where to go from here, once all of the false ribs are finished in a few weeks (maybe). I could start on the tail, but that will require a 4 x 8 work surface. The wing spars will require a longer bench, at least 12′ long. I may instead start working on cutting out the large number of nose ribs that will be needed, and the other high volume plywood parts. It’s awfully tempting to set up my CNC router again for that part, but I doubt that I will. I’d have to translate the outline from the printed plans into G-code for the router, and quite frankly I think by the time I got that right I could cut them all out by hand. I’ve seen a couple of guys use a router and a flush cutter to route the nose ribs from a pattern. I’m a little concerned about the radius on the inside corners where the nose rib glues to the false spar. I figure I could either sand a matching radius there, or touch up the corners of the nose ribs with a bandsaw or something. I’ll cross that bridge when I get to it.
Nothing new, but last night I gathered up all 47 full ribs and stacked them up, carefully aligning the cross pieces for the main spar, aft spar, and nose spar. I was a little concerned about the amount of variation I might find, considering the ribs came out of two jigs over a period of 20 months. I was very happy to see that there’s no more variation than could be attributed to wood thickness. Less than 1/64″, probably under .025″ anywhere along any of the ribs. Then I stacked up the dozen false ribs I have done so far, same story.
Wait – 47 full ribs? Yes, it seems somewhere along the line I must have lost count and built one extra aileron rib. I’ll either keep it around as a wall hanger/test piece, or maybe stick it under the wing walk for a little extra support. I’m not sweating it.
This exercise has also reinforced my idea to build a sled for the table saw to lop off the ends of the ribs for the leading and trailing edge pieces. They are very highly consistent, as they should be, so I think that will save time and make subsequent assembly steps easier.
The bad news is — my T88 epoxy is junk. I refilled the dispensing syringes and the resin looked a little “off”, not perfectly smooth and clear as it usually is. Maybe a little cloudy and with a different texture. I mixed up a small amount and glued up some test pieces. Where I glued the flat sides two sticks of capstrip together, the joint held well and pulled apart well into the wood. However, where I had glued a couple pieces of geodetic brace into the slots, the glue joints failed allowing the braces to pop out without breaking. The glue also was not clear and hard, as it should be, but had an almost grainy or mealy texture to it. I don’t have any trust in the remaining glue in those bottles. I’m certainly not going to risk using substandard adhesive to save about $20 worth of epoxy! Into the trash it goes. I have two new bottles here, and half a dozen new 60cc syringes on the way from Amazon.
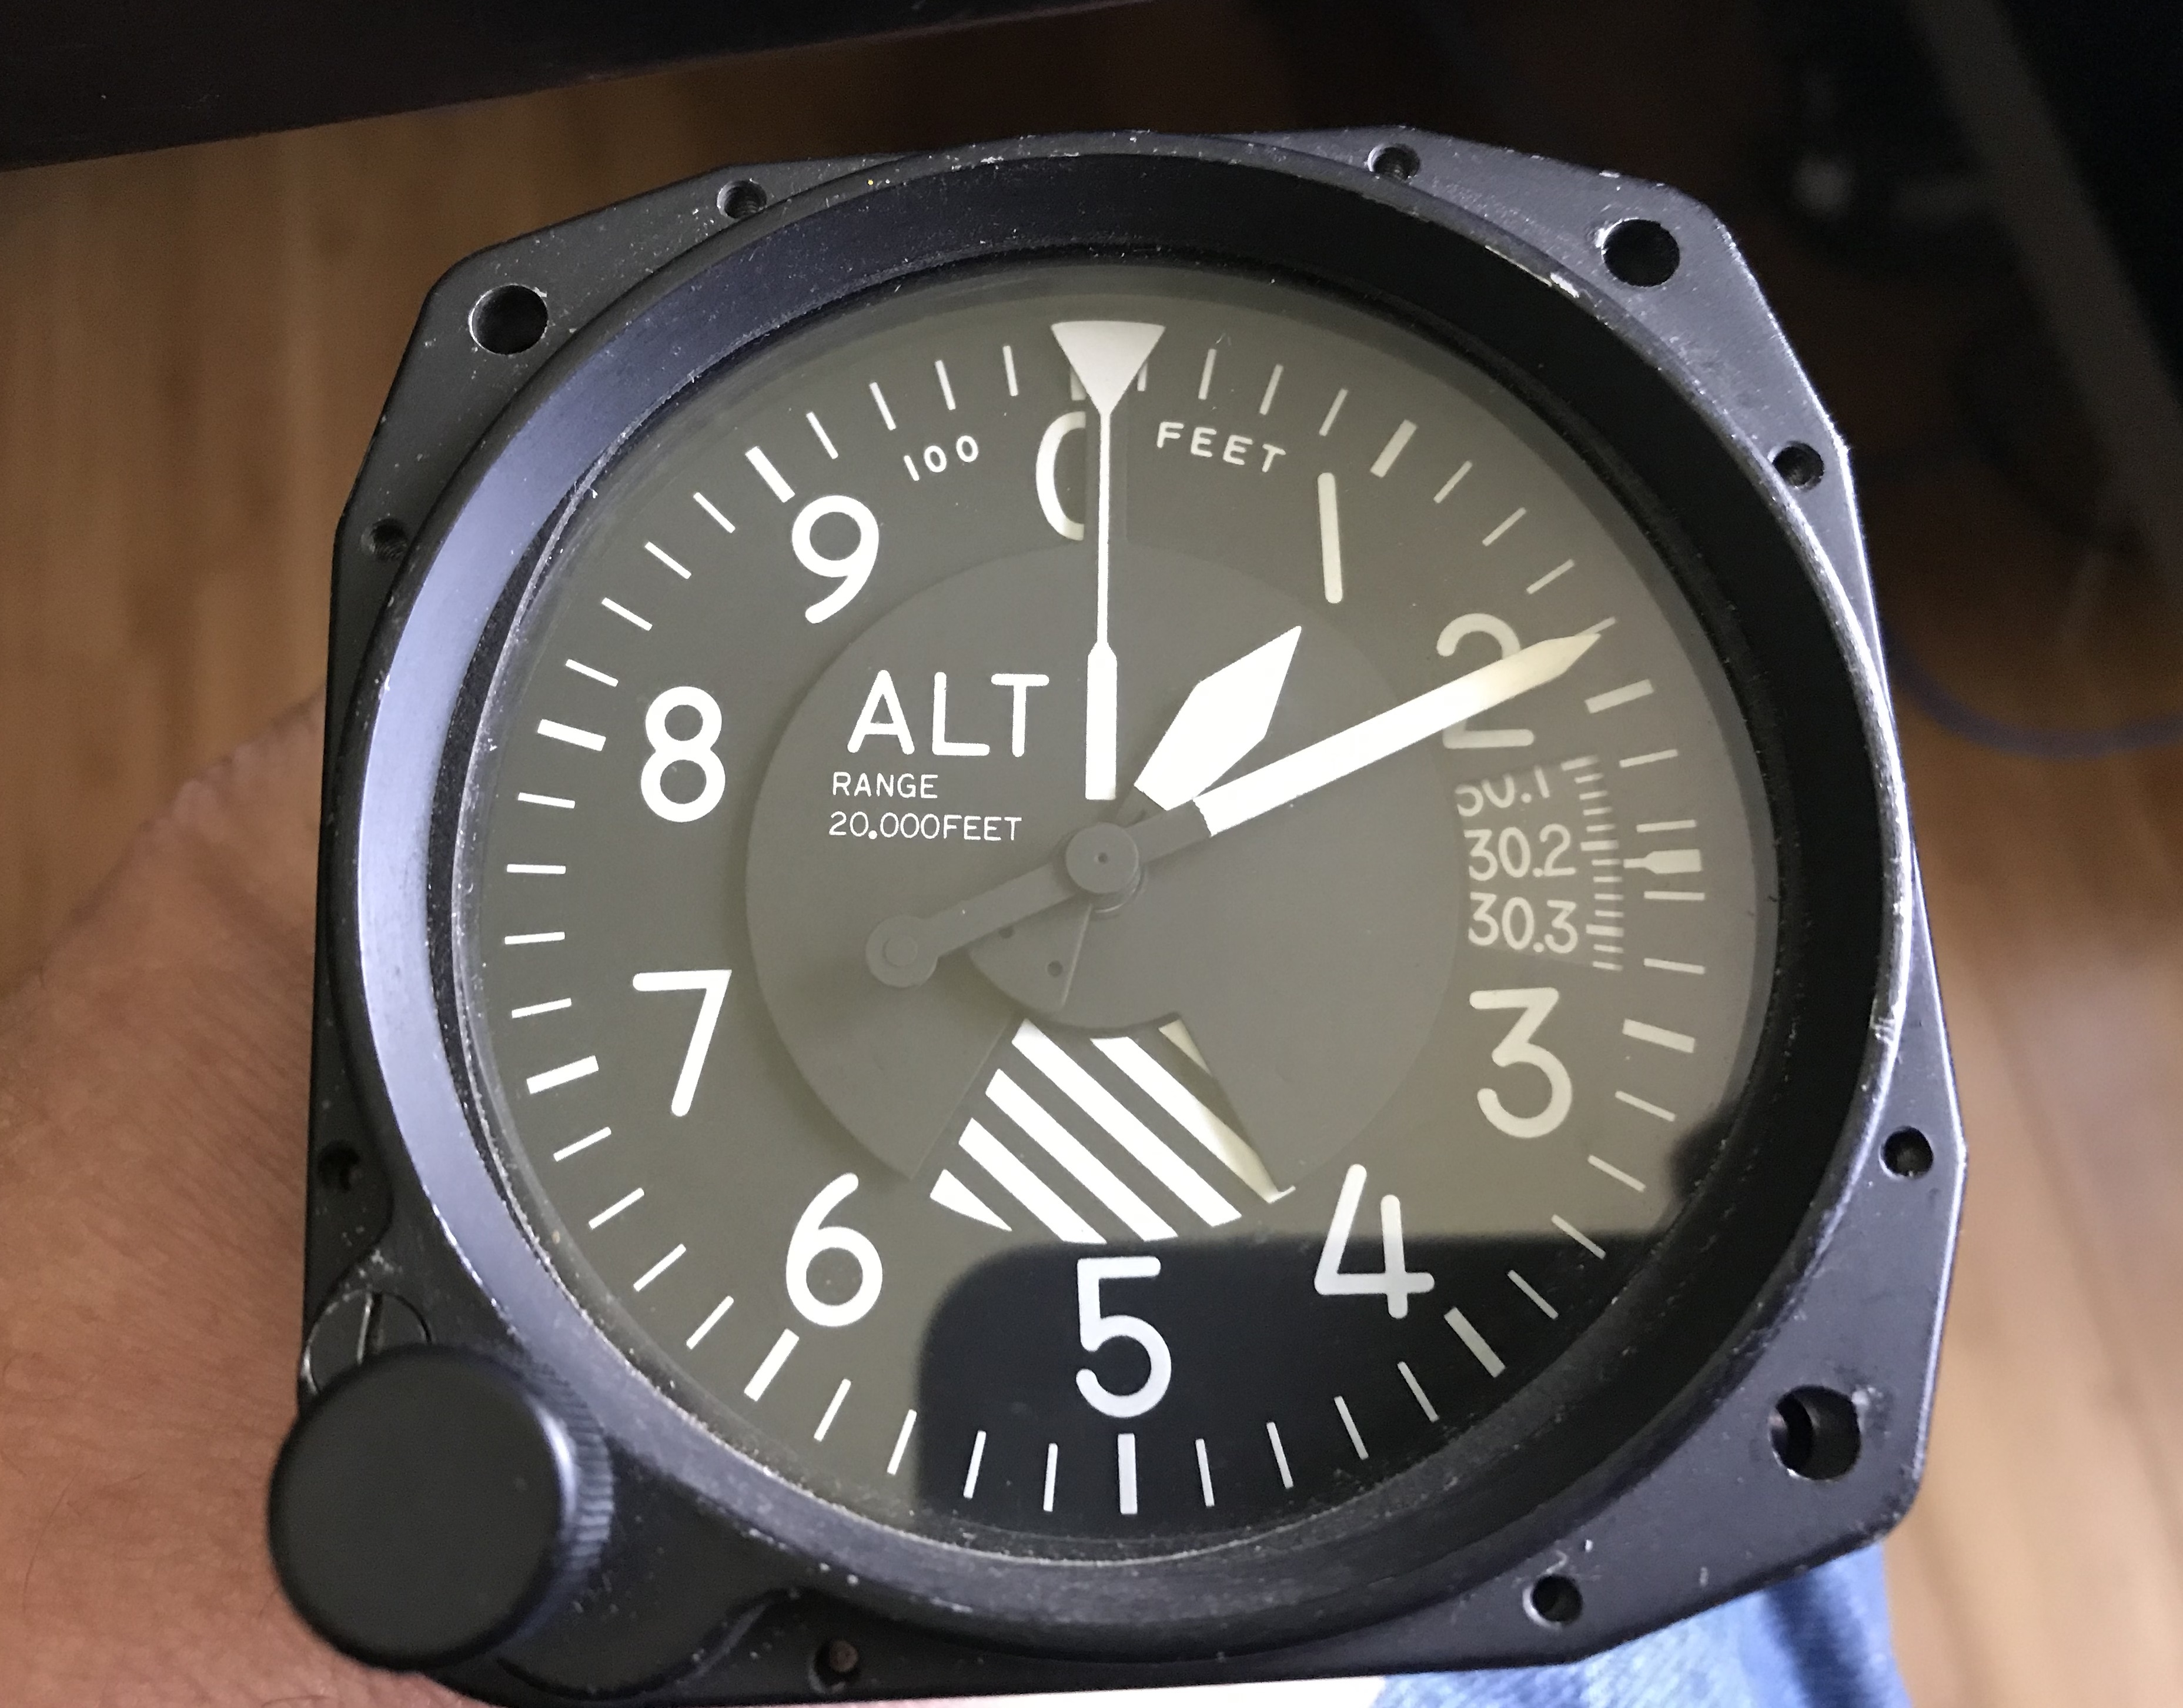
I haven’t been doing much on the biplane recently, but I did manage to score an altimeter for it. I’ve been watching the for sale ads on line for decent deals. Someone offered an altimeter that worked, but failed an IFR certification due to out of tolerance leakage at 15,000′. Well… if I ever do finish the bipe and fly it, it certainly won’t be at anything over 10K, let alone 15K. So for fifty bucks it was a no-brainer. It’s a pretty nice altimeter, not one of the super cheap imported junkers that’s being sold now. It’s really more altimeter than I need…
My “new” used Shinko Electric altimeter
So… I have an altimeter, and a quad oil temp / oil pressure / CHT / EGT gauge for monitoring the engine. I will still need an airspeed indicator. Most that I see for sale have speed ranges not appropriate for the Celebrity — I really don’t need or want a 200 knot ASI. Then I’ll need a compass, of course; a slip/skid ball; a tachometer. Whether I need a fuel gauge or not depends on what I decide to do for fuel tanks. I’m thinking no electrical fuel gauges, all float or sight type.
I could just ditch all of it and go with a single instrument from Dynon or Garmin, but I just think such a thing would look out of place in a classic biplane. I’m not sure what I’ll do for the front cockpit, though. It would be nice to at least have airspeed and altitude there for passengers, but I’m not sure I’ll be able to score a deal like this again. There’s always UMA…
Five down, eleven to go. Cutting the geodetic braces individually is really not as much of a chore as I thought it would be. I am finding that I’m going through the 6′ lengths of stock quickly, though — I figure I have enough shaved down for the next 3 ribs, maybe 4, then I’ll have to fire up the drum sander again and make some more. Not that it’s stupidly tedious work or anything, mind you.
In hindsight, it would have been a whole lot less work and actually less expensive to have bought 3/8″ thick spruce spar stock and just ripped it down to 3/32 strips, losing half the board to saw kerf. I am at a loss to explain why that little bit of math didn’t make itself obvious. Of course, I thought at the time that shaving 1/32″ off those strips would be quick and easy. Not so much. So… if you’re building a Celebrity from plans, you’d be better off doing that.